
90’s Bathroom Makeover – The Kids Bath REVEAL!
One Room Challenge Spring 2021 Week 8
We. Are. Done. What a feeling! It’s been what feels like a very long 8 weeks but we are happy to report that the basement kids’ bathroom update is complete! If you want to get all caught up, you can read all about our progress here, and read on to see how this 90’s bathroom makeover in our new home turned out!:
Week 1/ Week 2/ Week 3/ Week 4/ Week 5/ Week 6/ Week 7
This post may contain affiliate links. That means if you purchase anything from these links I earn a small commission, at no extra cost to you! This helps support my blog, so thank you!
Table of Contents
- One Room Challenge Spring 2021 Week 8
- Room Details – 90s Bathroom Makeover
- Before and After
- Budget Breakdown and Sources for 90’s Bathroom Makeover:
- You Might Also Like:
- Shop this 90’s Bathroom Makeover:
Room Details – 90s Bathroom Makeover
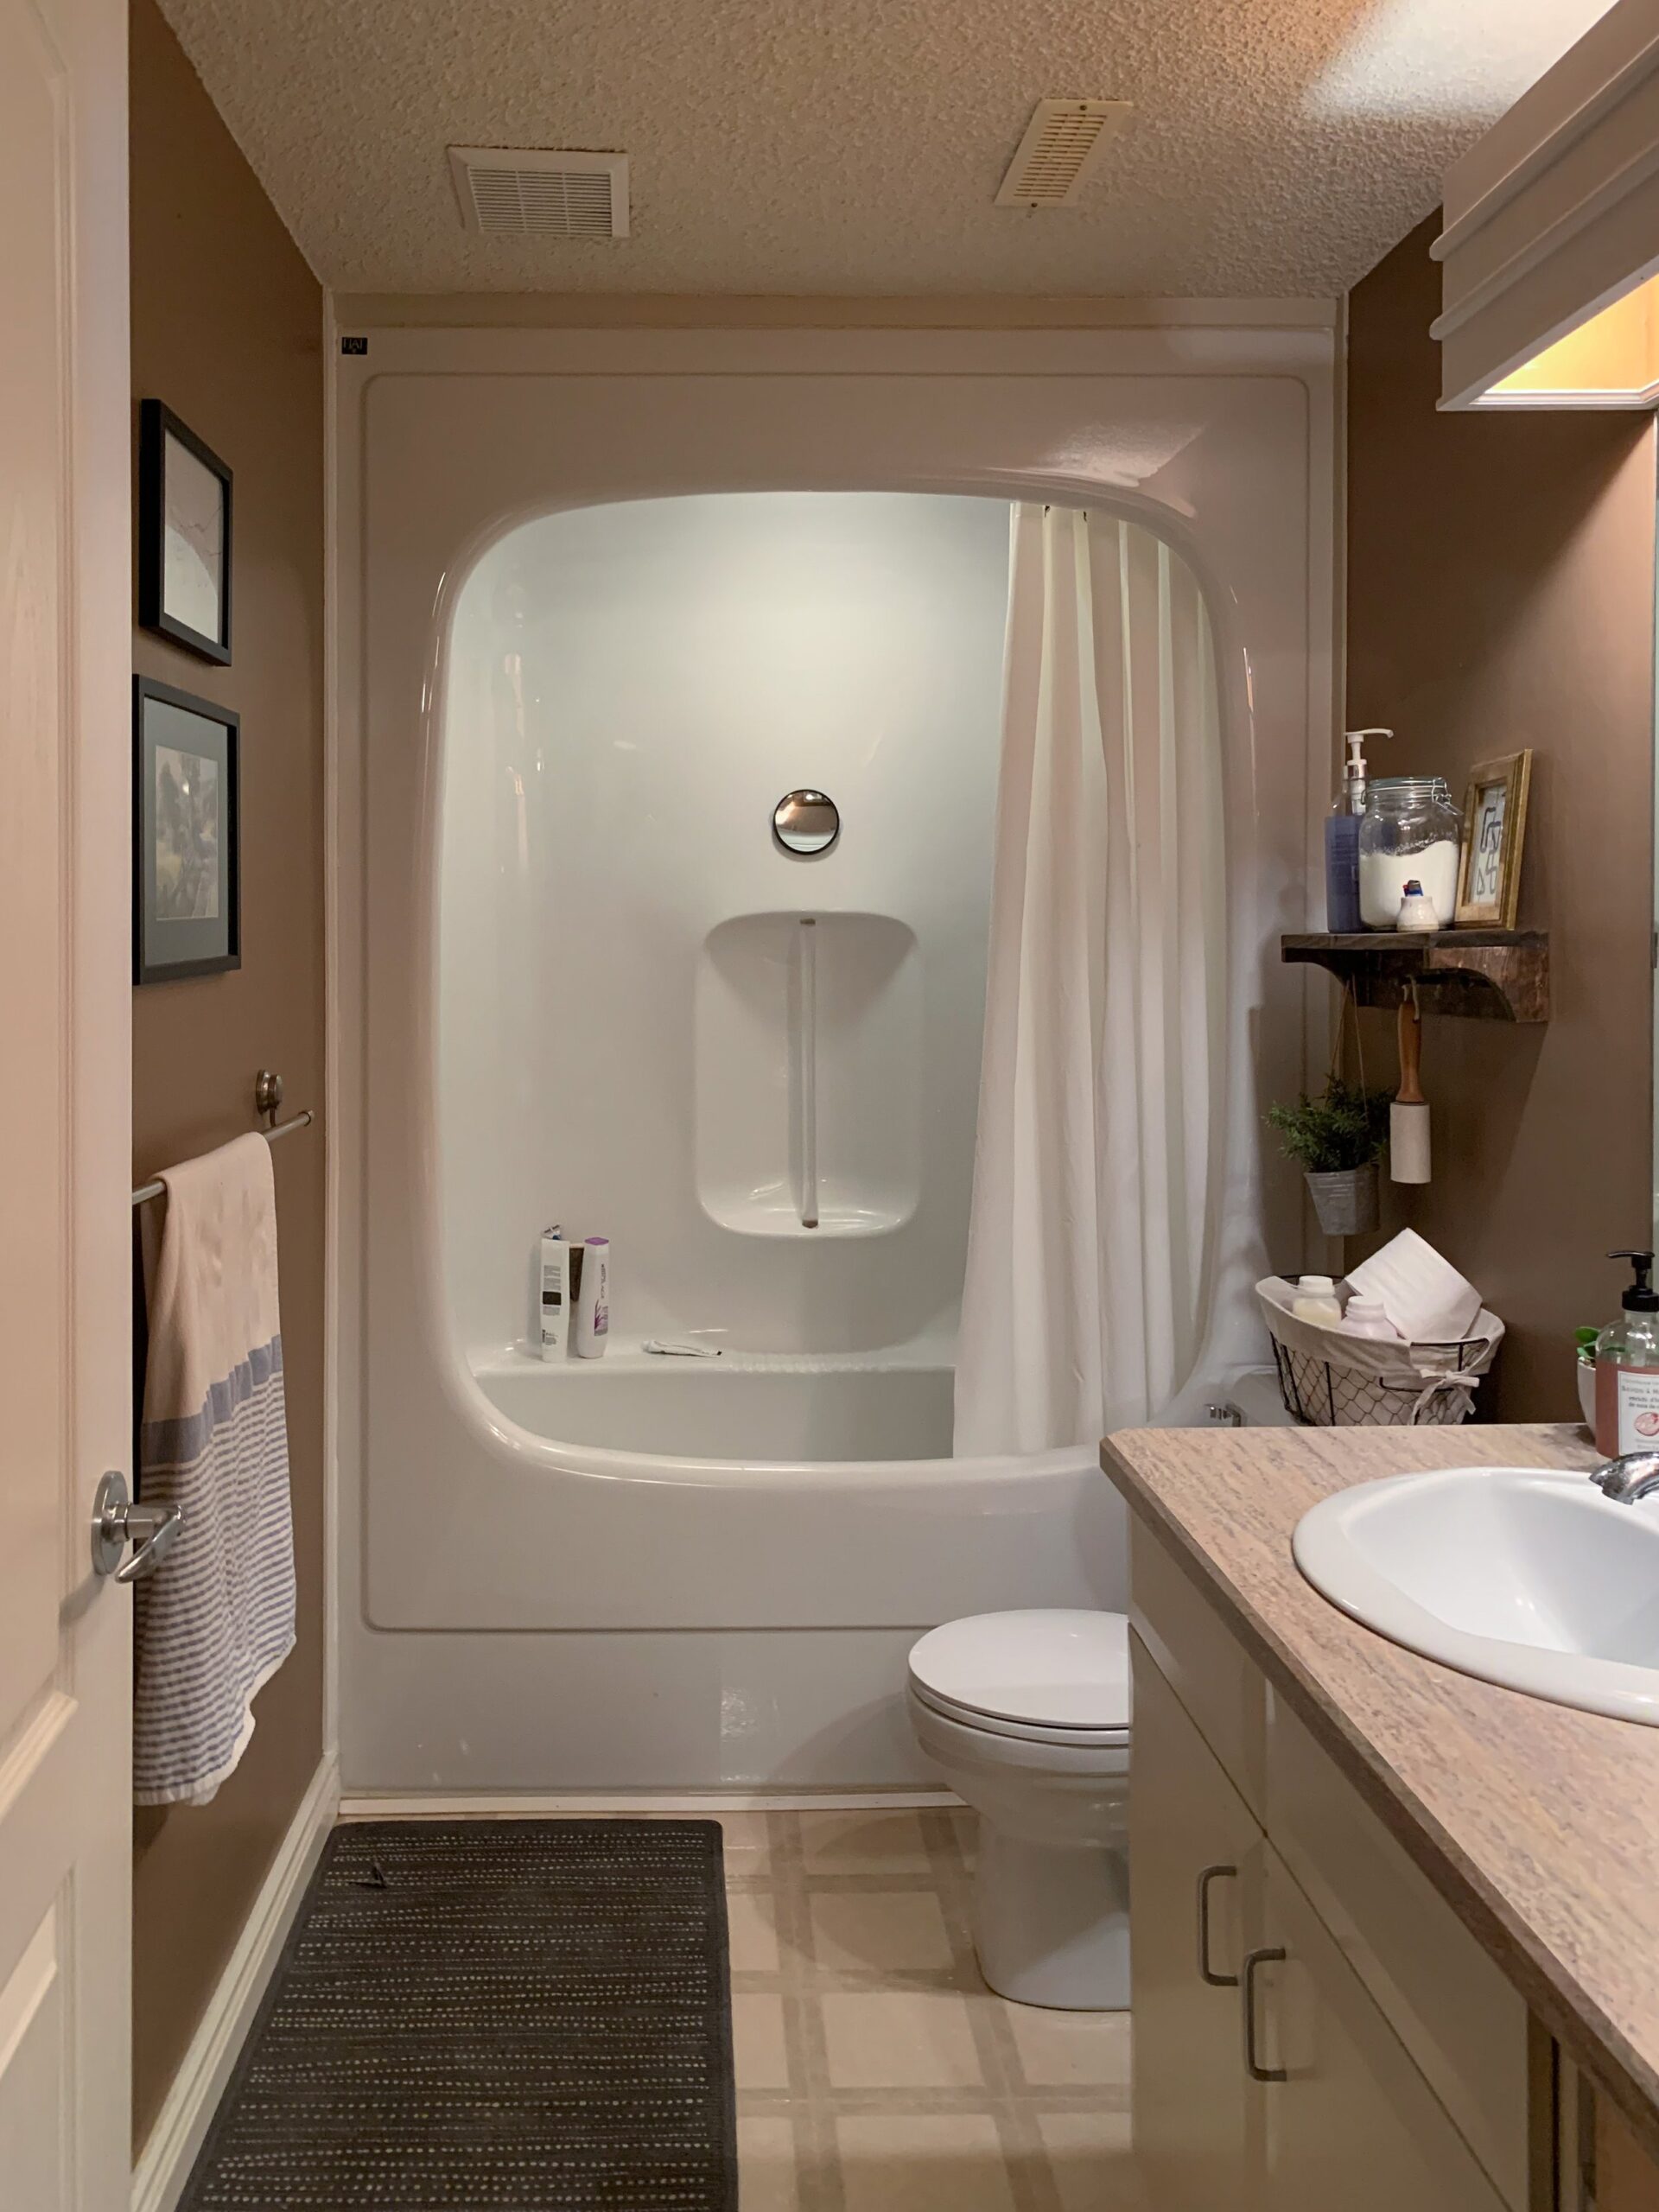
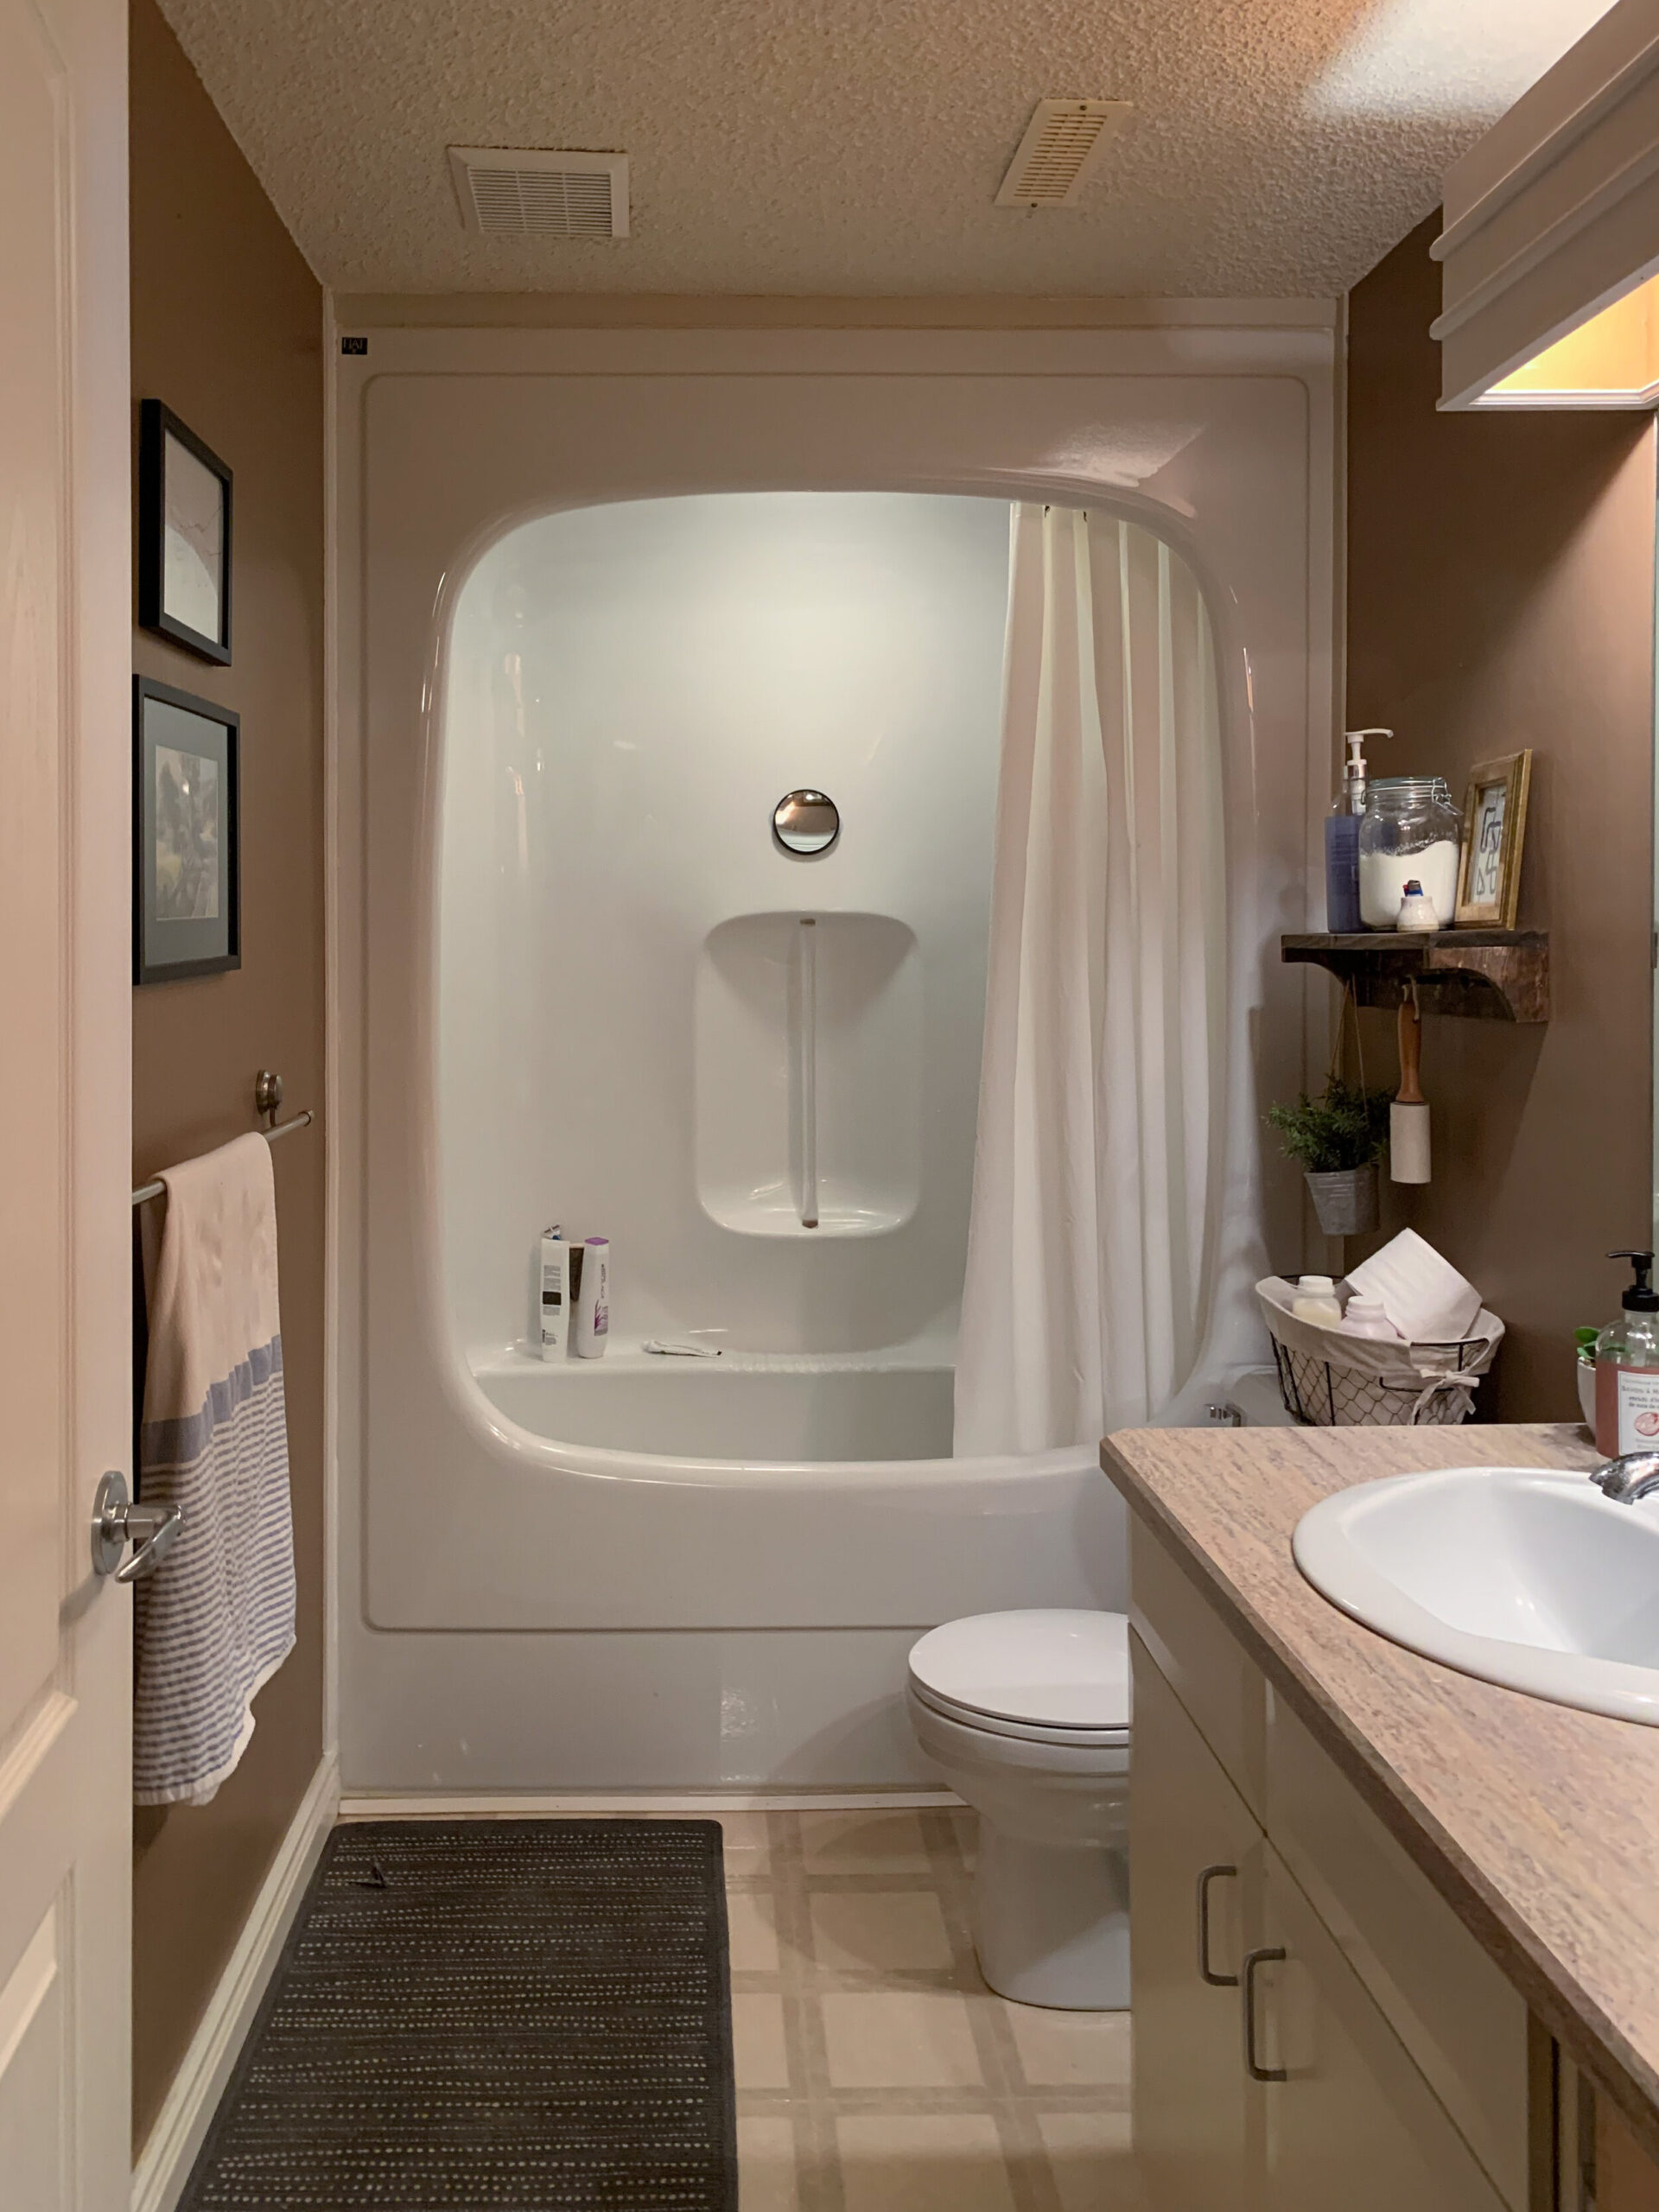
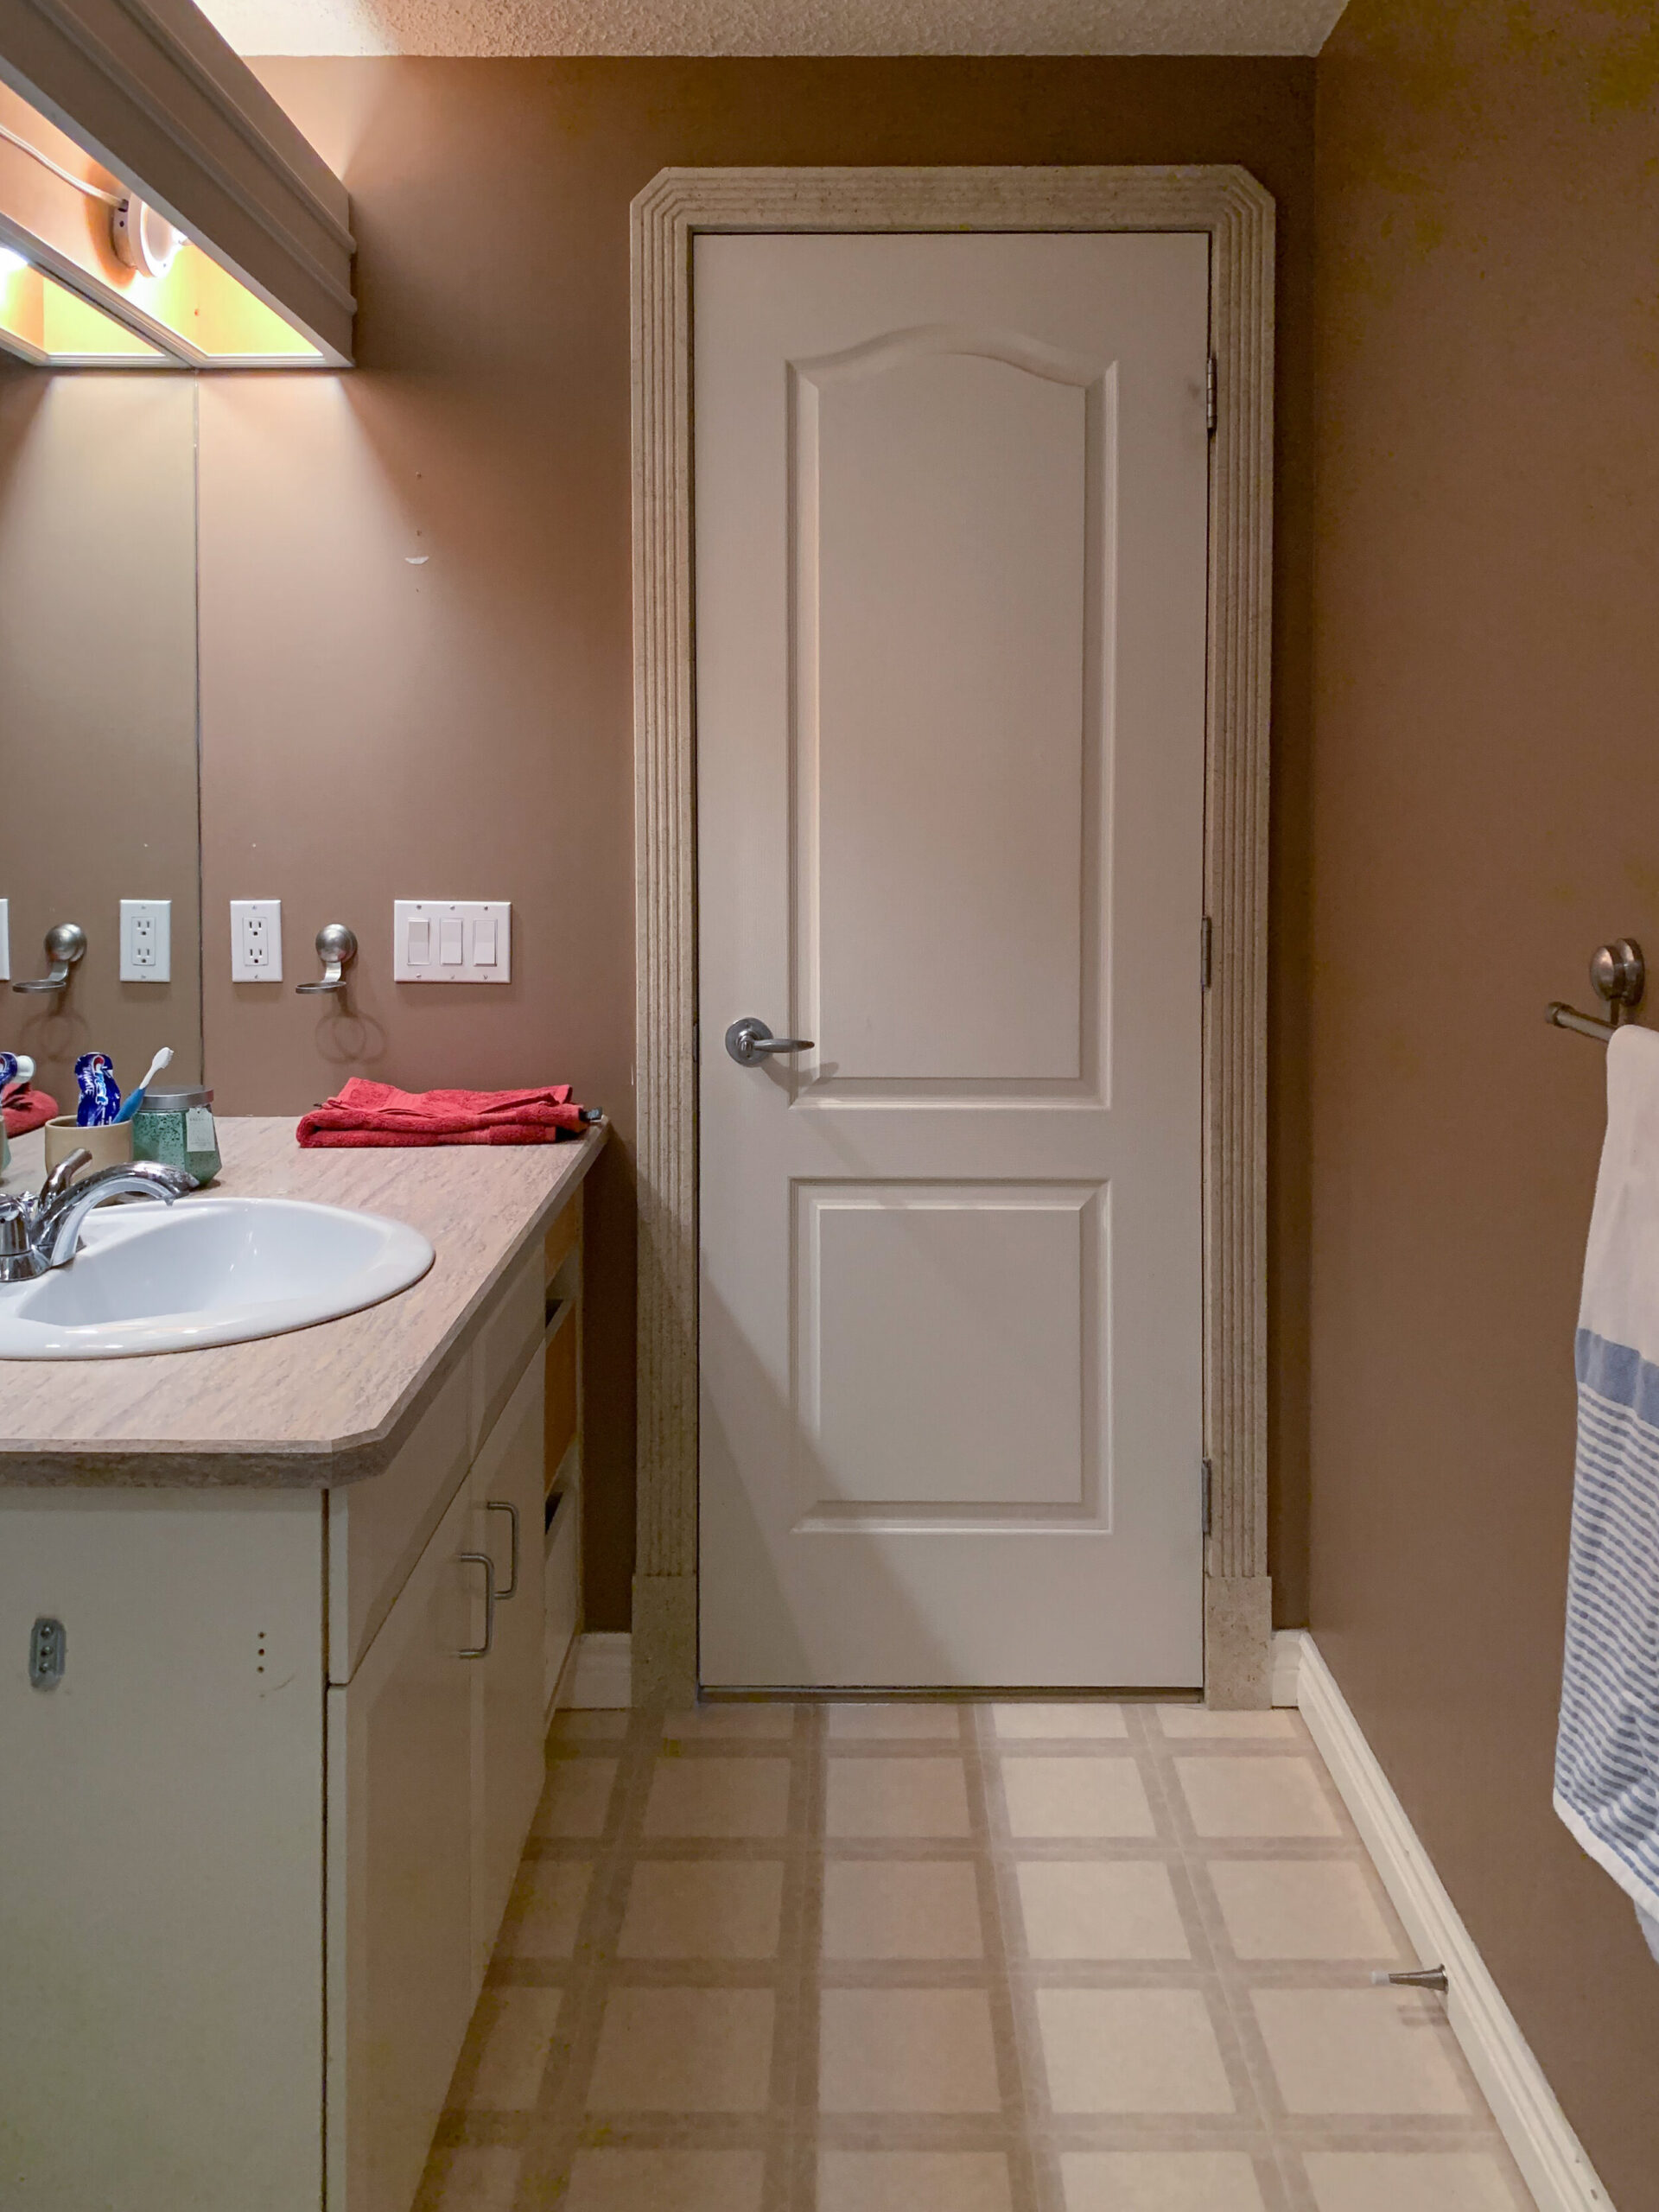
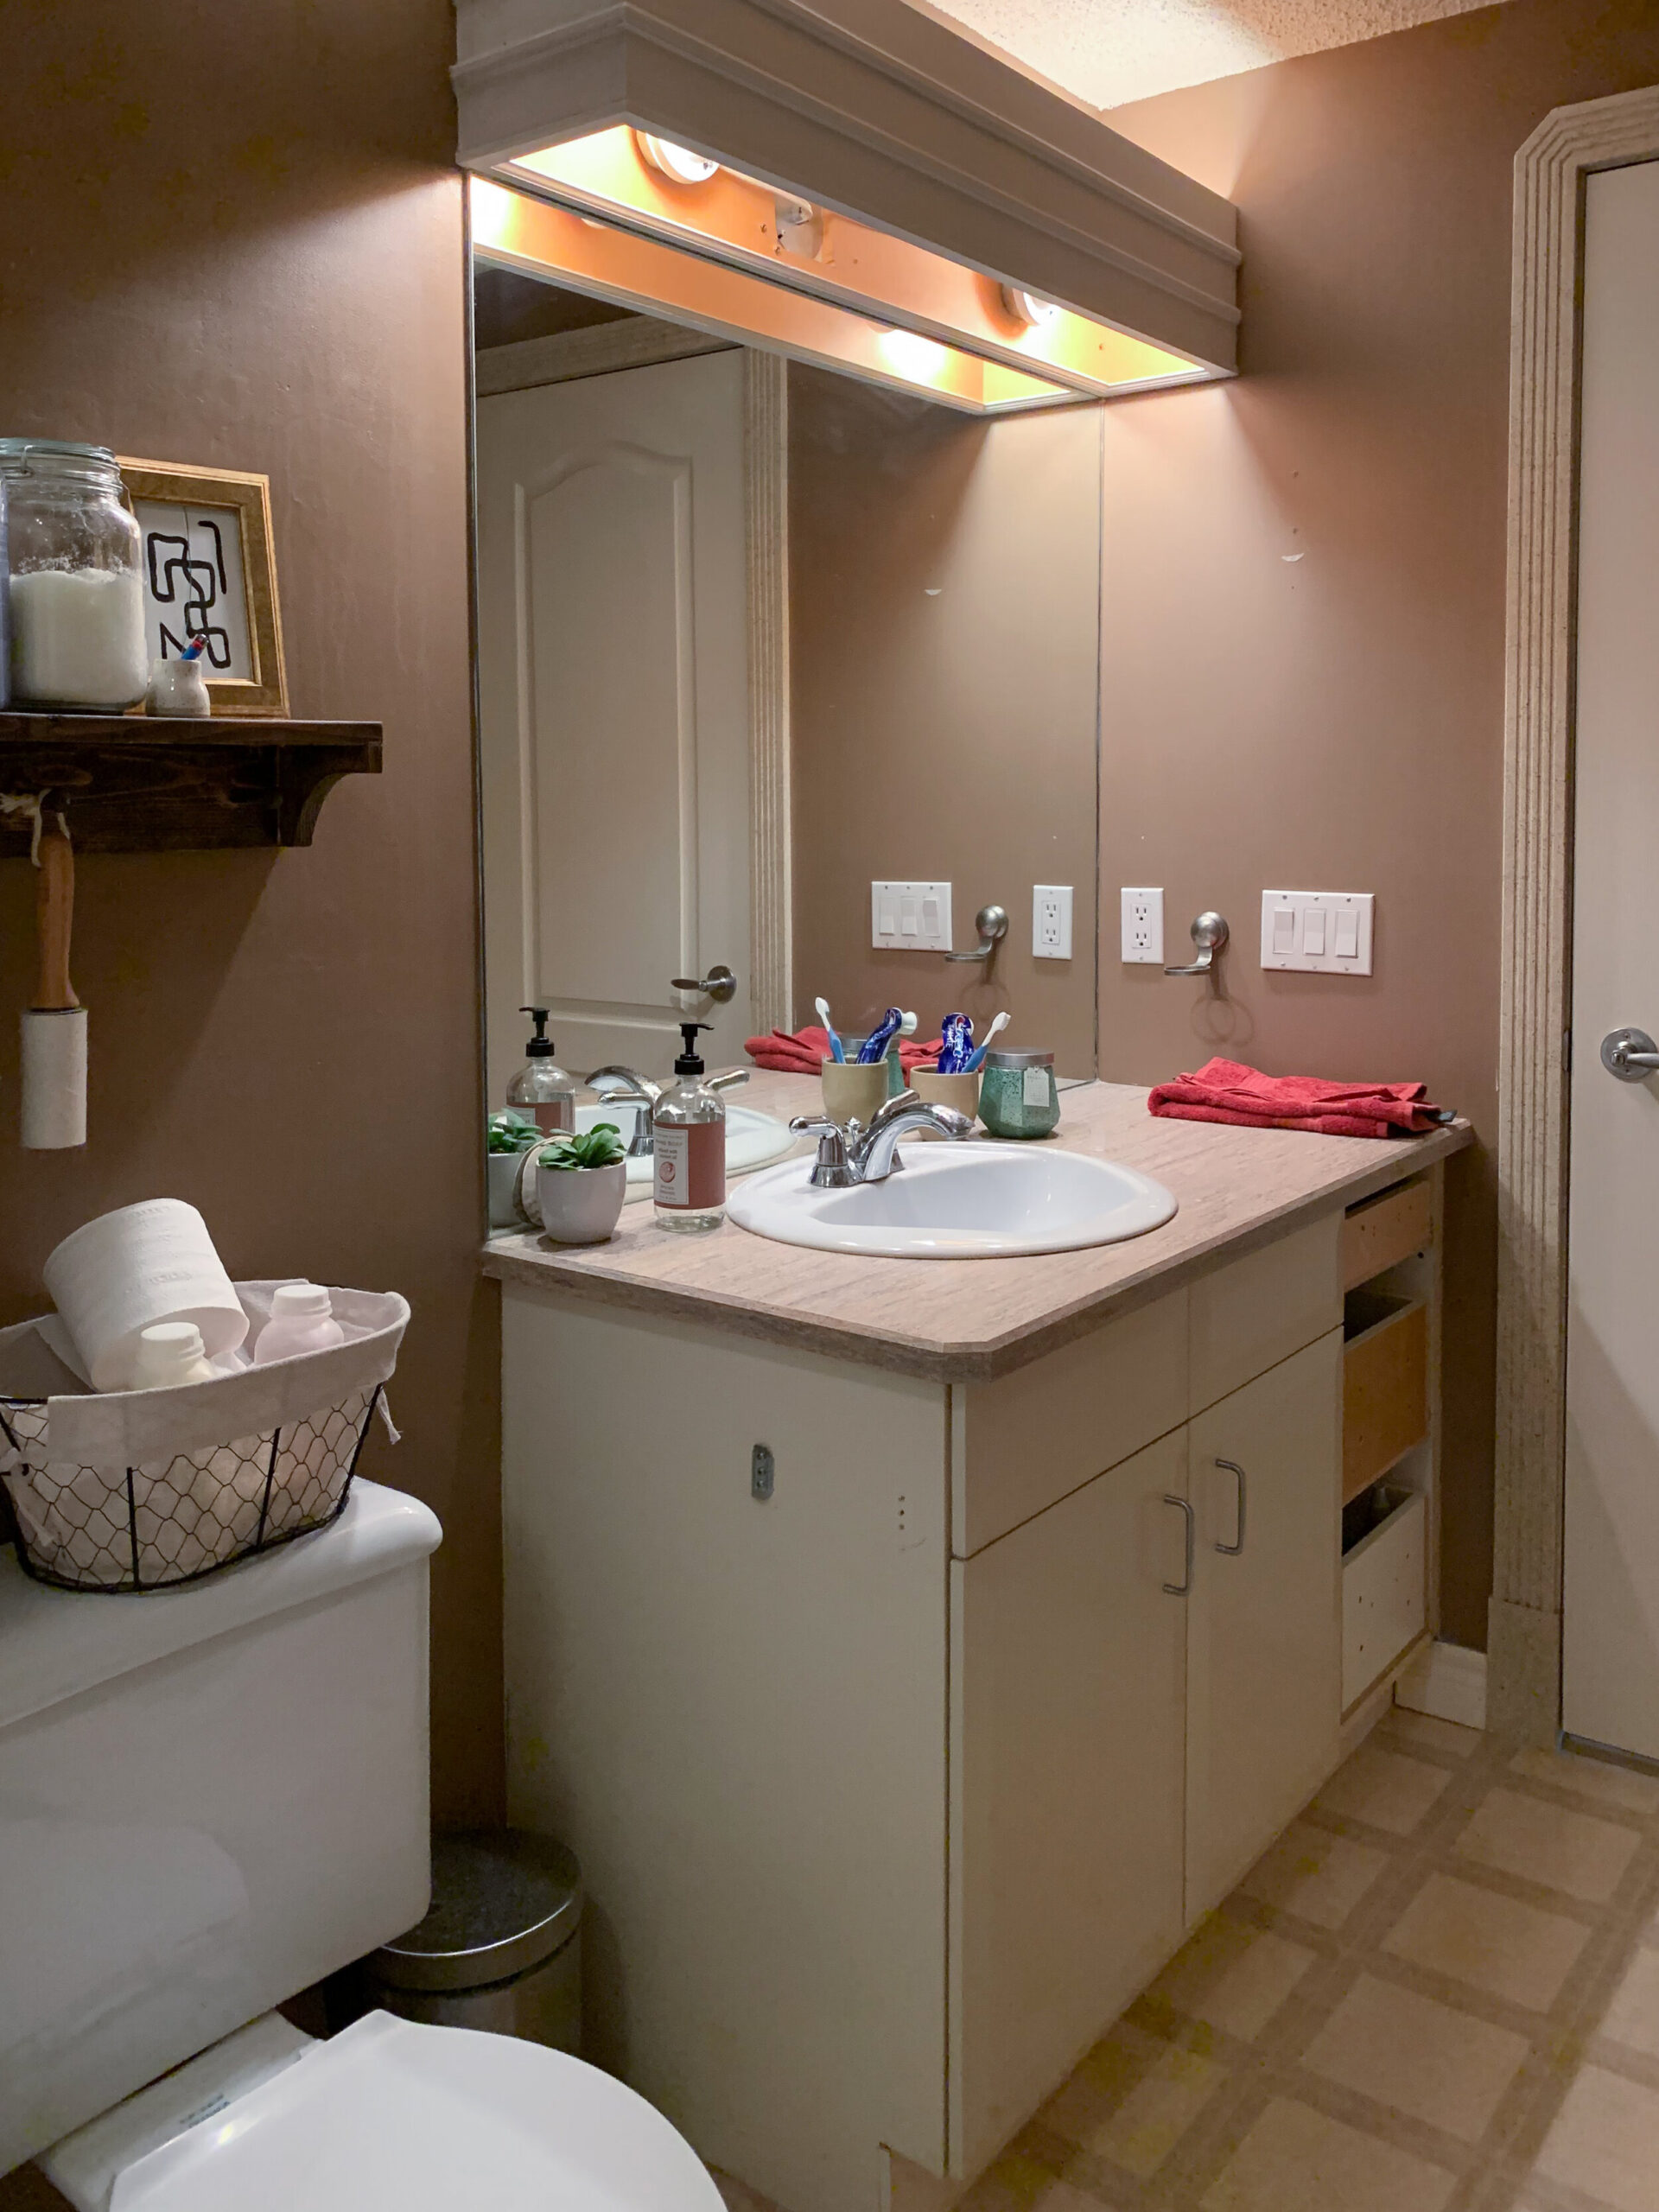
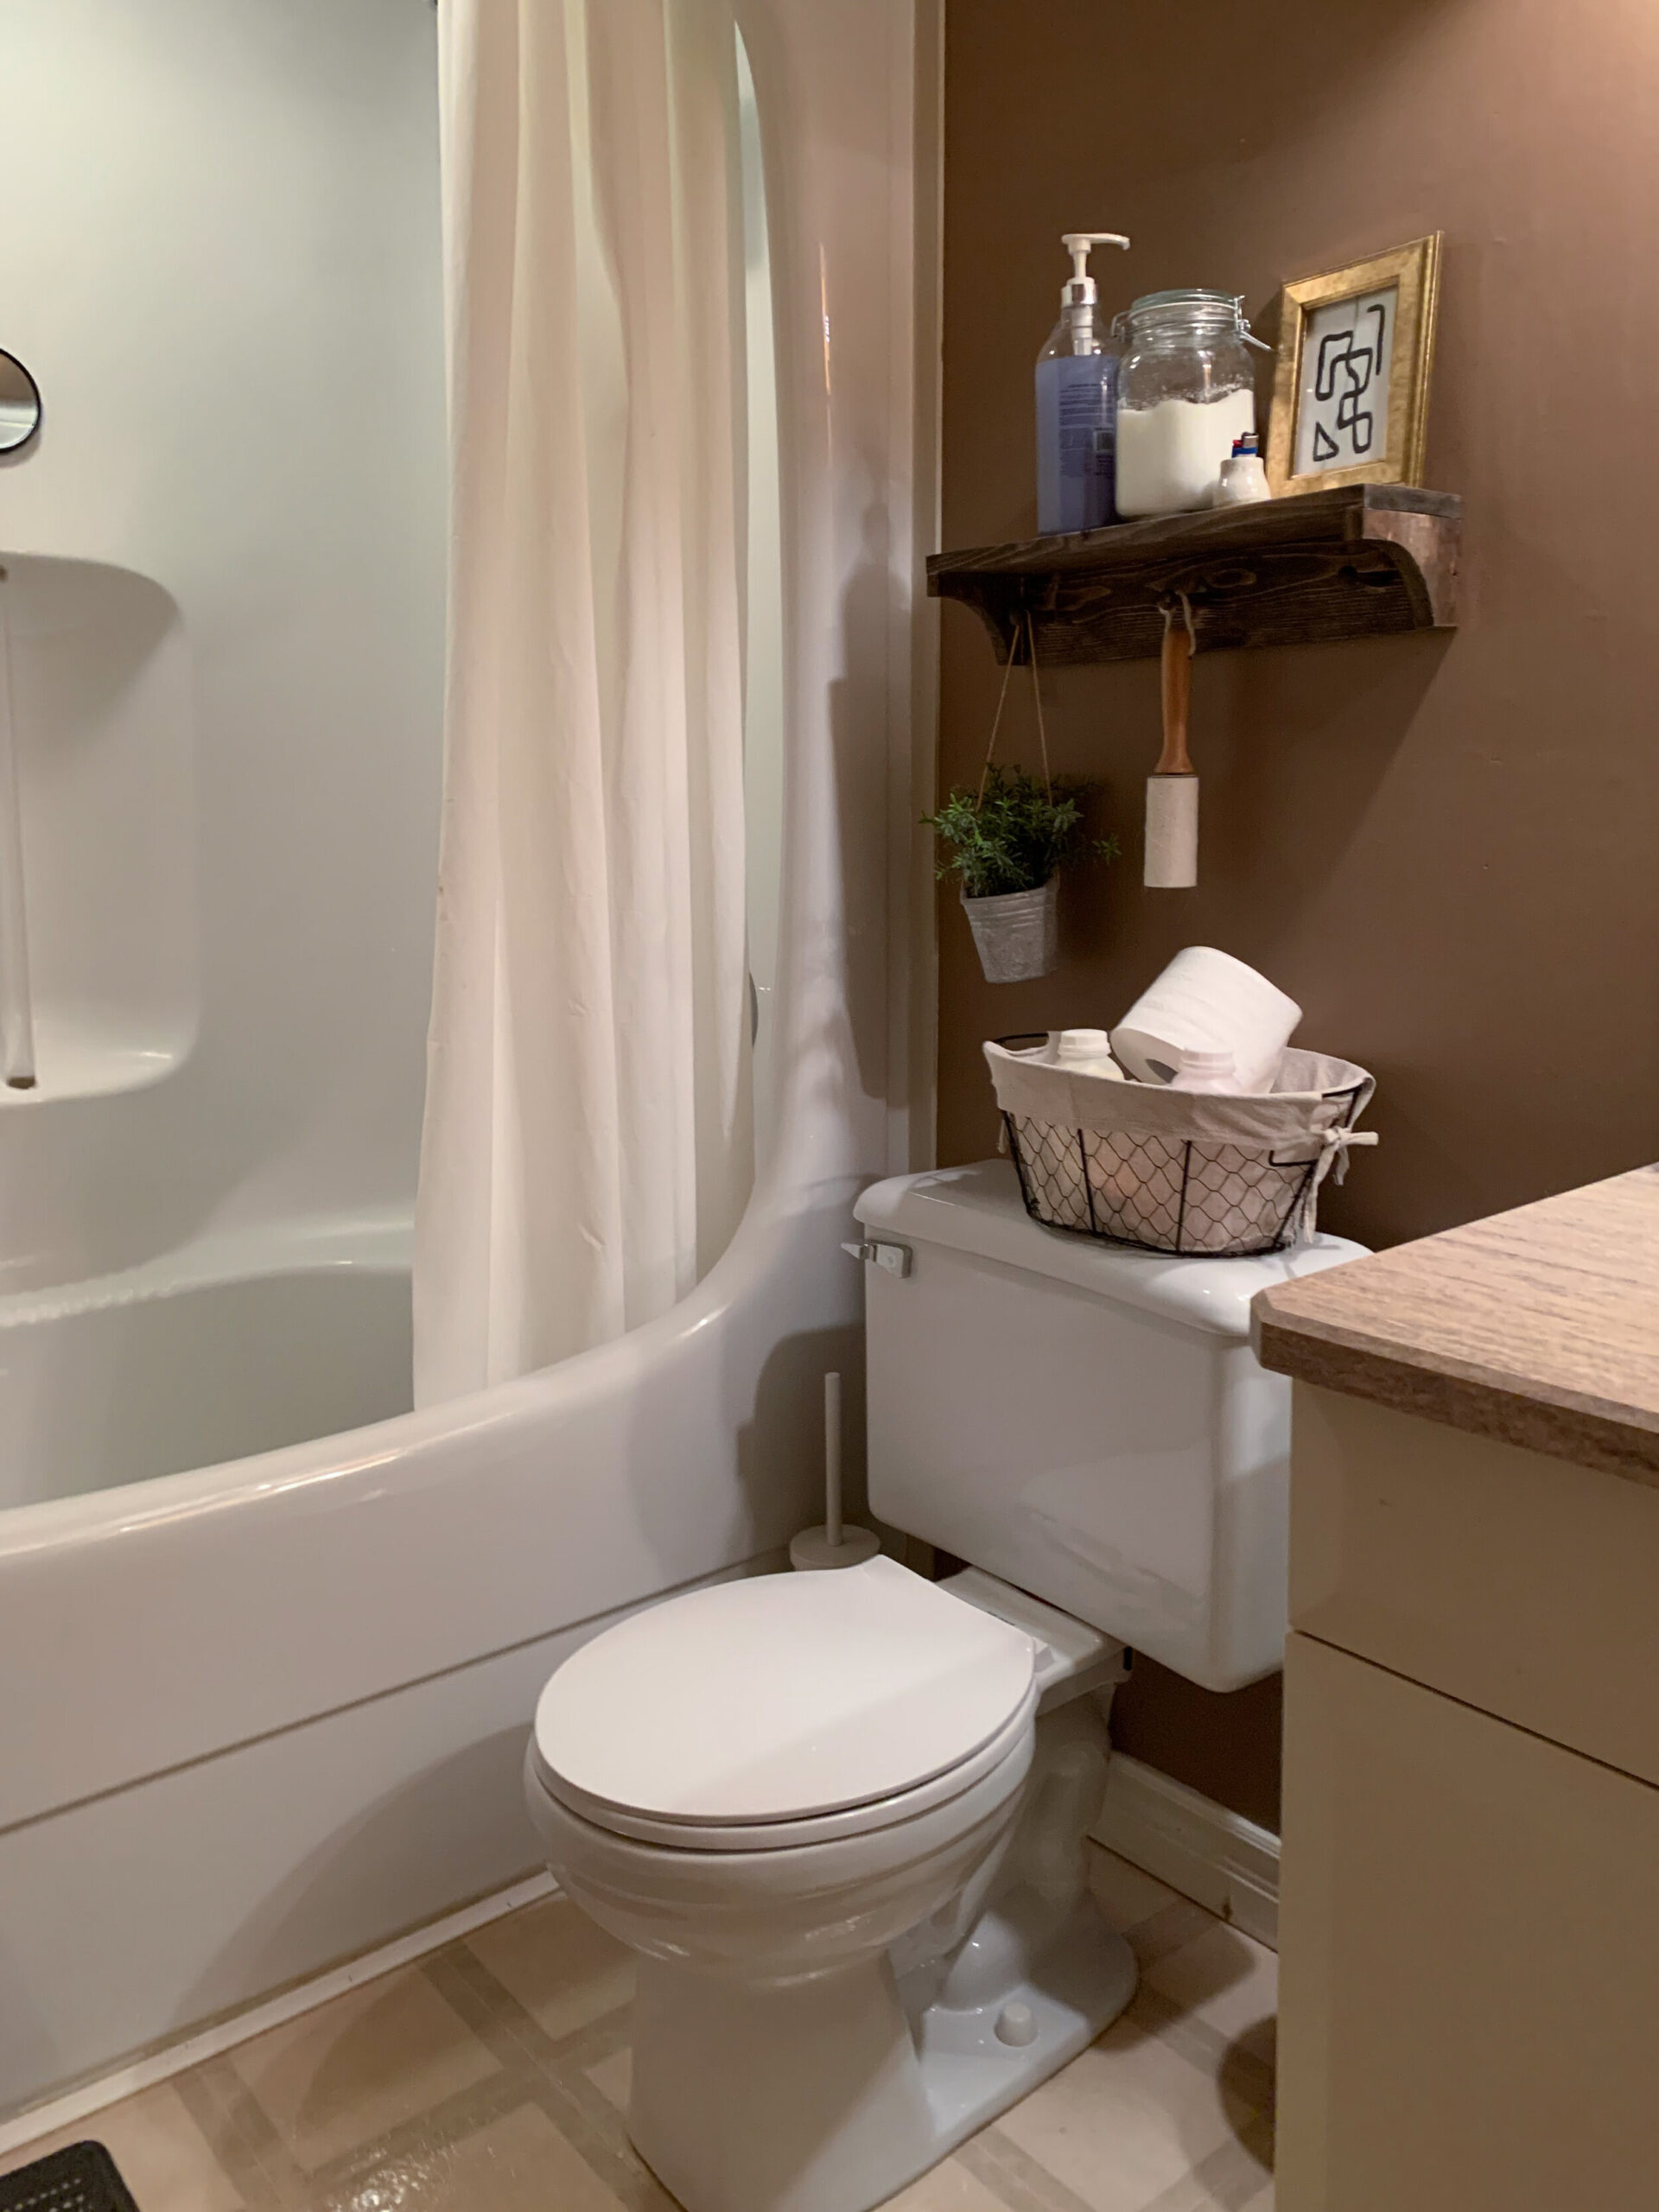
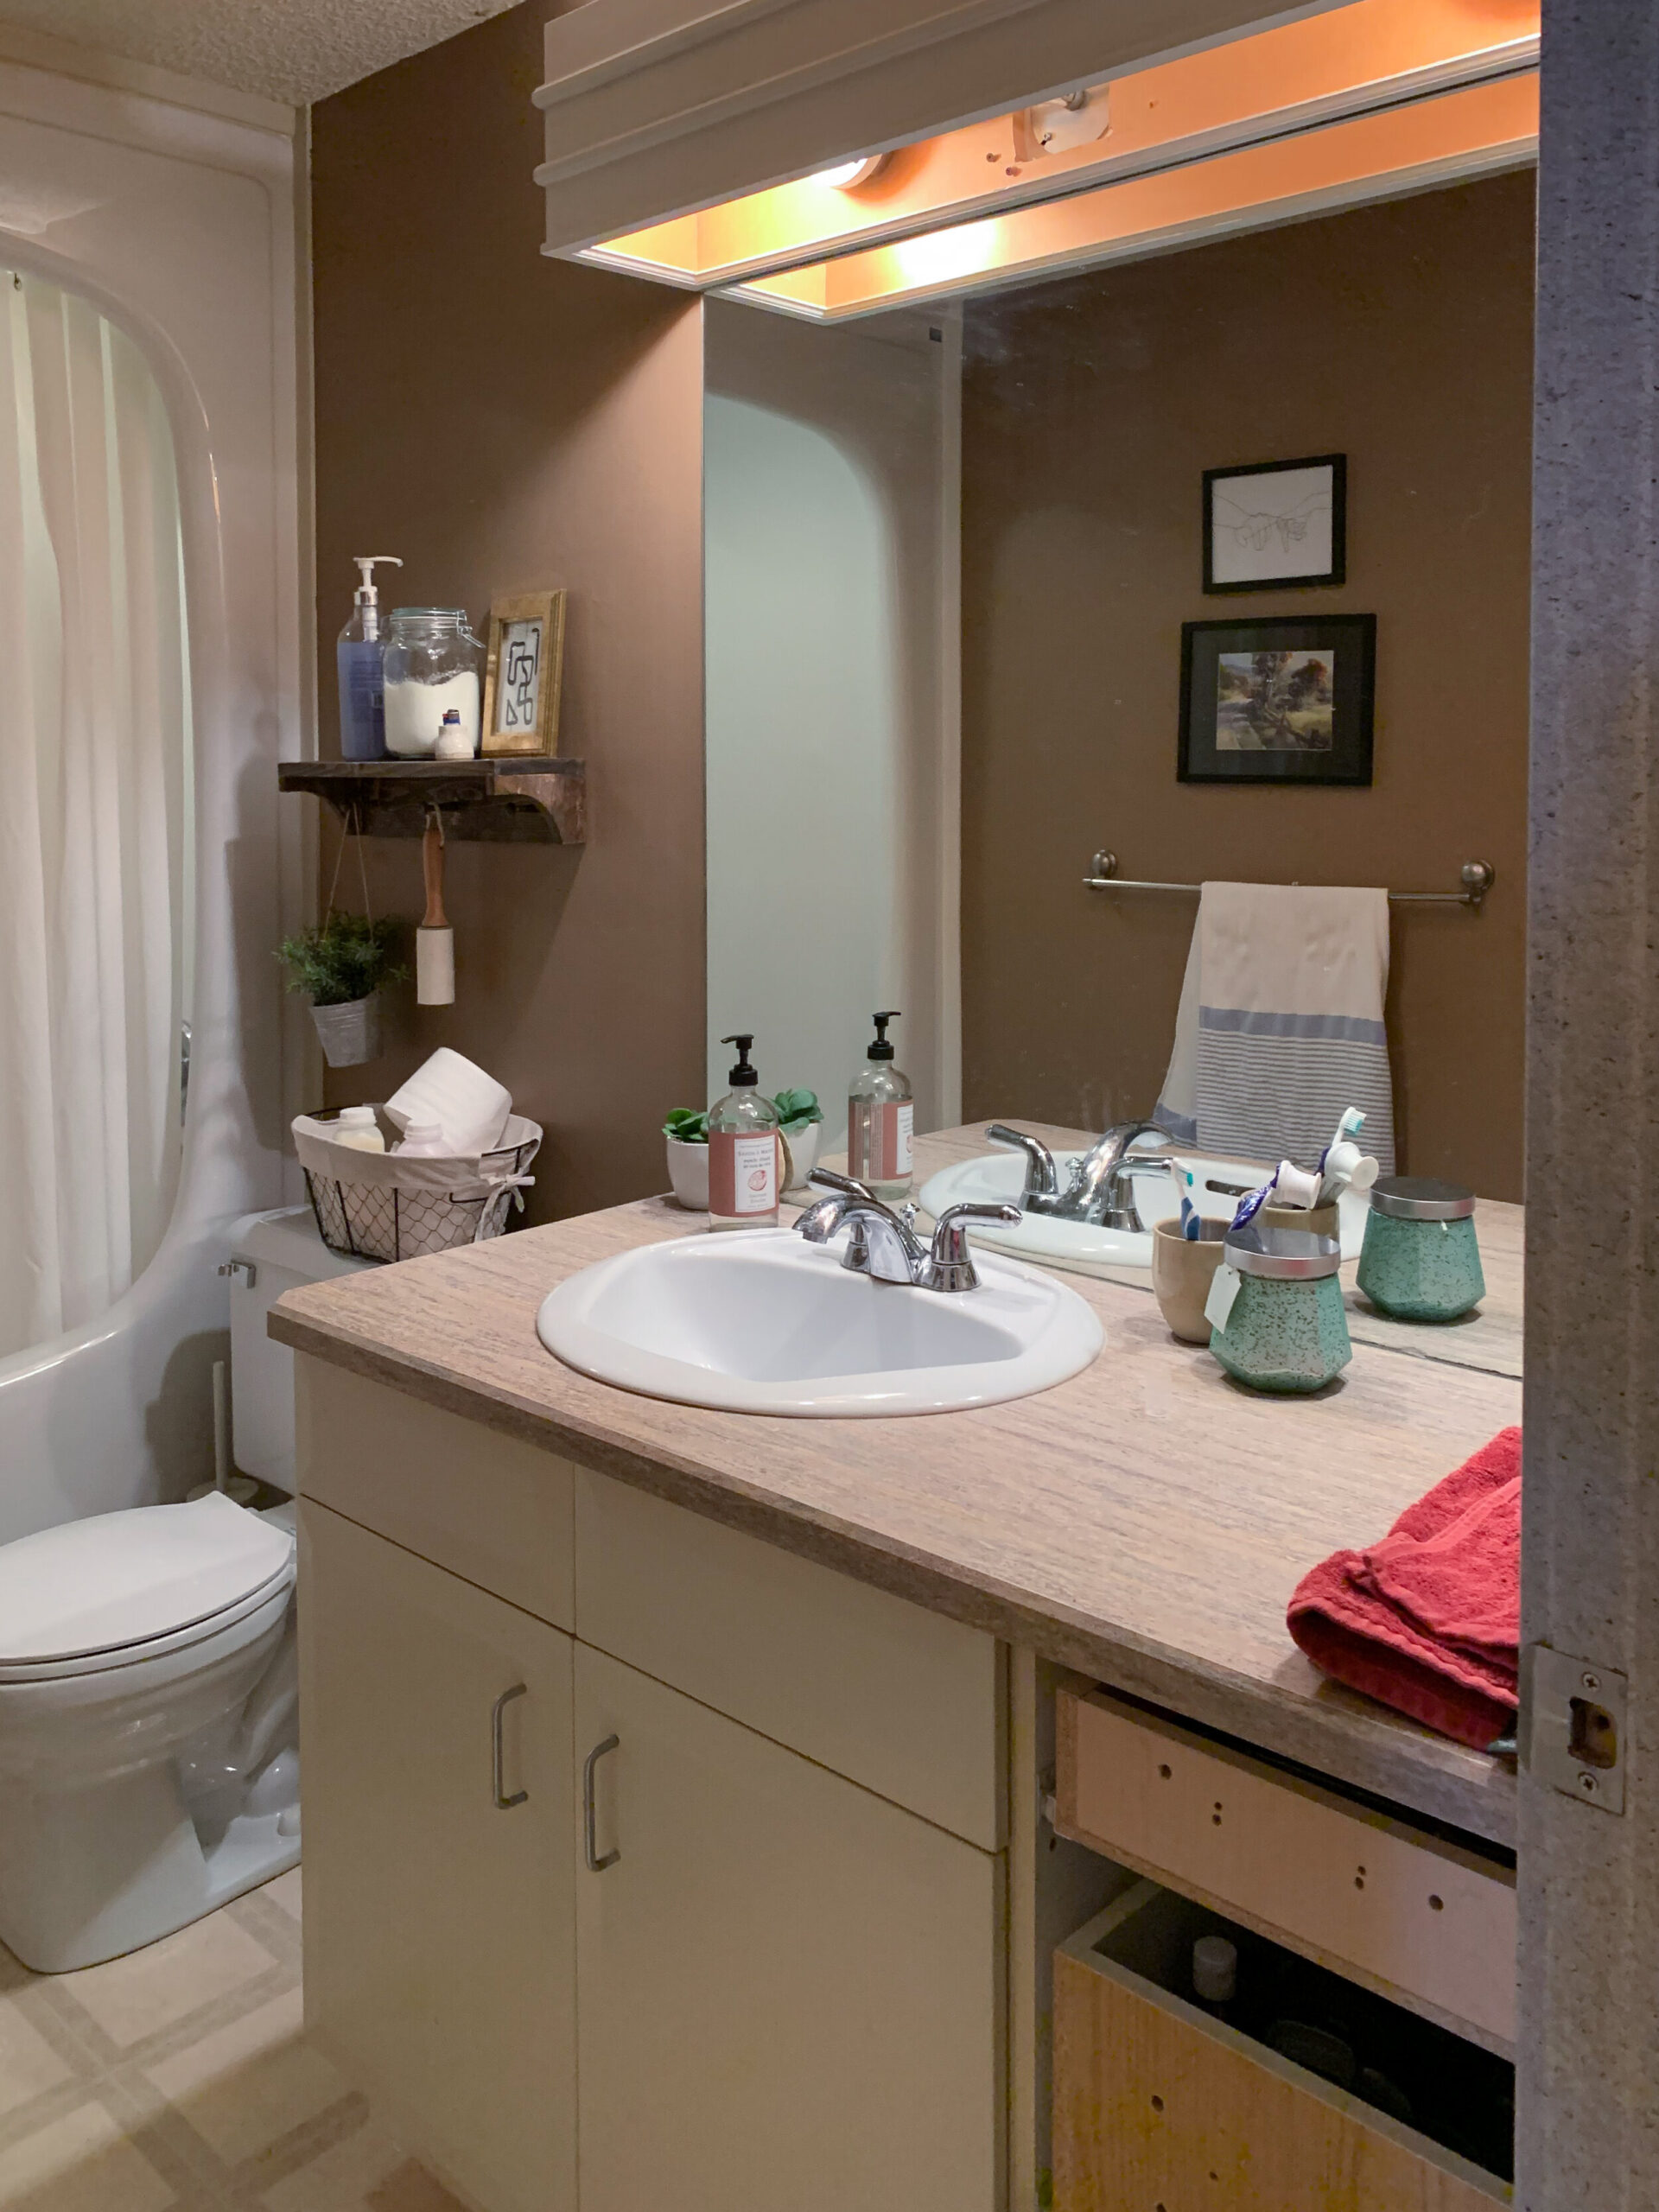
Before we get into too many details, let’s check out where we started with the original bathroom! The bad: The weird and not very functional bathtub “time machine” (as we called it!), the dingy linoleum floors, the popcorn ceiling, the laminate counters and leaky faucets, the toilet that constantly plugged, the poop brown on the walls, the boxed out light fixture enclosing fluorescent bulbs, the oversized basic existing mirror. The good? Not much, but the vanity was good quality, custom-built and fit the space well. So we started fresh and tore everything out, except the vanity box. We wanted to give the bathroom a more classic look without changing the floor plan.
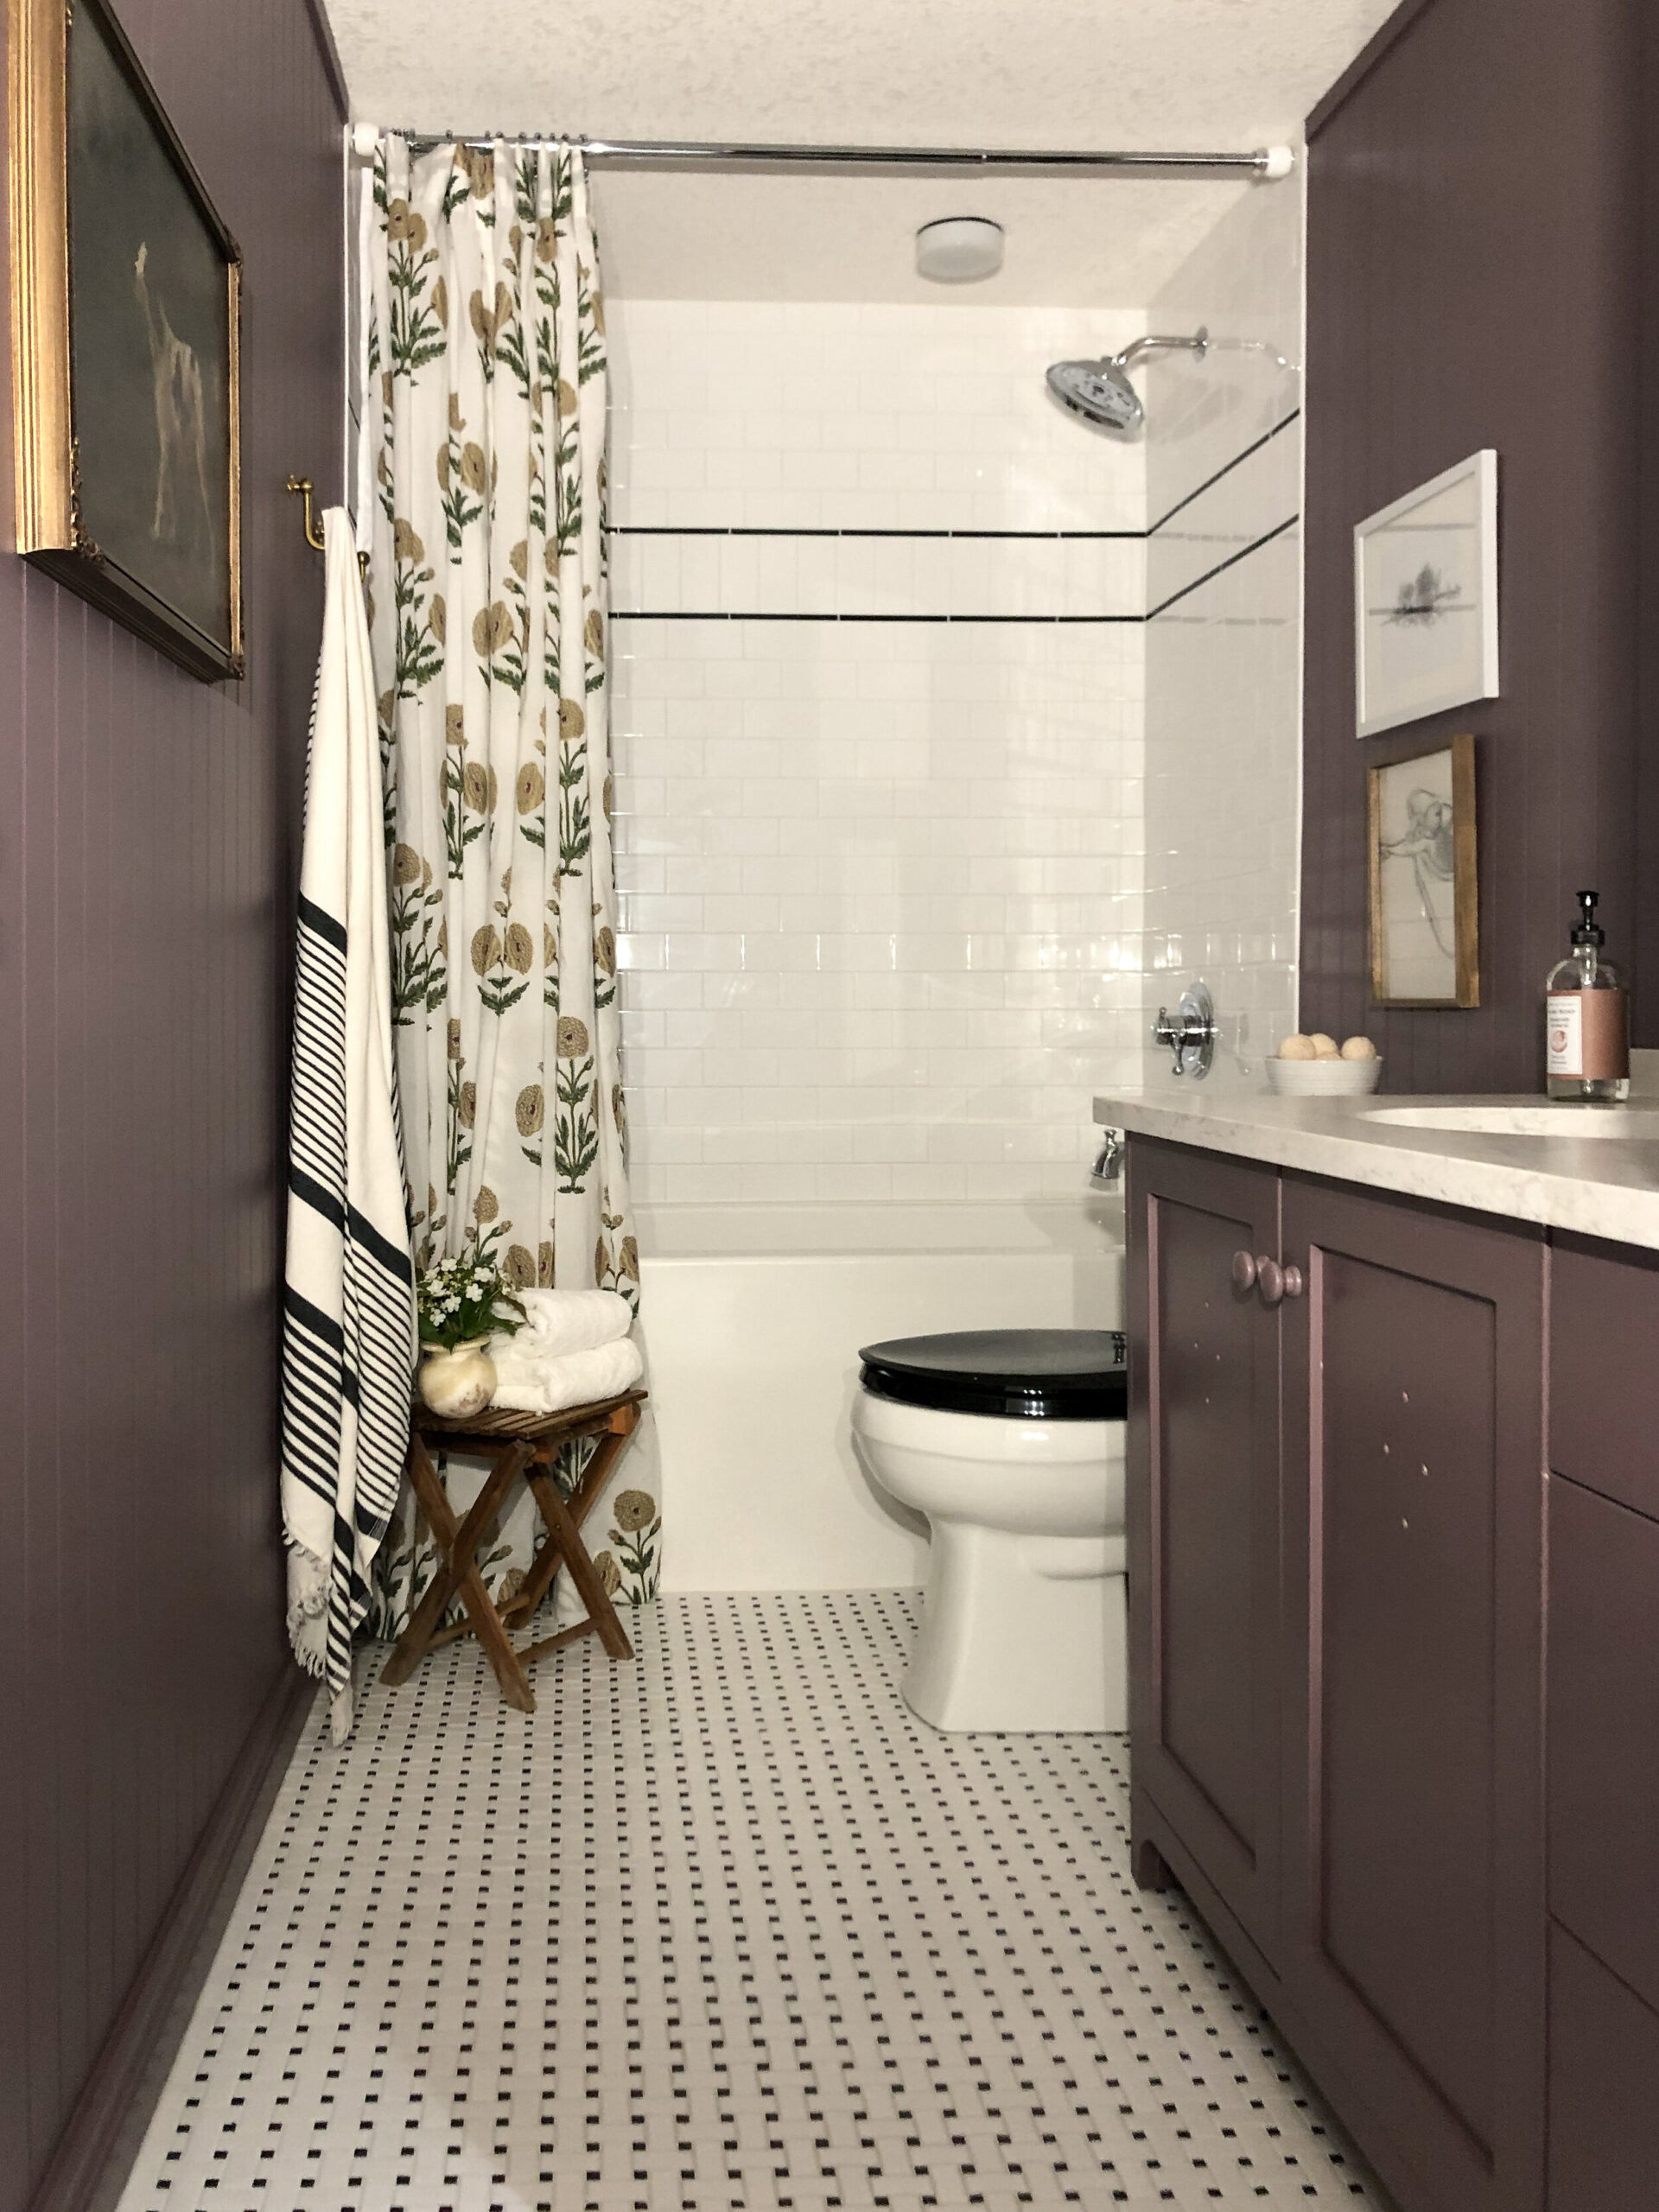
And just so you don’t have to scroll too far…. here’s the after!
This was basically a full remodel – we started by removing everything, including the ceiling. We re-drywalled the ceiling, removed the old tub and installed a new “normal” tub, furred out the wall to match the new tub width and made sure everything was waterproof.

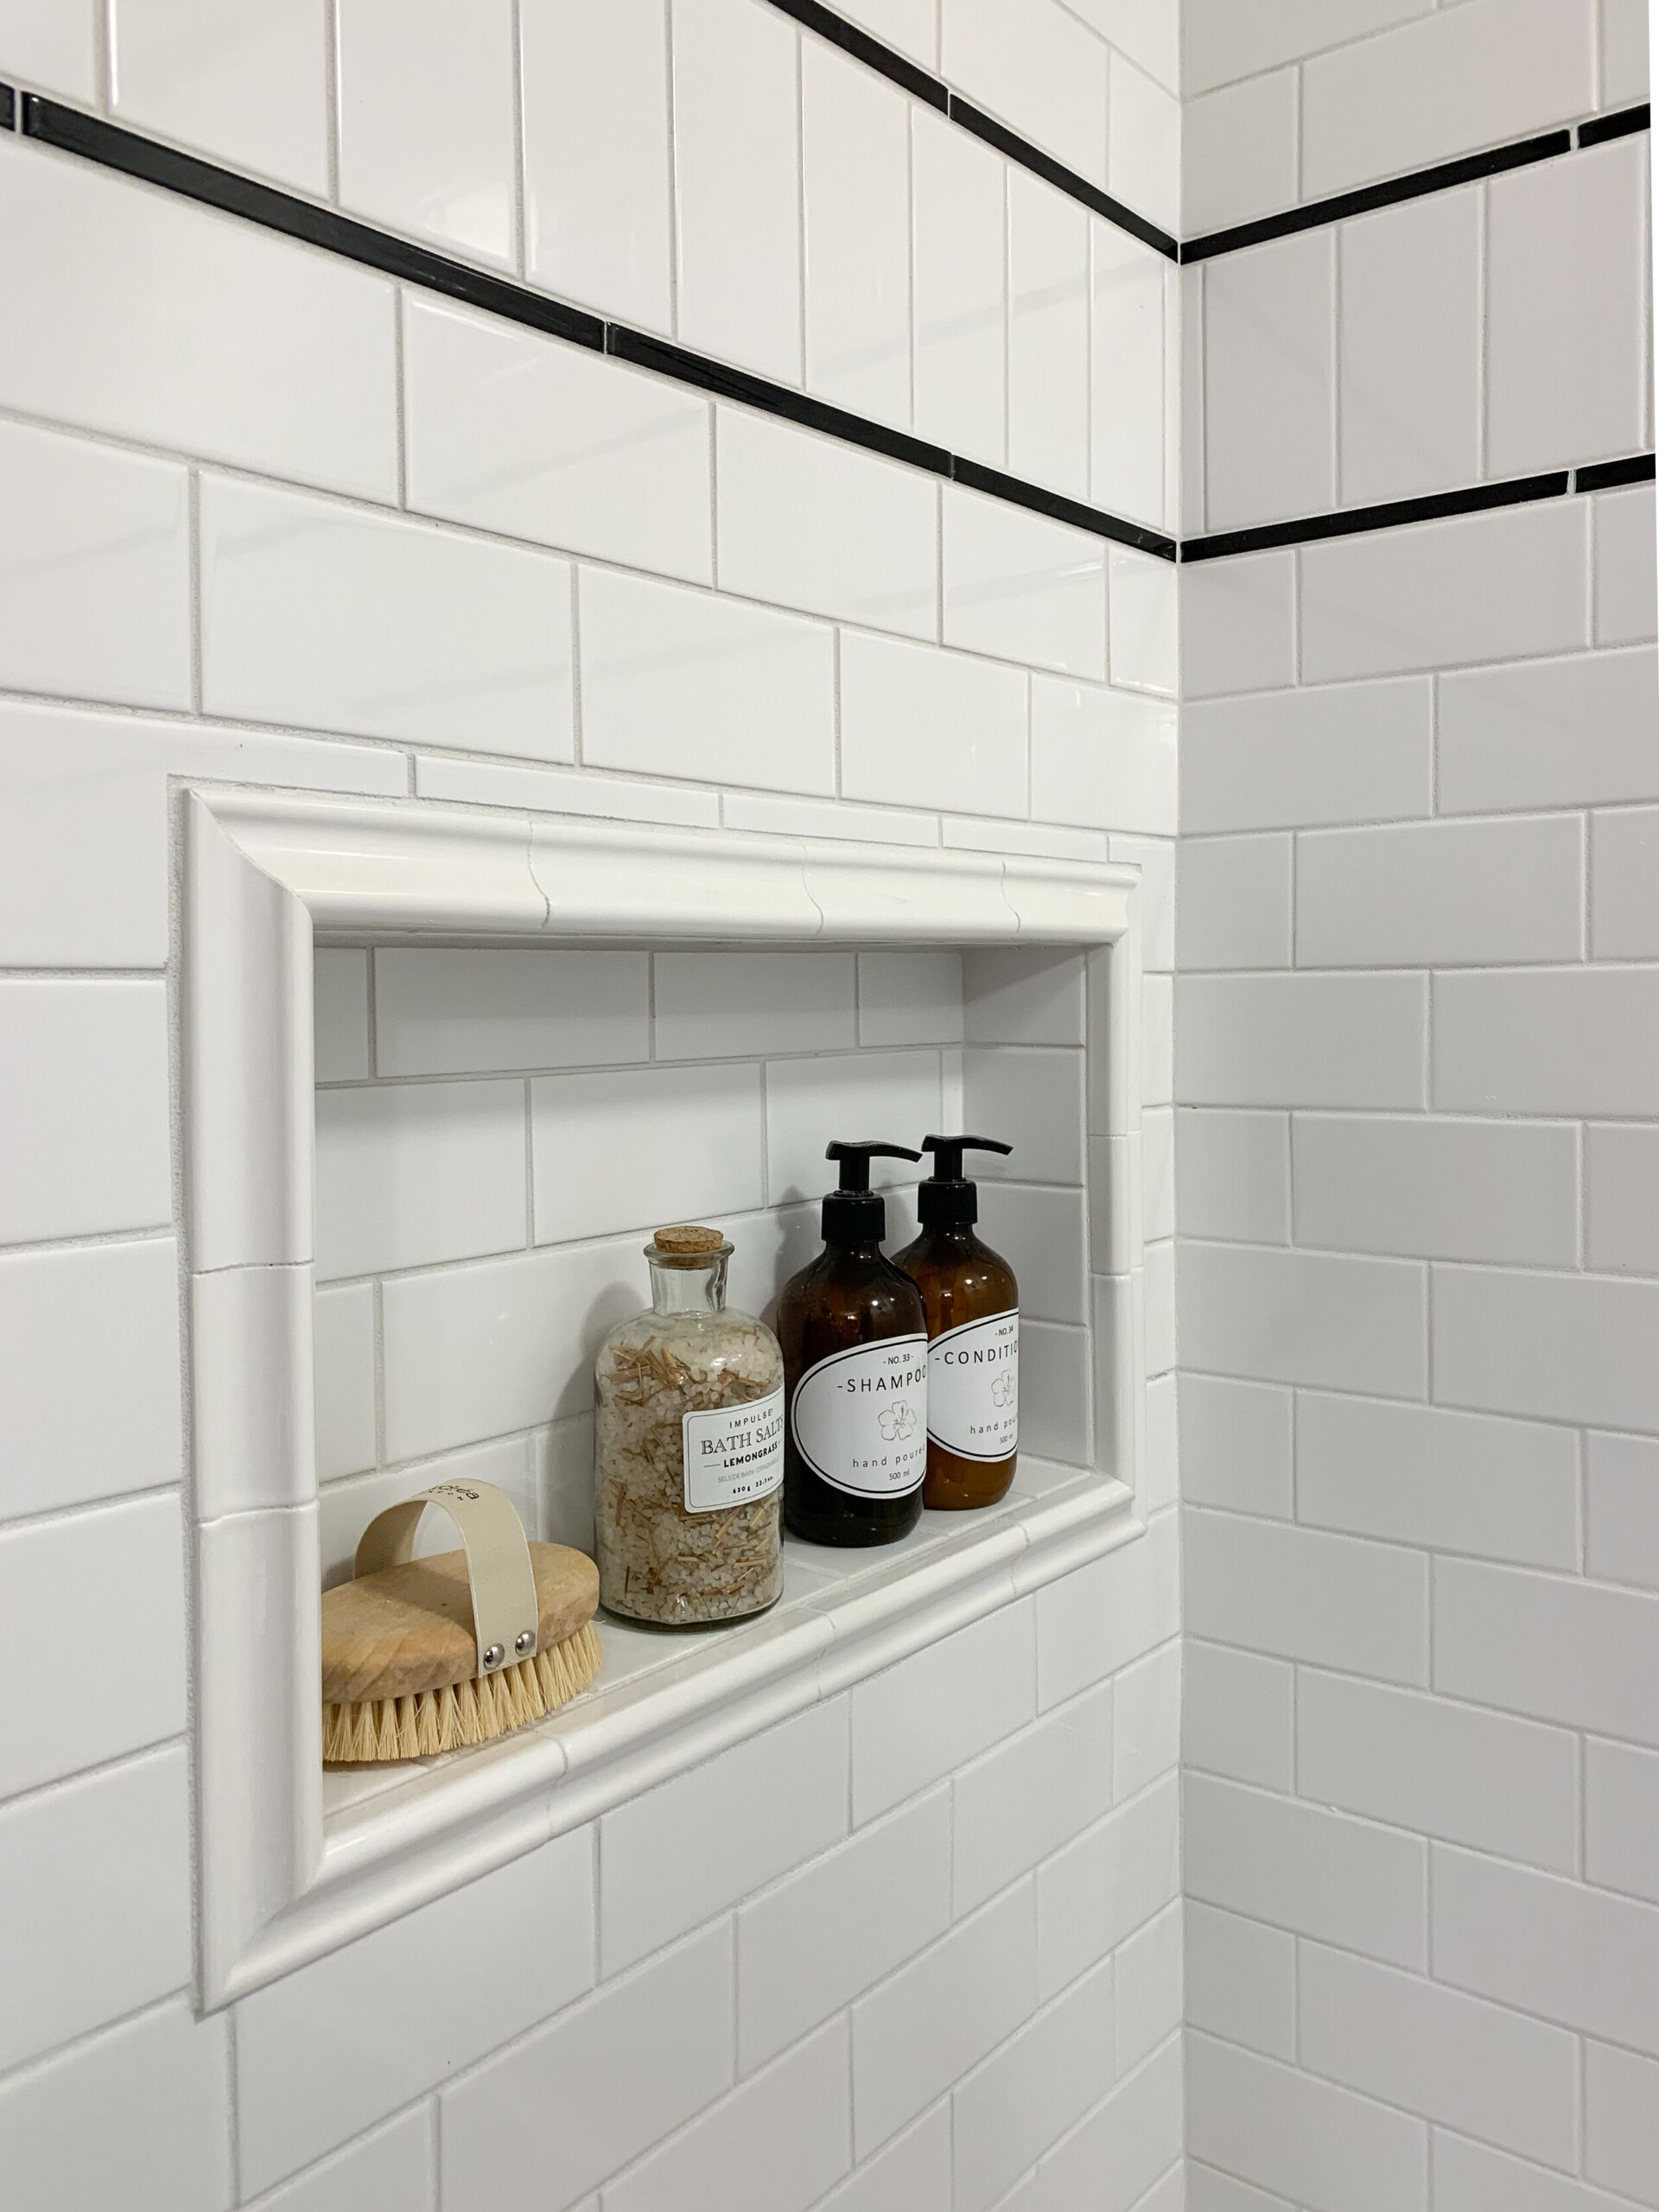
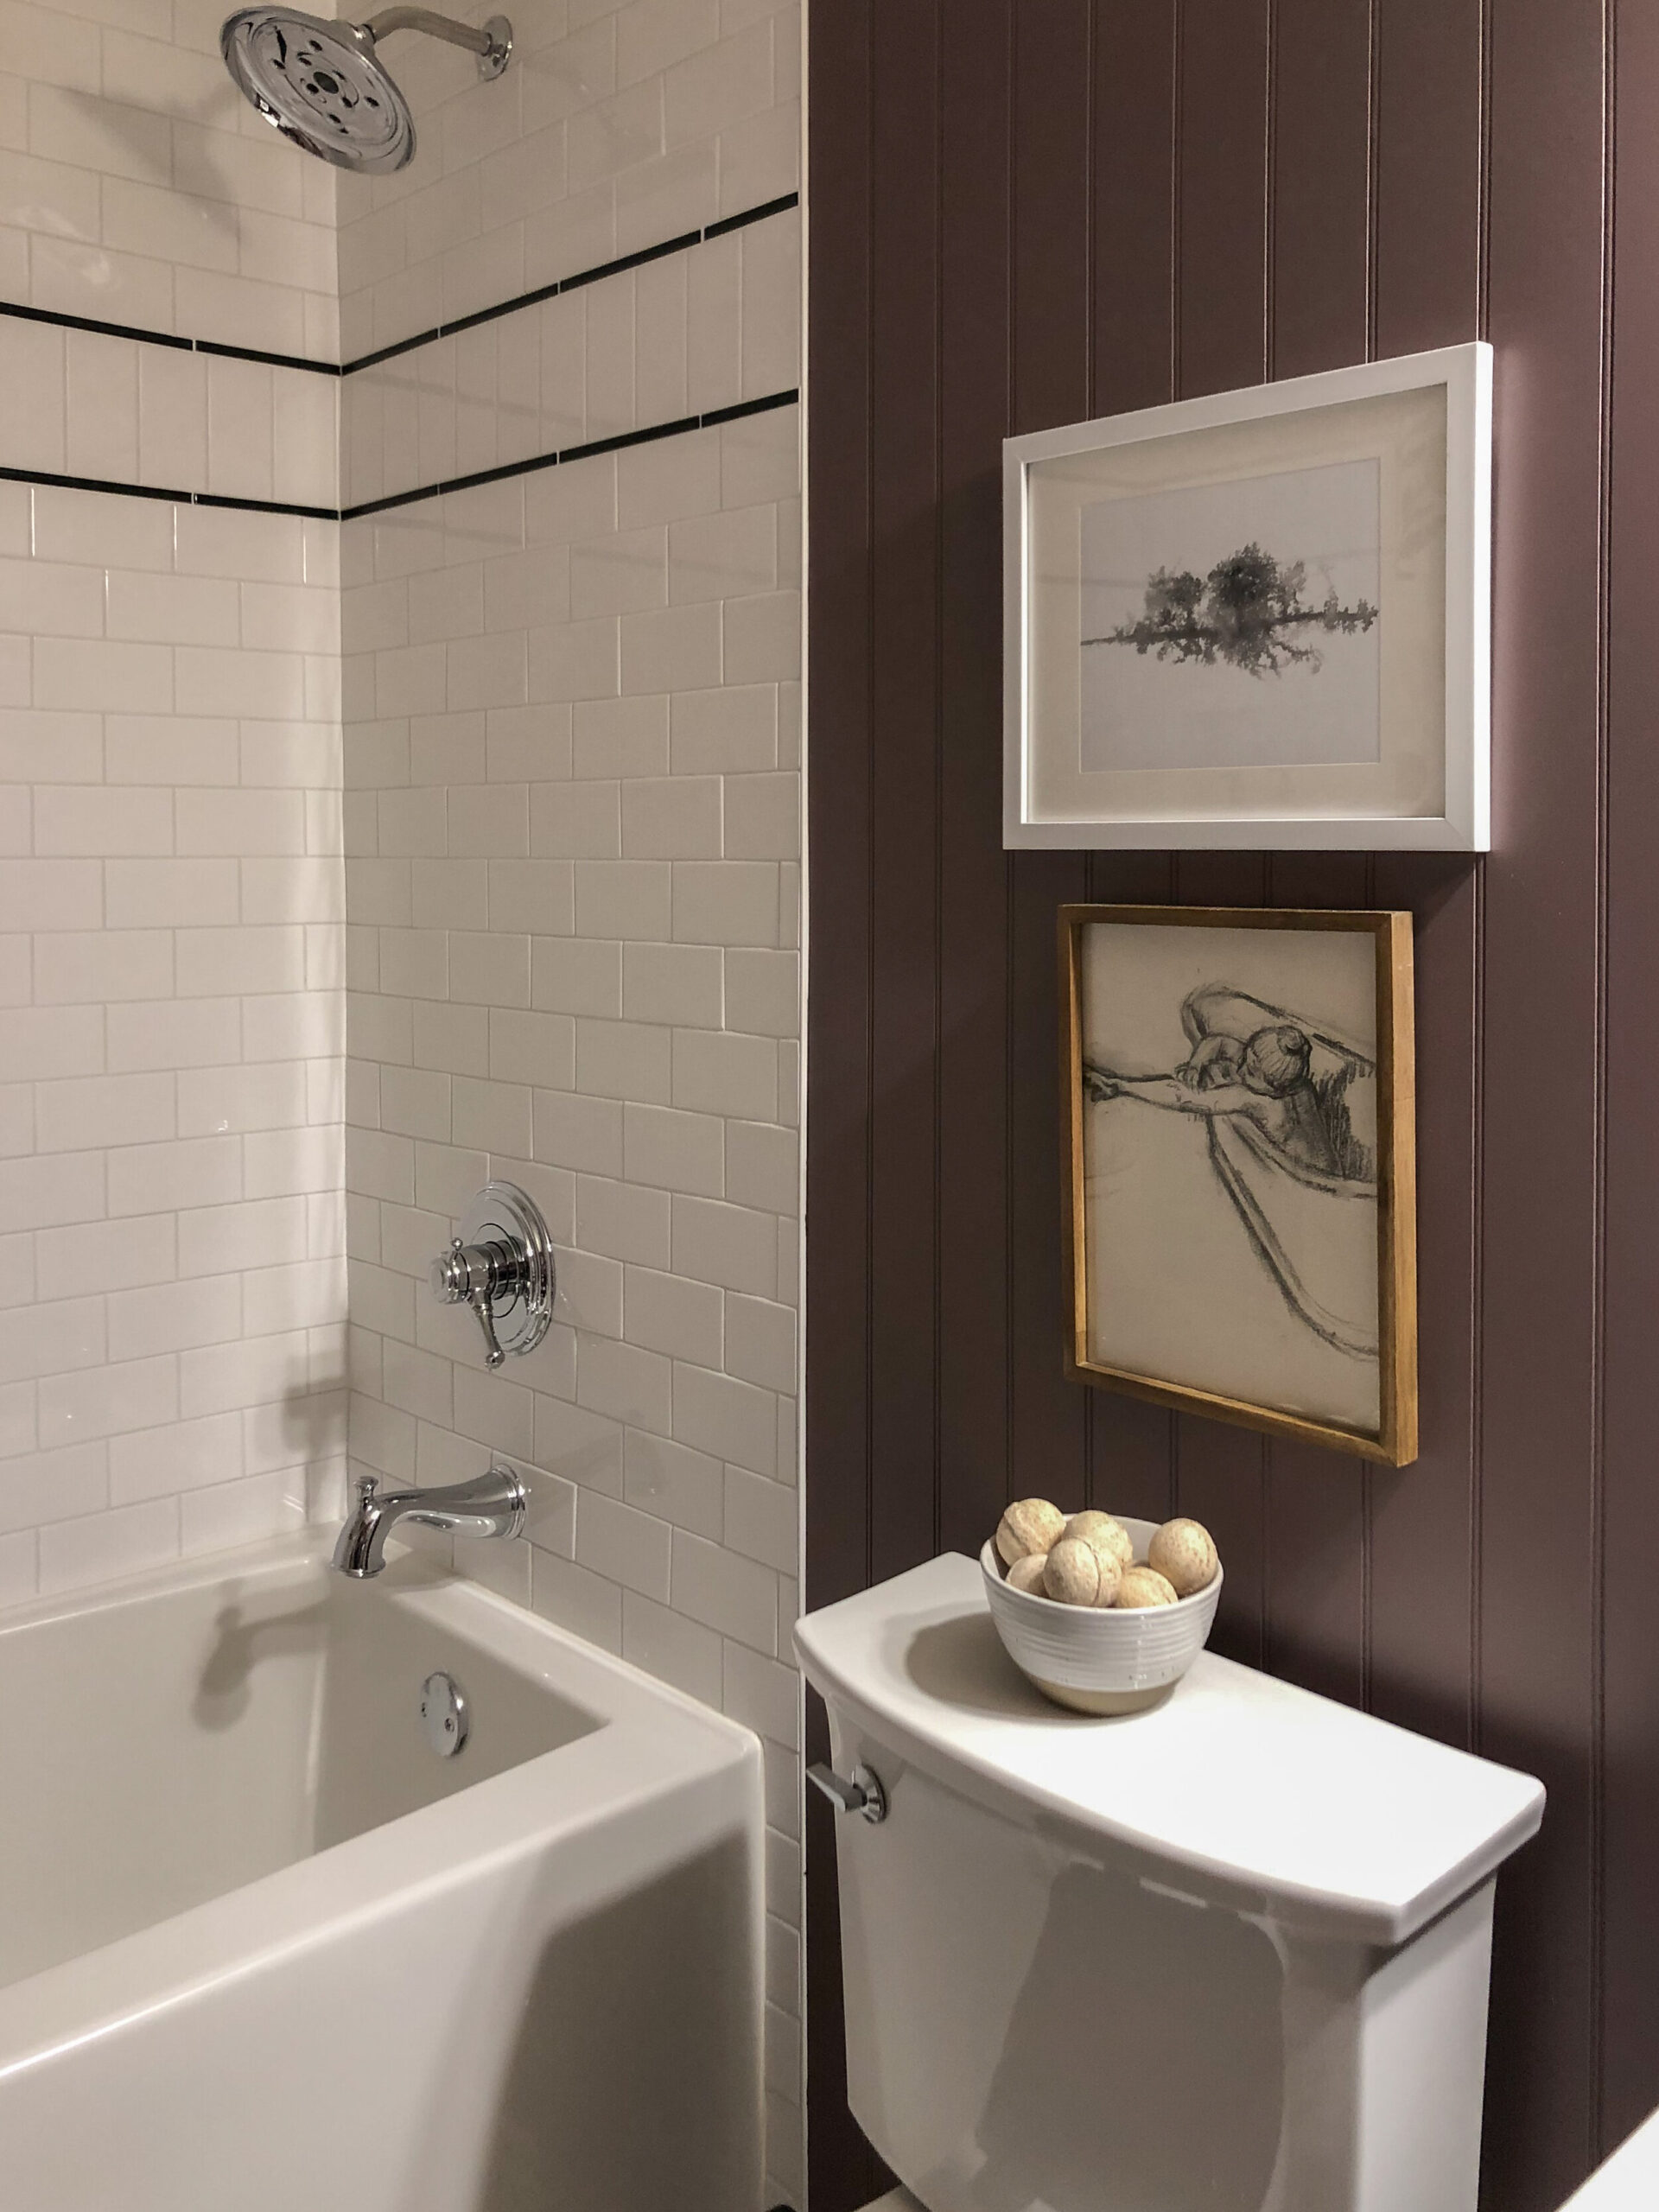
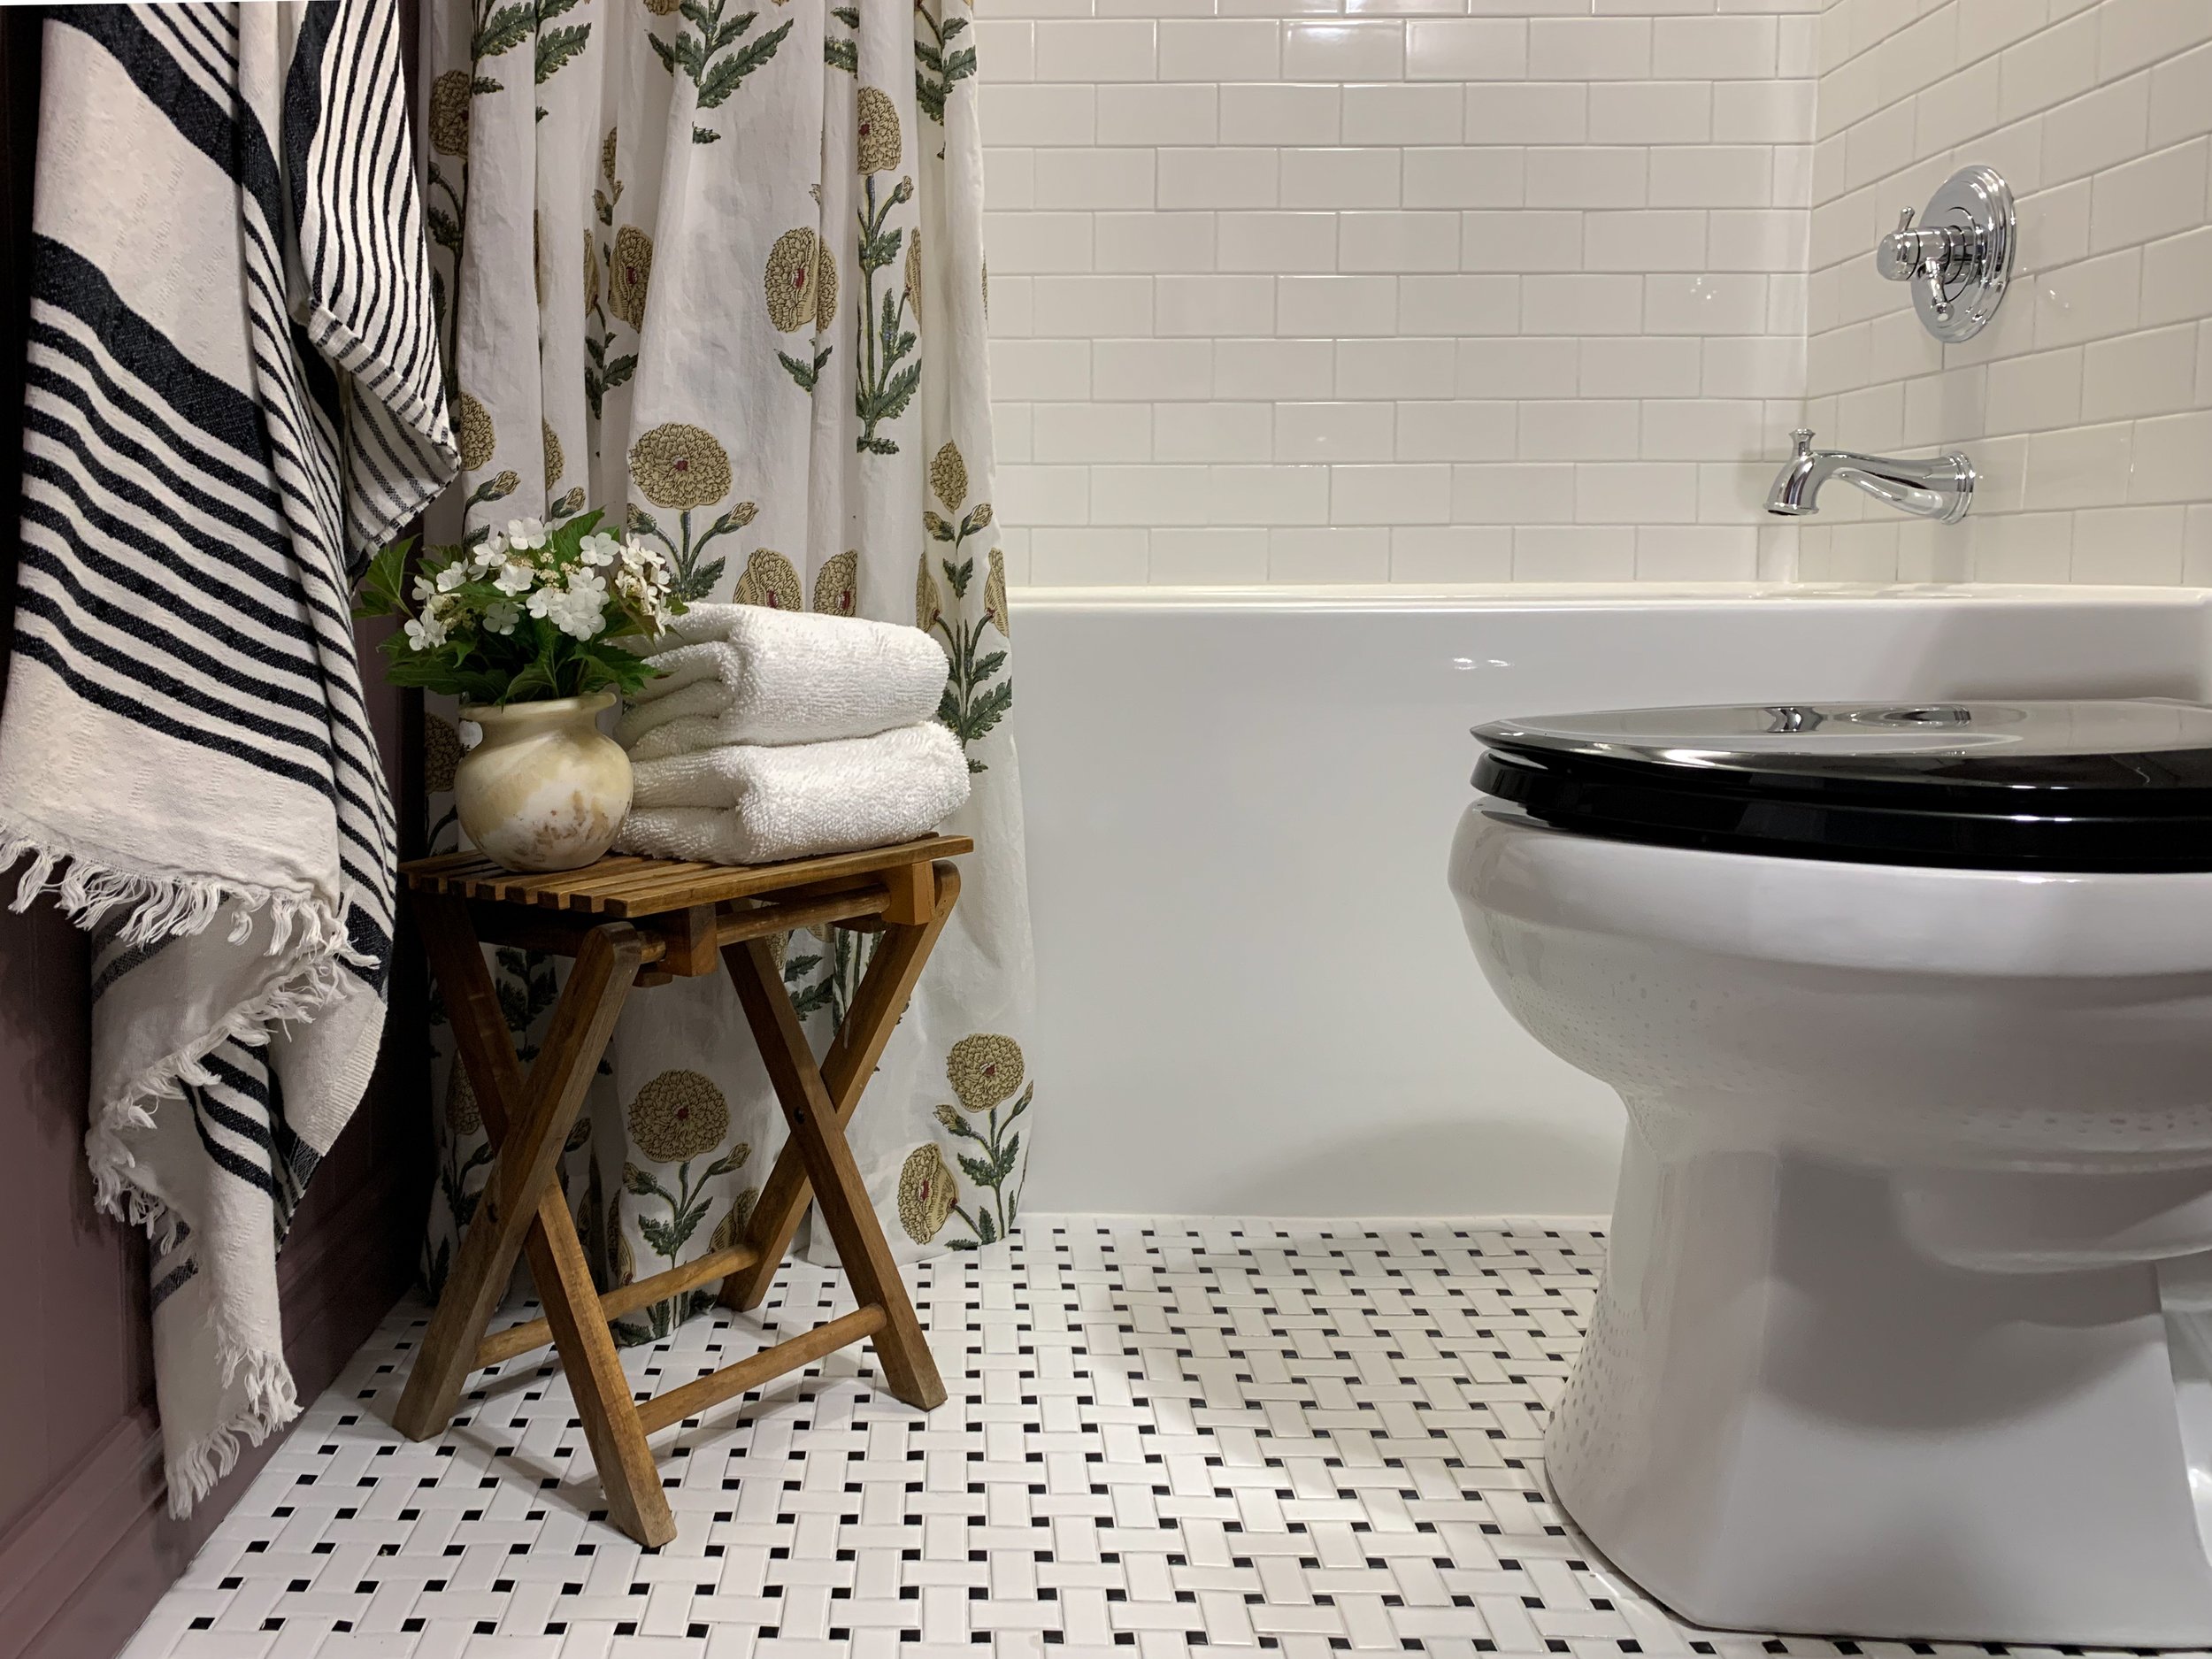
We installed a budget-friendly subway shower tile surround with a little detail to keep it from being too basic. I am usually not a big fan of the wall tile niche, but this tub had very little “deck space” and I knew that we needed to have something for the kids to keep all their potions for practical purposes. I framed out the niche with this bullnose tile trim and I’m so pleased with how it came out!
For the floor, I chose a (budget-friendly!) black and white ceramic basket weave bathroom floor tile to tie in with the shower trim detail. To keep the floor from looking too busy, I used a white grout that minimizes the contrast. I chose this grout that is supposed to be very stain-resistant … I will keep you posted on that!
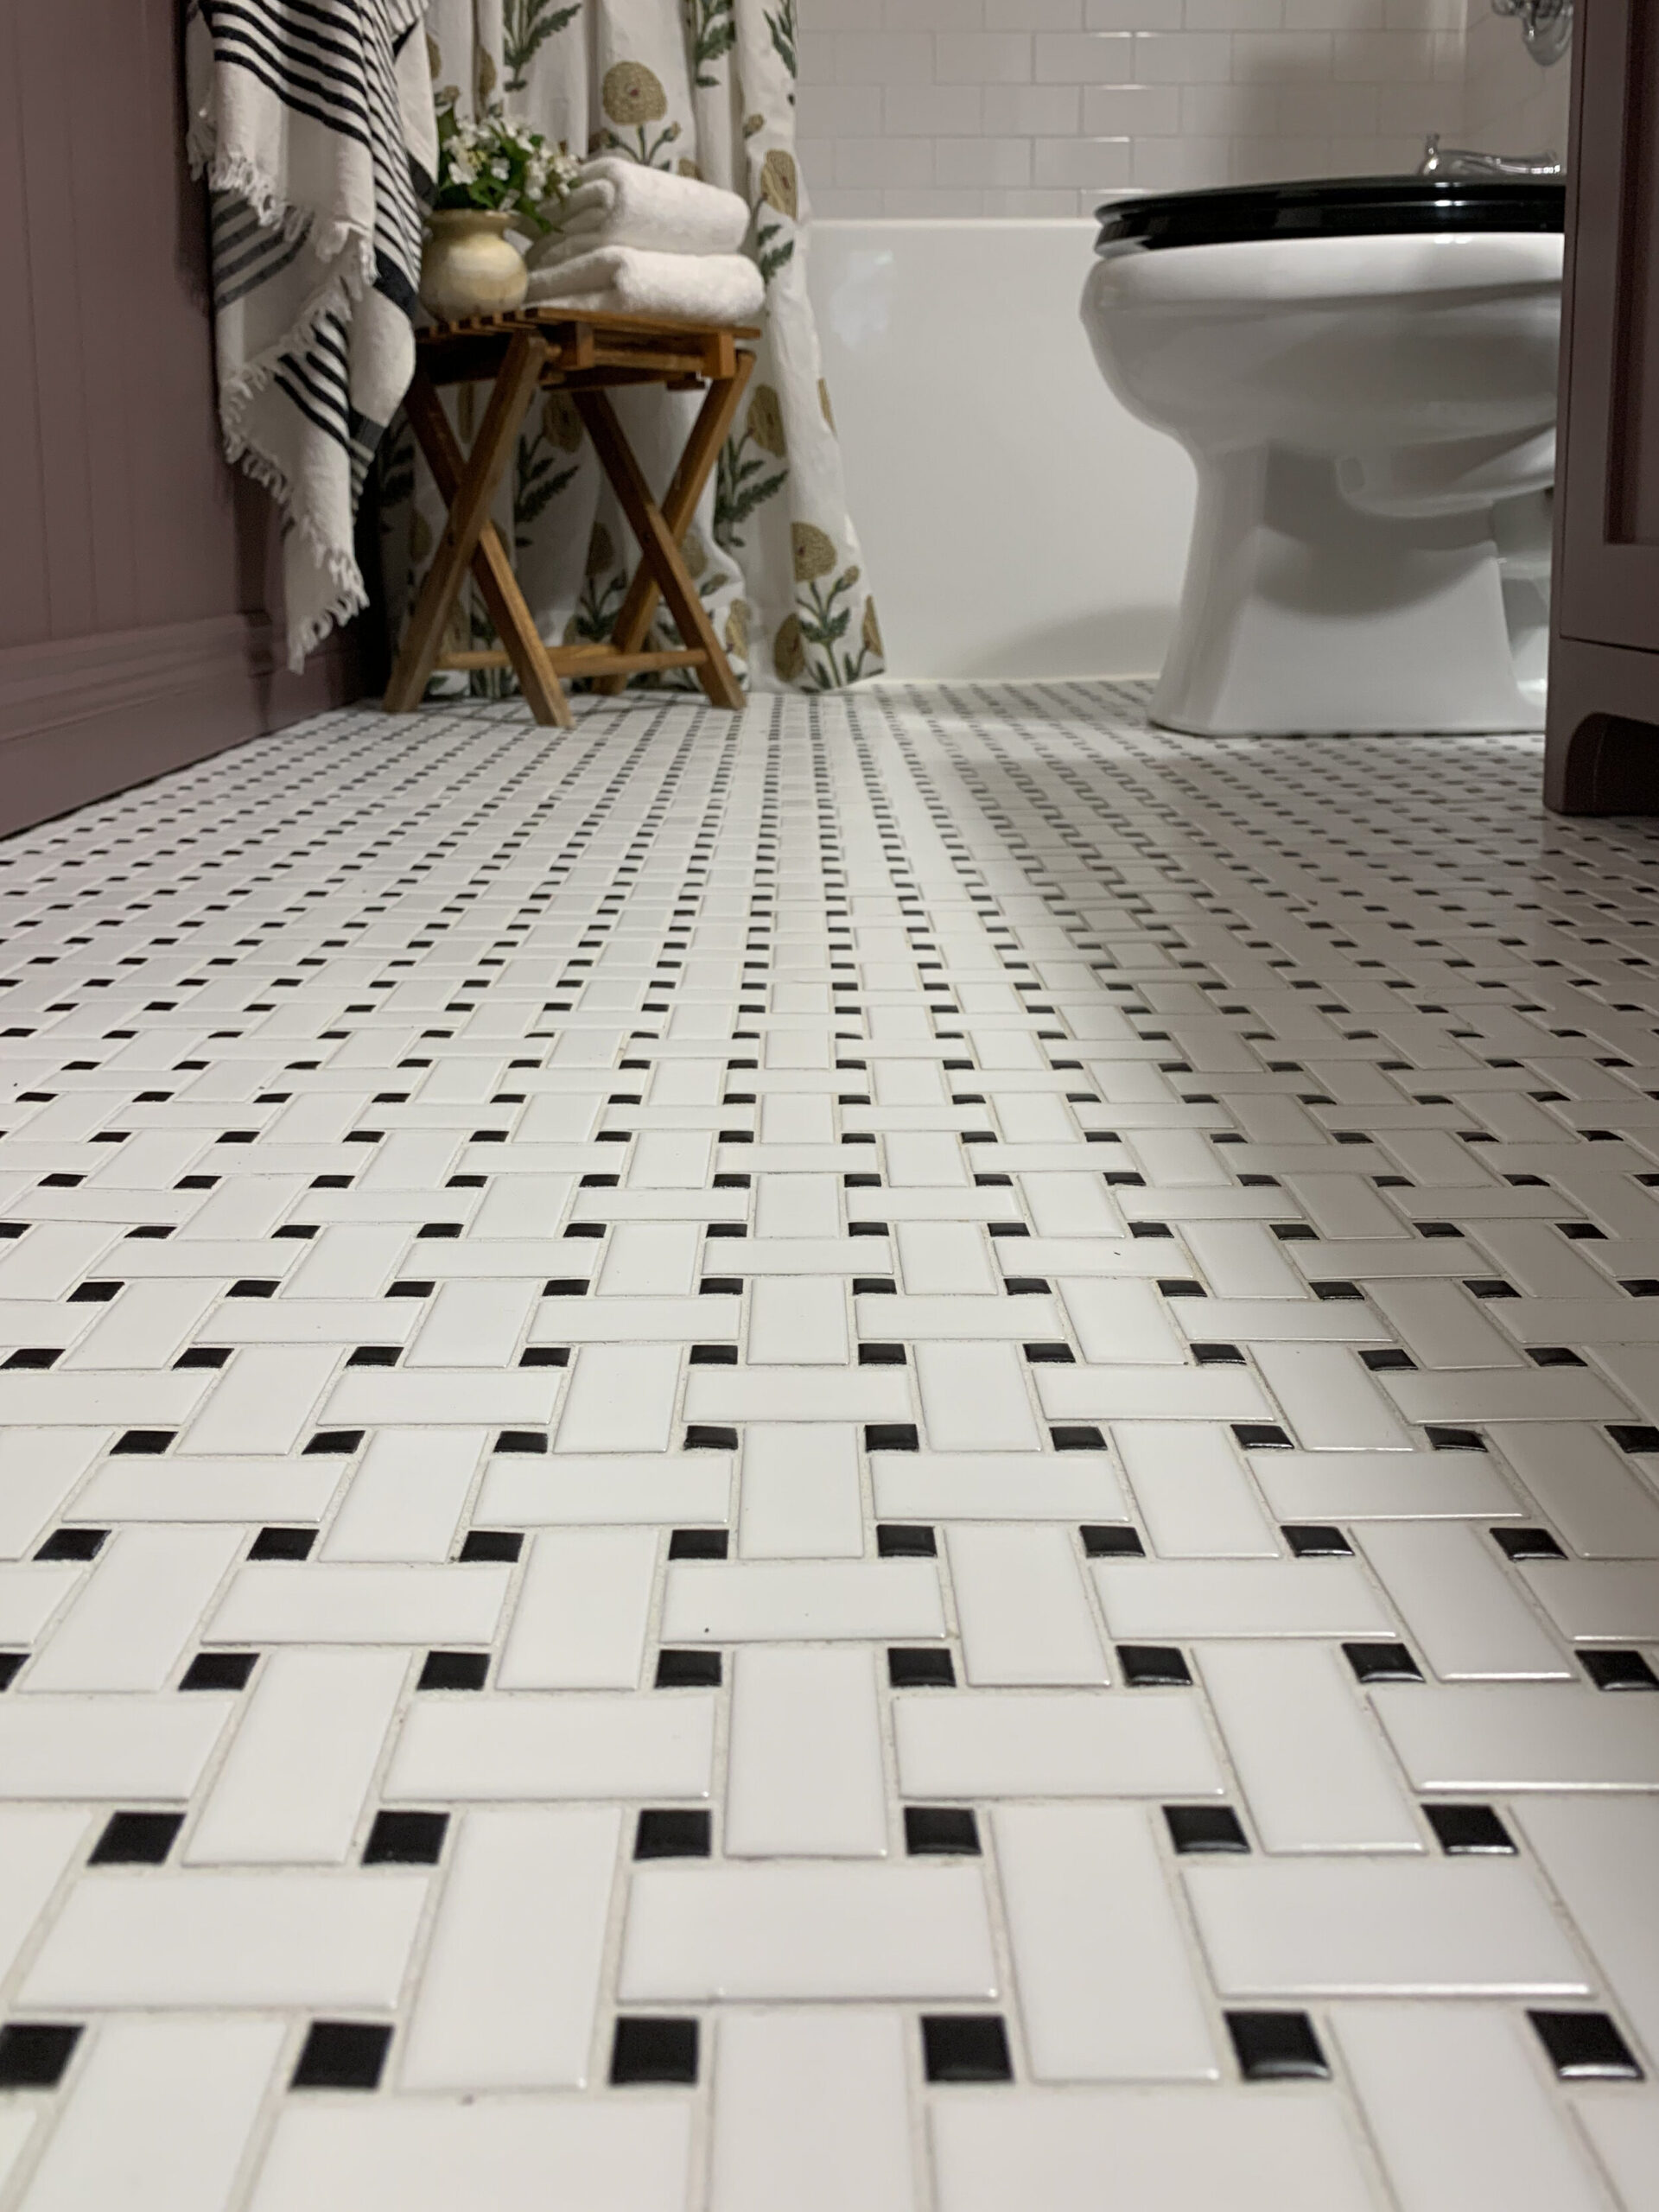
I thought long and hard about the tile choices in this space. I really wanted to make sure that it was classic, still a little fun, and wasn’t too trendy. The simple black and white tiles are easy to live with, and if one wants a change-up, a splash of paint and a new shower curtain will make this space feel totally different!
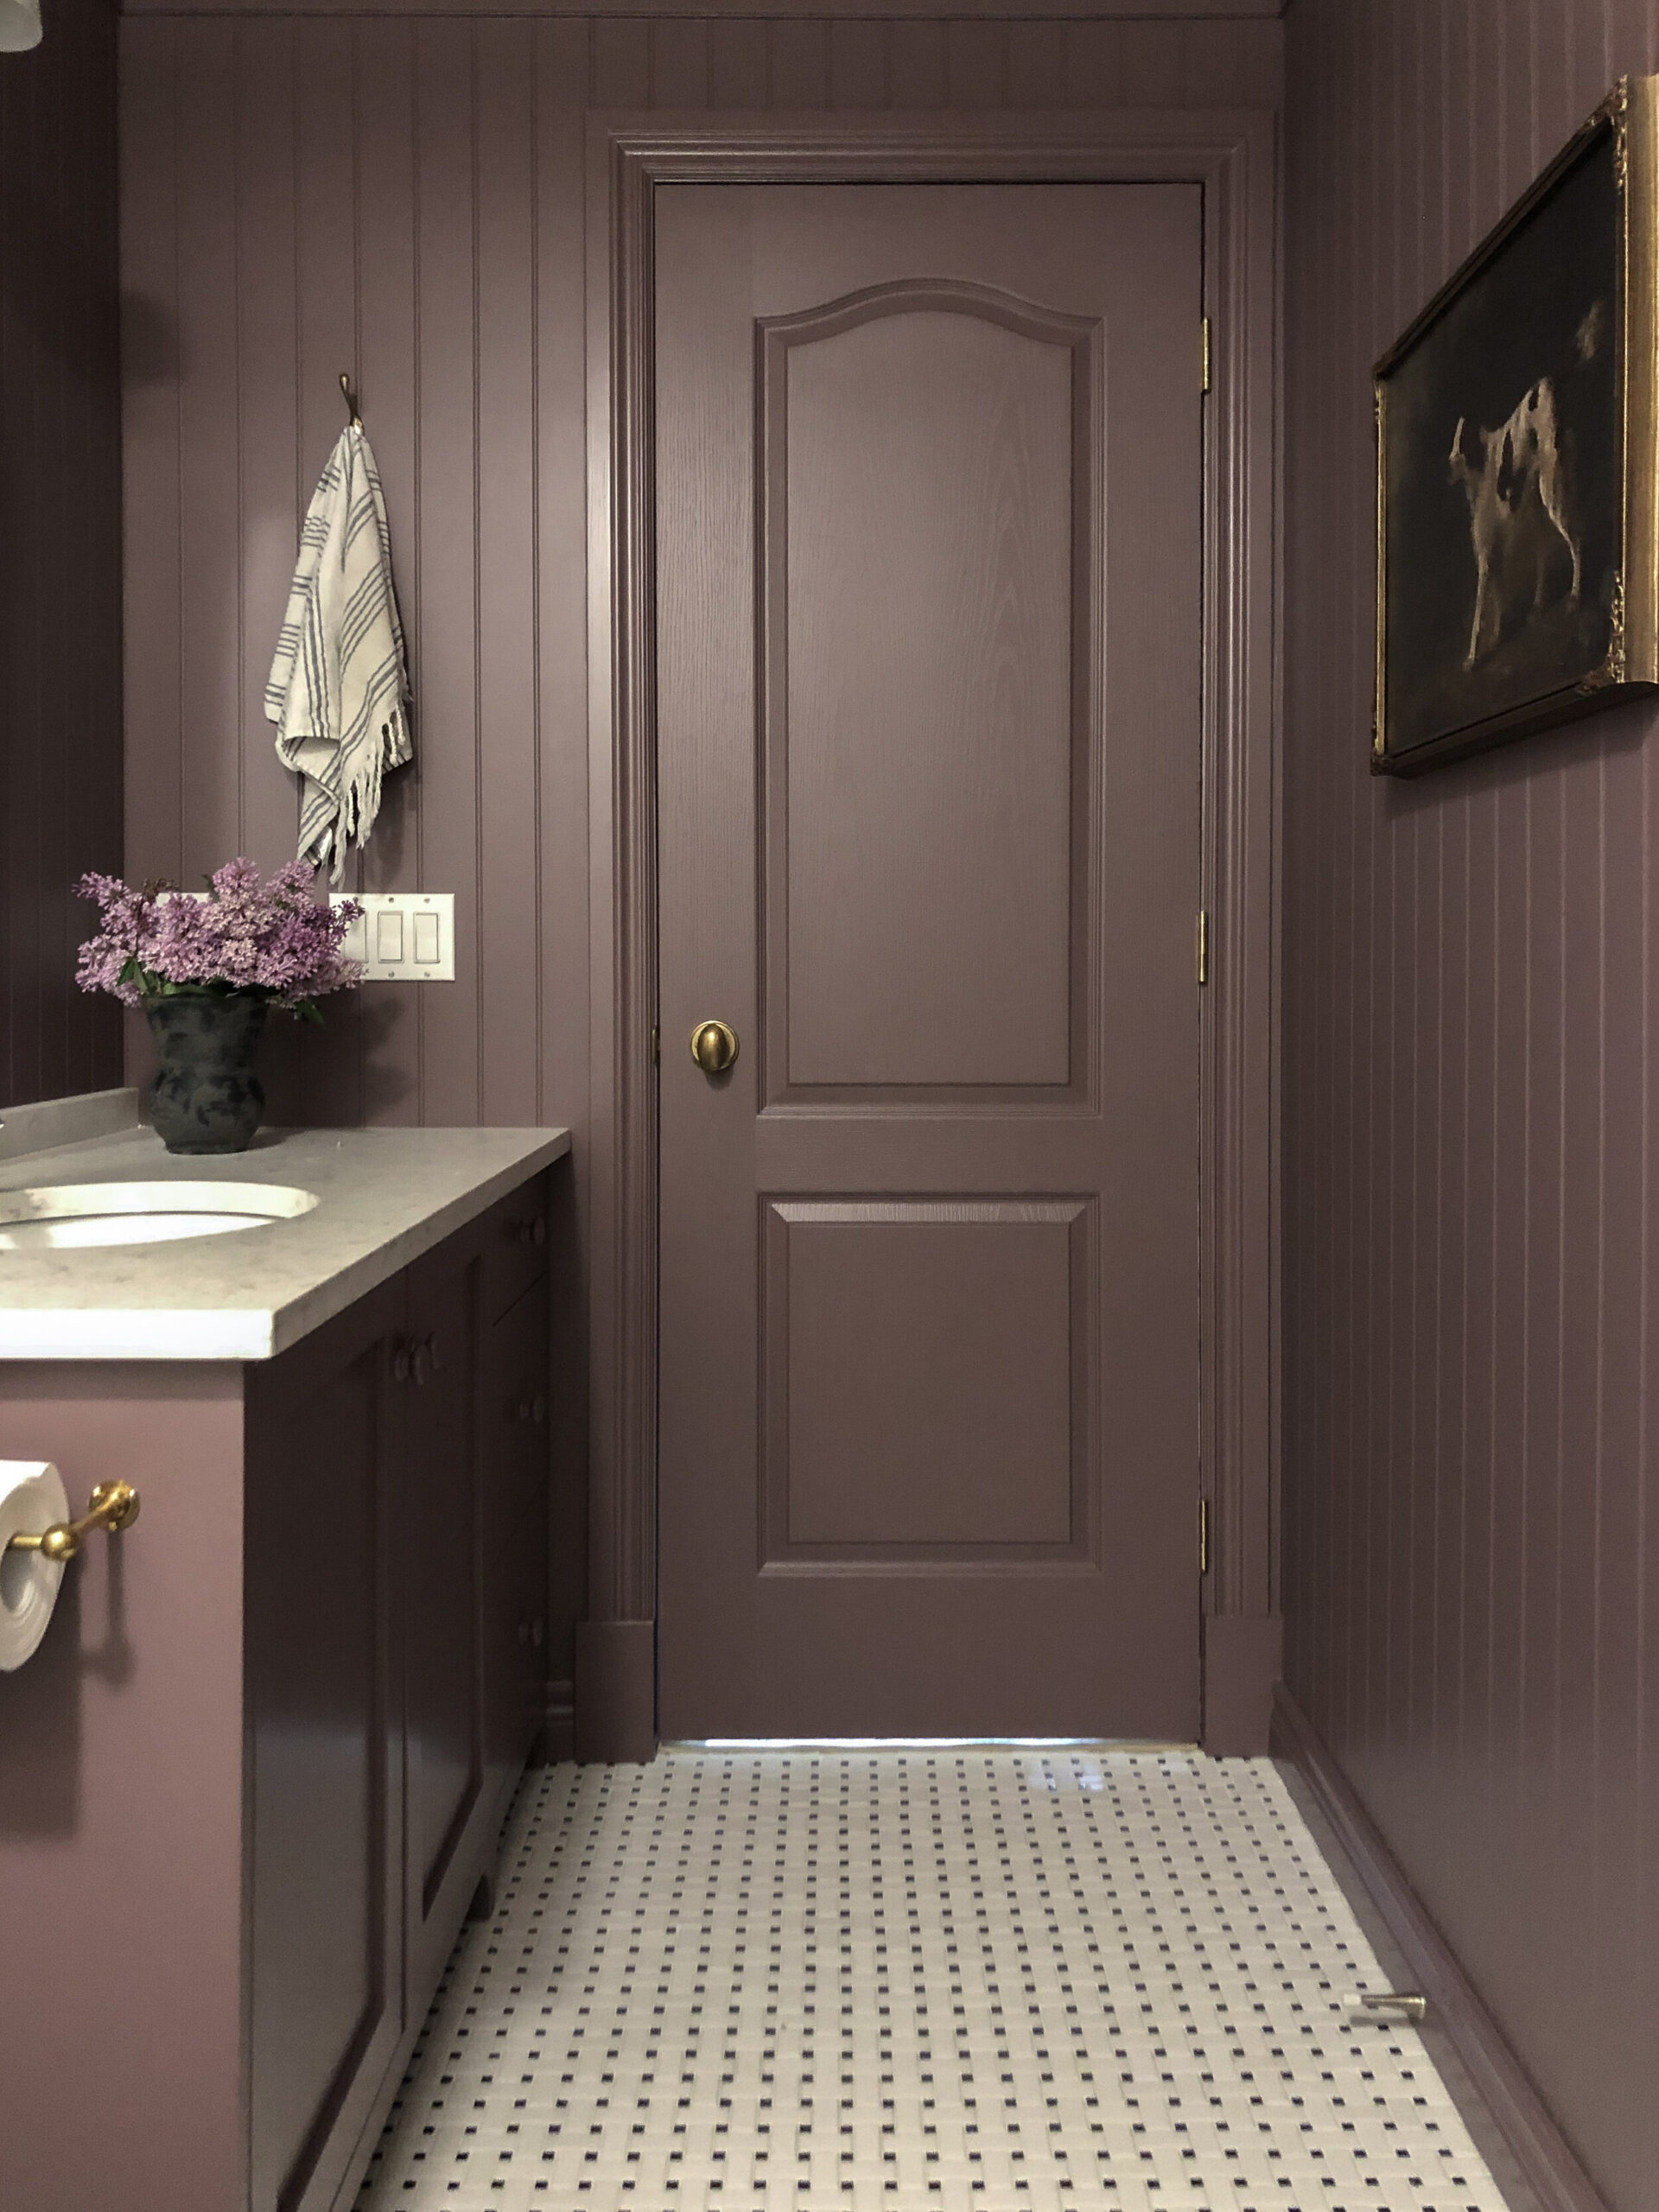
Speaking of paint… I love colour. I have noticed that how I react to a space with colour versus a neutral one is very different! I love and appreciate neutral shades too, but nothing makes me stop and say WOW like a room that has a very striking and well-executed color palette. I asked my kids what colour they wanted to see in this space and they both liked the idea of something a little darker, in a red or purple. We swatched so many paint colors and I ended up mixing a couple of paint samples to make my own… only to find out it was a very close match to Benjamin Moore’s Mink Violet. I like how this purple has a little depth to it with a hint of red, which keeps it from being too “sweet”. Let me tell you, this is outside my normal color scheme comfort zone of muted greens and blues but I’m so happy I went for it, it’s so fun and the kids love it. If we ever tire of it, it’s not a big deal to paint! I did decide to go all-in and paint the entire bathroom and put the same colour on the trim, vanity, and walls.
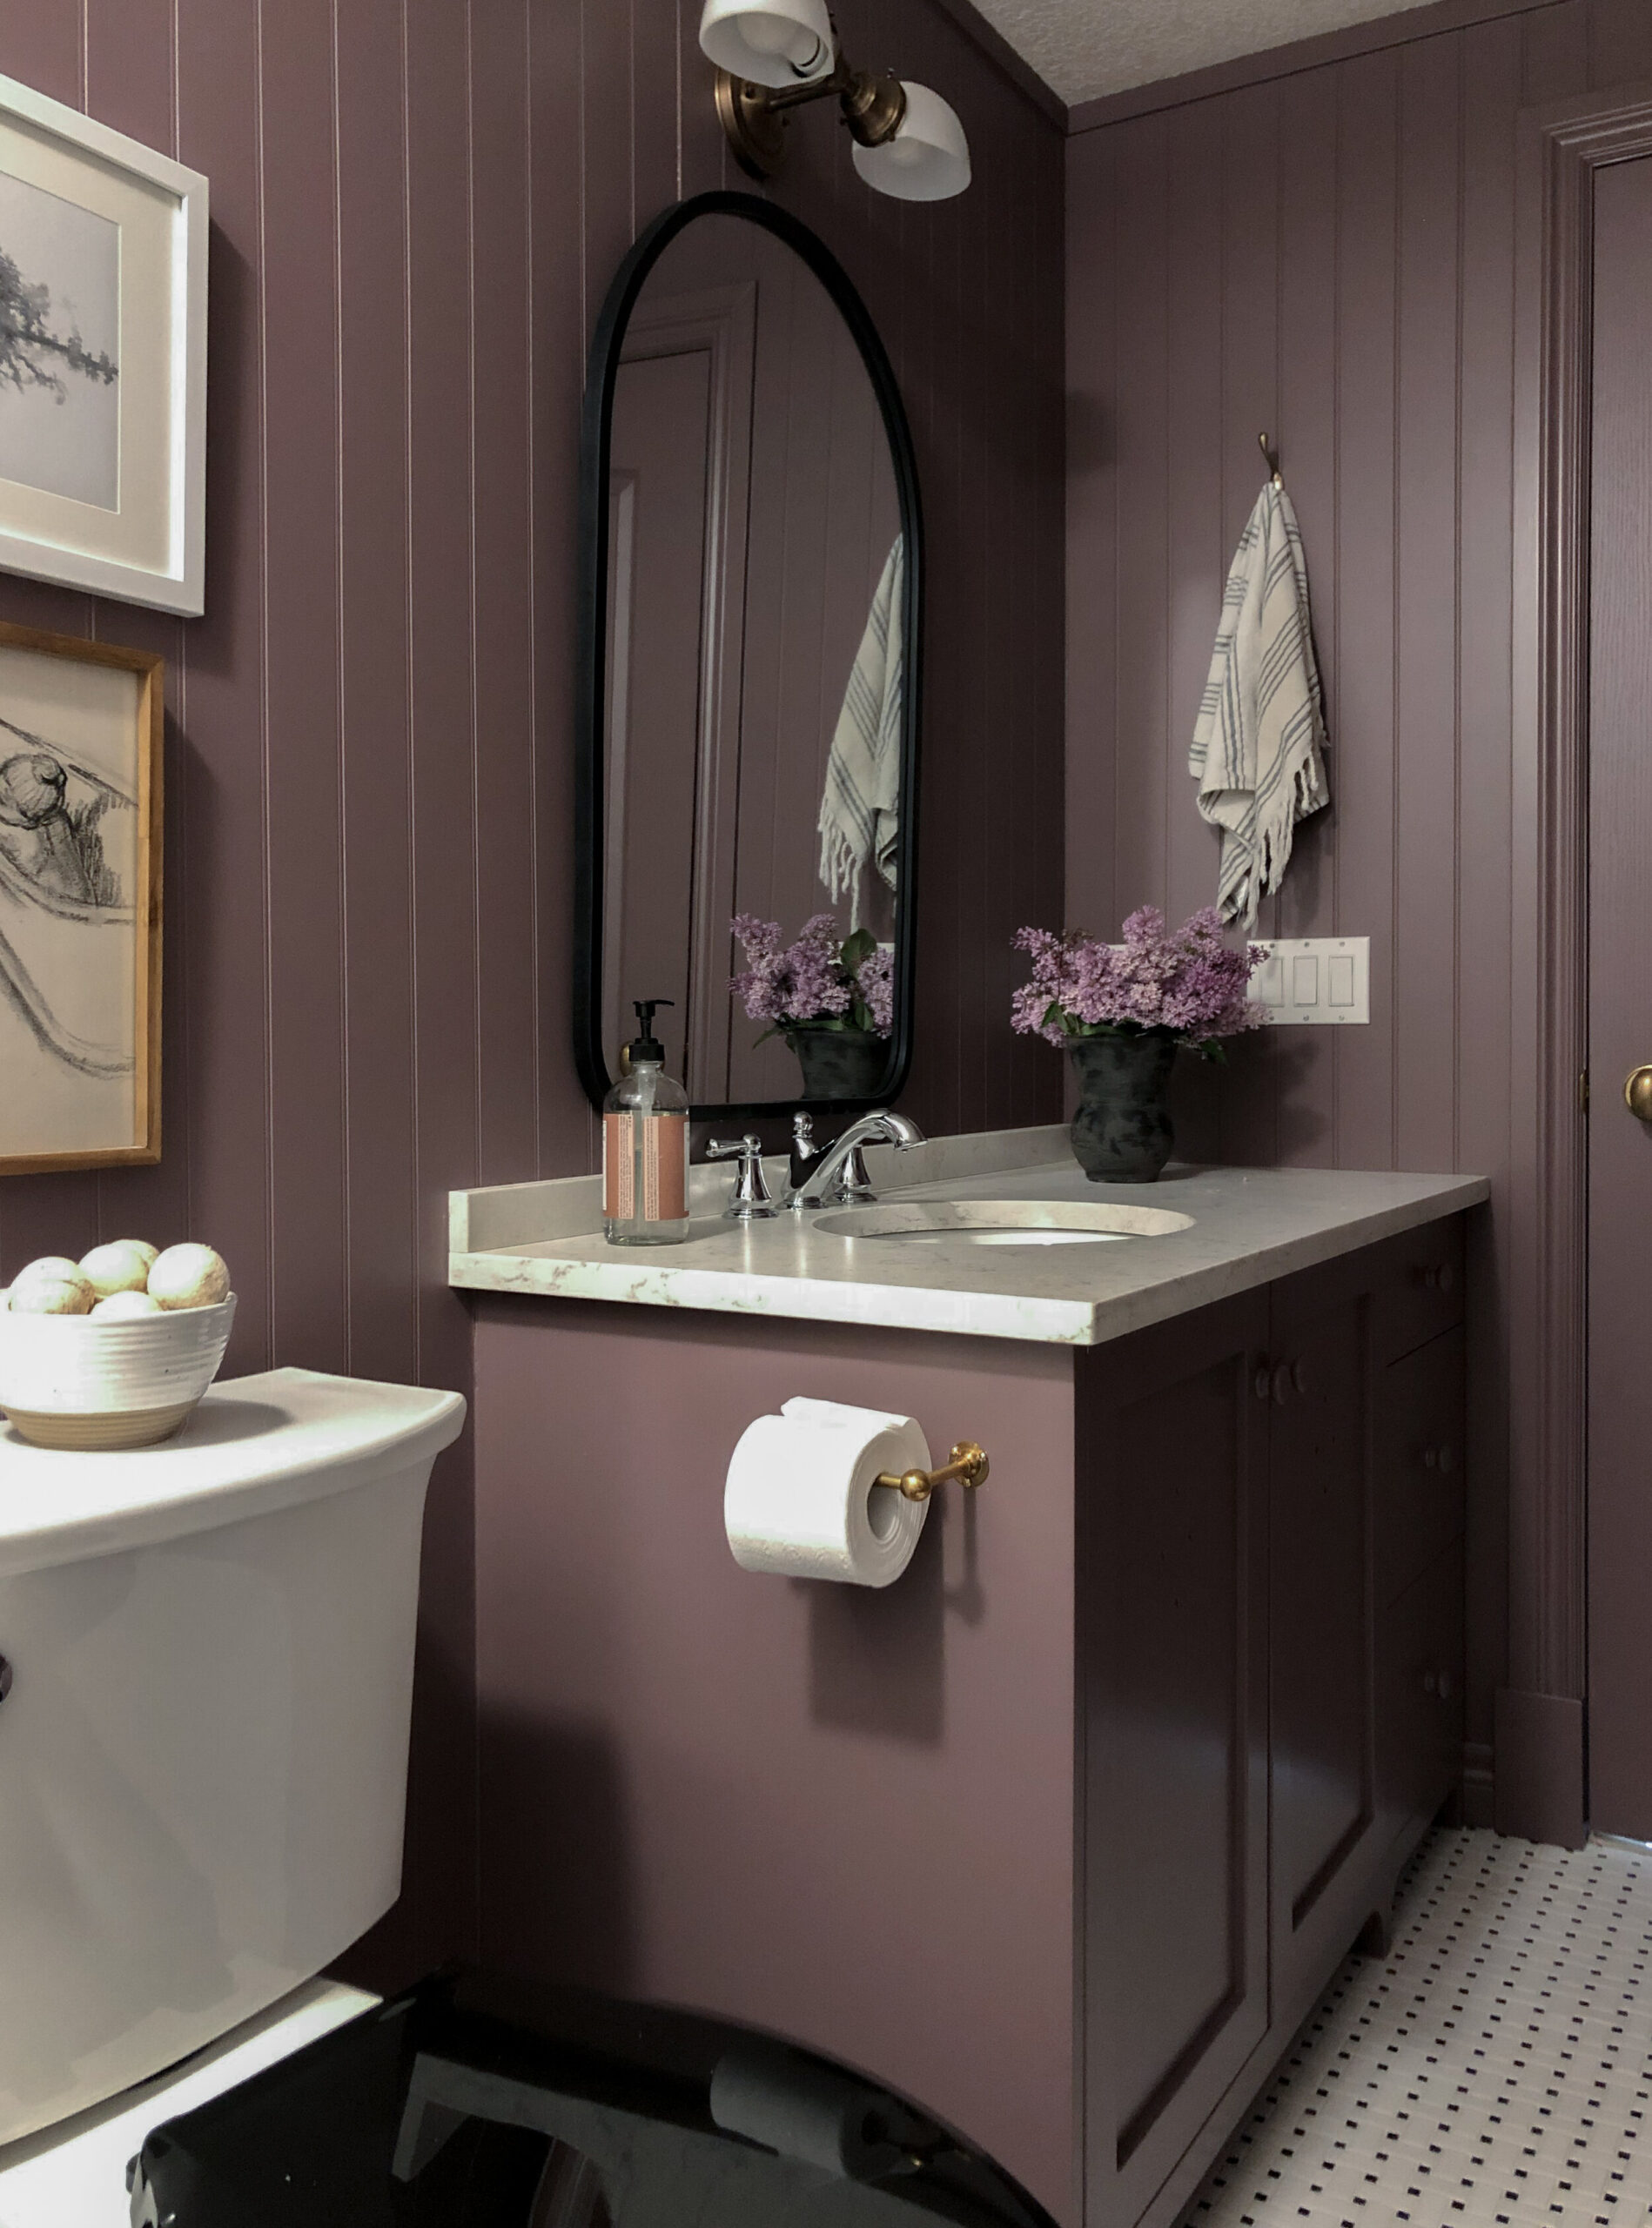
I am SO PLEASED with how the vanity turned out! I realized that the existing vanity was still in good condition and functioned very well for the kids so a totally new one was not necessary. Instead, we gave the old vanity a new life. It was a bit of a DIY project, we had two shaker doors made by a local cabinet company and DIY’ed a few other details (new drawer fronts, some “feet” and a side panel) to give this vanity a little pizzaz! And the final detail – drilling little holes in the doors – had me so nervous but that combined with the little feet make this vanity just the cutest little thing. We added some cute painted knobs for the cabinet hardware t too, new hardware goes a long way toward updating anything! I say this all the time, but small upgrades like paint and hardware can make such a huge difference, especially in a small space.
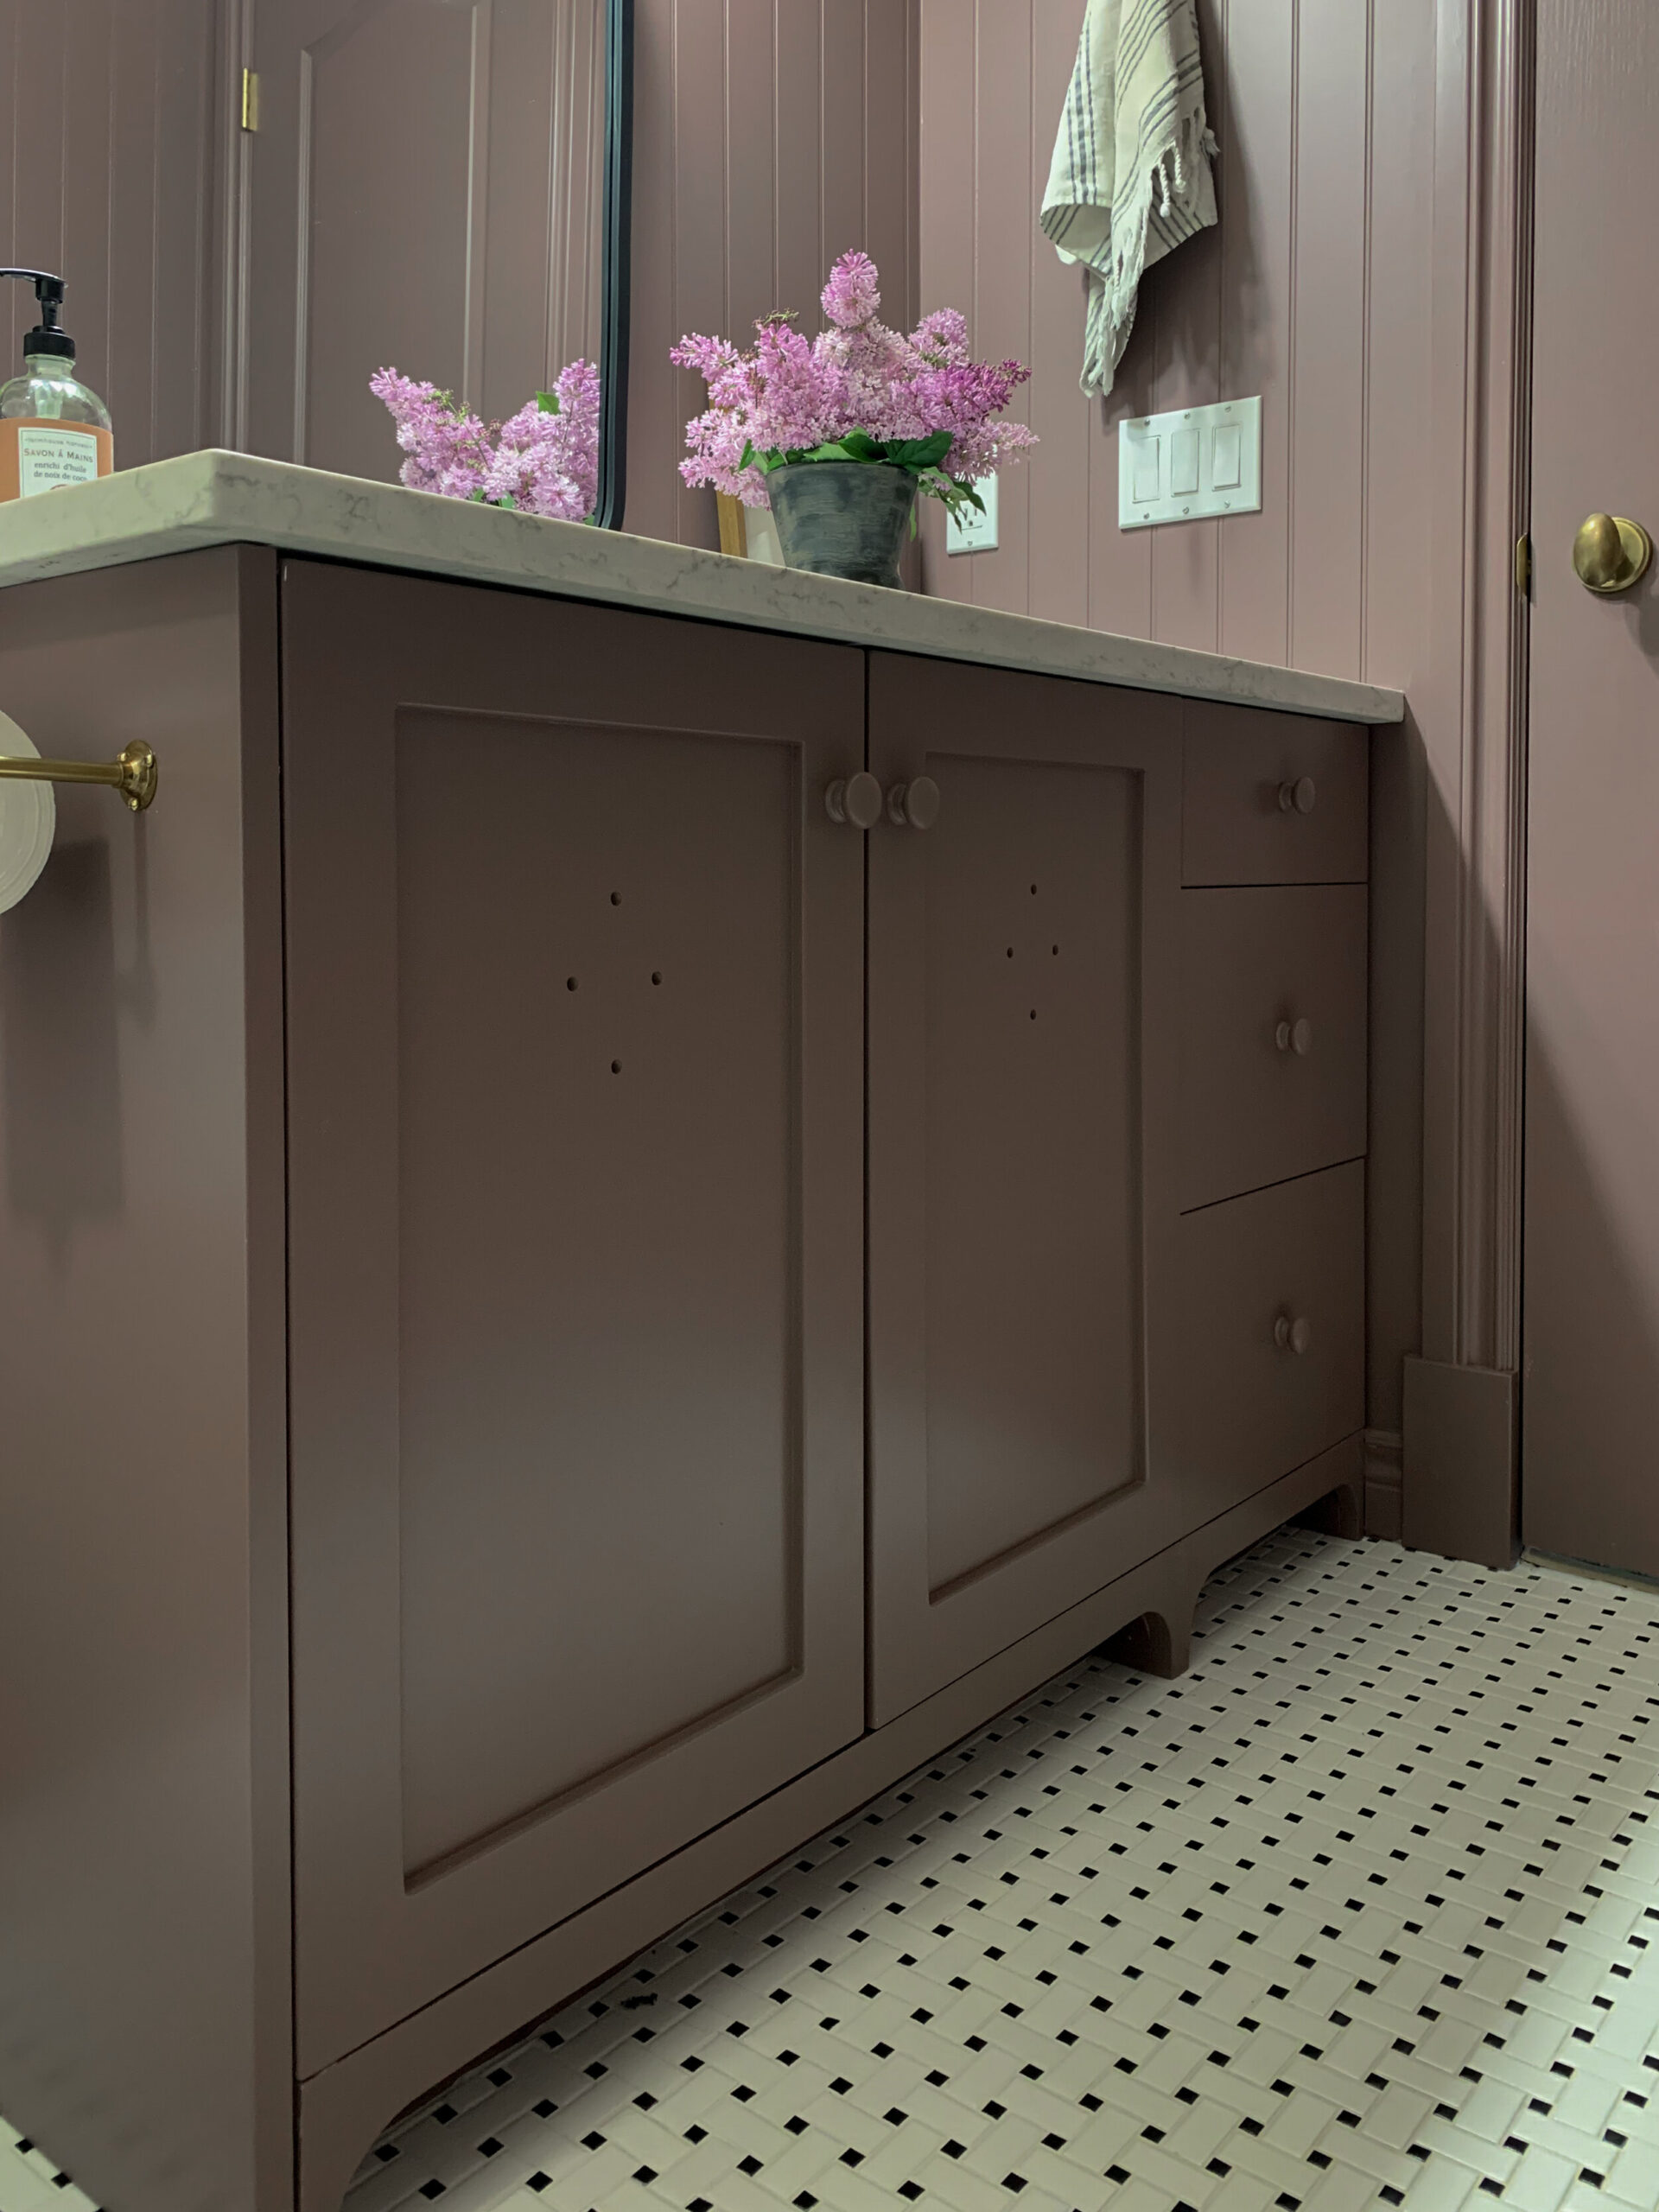
My daughter once told me that I do too many half-walls in my design (I think she means wainscotting?) So for her bathroom, I decided to bring the beadboard floor-to-ceiling wall panels from Home Depot to break out of the half-wall mould she said I’m in. I’m glad I did, it gives the walls some dimension and with all the tile happening in this space, I think a half wall might have made it look too busy.
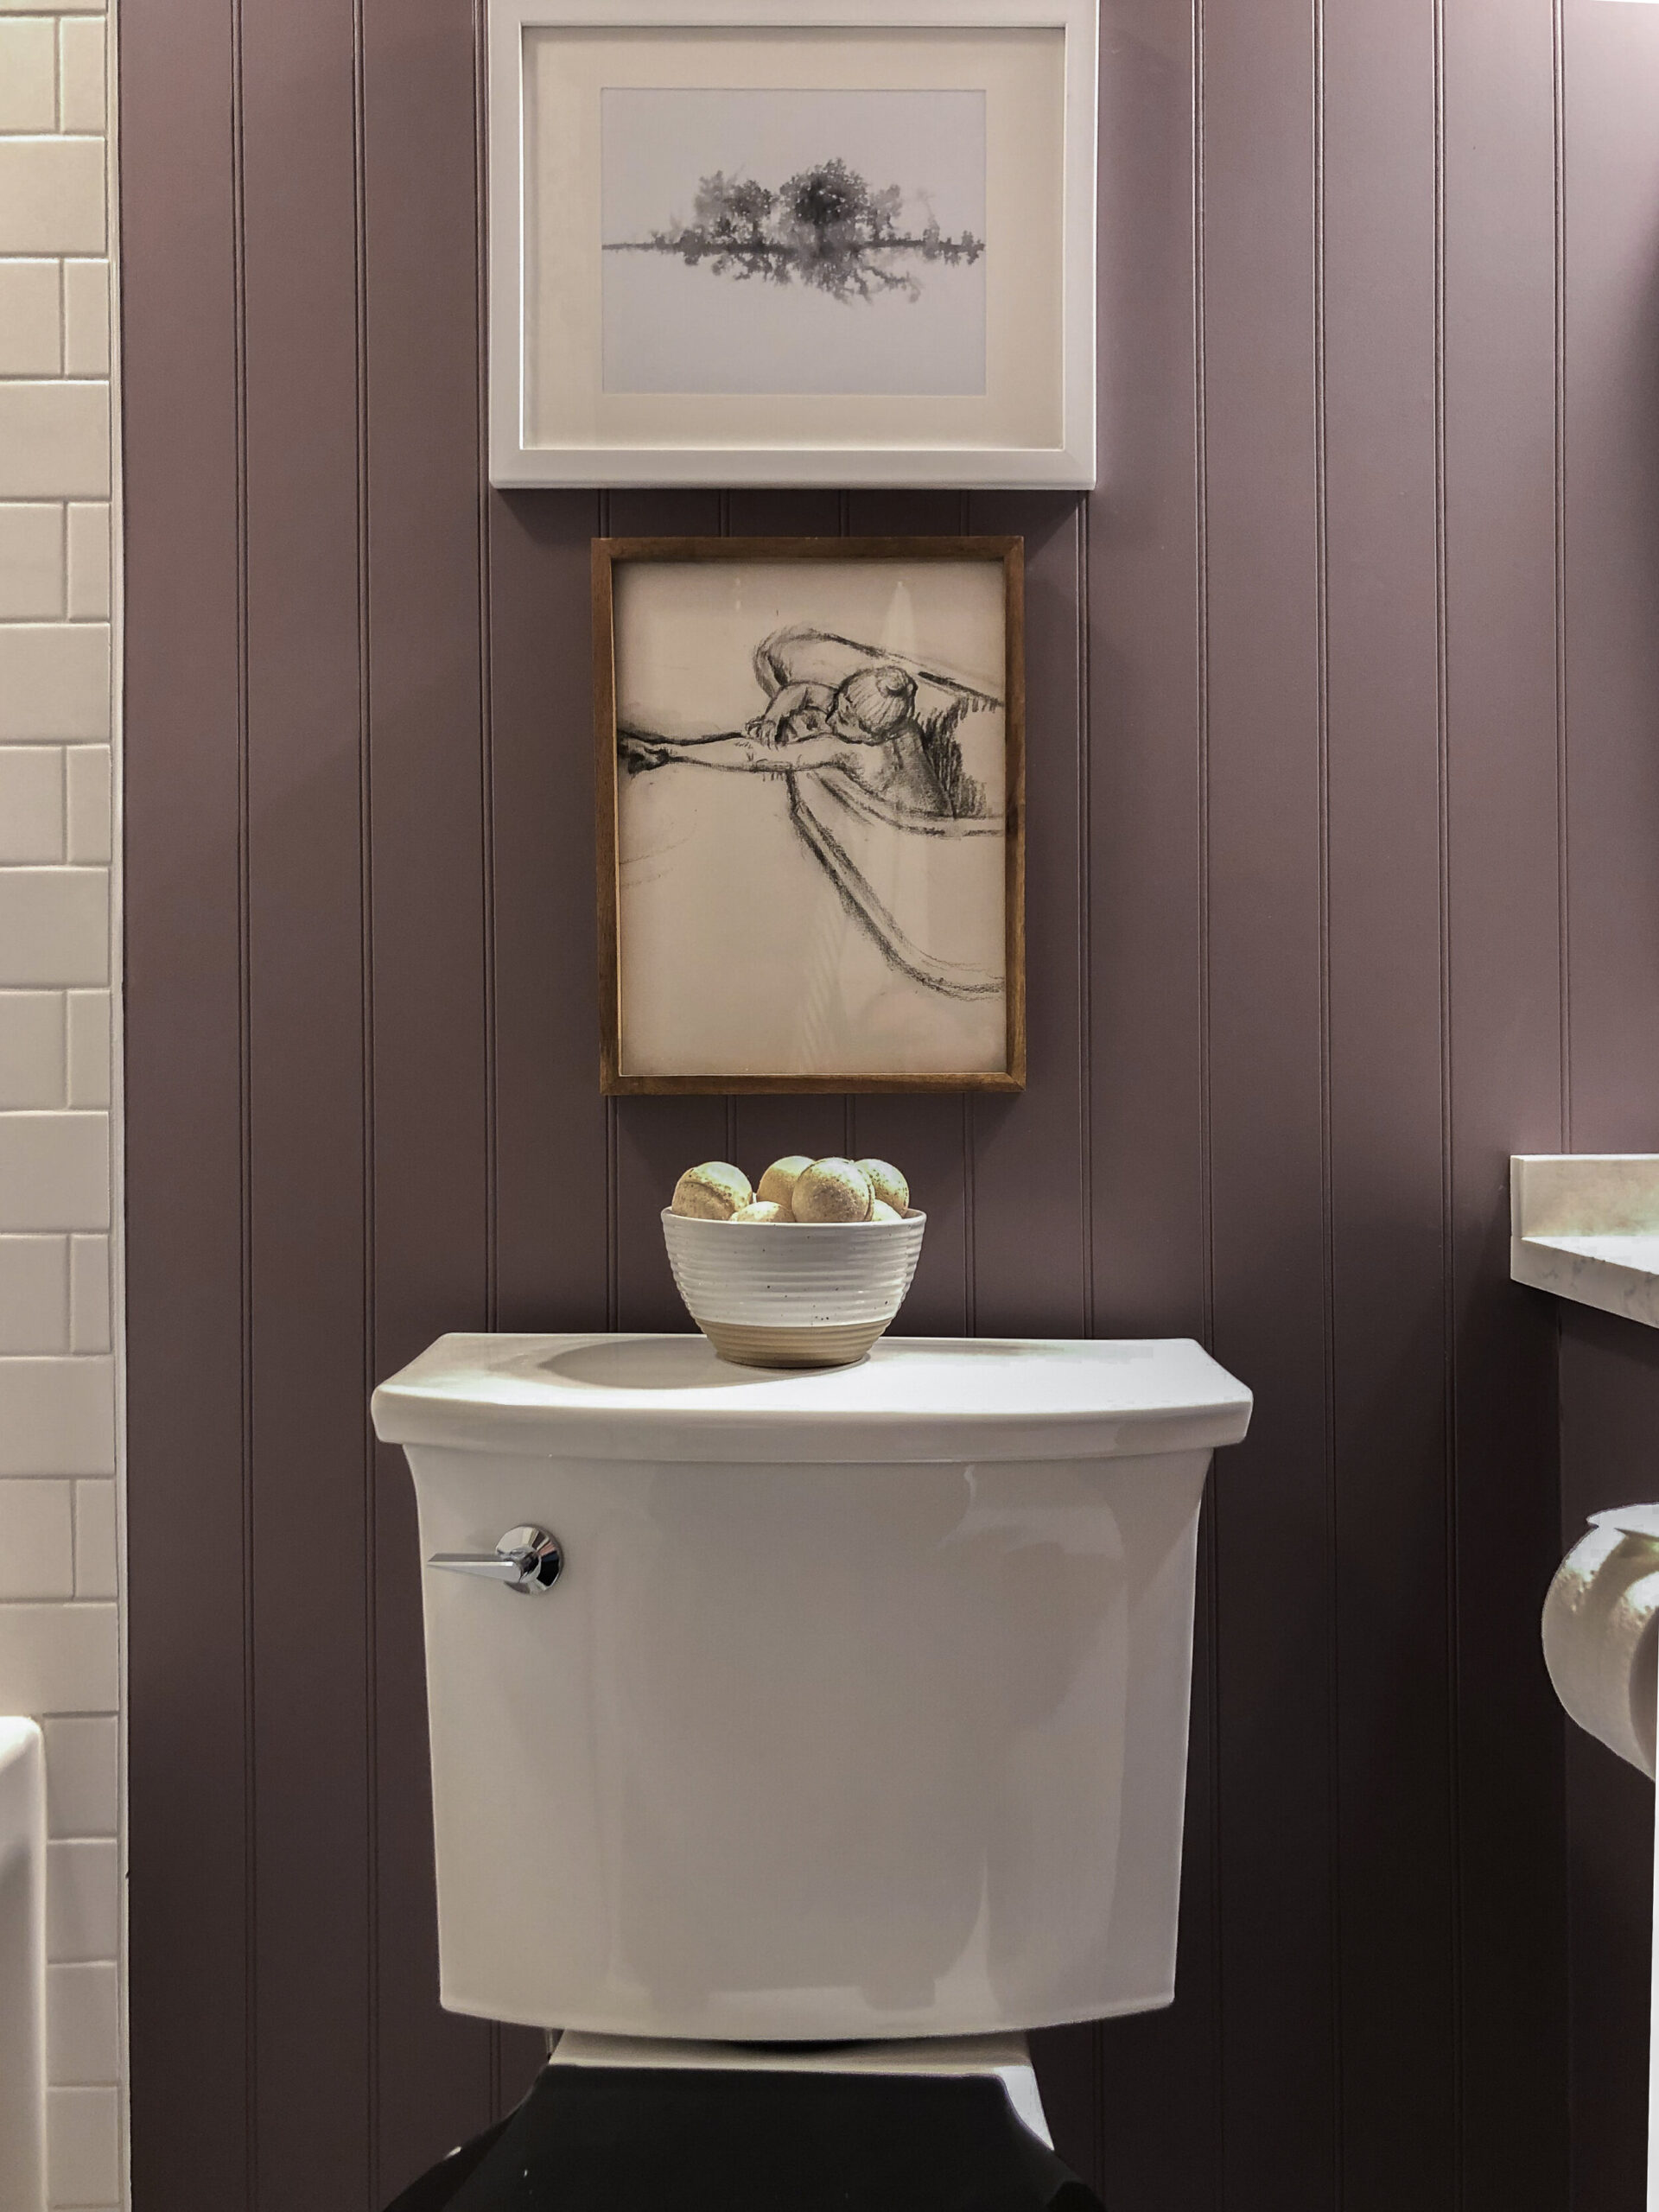
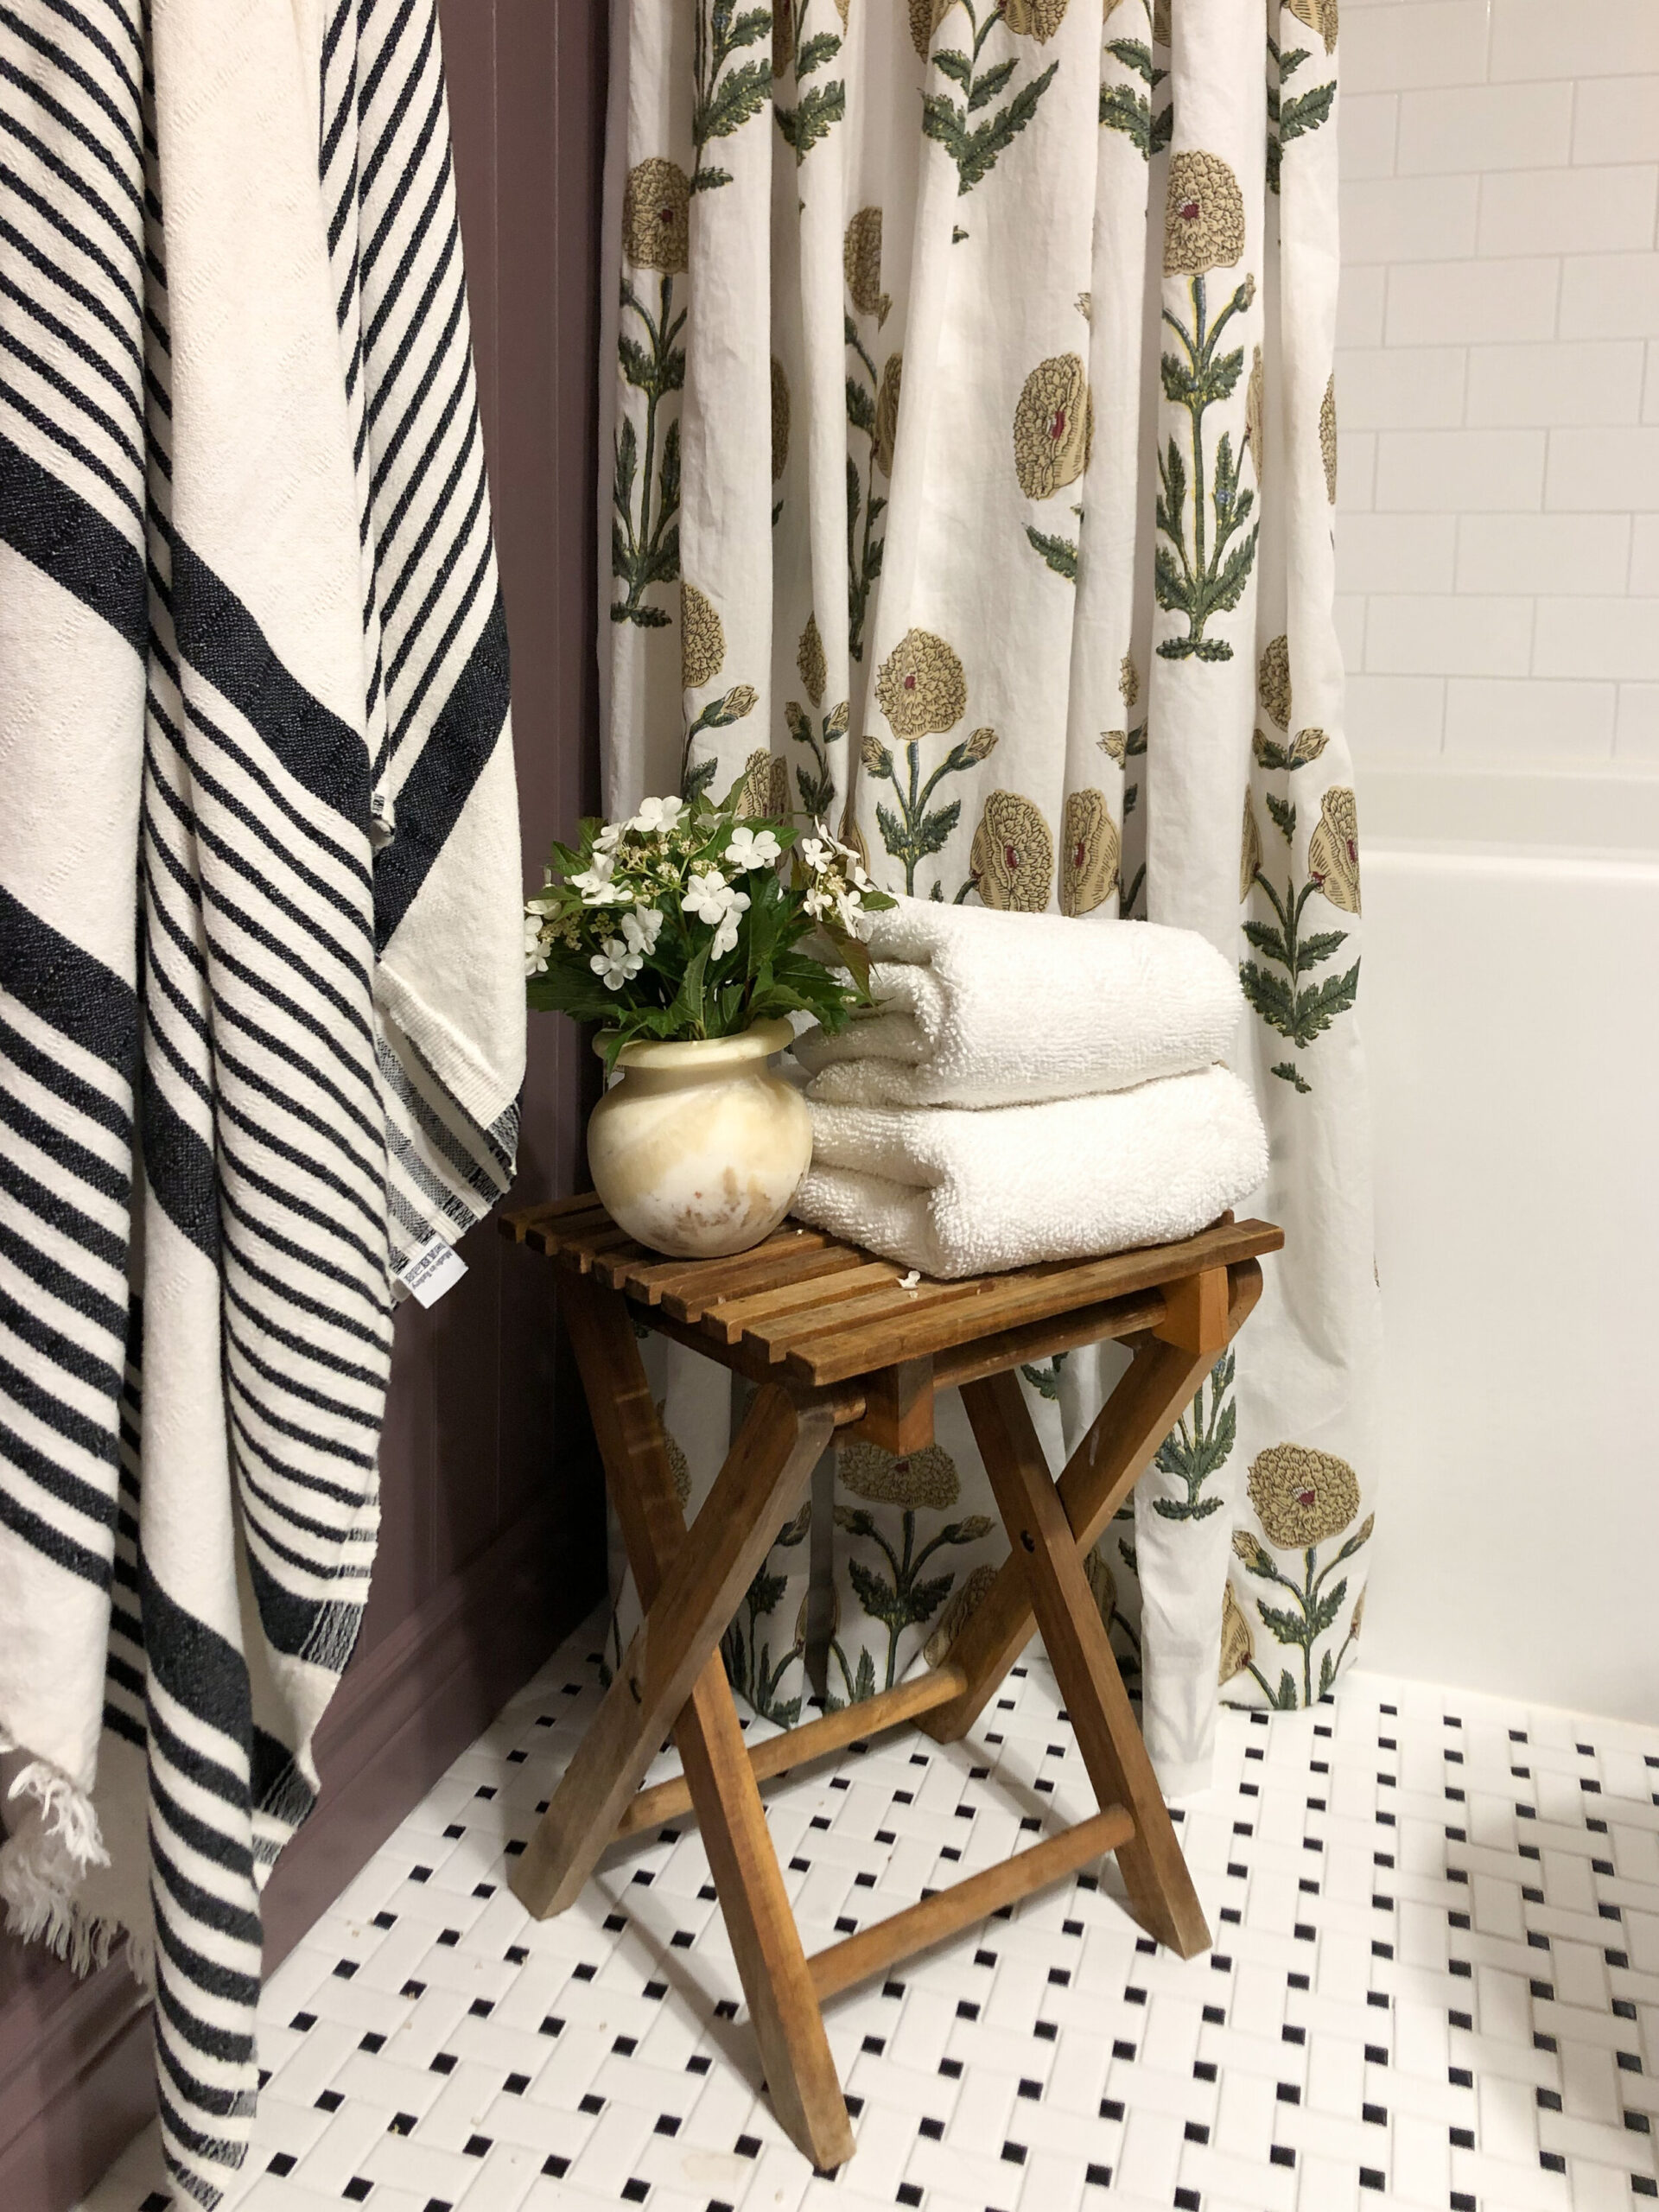
To keep the room from being just ‘the purple room’ I brought in some DIY art and DIY’ed a shower curtain to add a bit of contrasting colour. It really helped break up the purple and I love the added detail.
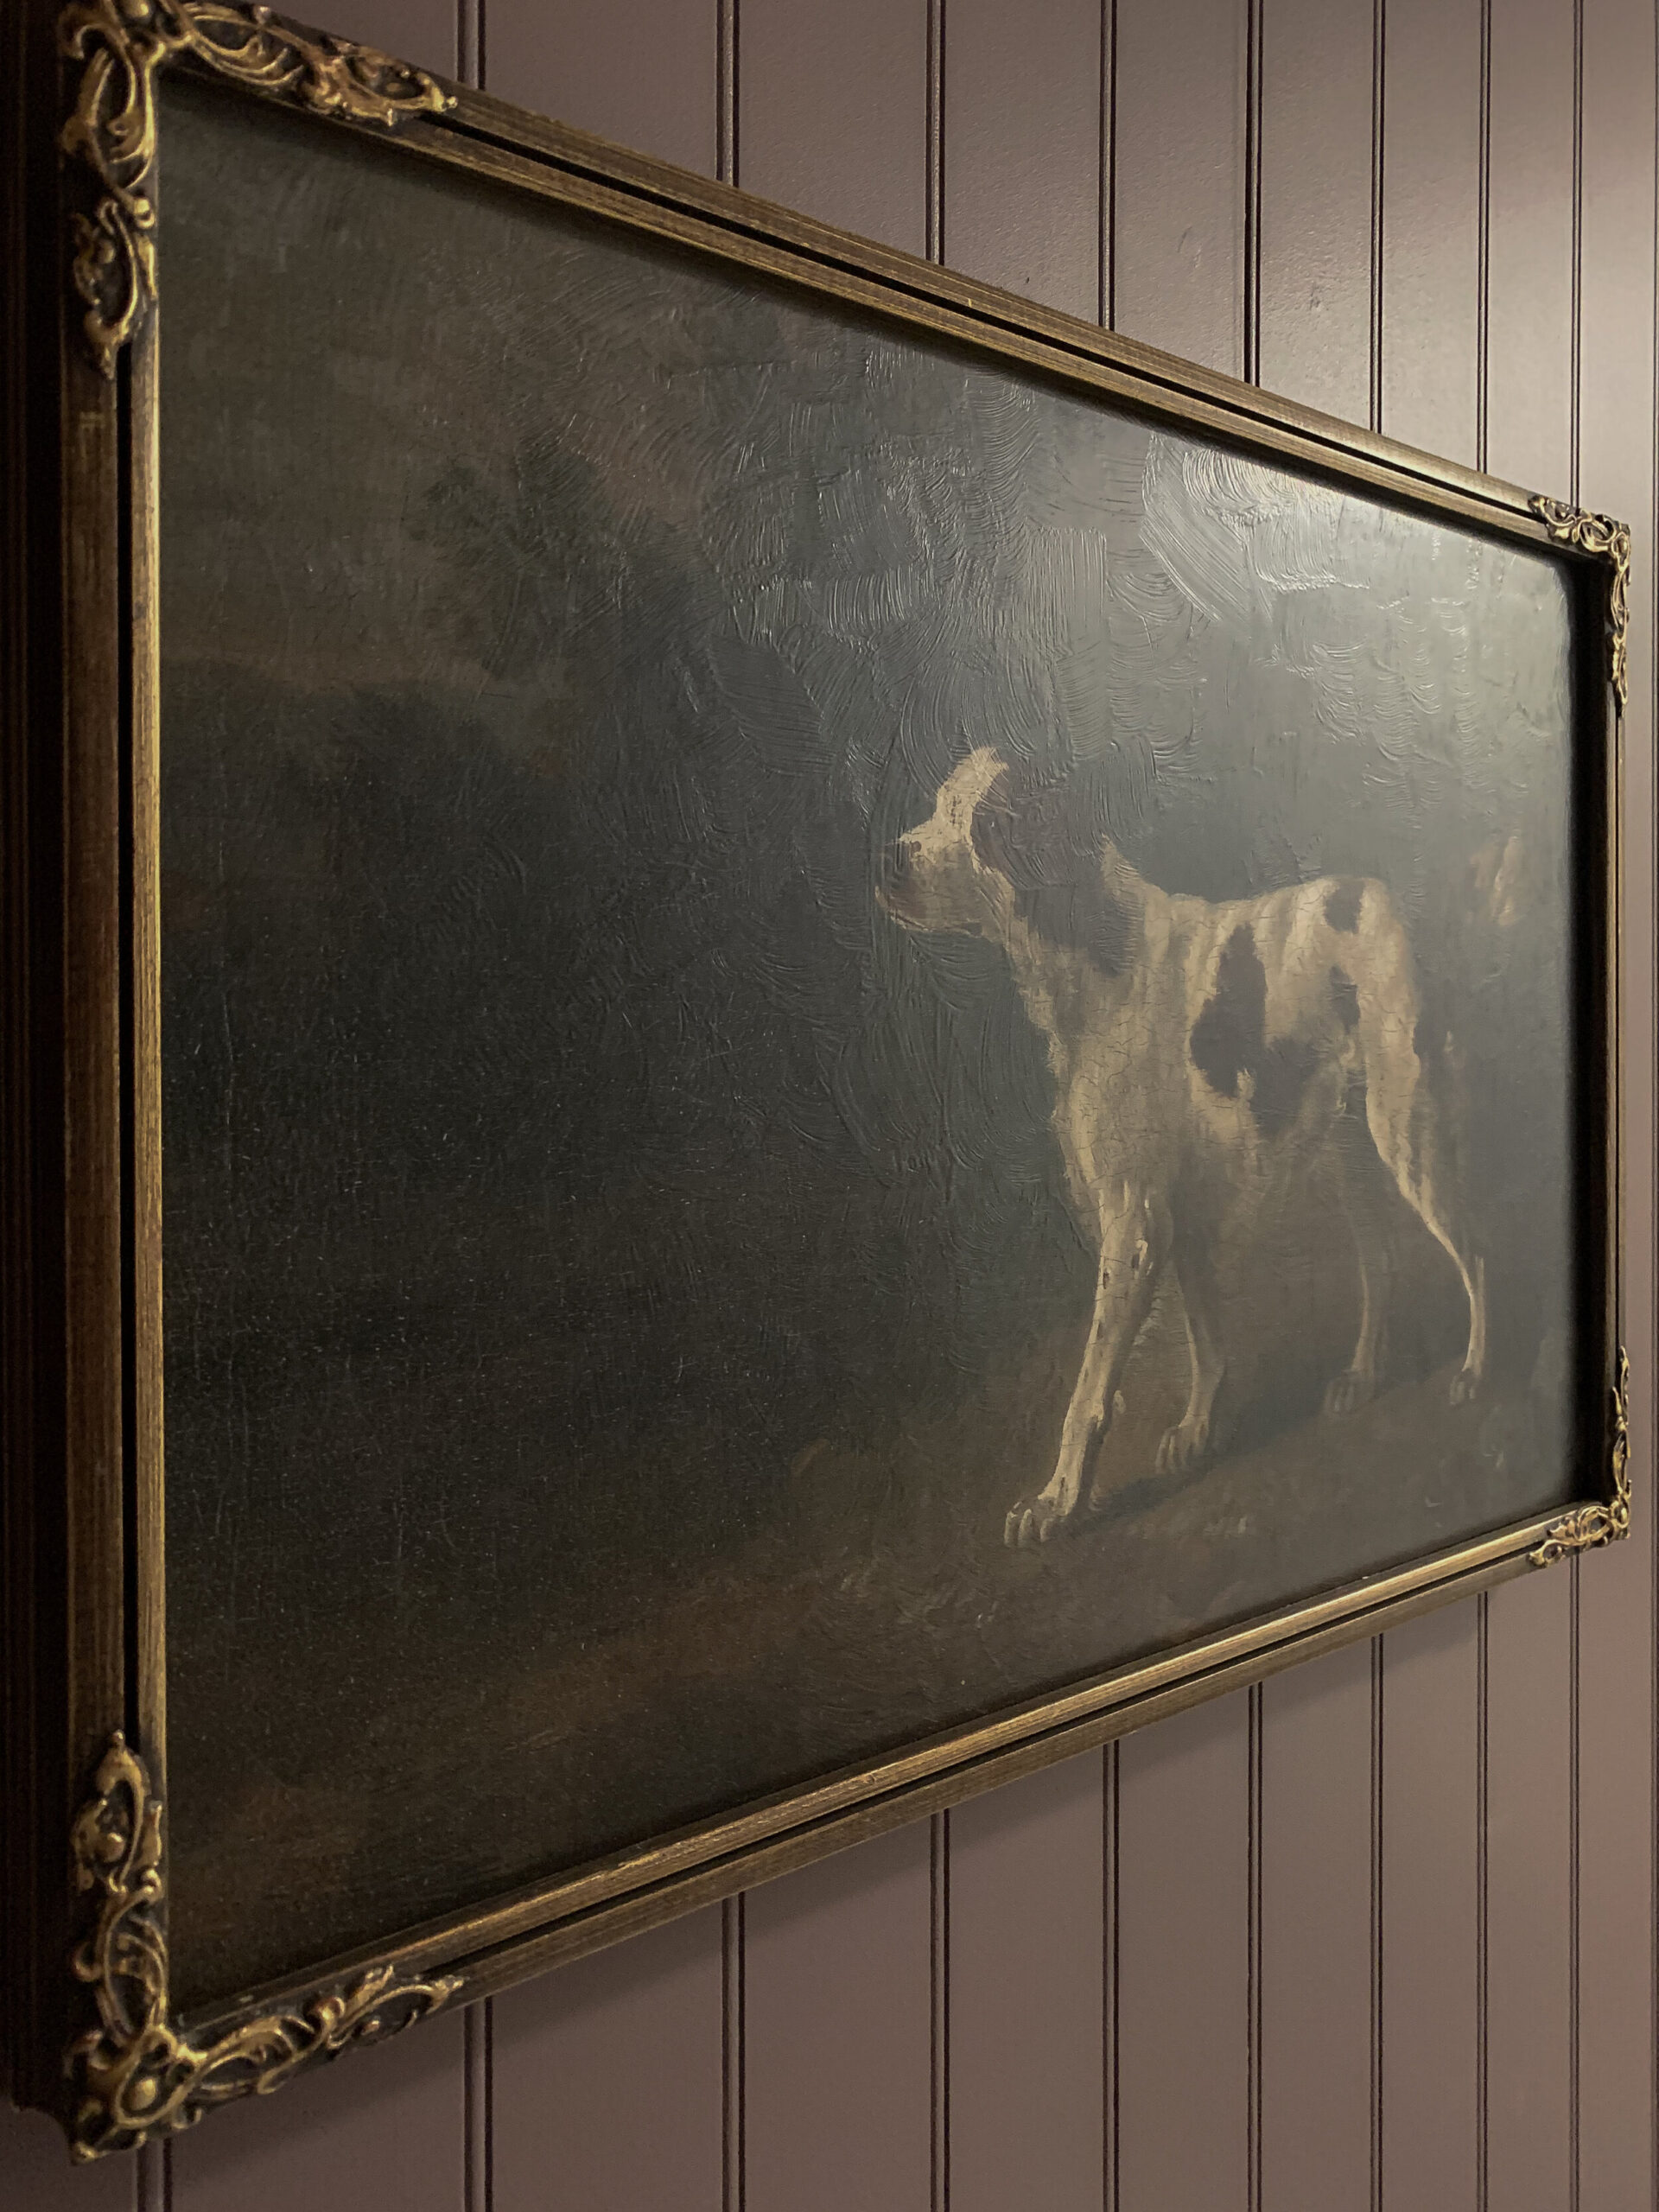
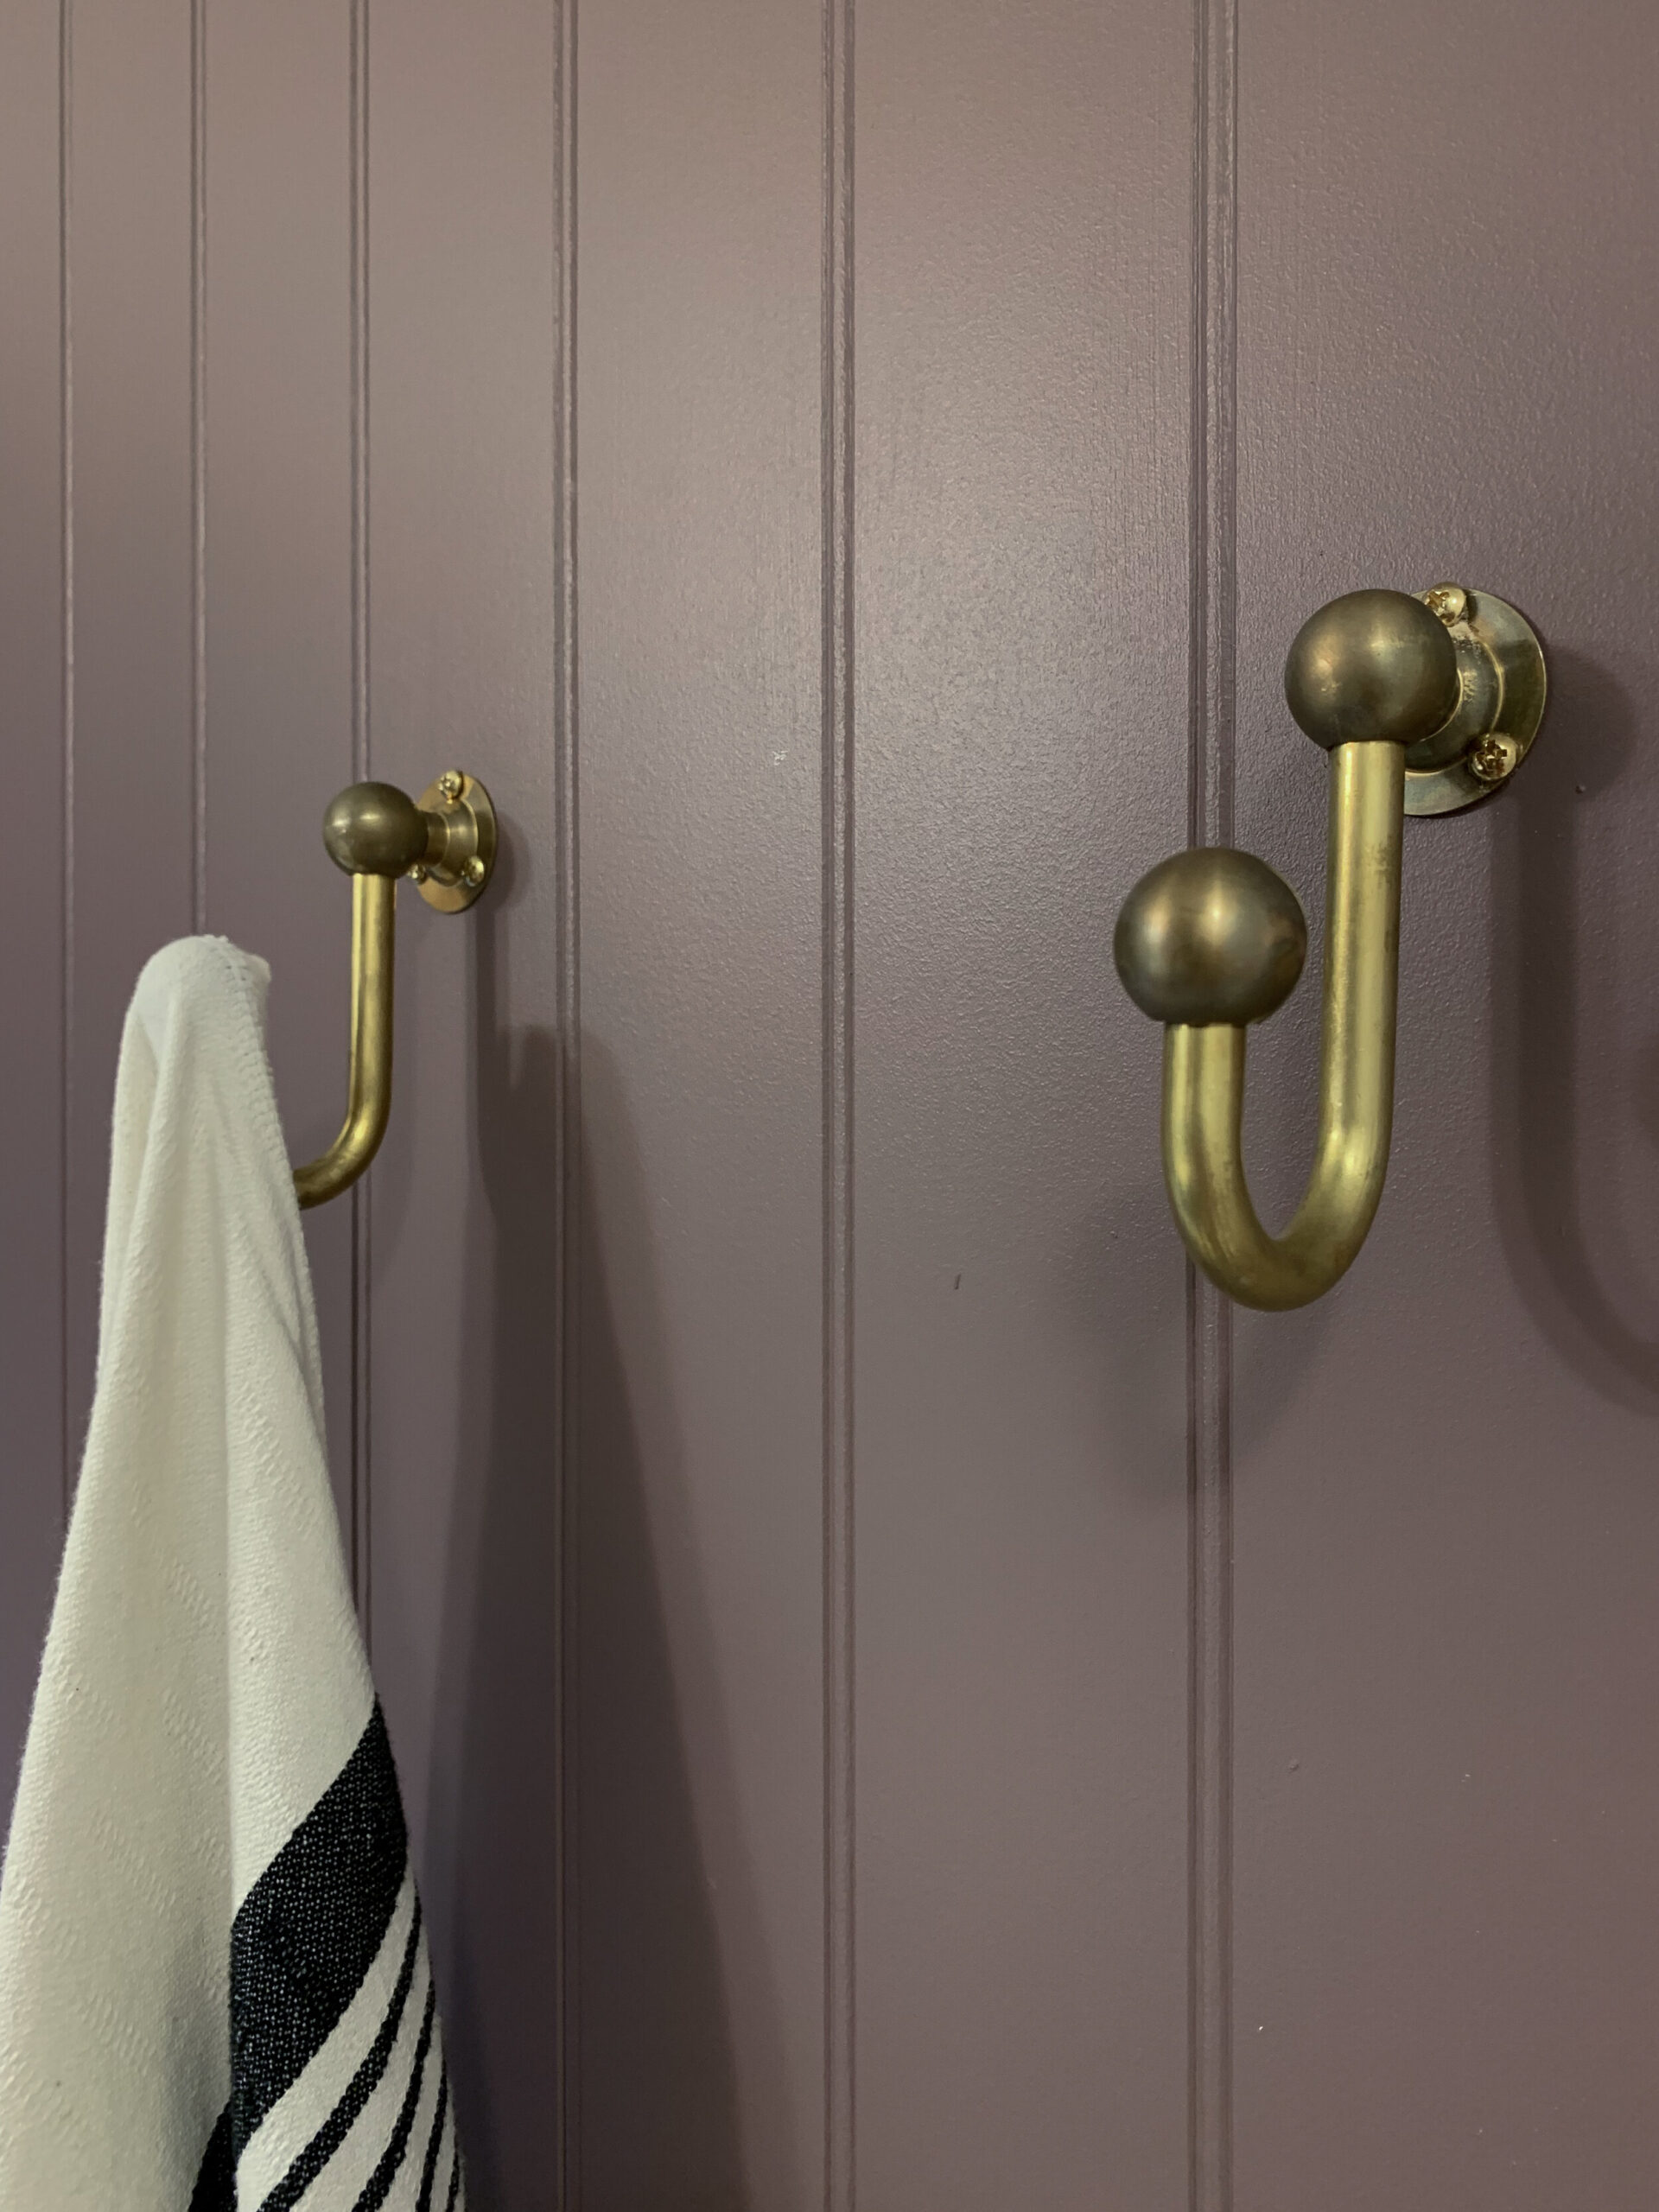
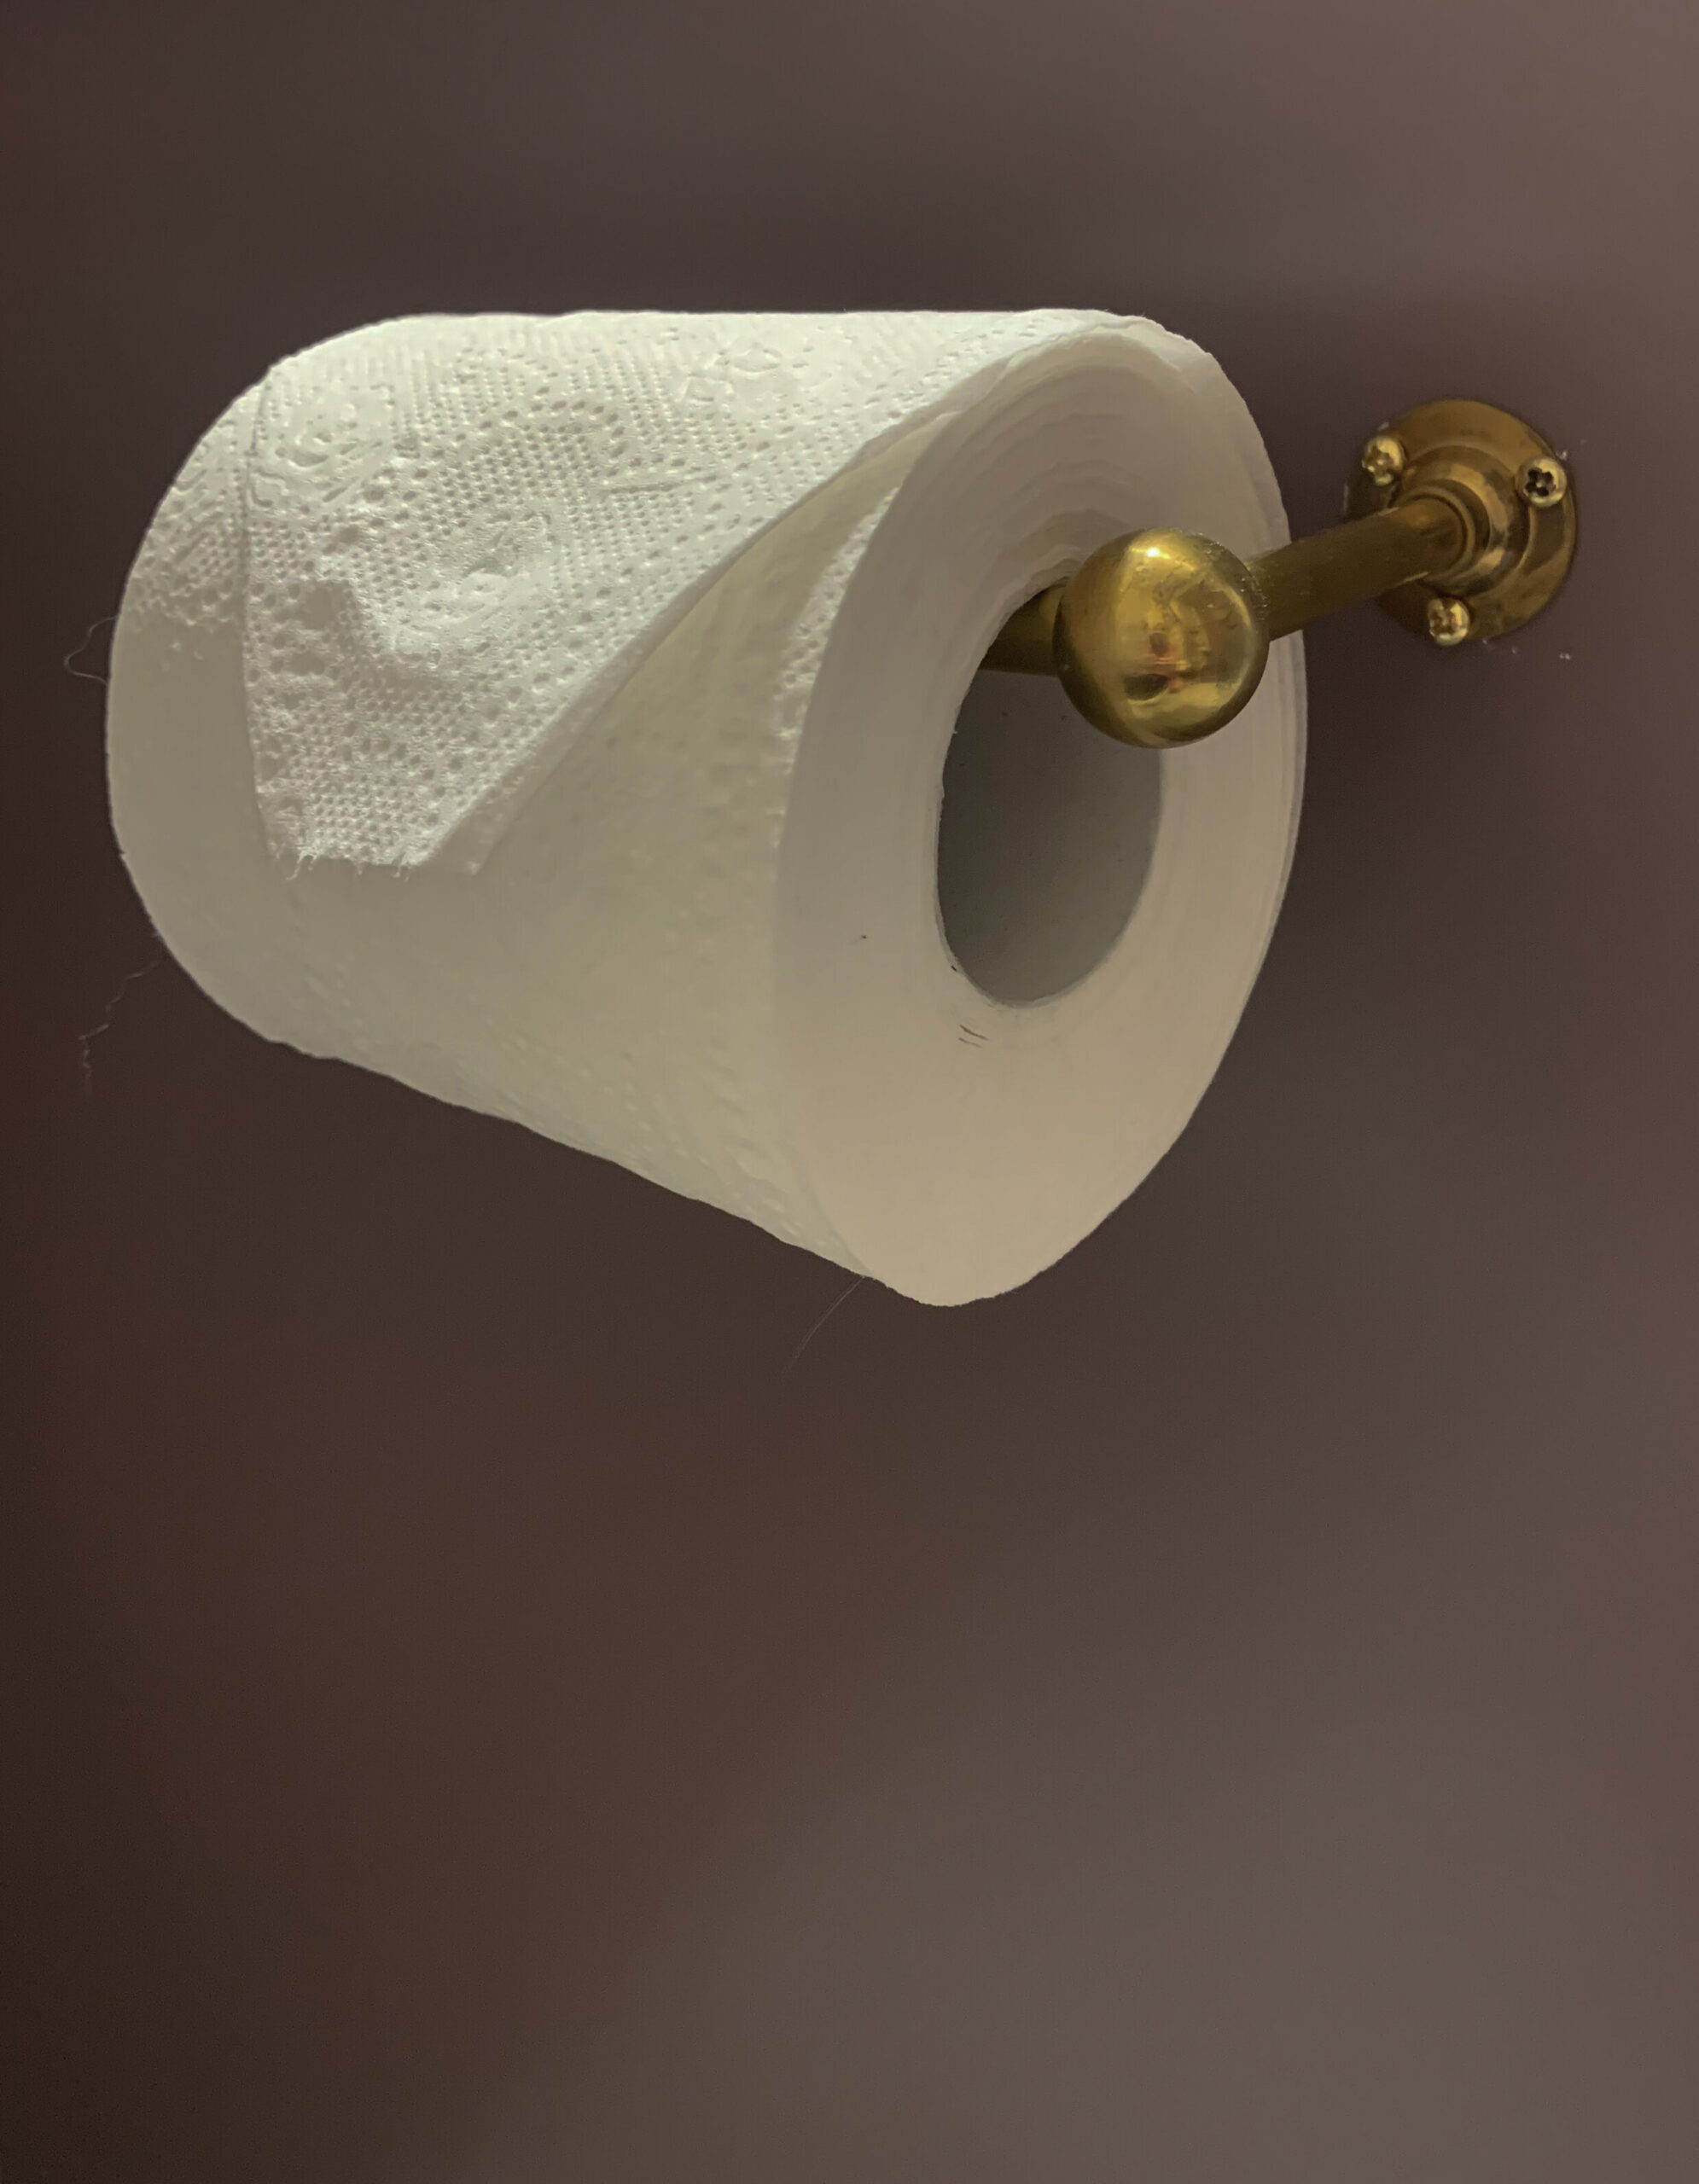
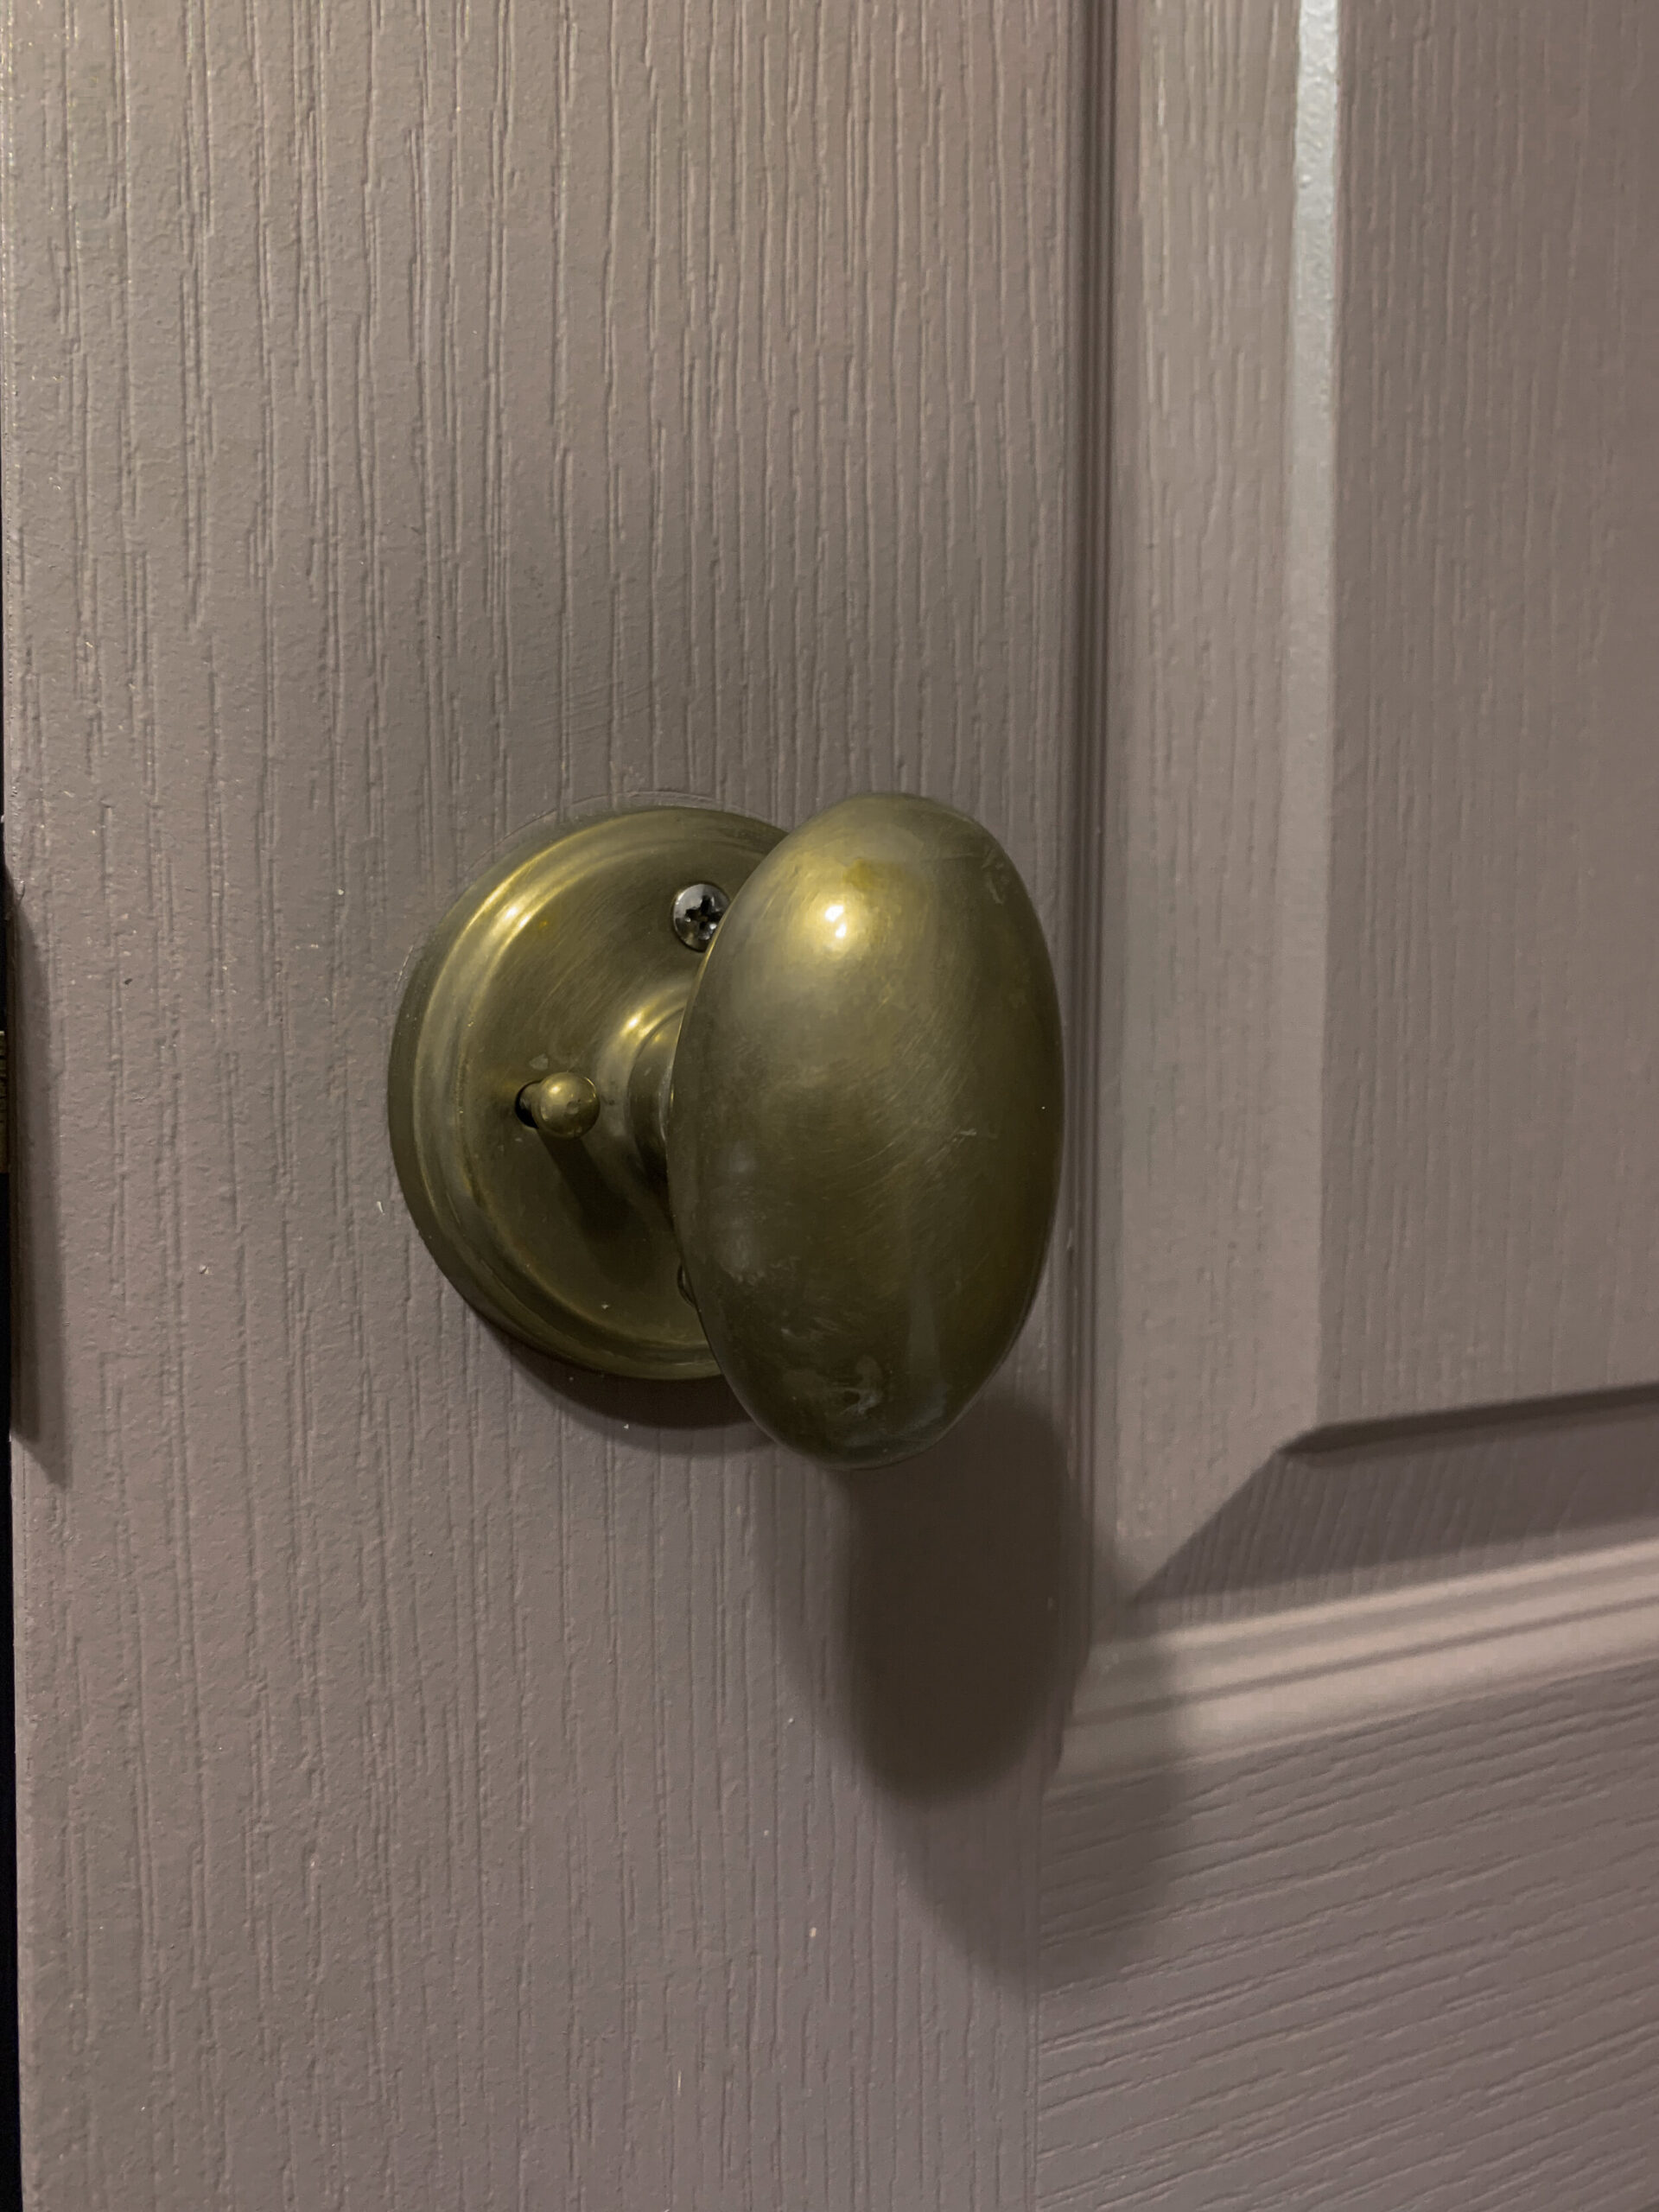
I also brought in a healthy dose of brass in the vintage style new lighting, the DIY aged brass doorknob (a Facebook Marketplace find!) and the hooks and toilet paper holder I found on Etsy. The warm undertones of the aged brass looks so good against the purple.
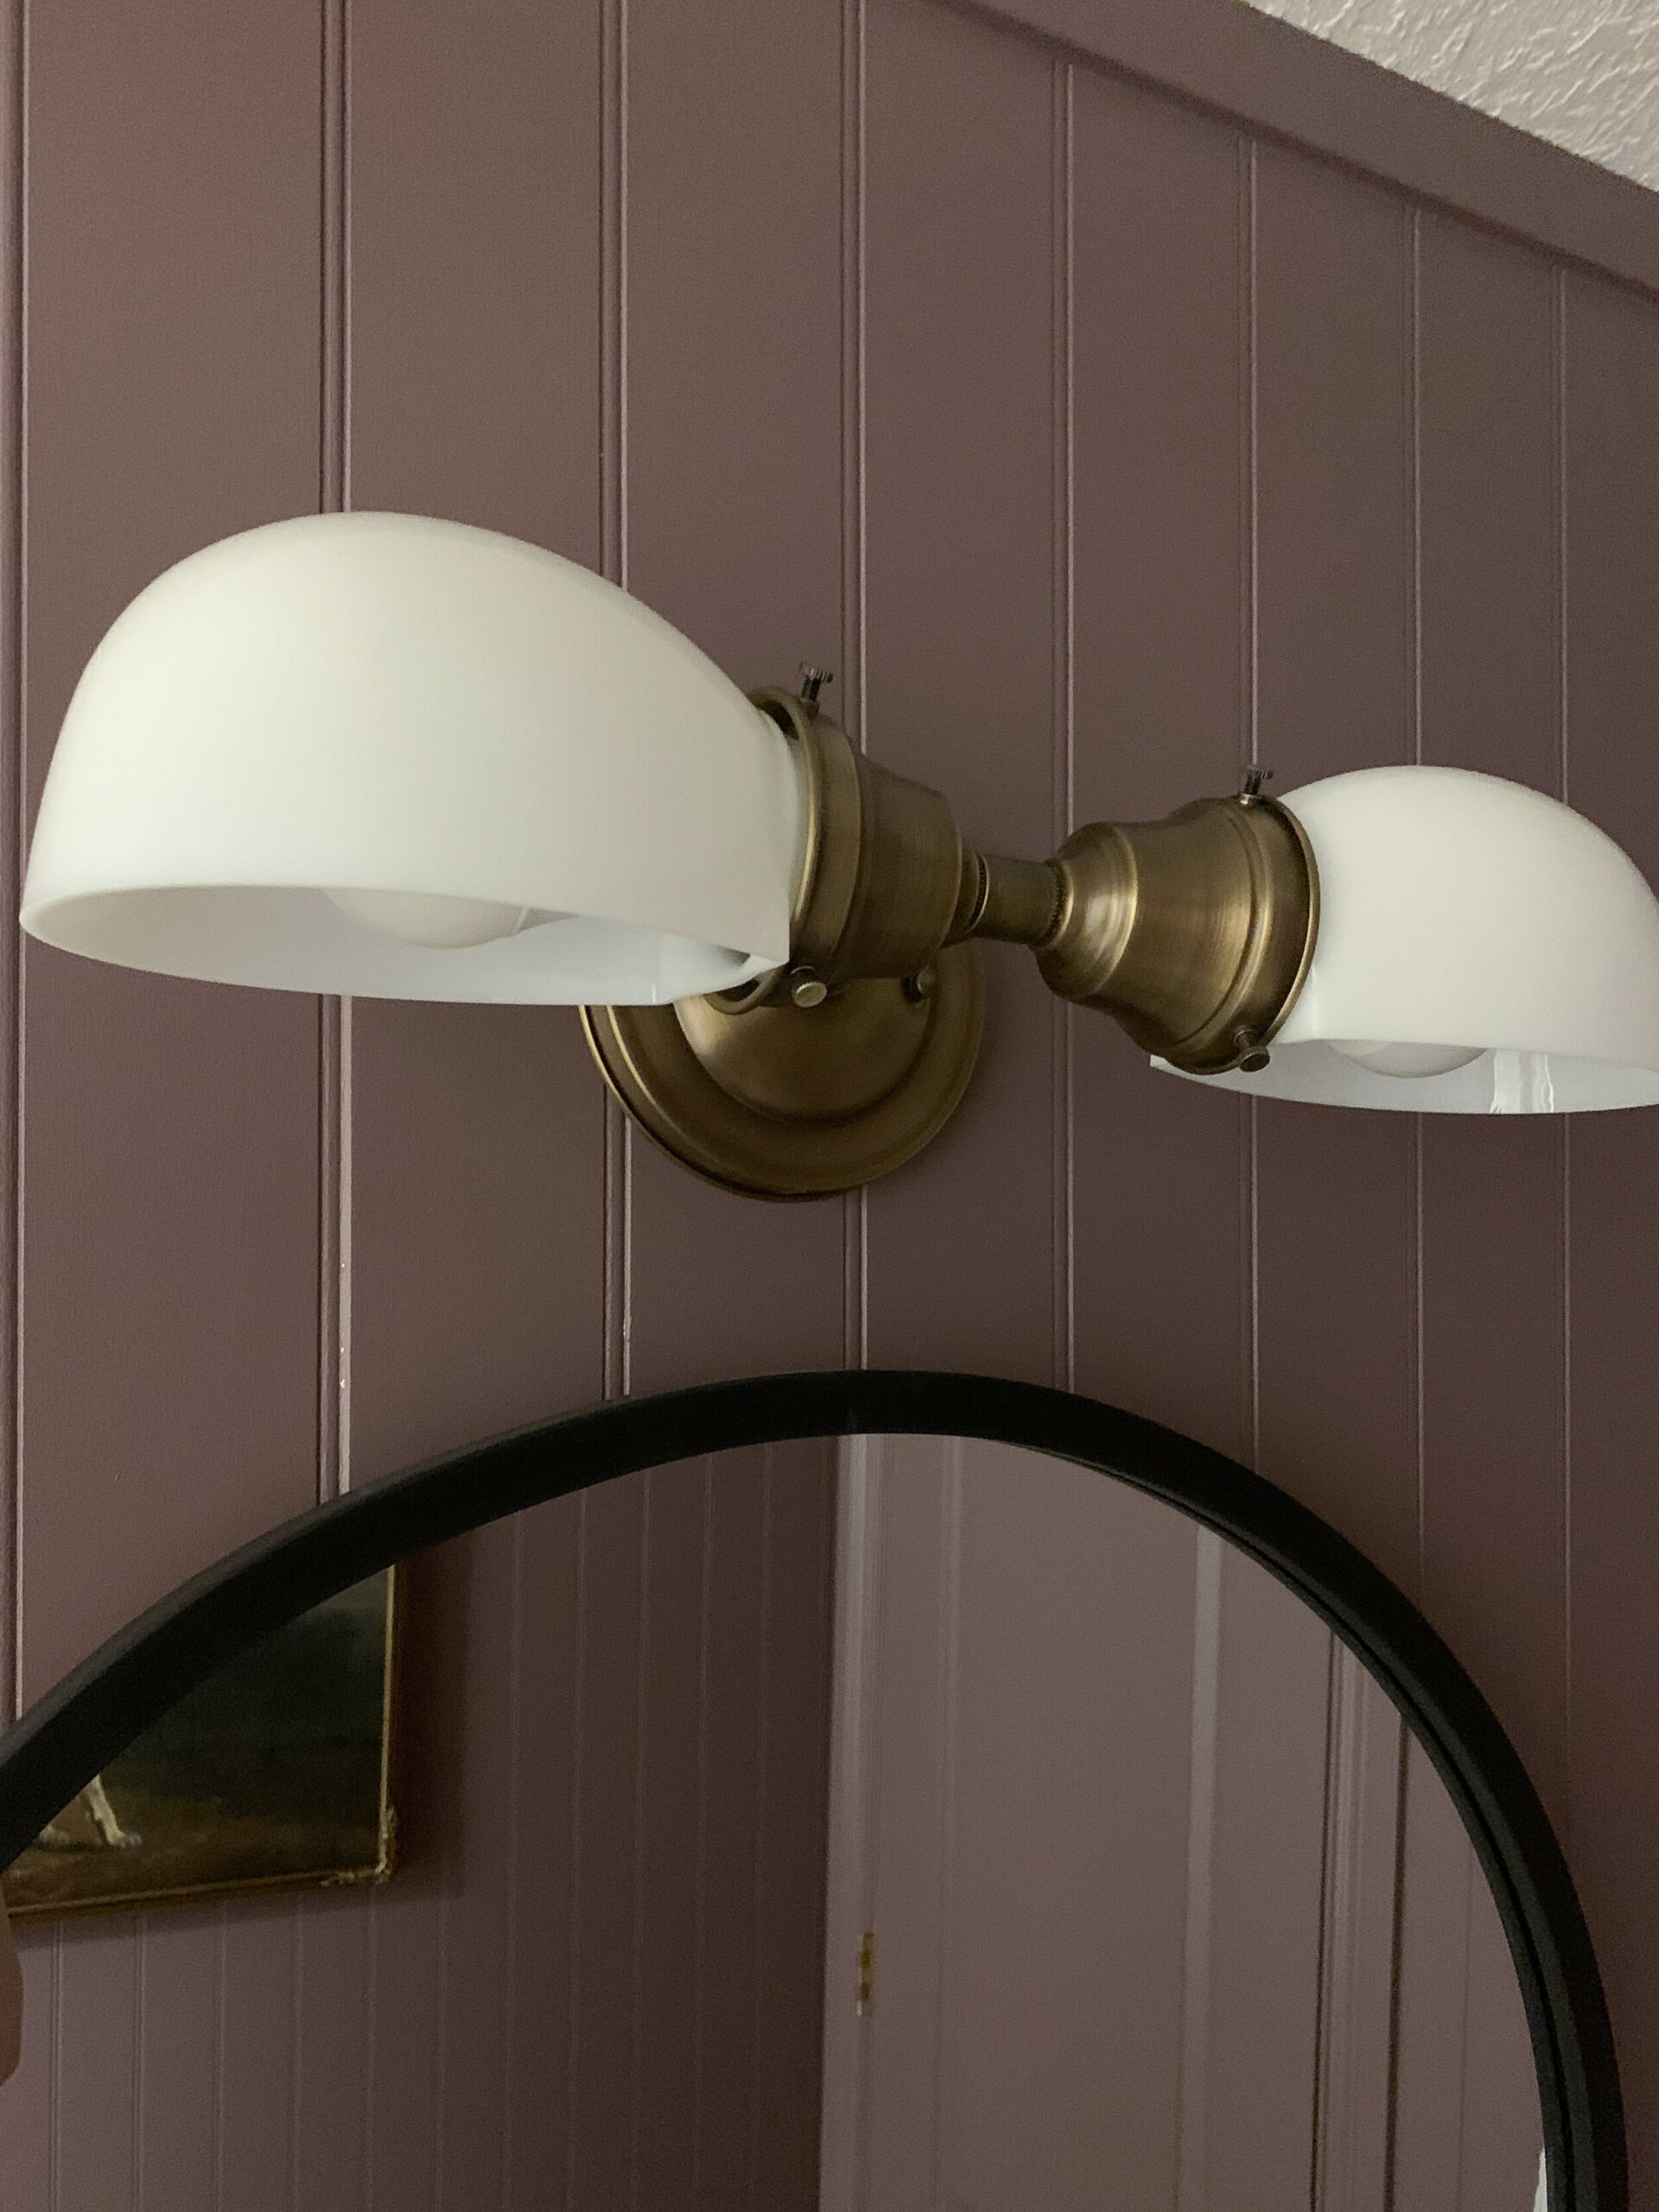
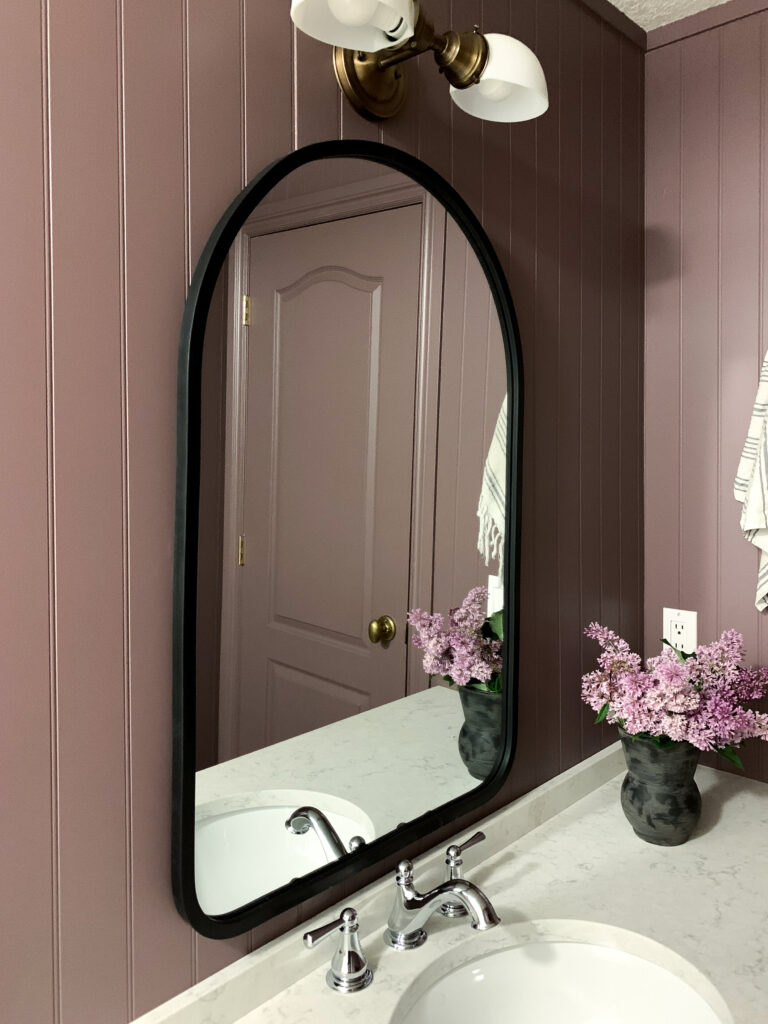
This space doesn’t have a ton of modern elements in it so I brought in a more modern black arched mirror from Umbra. I love the touch of black and a bit of modern feel it brings to this fairly vintage-looking bathroom.
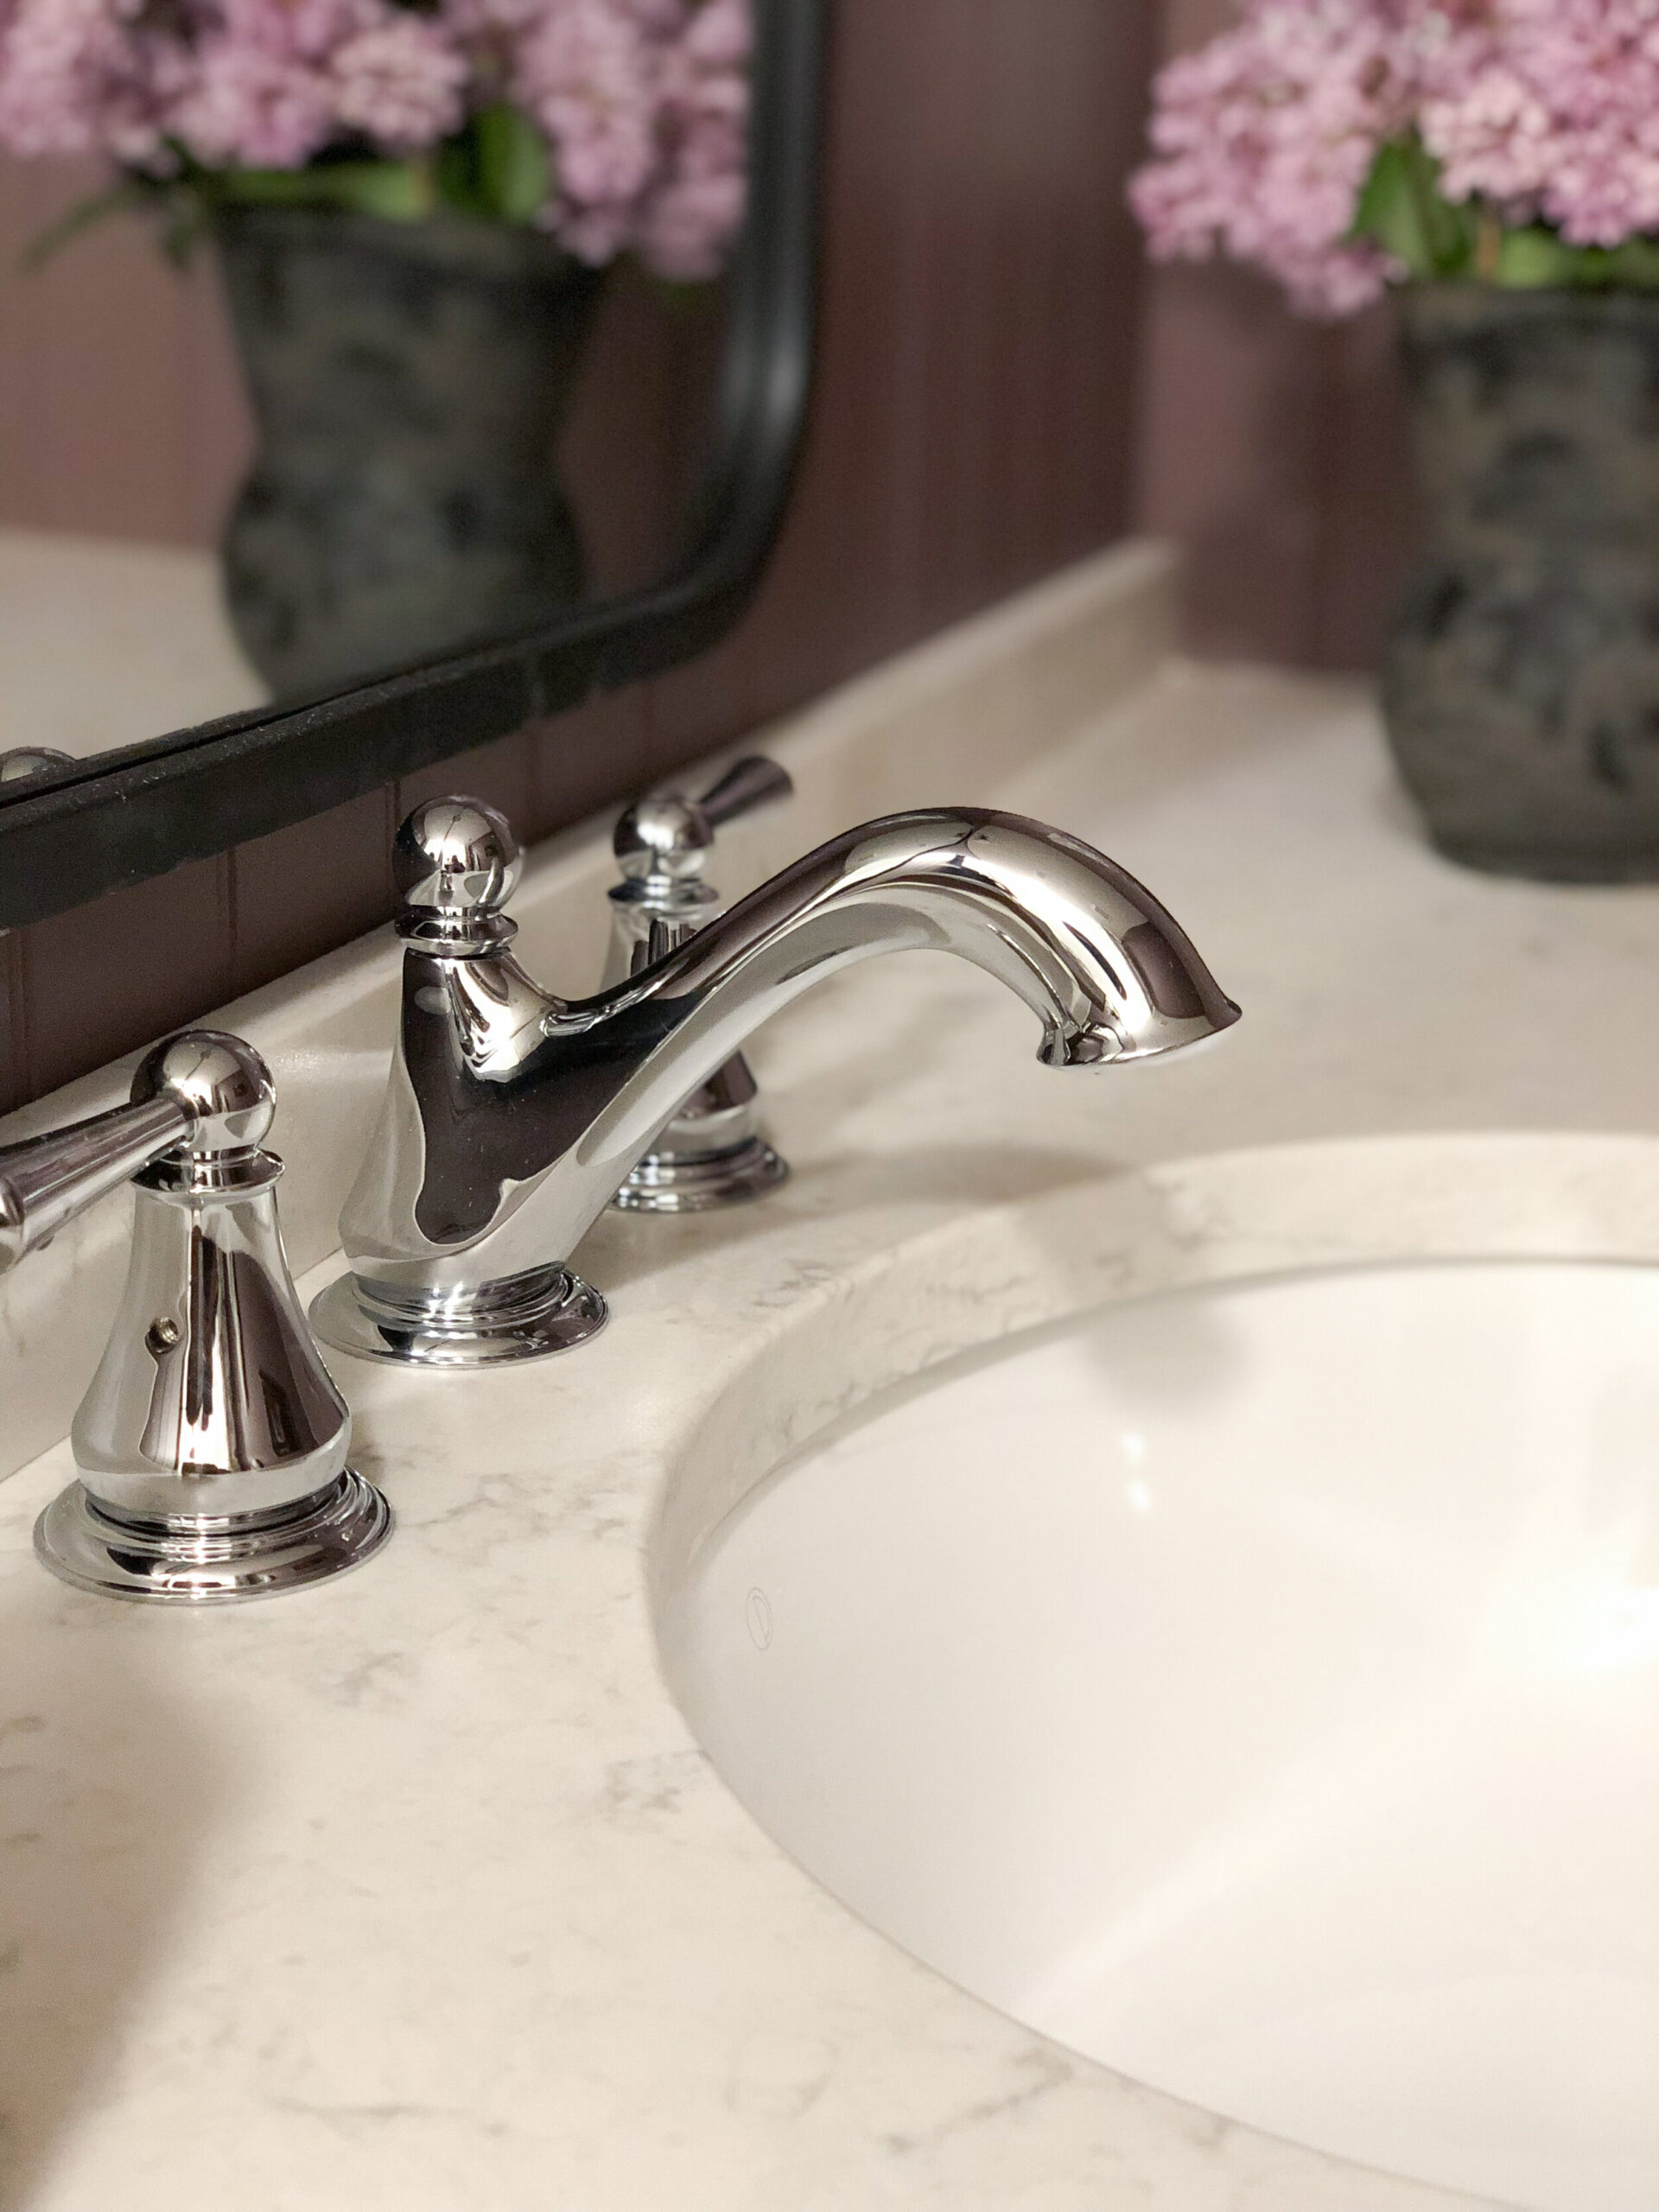
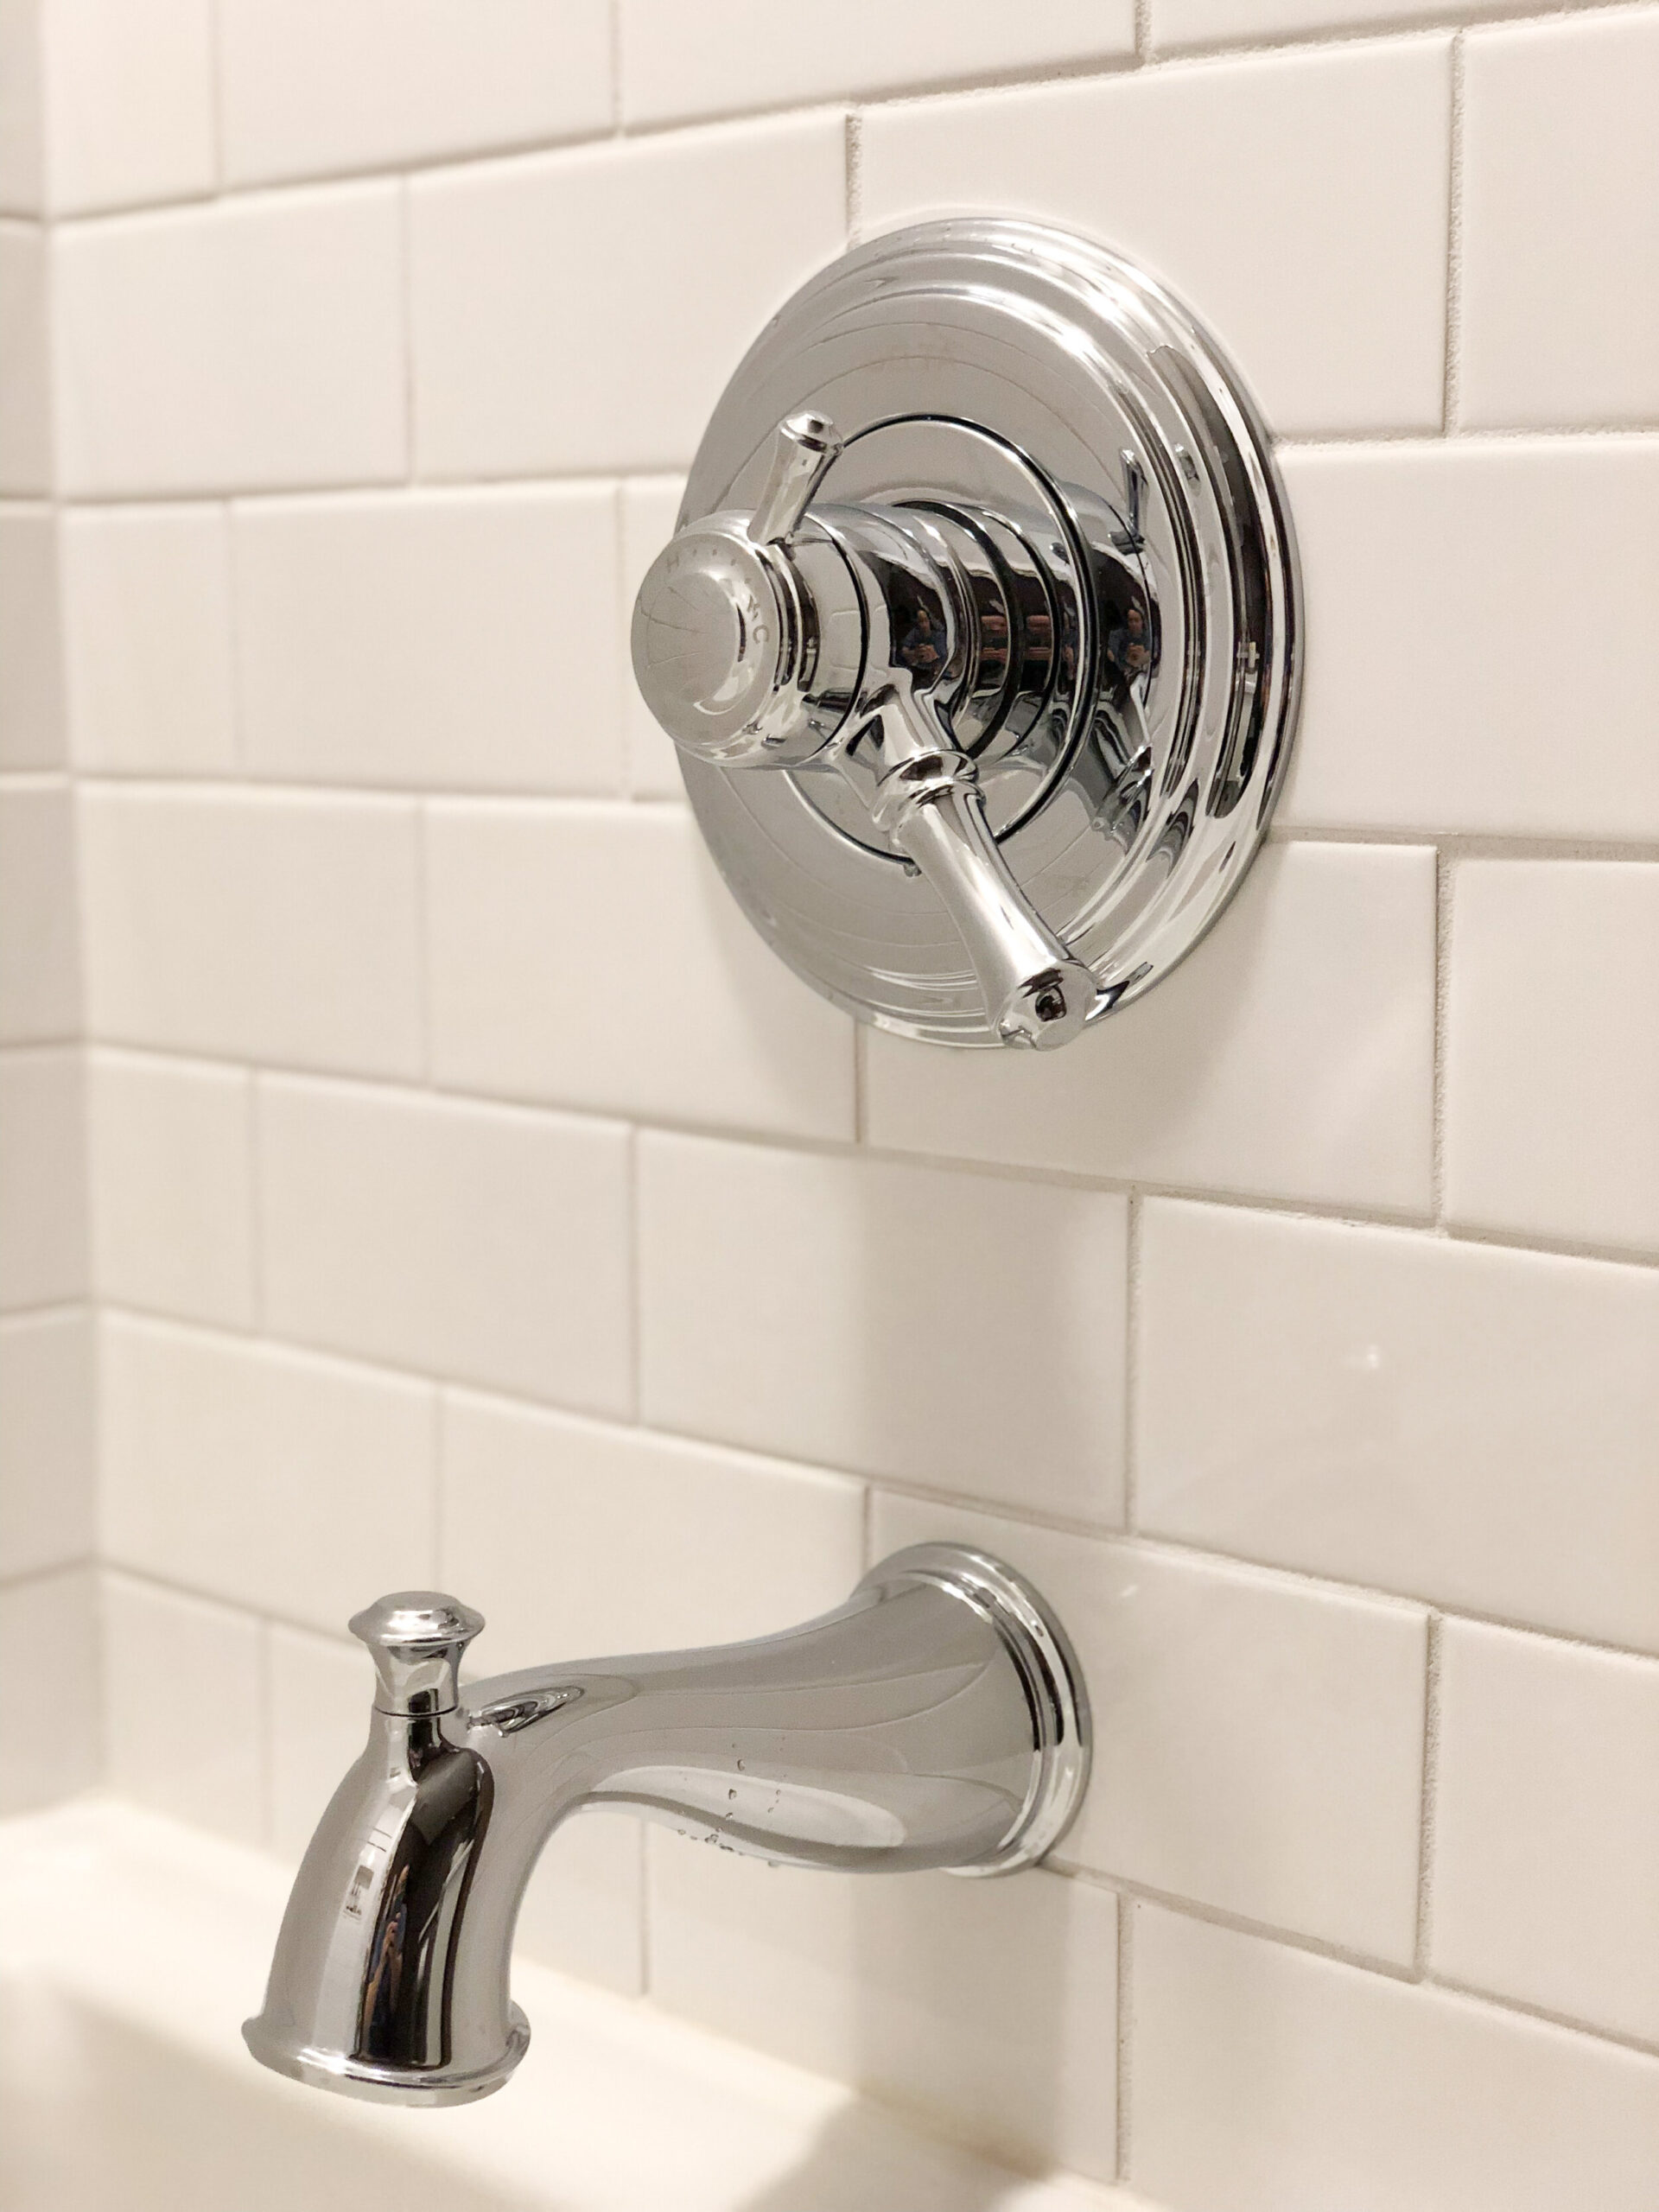
Finally, the fixtures! These were the last-minute addition, I had originally planned to partner with Delta but shipping and production issues during this time are so common and Delta was not able to get them to me on time. I had originally planned on Polished Nickel for the space, but snagged these chrome ones from Amazon and I’m happy with how they turned out, I love the low-arc faucet and shower head and I think chrome is such a classic finish, I have no regrets!
Before and After
Now because I remembered to take a variety of before shots for once, let’s do a few very fun before/ afters, shall we?

And that’s that! The kids now have the nicest bathroom in the house. Let’s just hope this encourages them to keep it clean!
Budget Breakdown and Sources for 90’s Bathroom Makeover:
I haven’t included a cost in my blog posts before but I know I find it so helpful when people do that. I think it’s important to know the cost of an endeavour like this before you dive in! We saved a lot of money using budget-friendly materials with just a few splurges, and DIY- ing almost everything, so I’m happy with where we ended up. I’ve included the cost of the items as well as links (where possible!) if you are looking for a source!
Subway Tile – $224.40
Pencil Tile – $413.10
Bullnose Tile – $156.52
Basketweave Tile – $192.00
Beadboard and Door Trim- 324.59
Tile Installation and Waterproofing Supplies (mortar, grout, (Kerdi Board, Kerdi Fix, Kerdi Band, Niche, Kerdi Screws, Kerdi Seal) – $794.79
Faucet – $155.64
Shower Fixtures – $247.06
Mixing Valve for Shower – $46.79
Quartz Countertop (From local company, included sink) – $441.00
Drywall for ceiling – $51.84
MDF shaker doors (From Local Cabinet Company, Unfinished) – $178.50
MDF for DIY vanity components (On hand, leftover material)
Paint (Benjamin Moore Regal Select (walls) and Advance (Cabinets and trim) – $116.80
Mirror (gifted) – $155.00
Light Fixture – $351.80
Hooks and Toilet Paper Holder – $103.55
Toilet – $313.95
Toilet Seat – $118.68
Art (Frame thrifted, free download printed at Staples)
Shower Curtain Fabric – $65.96
Towels (Already Owned)
Drywaller (labour) – $300
Plumber (labour) – $500 (estimated…. we haven’t yet received this bill)
Total $5626.16 (CAD)
We had a tight budget of $5000 for this 90’s bathroom makeover, so came in a little over that once we added in the labour for the drywaller and plumber, and the last-minute purchase of the fixtures. I think it would have been easy to spend double or triple this much money had we chosen more expensive finishes or hired out more labour, so I’m pretty happy with how we ended up. I still think the quality and finish in this bathroom is top-notch and I’m very happy with how this 1990s bathroom has been transformed into a beautiful room with a big impact! The only regret I have about it is that it is for my kids and not for me!!! I hope that our ensuite does not end up being the last room that we complete, but it is the biggest of the bathroom projects so that might just be the case.
I want to thank Linda and all the folks that run the One Room Challenge for organizing and running yet another exciting season. As always there was an amazing lineup of featured designers and guest participants and there were some fantastic makeovers! Check out the link below to be redirected to the One Room Challenge website and see all the satisfying reveals!

You Might Also Like:
- One Room Challenge Spring 2021 – Week 7 – DIY Full Length Shower Curtain
- How to Remove Lacquer from Brass (and Age it using Vinegar! )
- The Modern Traditional Guest Bathroom Reveal! -One Room Challenge Spring 2022
- How Much does it cost to DIY a Kitchen?
- DIY Window Panes
- Media Room Makeover! (And Budget Friendly Ideas)
- How to Make a Bathroom Handicap Accessible
Shop this 90’s Bathroom Makeover:

ERIN!!!!!!!!!!!!!!!!!!!!!!!!
SOOOO GOOD! Every single detail has been thought of. I’ve loved watching this space come together and even though you showed so much along the way, the reveal still feels like a "big reveal"! As always, your vision was executed perfectly! Love that you went outside of your comfort zone with the purple. It is classy yet fun! All the brass accents really warm it up too. So so perfect. Really hoping to see you on that featured designers list in the fall – you deserve it and totally have my vote!
So good Erin! I’ve been dying to paint something purple and this color is amazing! All the details are amazing!!!!
Erin it’s absolutely stunning. Your kids have an uber stylish bathroom Great idea to do the side by side photos!
Beautiful! you have such a talent for envisioning what you want and pulling it all the details together, in a very unique, classic and timeless style. I love all of your choices here.
It’s a beautiful bath! I really love the color… great choice on design here.
Awww thank you so much Robyn! Thanks for being such a cheerleader through all of this!
Thank you Suzanne! The colour felt like such a risk but I’m glad I went for it, I love it now!
Thank you so much Maria! I’m glad you like the before and after shots, I’m pretty proud that I mostly remembered to take the before shots for once, there is a first for everything!
Thank you so much Leslie, that is such a kind comment, I’m blushing!
Thank you Jamala!
The tilework and flooring are beautifully done! I love that shower curtain too. And the wall colour.
It’s so good, no more time machine bathtub!!!
It’s beautiful, Erin! I love all of the fixtures and the wall color!
These before and afters are so good! I love all of the elements in your design and all of your DIYs to stay on budget!
This looks amazing!! I love the wall color so much and great tile and accessories!! Well done!!
This is incredible! Also love the before & after pics side-by-side – the best way to see the magic 🙂
Erin, this is a gorgeous transformation! I am in love with that wall color!! Congrats!
You made the purple work so well! Love everything. This shower curtain still makes my heart sing.
Thank you so much Shawna!
Thanks Laura! No one misses the time machine!
Thank you so much Nicole! I love the fixtures too, thank goodness, they were such a last-minute addition!
Thank you Lindsey! It’s all about the DIY’s for me, I always need to have some!
Thank you so much Marcie!
Thank you Karen! I love a good before and after too!
Awww thanks so much Libbie!
Thanks Marie! I was nervous about the purple but glad I went for it!
I have picked a similar tile for my daughter’s old bathroom whenever we get to that project – mostly because her fixtures are all black. I have not considered adding those gorgeous purple walls in the room but you have made me rethink that. Your project is stunning and the kids will enjoy it for a long time! Congratulations on finishing it all in 8 weeks too.
I love how you kept most of the elements in here so timeless and classic, but then punched it up with that unexpected purple. It turned out amazing Erin!
Erin, I love it all! That purple color is perfection, and that vanity is so cute with the new feet and the holes in the door. Great work!
Love the color! I also renovated my guest bathroom.
You did a great job!
This doesn’t even look like the same space, Erin, you totally knocked it out of the park. Every detail is just amazing. I’m so excited for you. It’s all really beautiful. Hugs, CoCo
Love the transformation of this space! The purple works so well with the classic floor and beadboard walls, congrats!
Is the grout still holding its color?
Yes it is, for the most part! The floor grout gets a bit dirtier in the main pathways than the wall tile but it does clean up to white again with a bit of a scrub. The wall tile grout has stayed pretty white!