DIY Bathroom Vanity Makeover
One Room Challenge Spring 2021 – Week 5
Week 5!!! I’m happy that there are actually 8 weeks in this round because I’m pretty sure I could not have finished this budget-friendly bathroom makeover in just 6 weeks! At least not finish it AND get any sleep. If you missed last week, here are the first few weeks:
Week 1/ Week 2/ Week 3/ Week 4
This post may contain affiliate links. That means if you purchase anything from these links I earn a small commission, at no extra cost to you! This helps support my blog, so thank you!
Table of Contents
- One Room Challenge Spring 2021 – Week 5
- Progress this week
- DIY Bathroom Vanity Makeover
- DIY Bathroom Vanity Makeover – The Design
- DIY Bathroom Vanity Makeover – Step by Step
- How to Complete the DIY Bathroom Vanity Makeover
- Next Week:
Progress this week
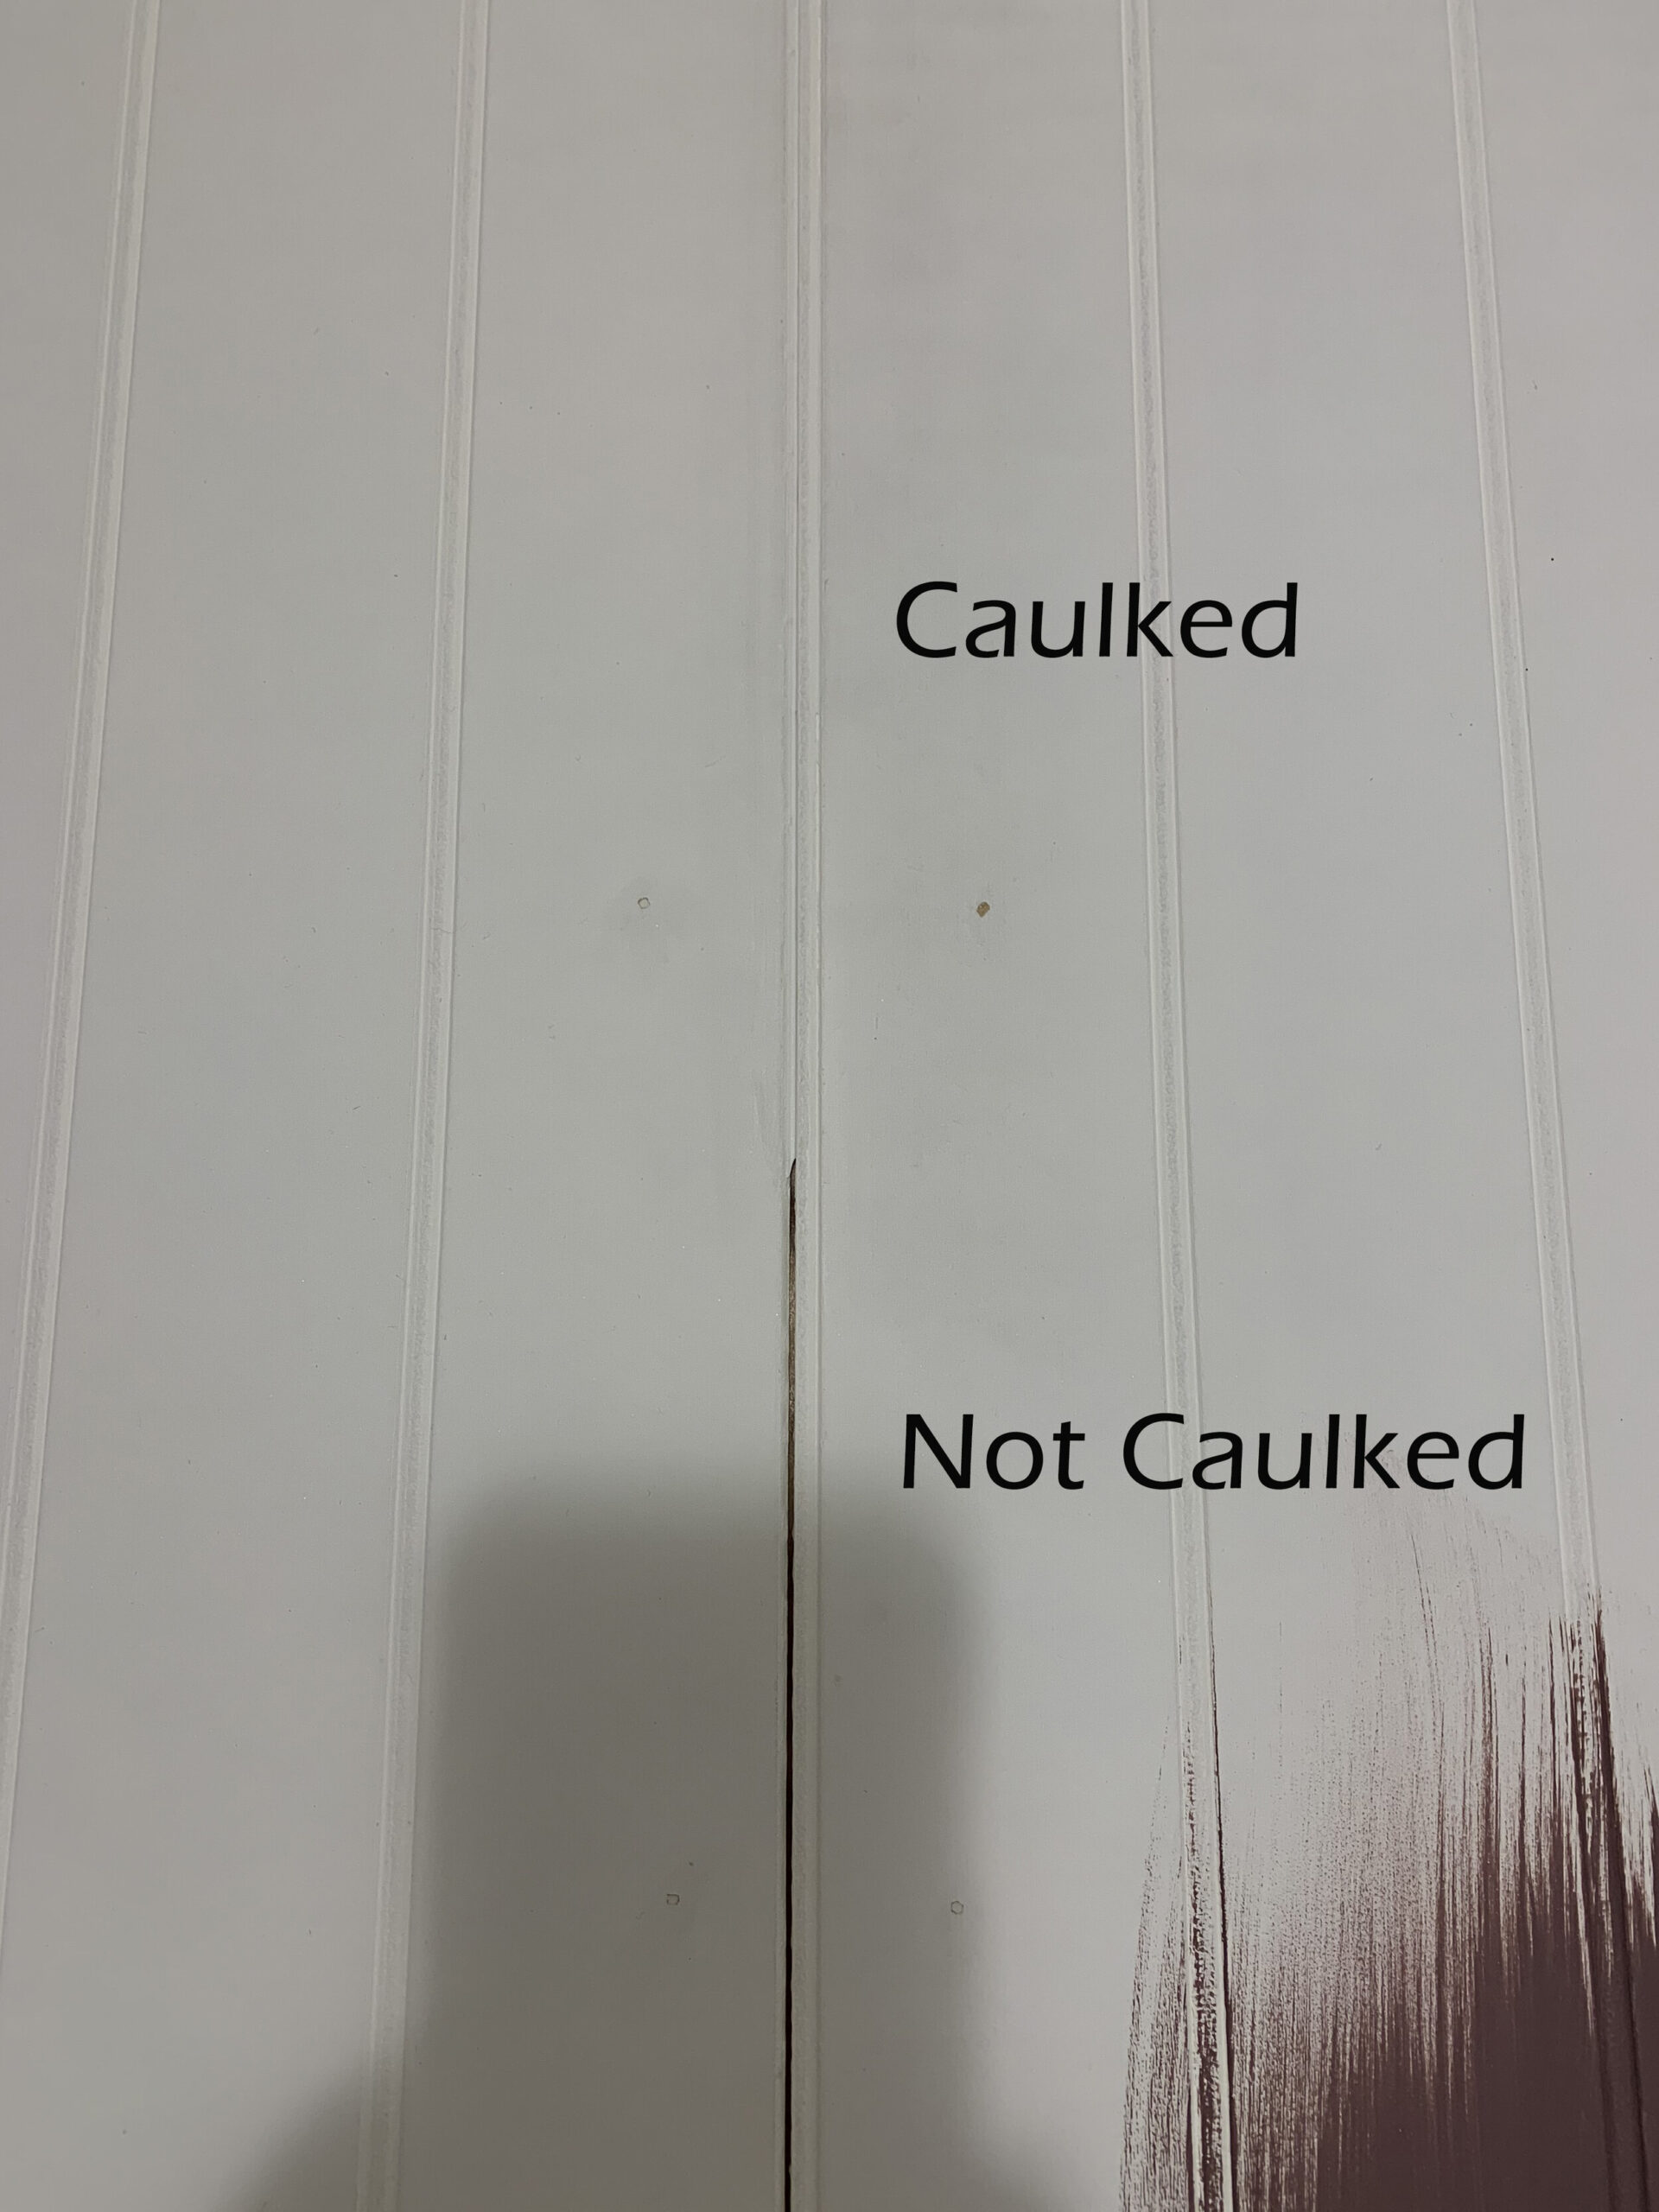
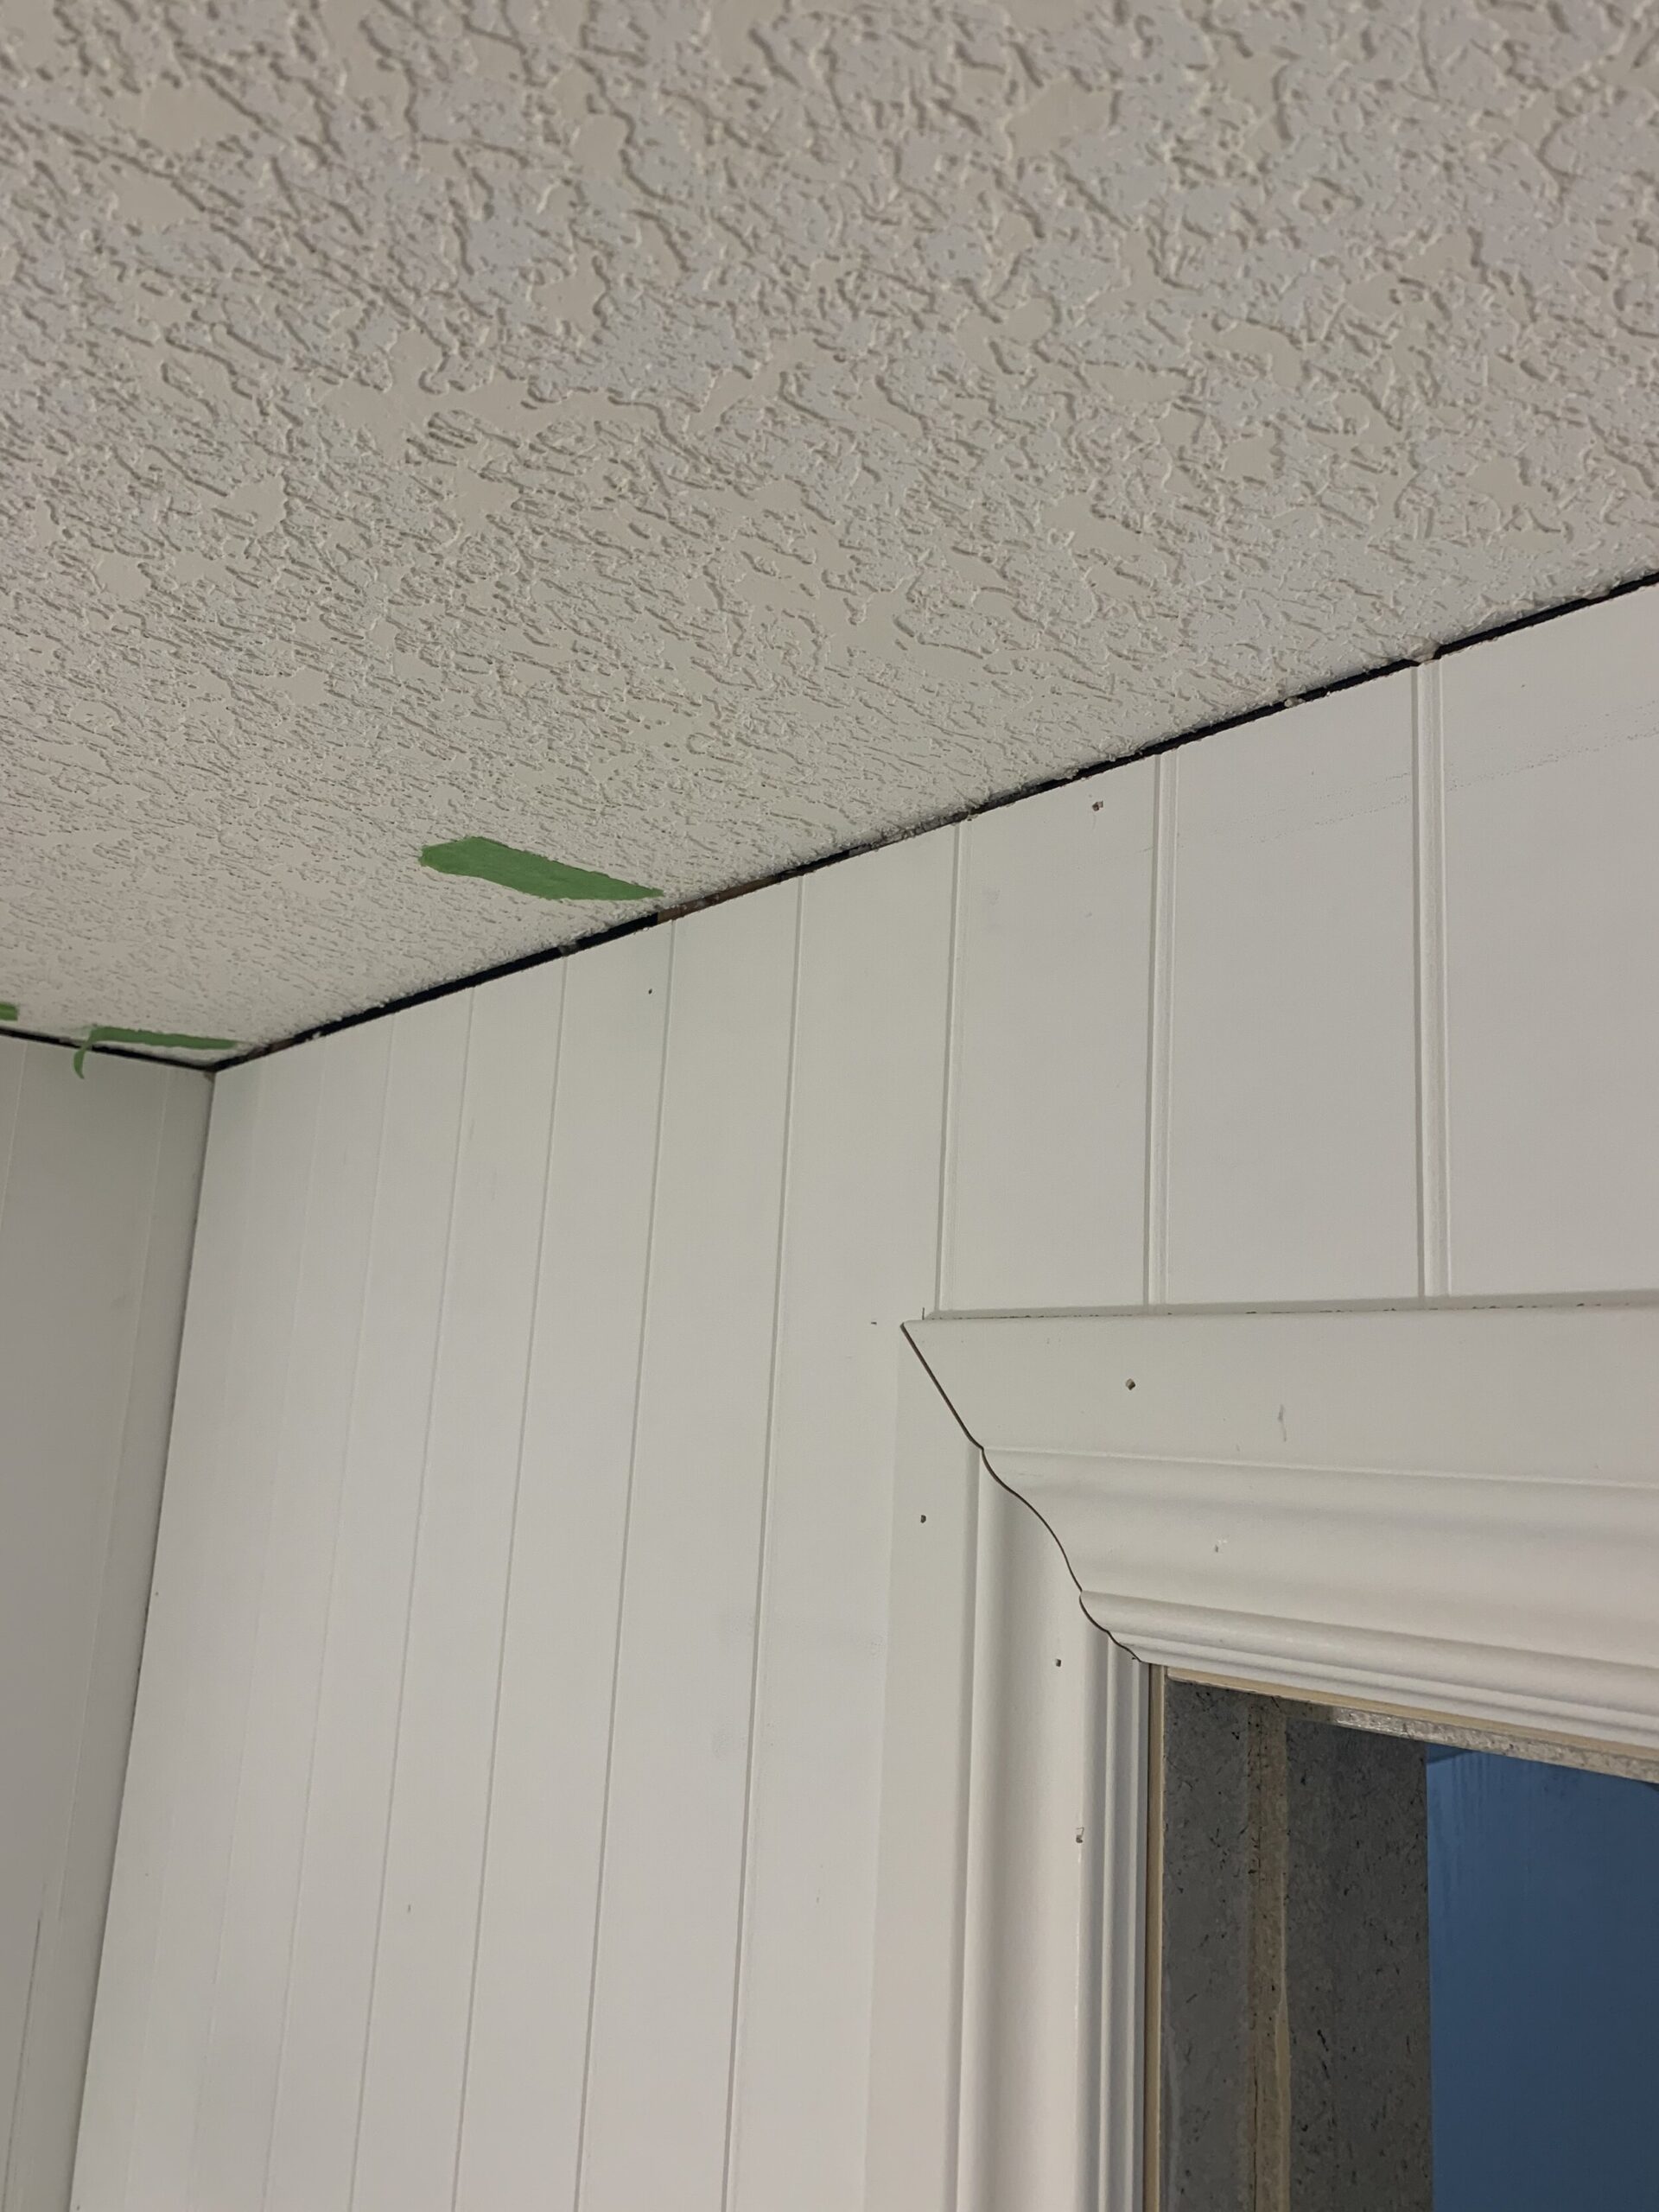
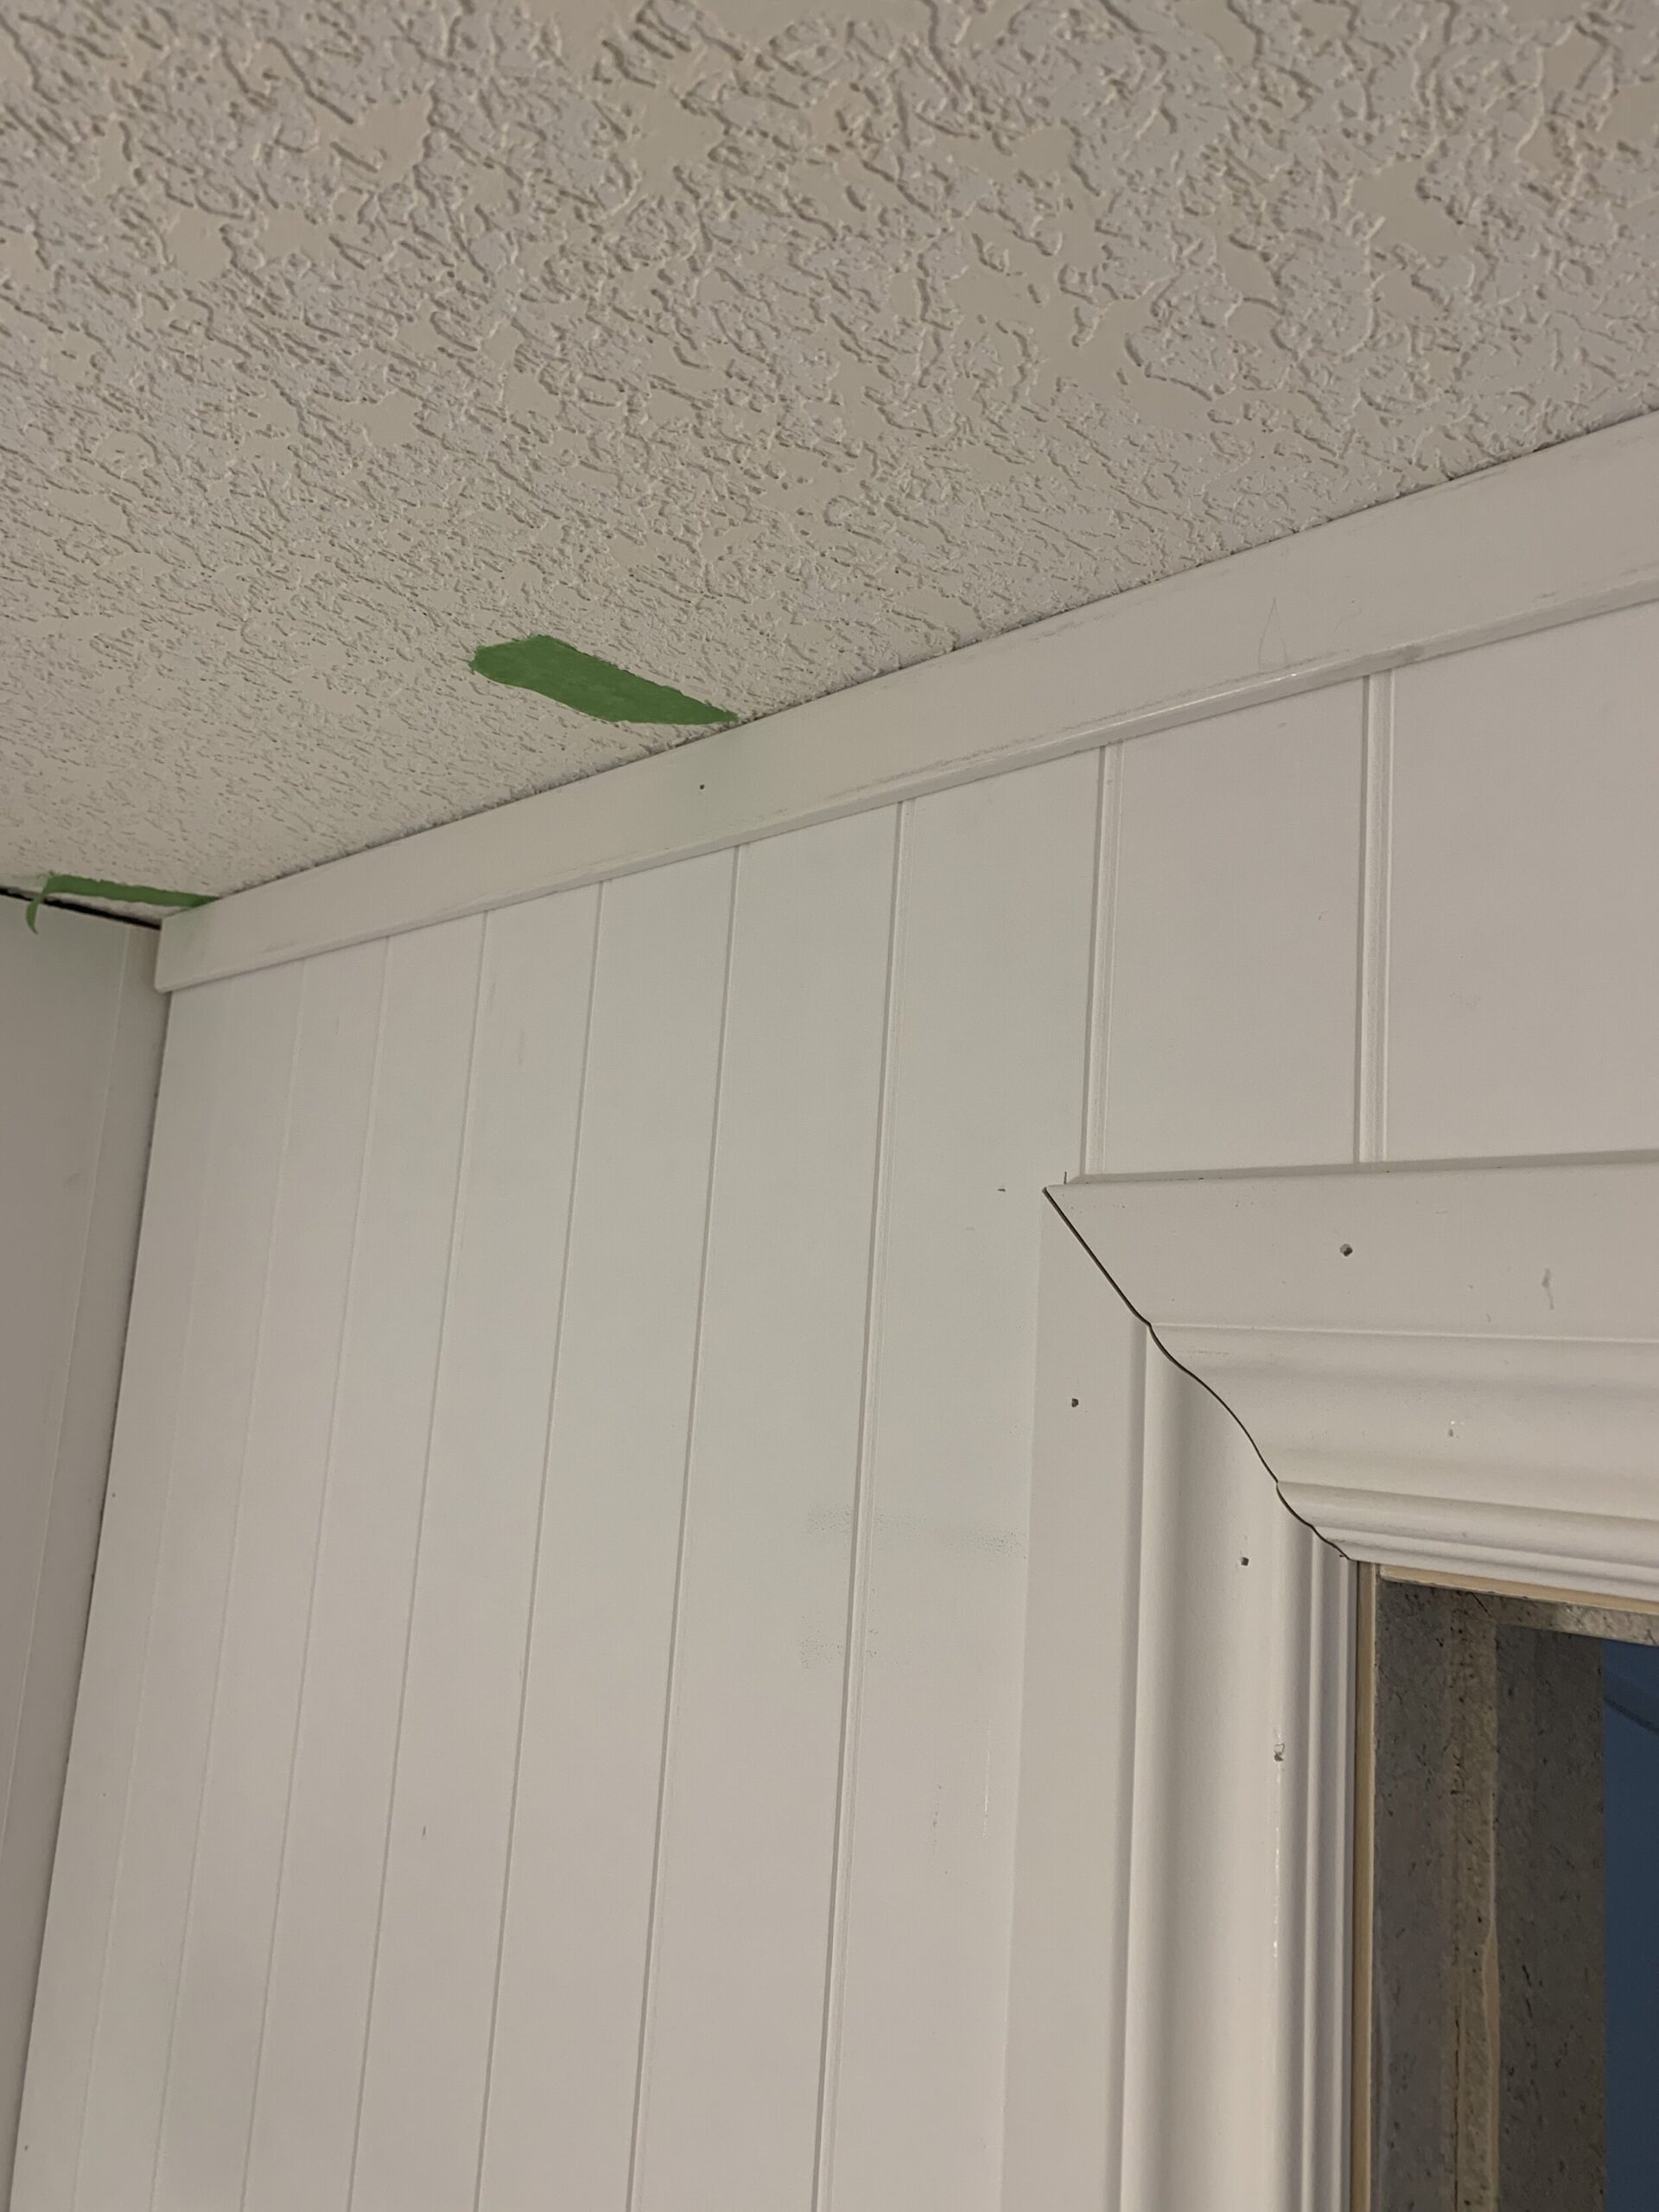
This week, I finished up the beadboard by adding a small trim piece to the top of the wall, caulking and filling holes. Super exciting stuff, I know! But necessary for that flawless paint job. I love the way the seams in the beadboard just disappear after caulking, it is so satisfying! I also love how the beadboard makes the small bathroom feel so special and cozy. I can not wait to get the dark color I chose up on that beadboard to really bring home the cozy factor.
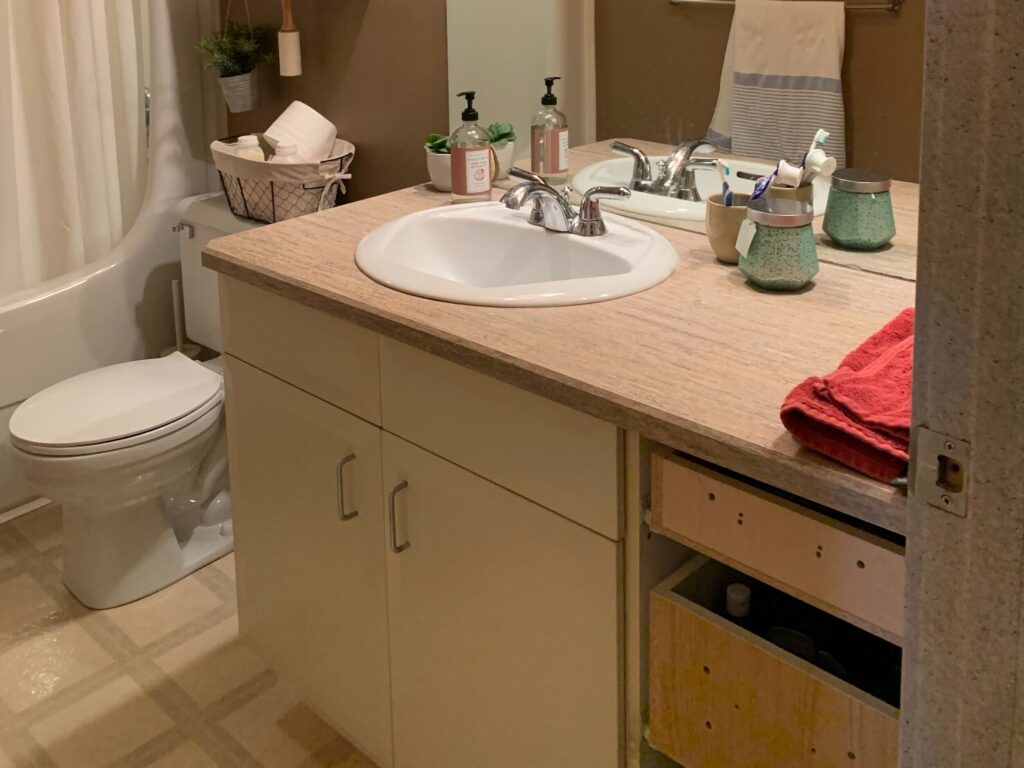
The other thing we accomplished this week is a little build-out for the bathroom cabinet! If you recall, we decided to keep the existing vanity because it was good and solid and in good shape. The inside of the cabinet is standard white melamine, in good condition. Instead of it ending up in a landfill, we are using what we have to give it a little makeover! New doors, a different color, some new cabinet hardware and a few other little embellishments will make this old bathroom vanity look brand new!
DIY Bathroom Vanity Makeover
The doors to the vanity were sort of a bevelled slab, and while they were not offensive they were a little boring. The old hardware was also very basic. I thought that we could probably replace the doors, and add a few things to the vanity to make it look pretty custom for not a lot of dough!
Countertops
We did get rid of the laminate vanity top, sink and leaky faucet and had a remnant piece of quartz cut to fit the old vanity, with a new sink and all. I would show it to you, but we haven’t installed it yet and it’s sitting face-down in the garage taking up a parking stall. (Who parks inside their garage anyway?)
I went out and browsed around at a local countertop yard to see what they had as remnants and fell pretty hard for this quartz. It is not too veiny, sort of nondescript which is what I wanted for this space, and even better, it has a matte, leathered finish! I almost always love a matte finish over a glossy one and I had never seen leathered quartz before so that decision is pretty easy.
We haven’t installed the countertop yet because I want to paint first (I imagine I could get purple paint out of leathered quartz, but do I really want to test that theory?) Anyway, by choosing a remnant, picking it up when it was ready and installing it ourselves, we are saving quite a bit compared to buying a new slab, so that’s a great option to save a bit on a solid surface countertop in a bathroom. We also have some new faucets on the way to replace the leaky one.
DIY Bathroom Vanity Makeover – The Design
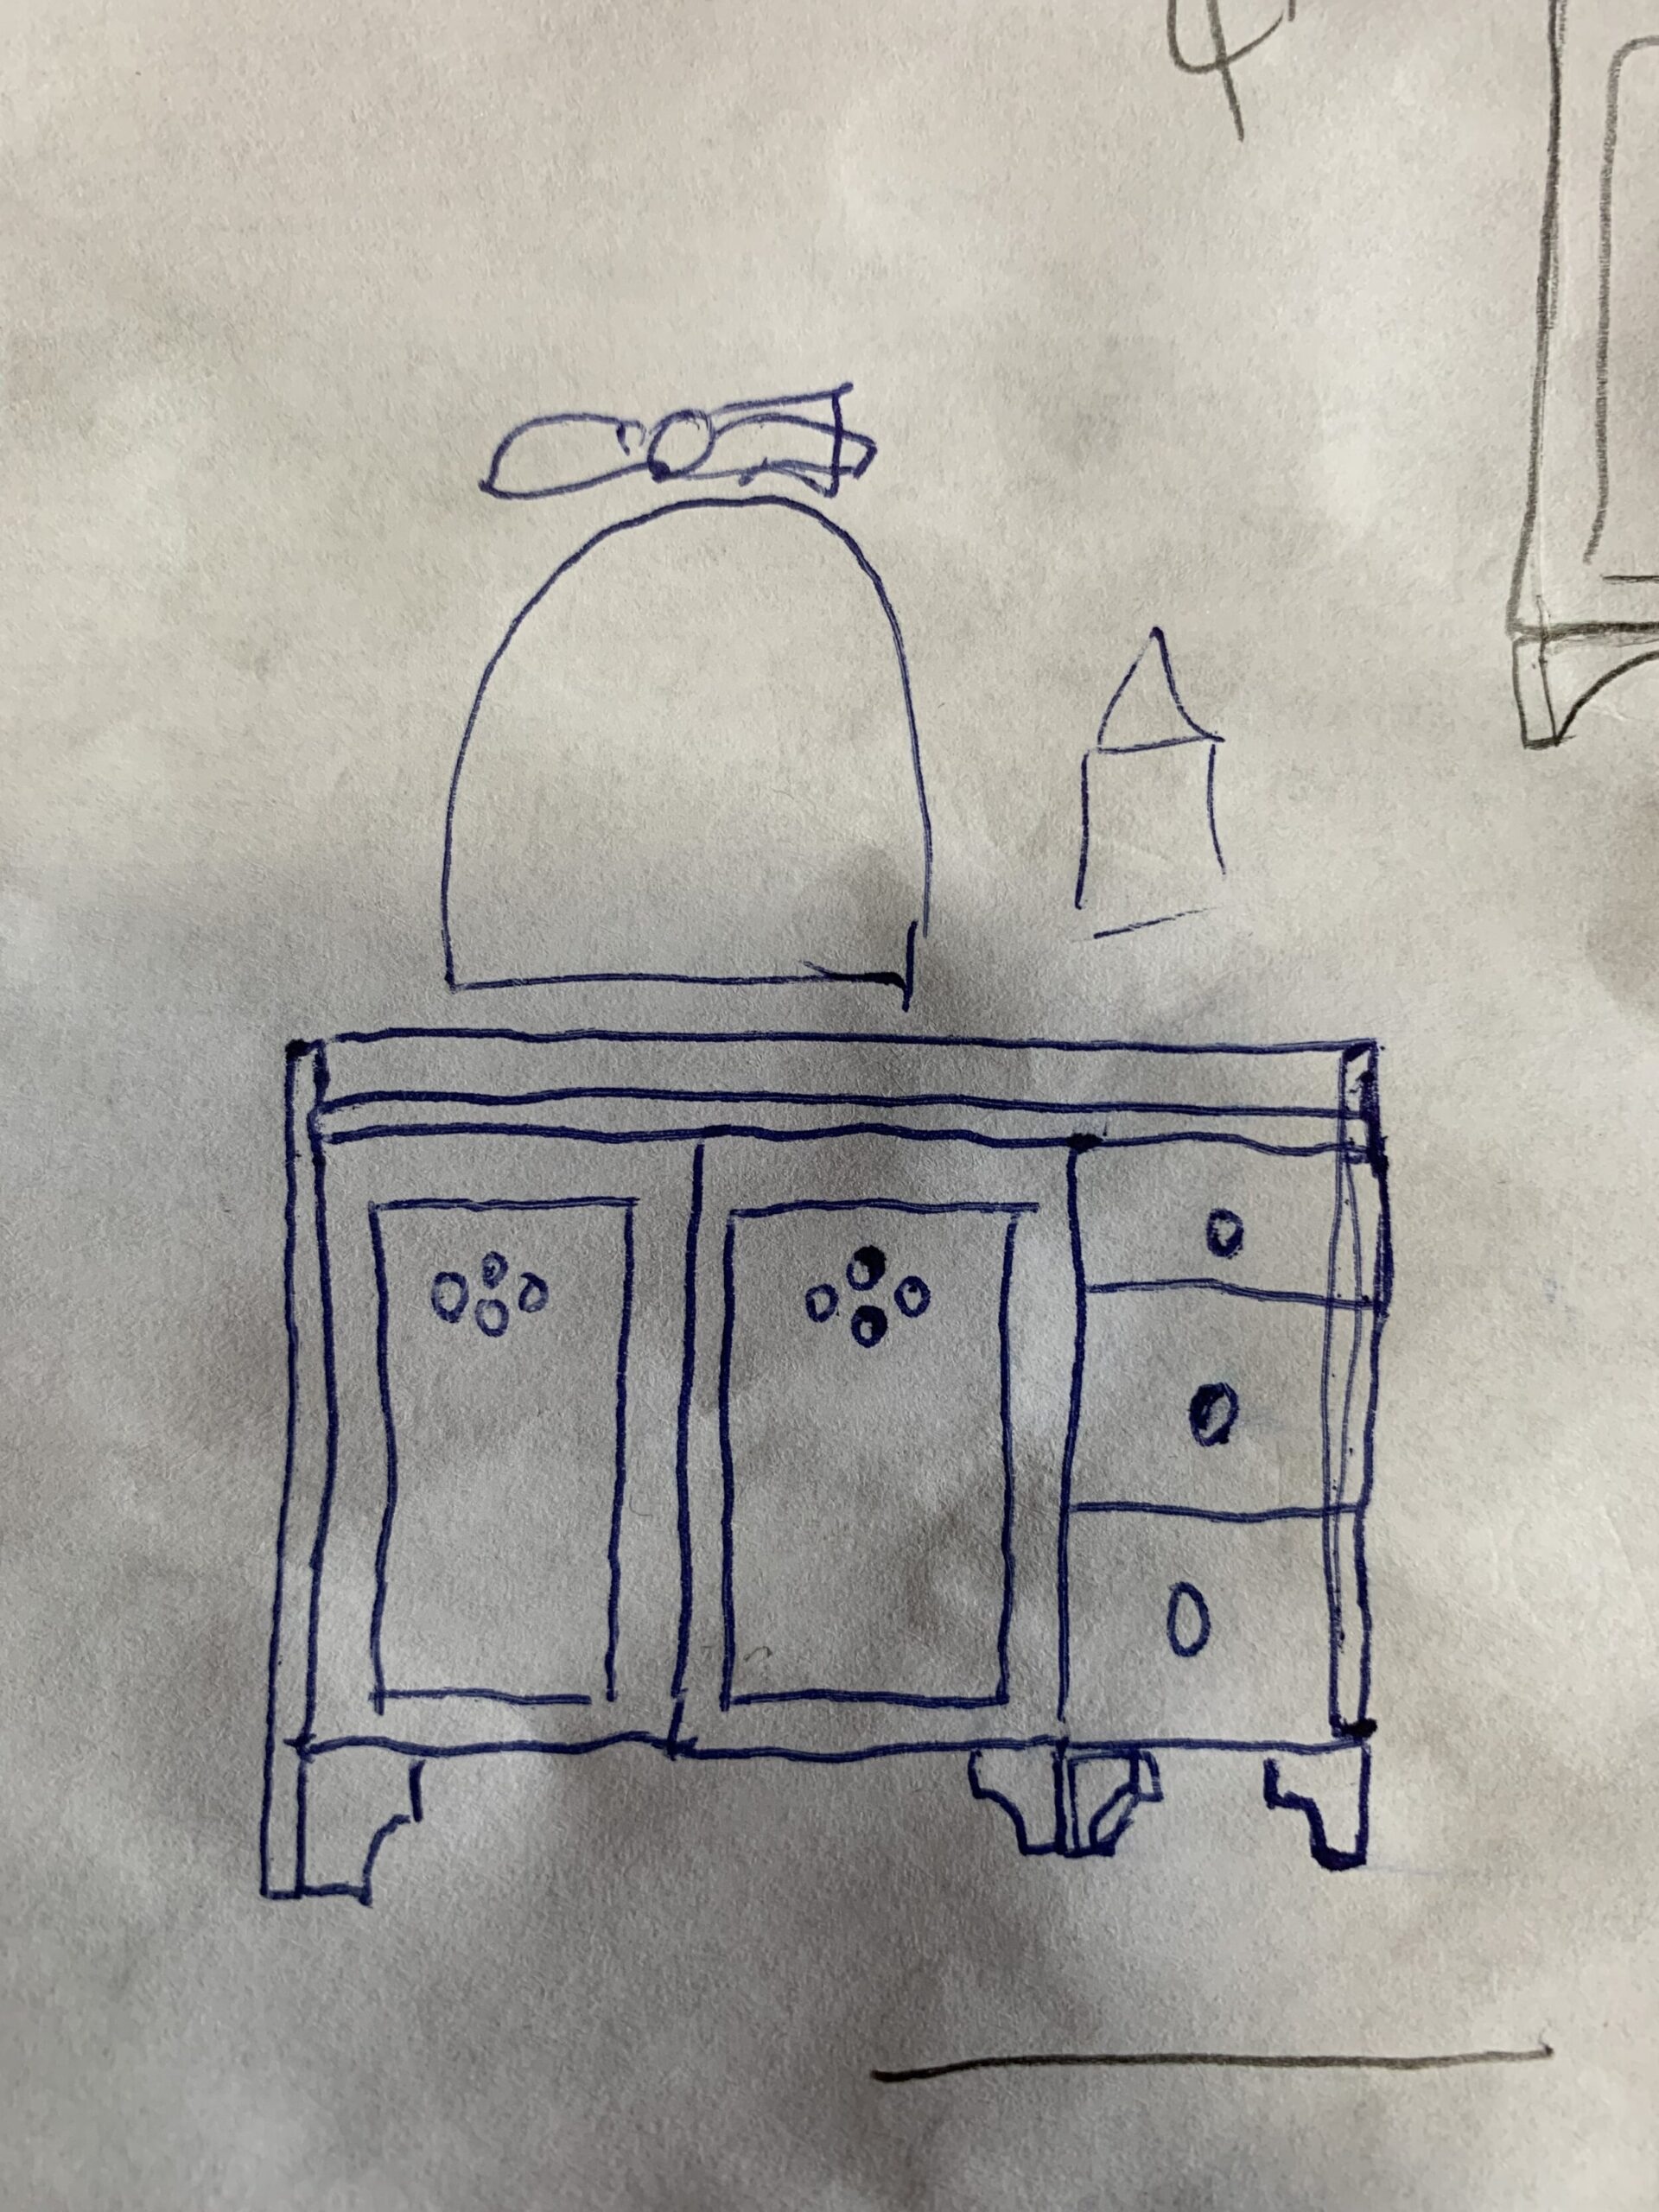
So with the countertop taken care of, I started to think about how I wanted the vanity to look. In my inspiration mood board, our original plans were to make the doors ourselves, with a slab style door with little grooves in them, like this inspo image from Heidi Callier.
But after some thought, I realized that was going to be just too many vertical lines with a beadboard wall. I thought about trying to make my own shaker-style doors, but after doing a little research on this I decided it was more work than I was willing to take on, considering I could have a much more professional door made up pretty easily locally and this bathroom is pretty chock-full of other DIY projects.
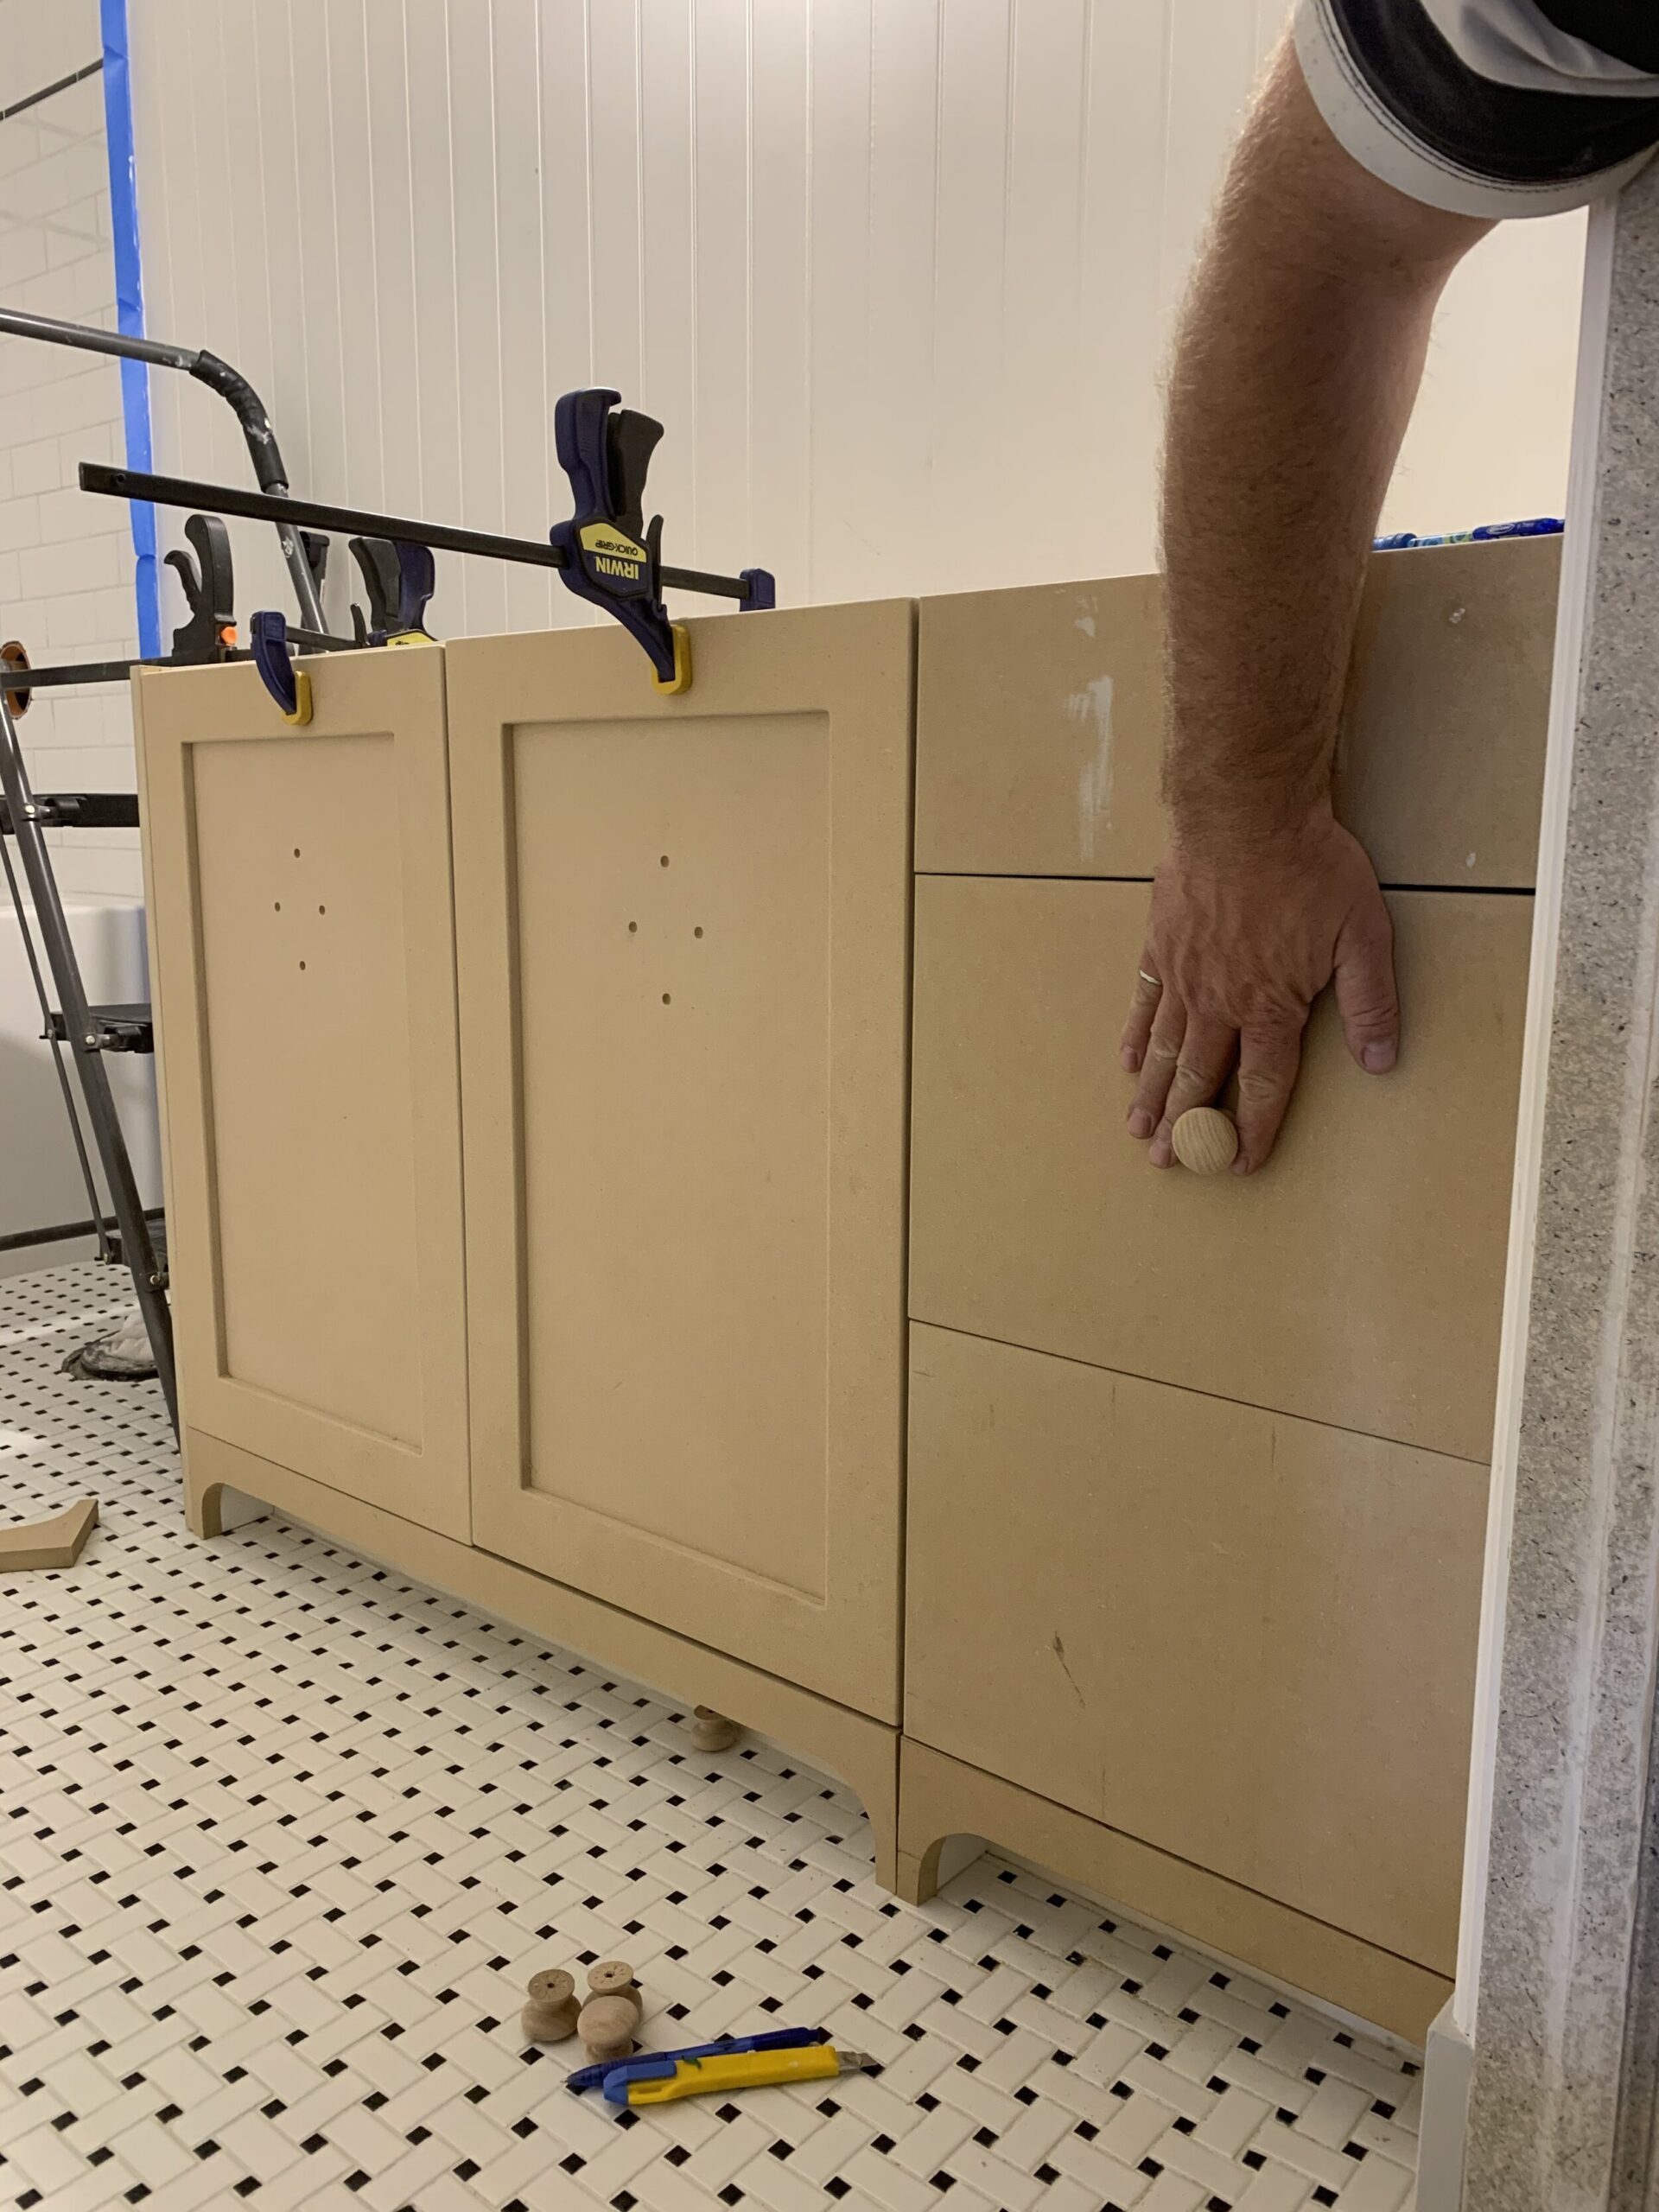
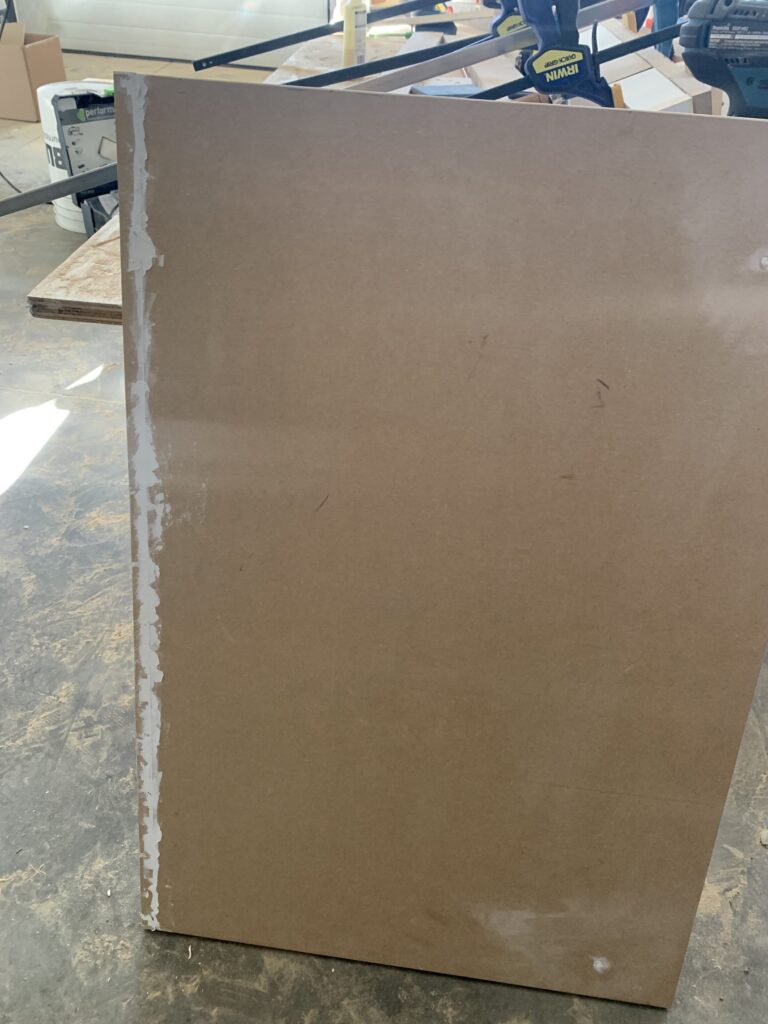
So the first thing I did was take some measurements (I decided to ditch the little faux-drawers right under the sink and instead go for a full-height door to keep the whole design a little less busy) and sent that off to our local cabinet company and they whipped me up some very nice unfinished new cabinet doors out of MDF, for not too much moolah.
I love the look of a slab-style drawer mixed with a shaker door so we decided we would make our own drawer fronts. I also came up with a sketch to add a few extra details to the existing bathroom vanity cabinet to give it a bit more detail, and I’ll show you what we did, below:
DIY Bathroom Vanity Makeover – Step by Step
The Side Panel
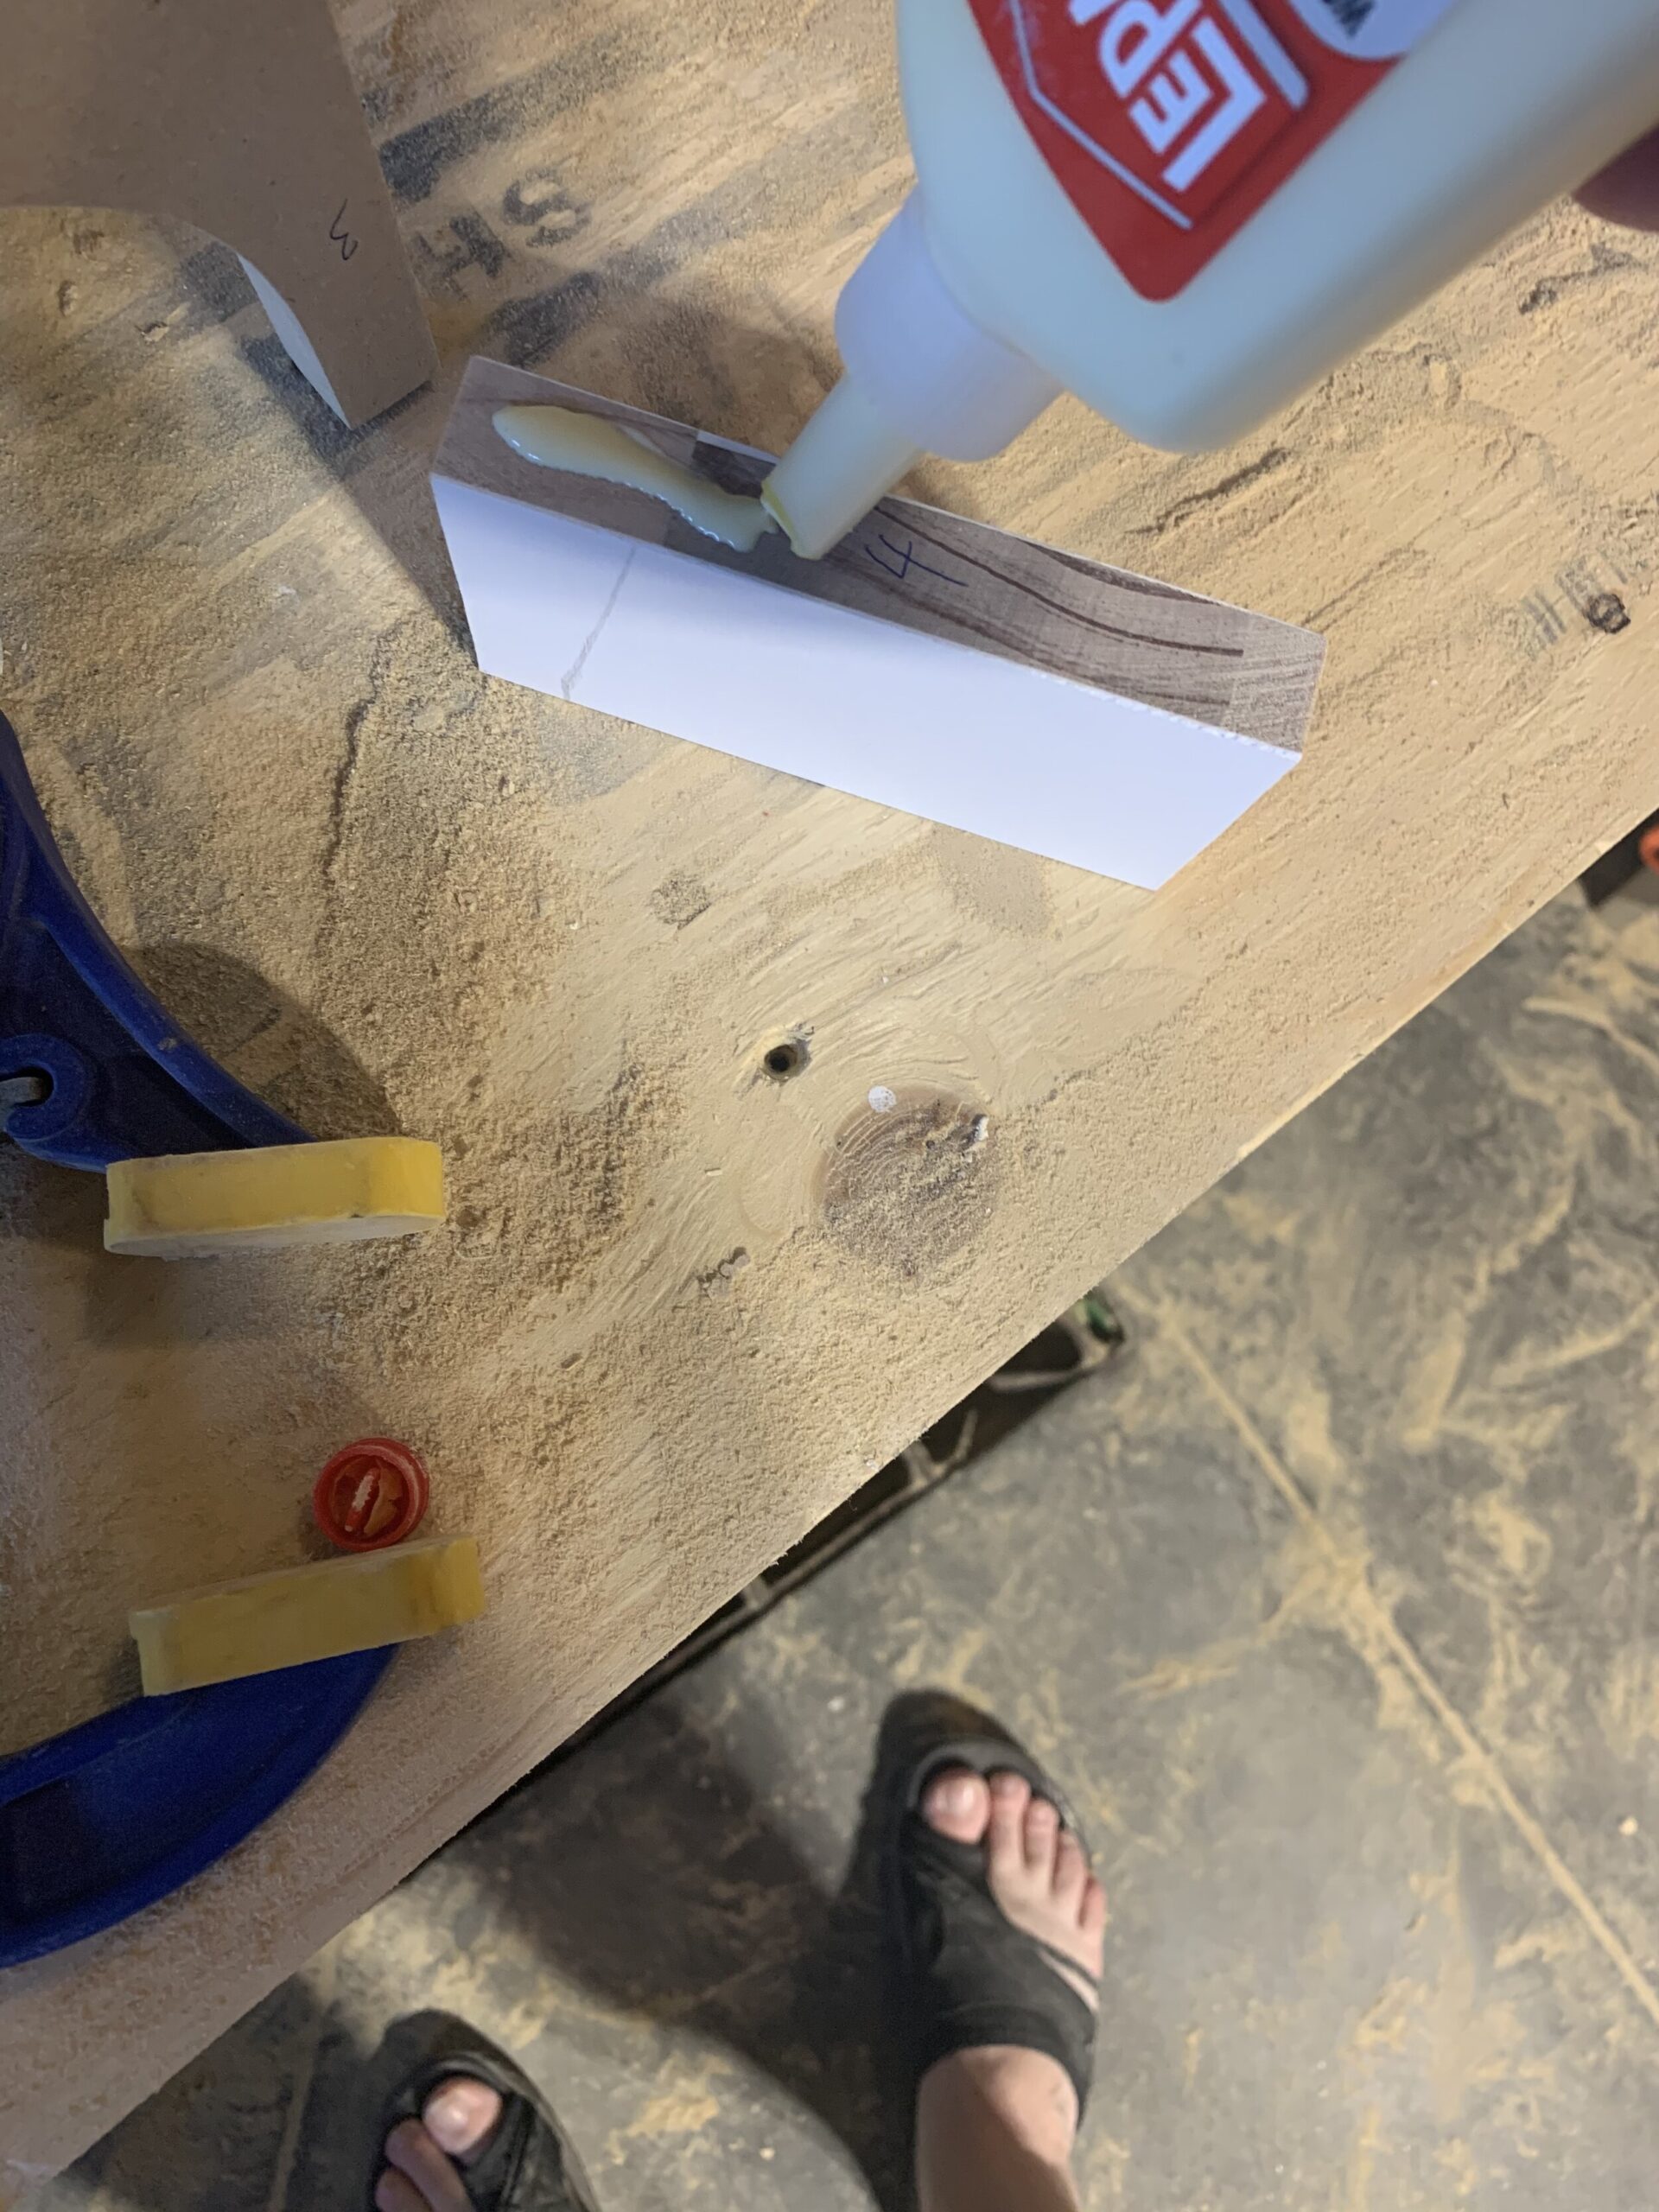
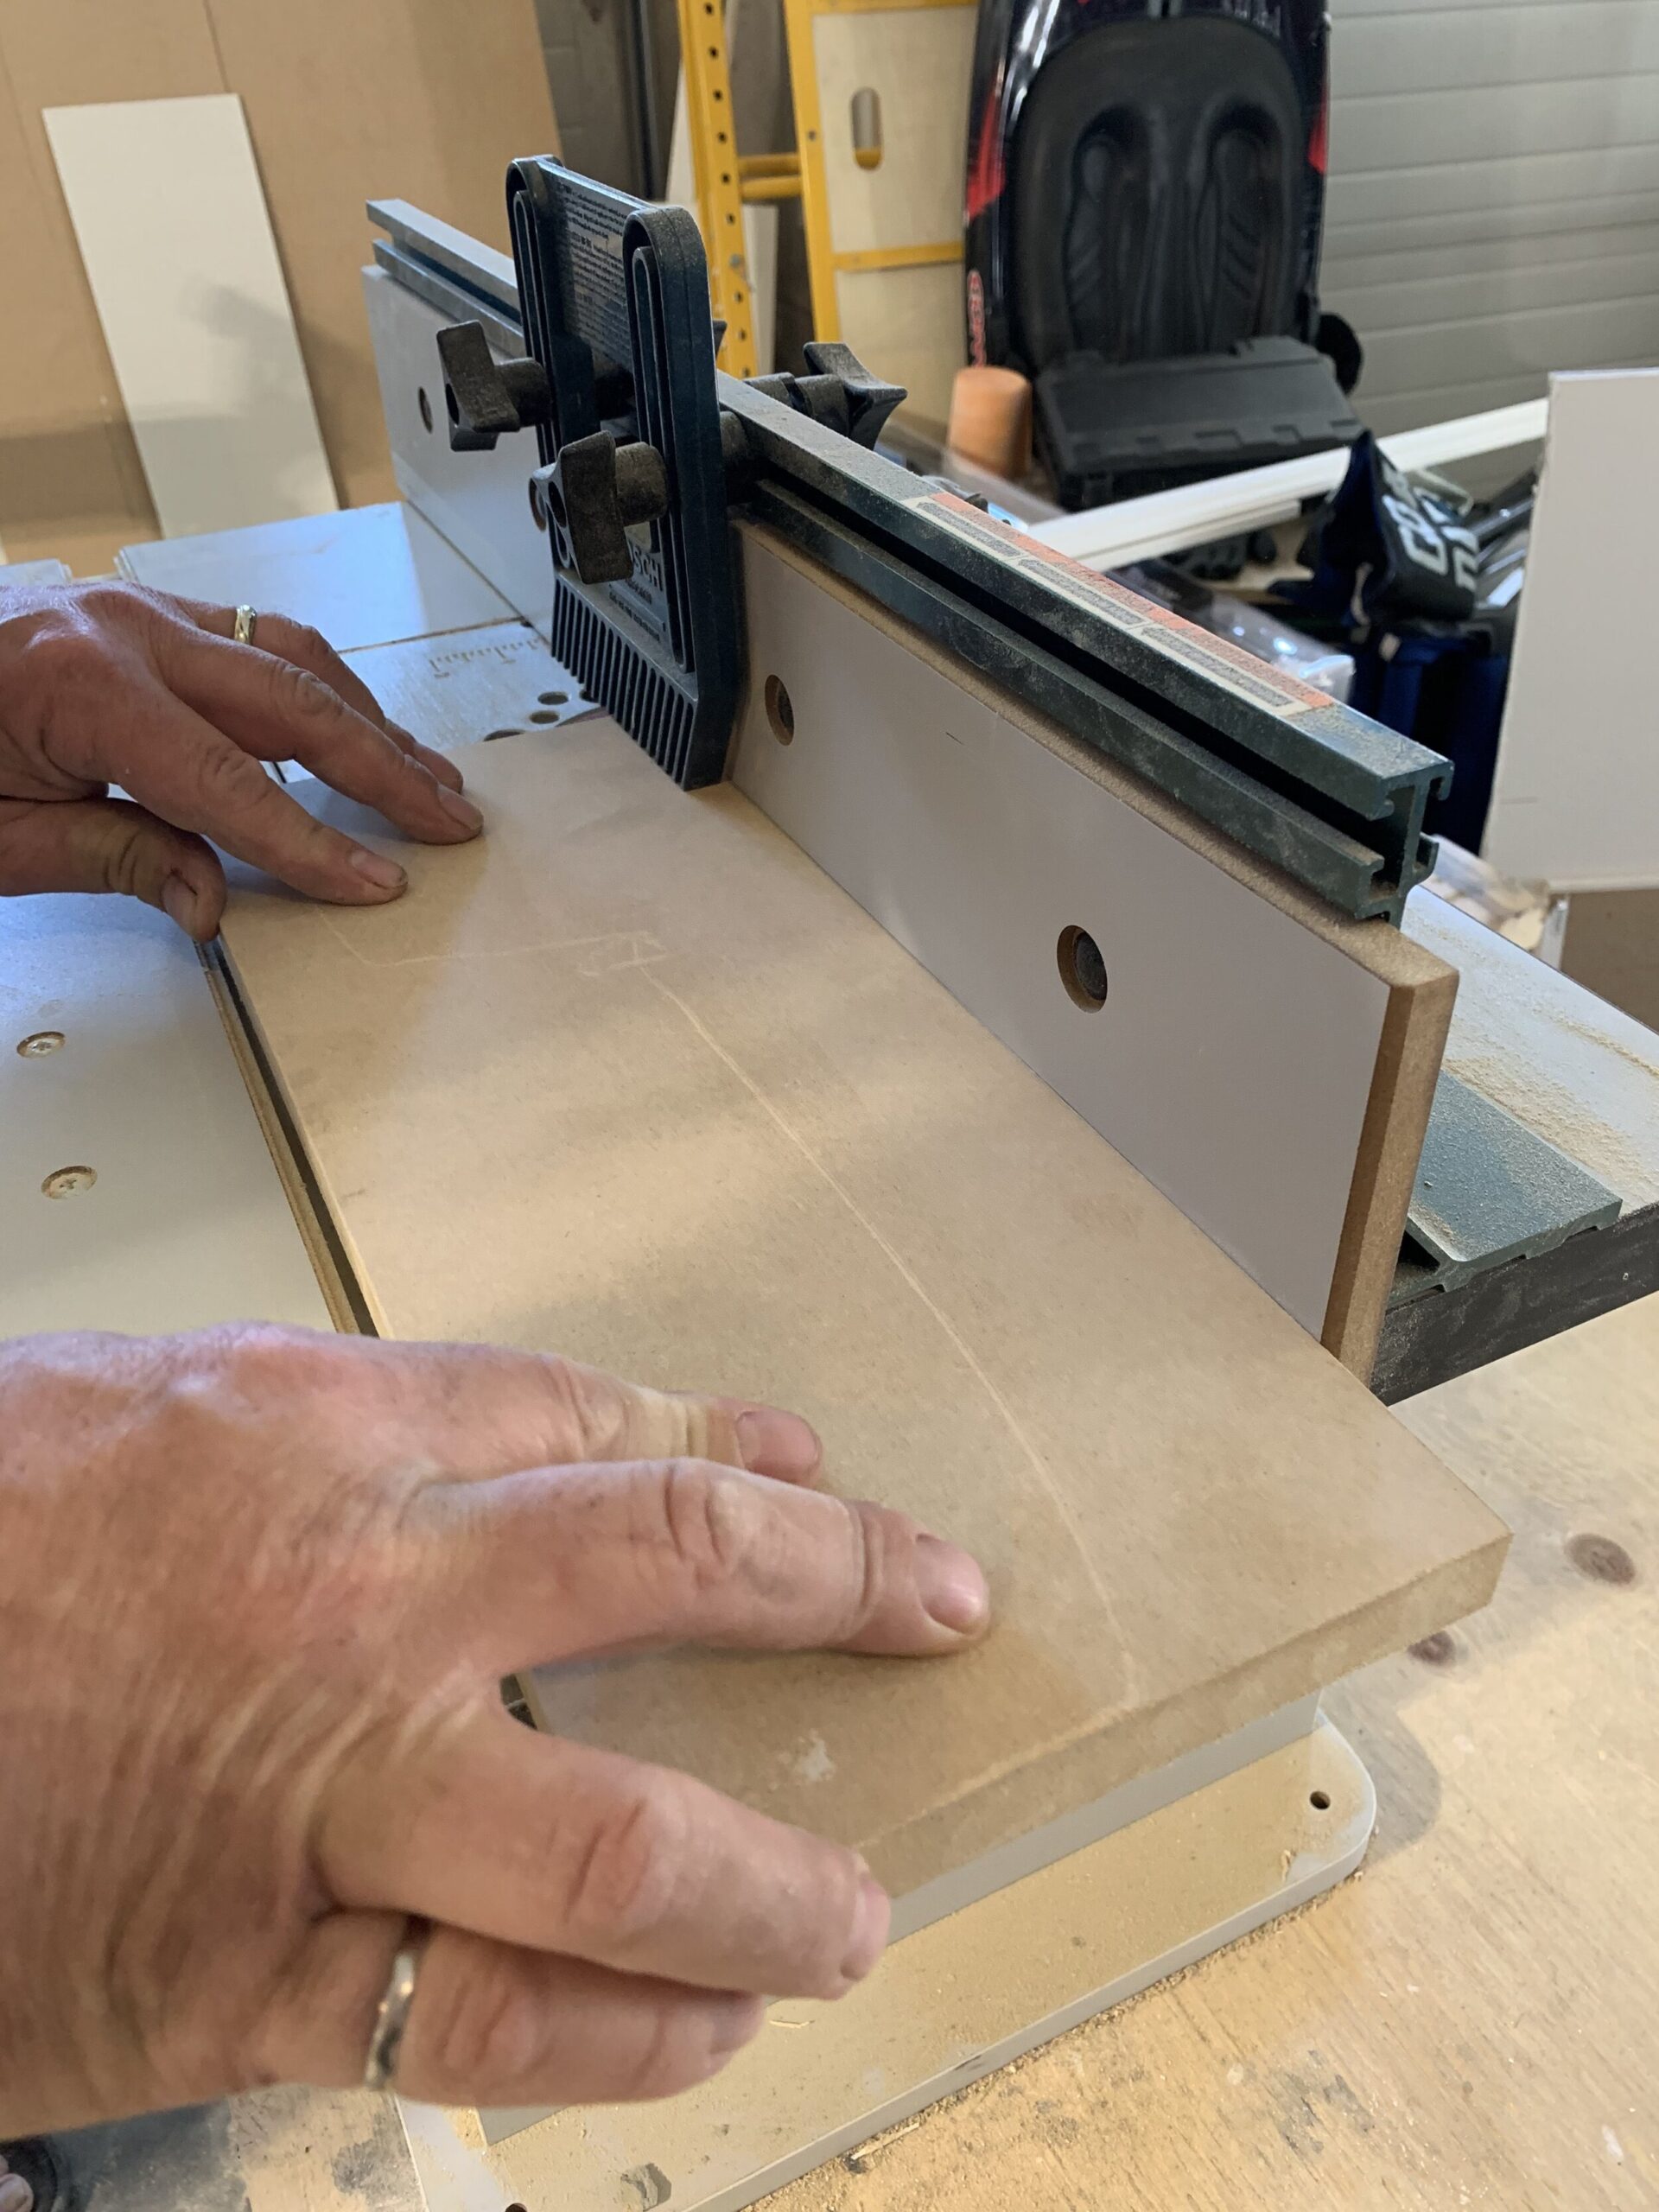
The existing vanity was just plain melamine on the side, it’s like someone forgot to put the finished panel on. So I knew I wanted a panel on the side that I could paint, and I also wanted it to extend past the toe kick so it provided a “side” to the toe kick area (more on that in a minute) We just cut a piece of 3/4″ MDF that we picked up at Home Depot to size and used an ⅛” roundover bit on our router to round the edges, which is similar to how the shaker doors were finished by the cabinet company.
We did mess this up, however. We measured the existing side of the vanity with the doors off, and cut the panel to fit that. However, with the doors on, the front of the vanity is actually ¾” deeper and so we cut it too small!
Rather than cut a new piece, we cut a ¾” strip on the table saw and glued and clamped it to the end. After filling, sanding and painting, I’m really hoping the seam disappears! It is on the side next to the toilet so really not very visible so I think it will be ok. (We were sure to take into account the extra thickness of this additional side panel when we were giving the countertop company measurements for the counter, thank goodness!)
At any rate, having the side panel instantly helped the vanity look and gave it a whole new look!
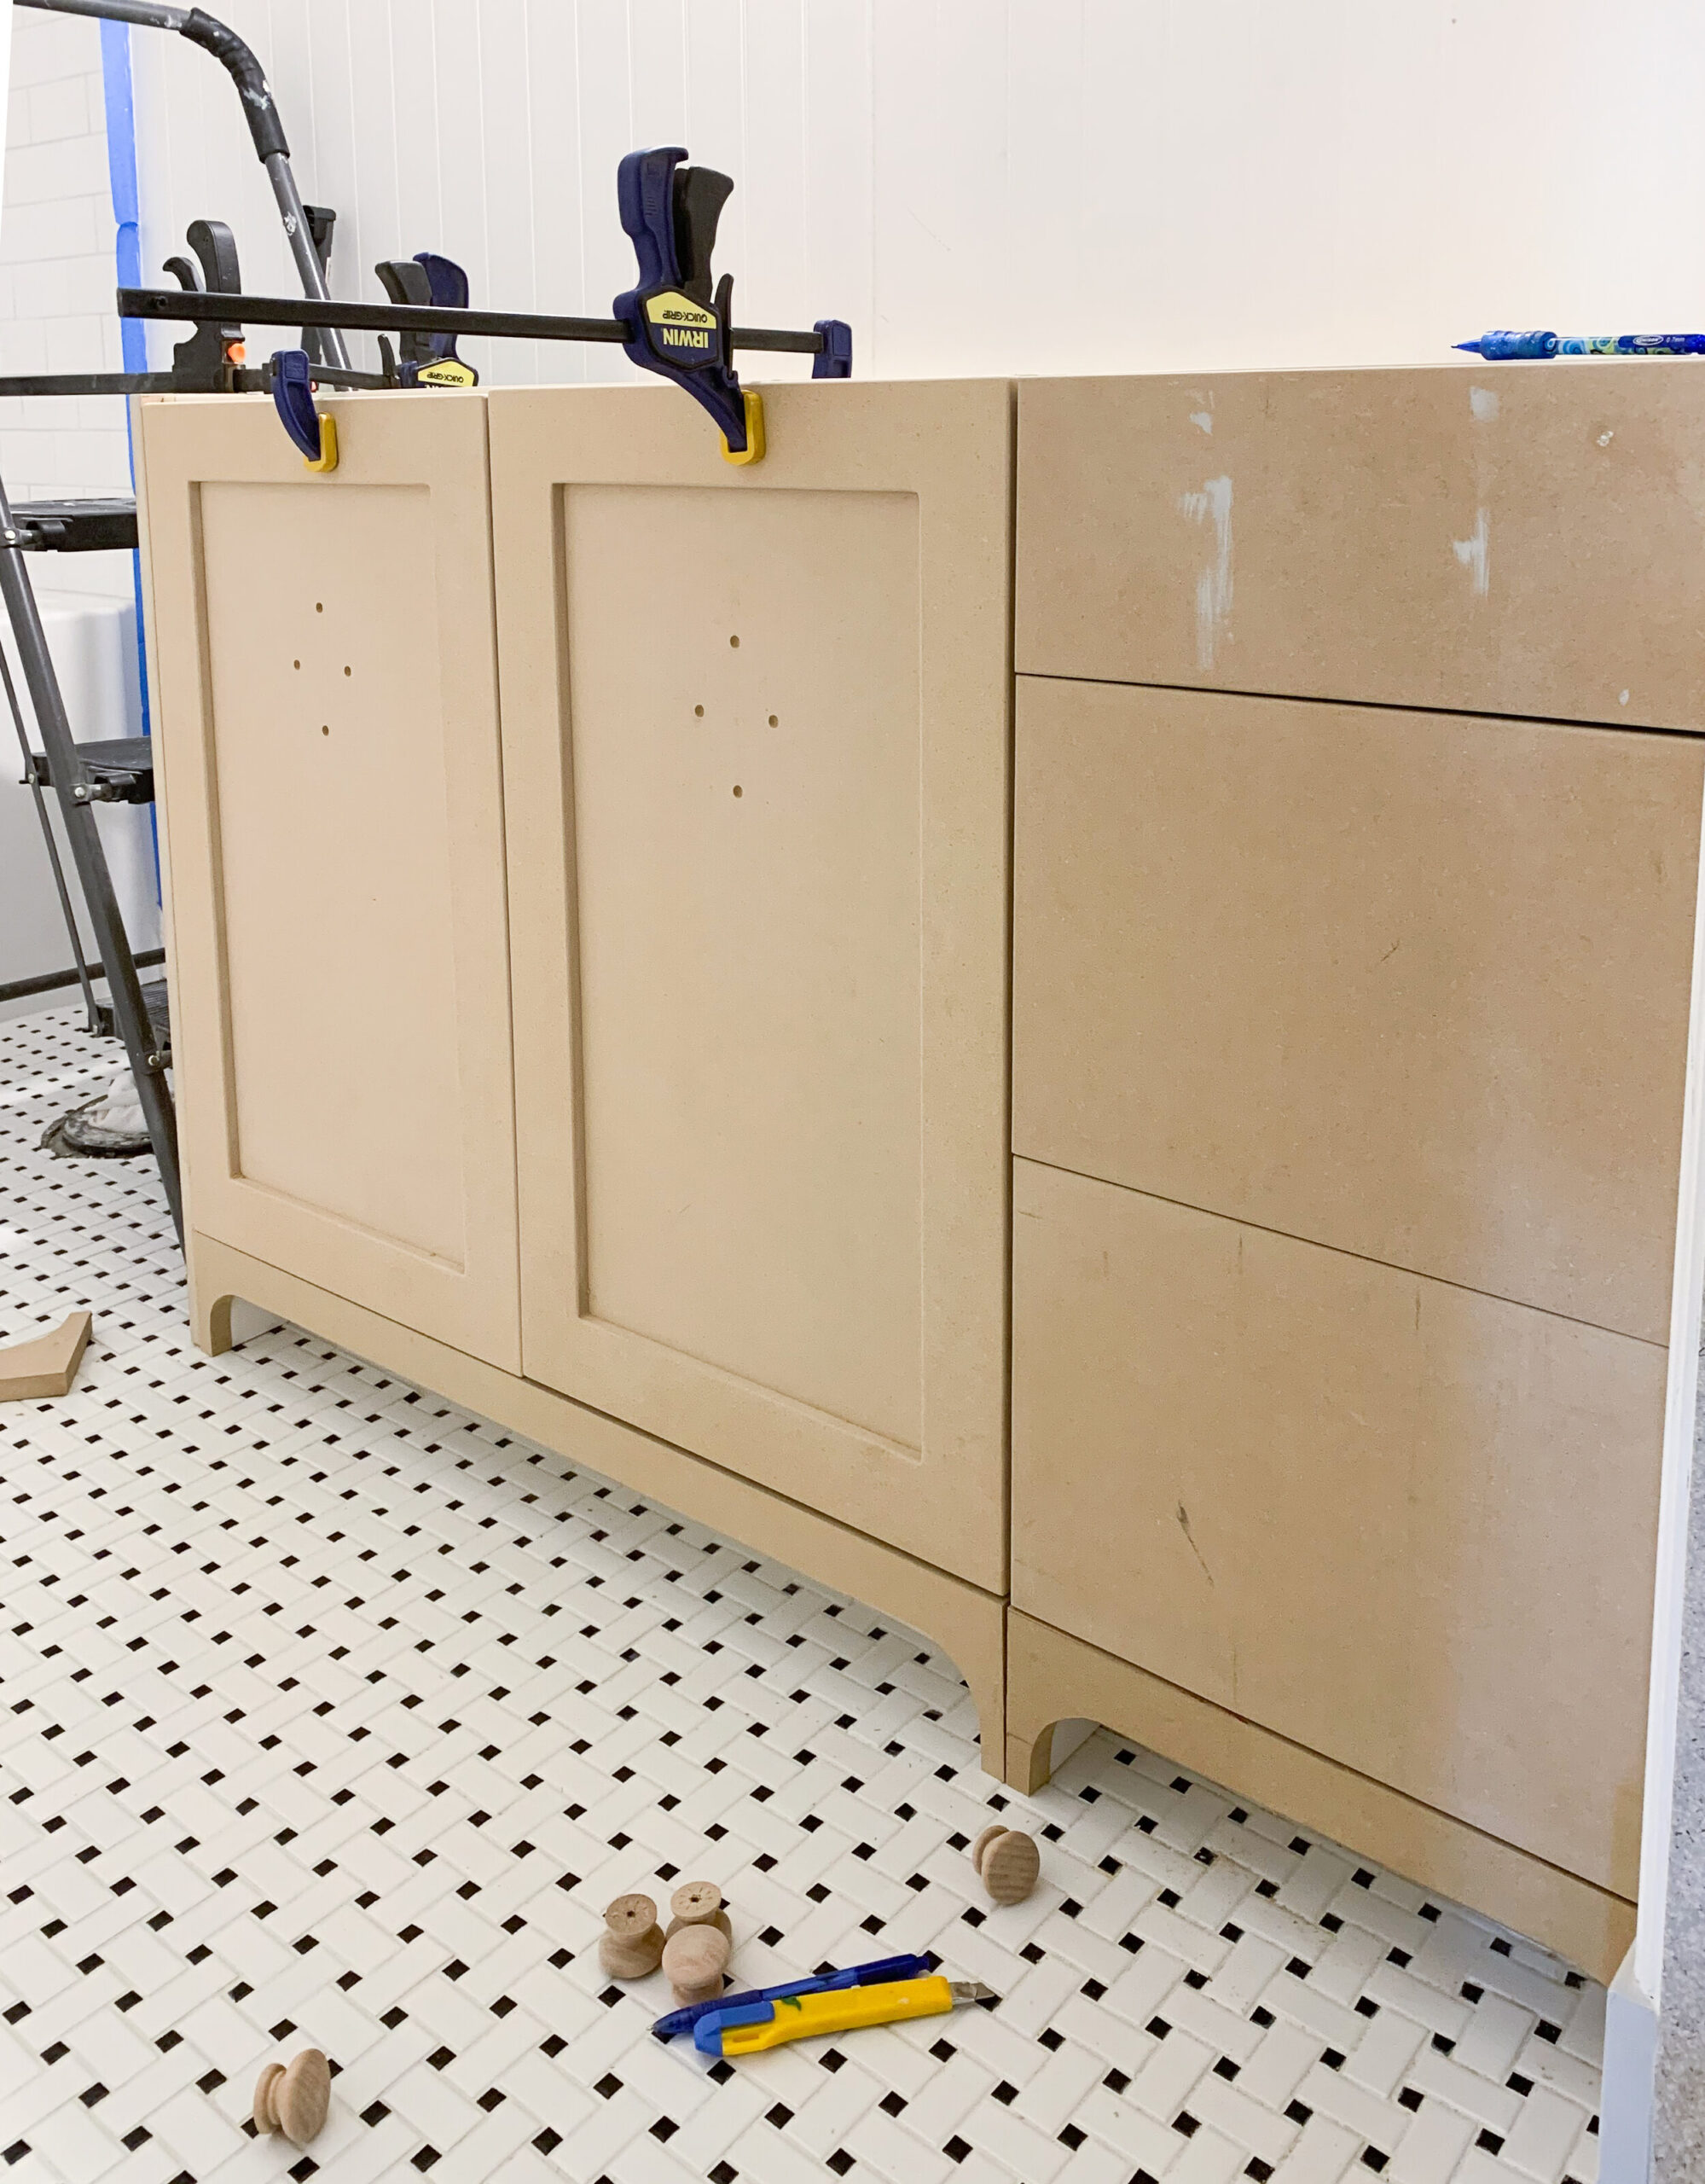
Adding Feet to our Existing Vanity
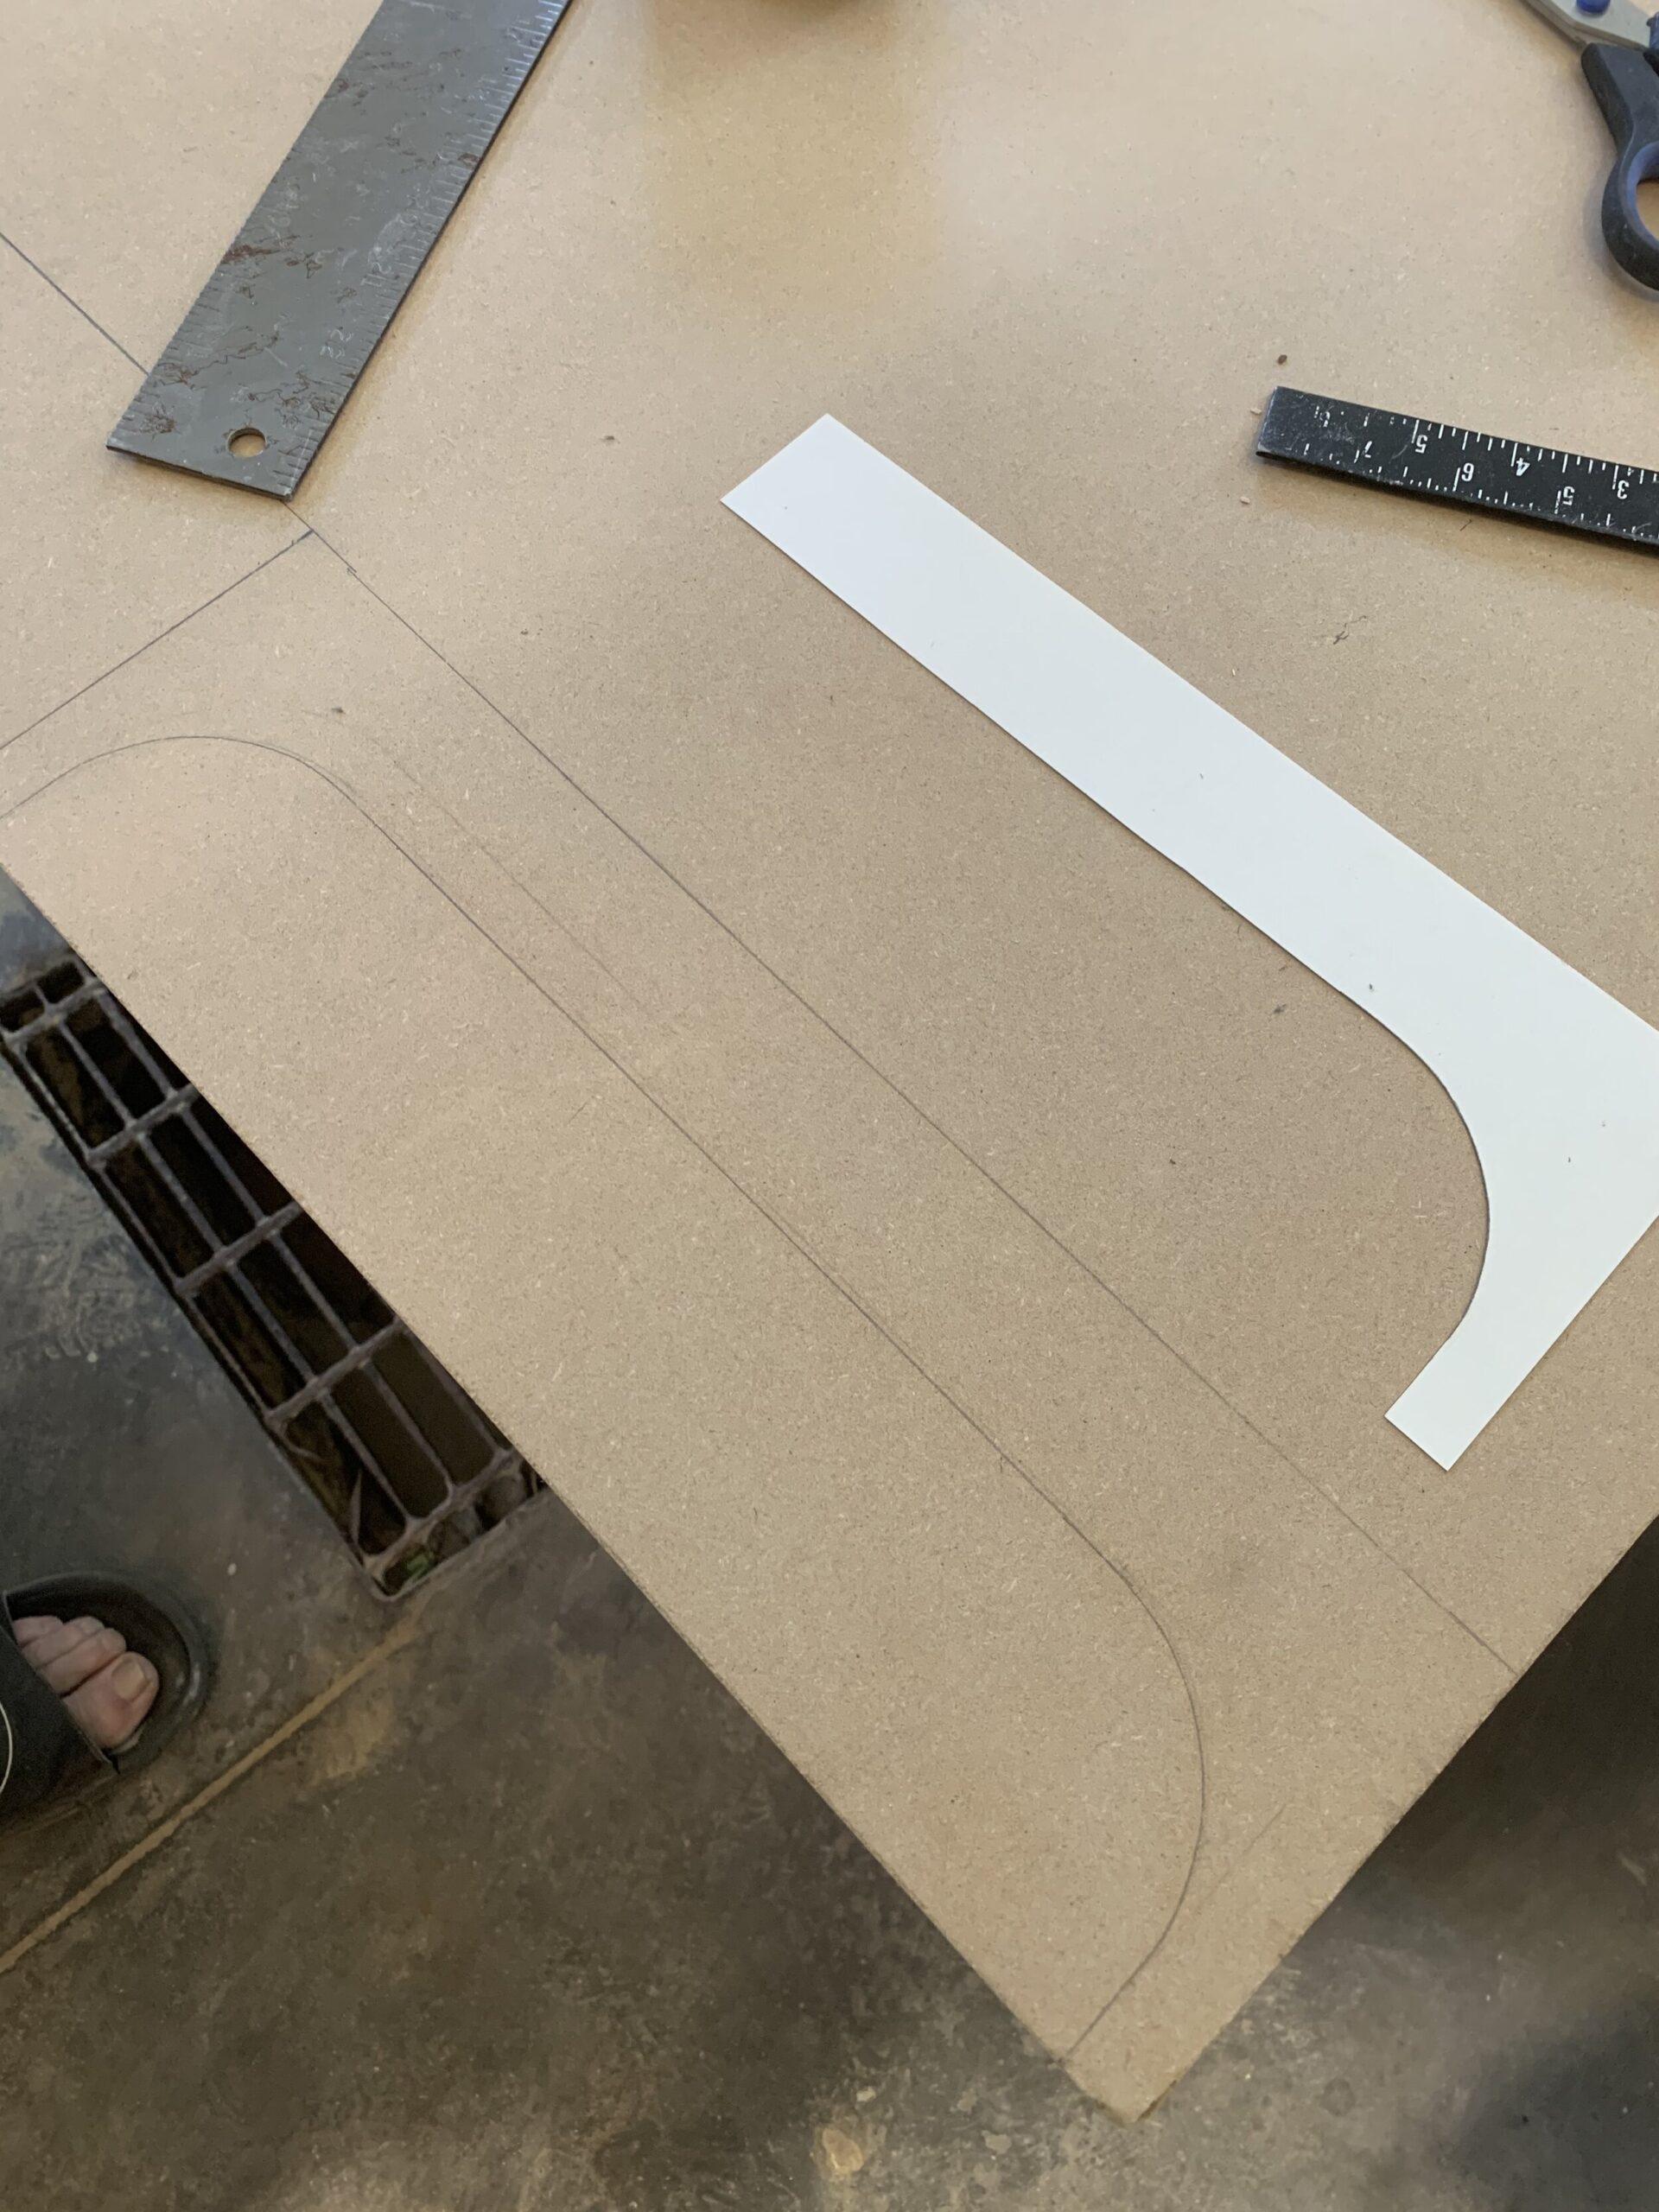
After the side panel was on, we started to think about feet. I won’t go through the iterations of feet designs that we went through (if you saw us working through this on Instagram you might have seen this!) but let’s just say…. Had I taken a minute to watch a few youtube videos on how people make cabinet feet/ custom toe kicks, I might have saved us a lot of time.
But I didn’t do that, I basically tried all the things until we came up with a way that works (and in retrospect, is the way that they are generally made, we just took some time to come to this realization on our own! Ooops!)
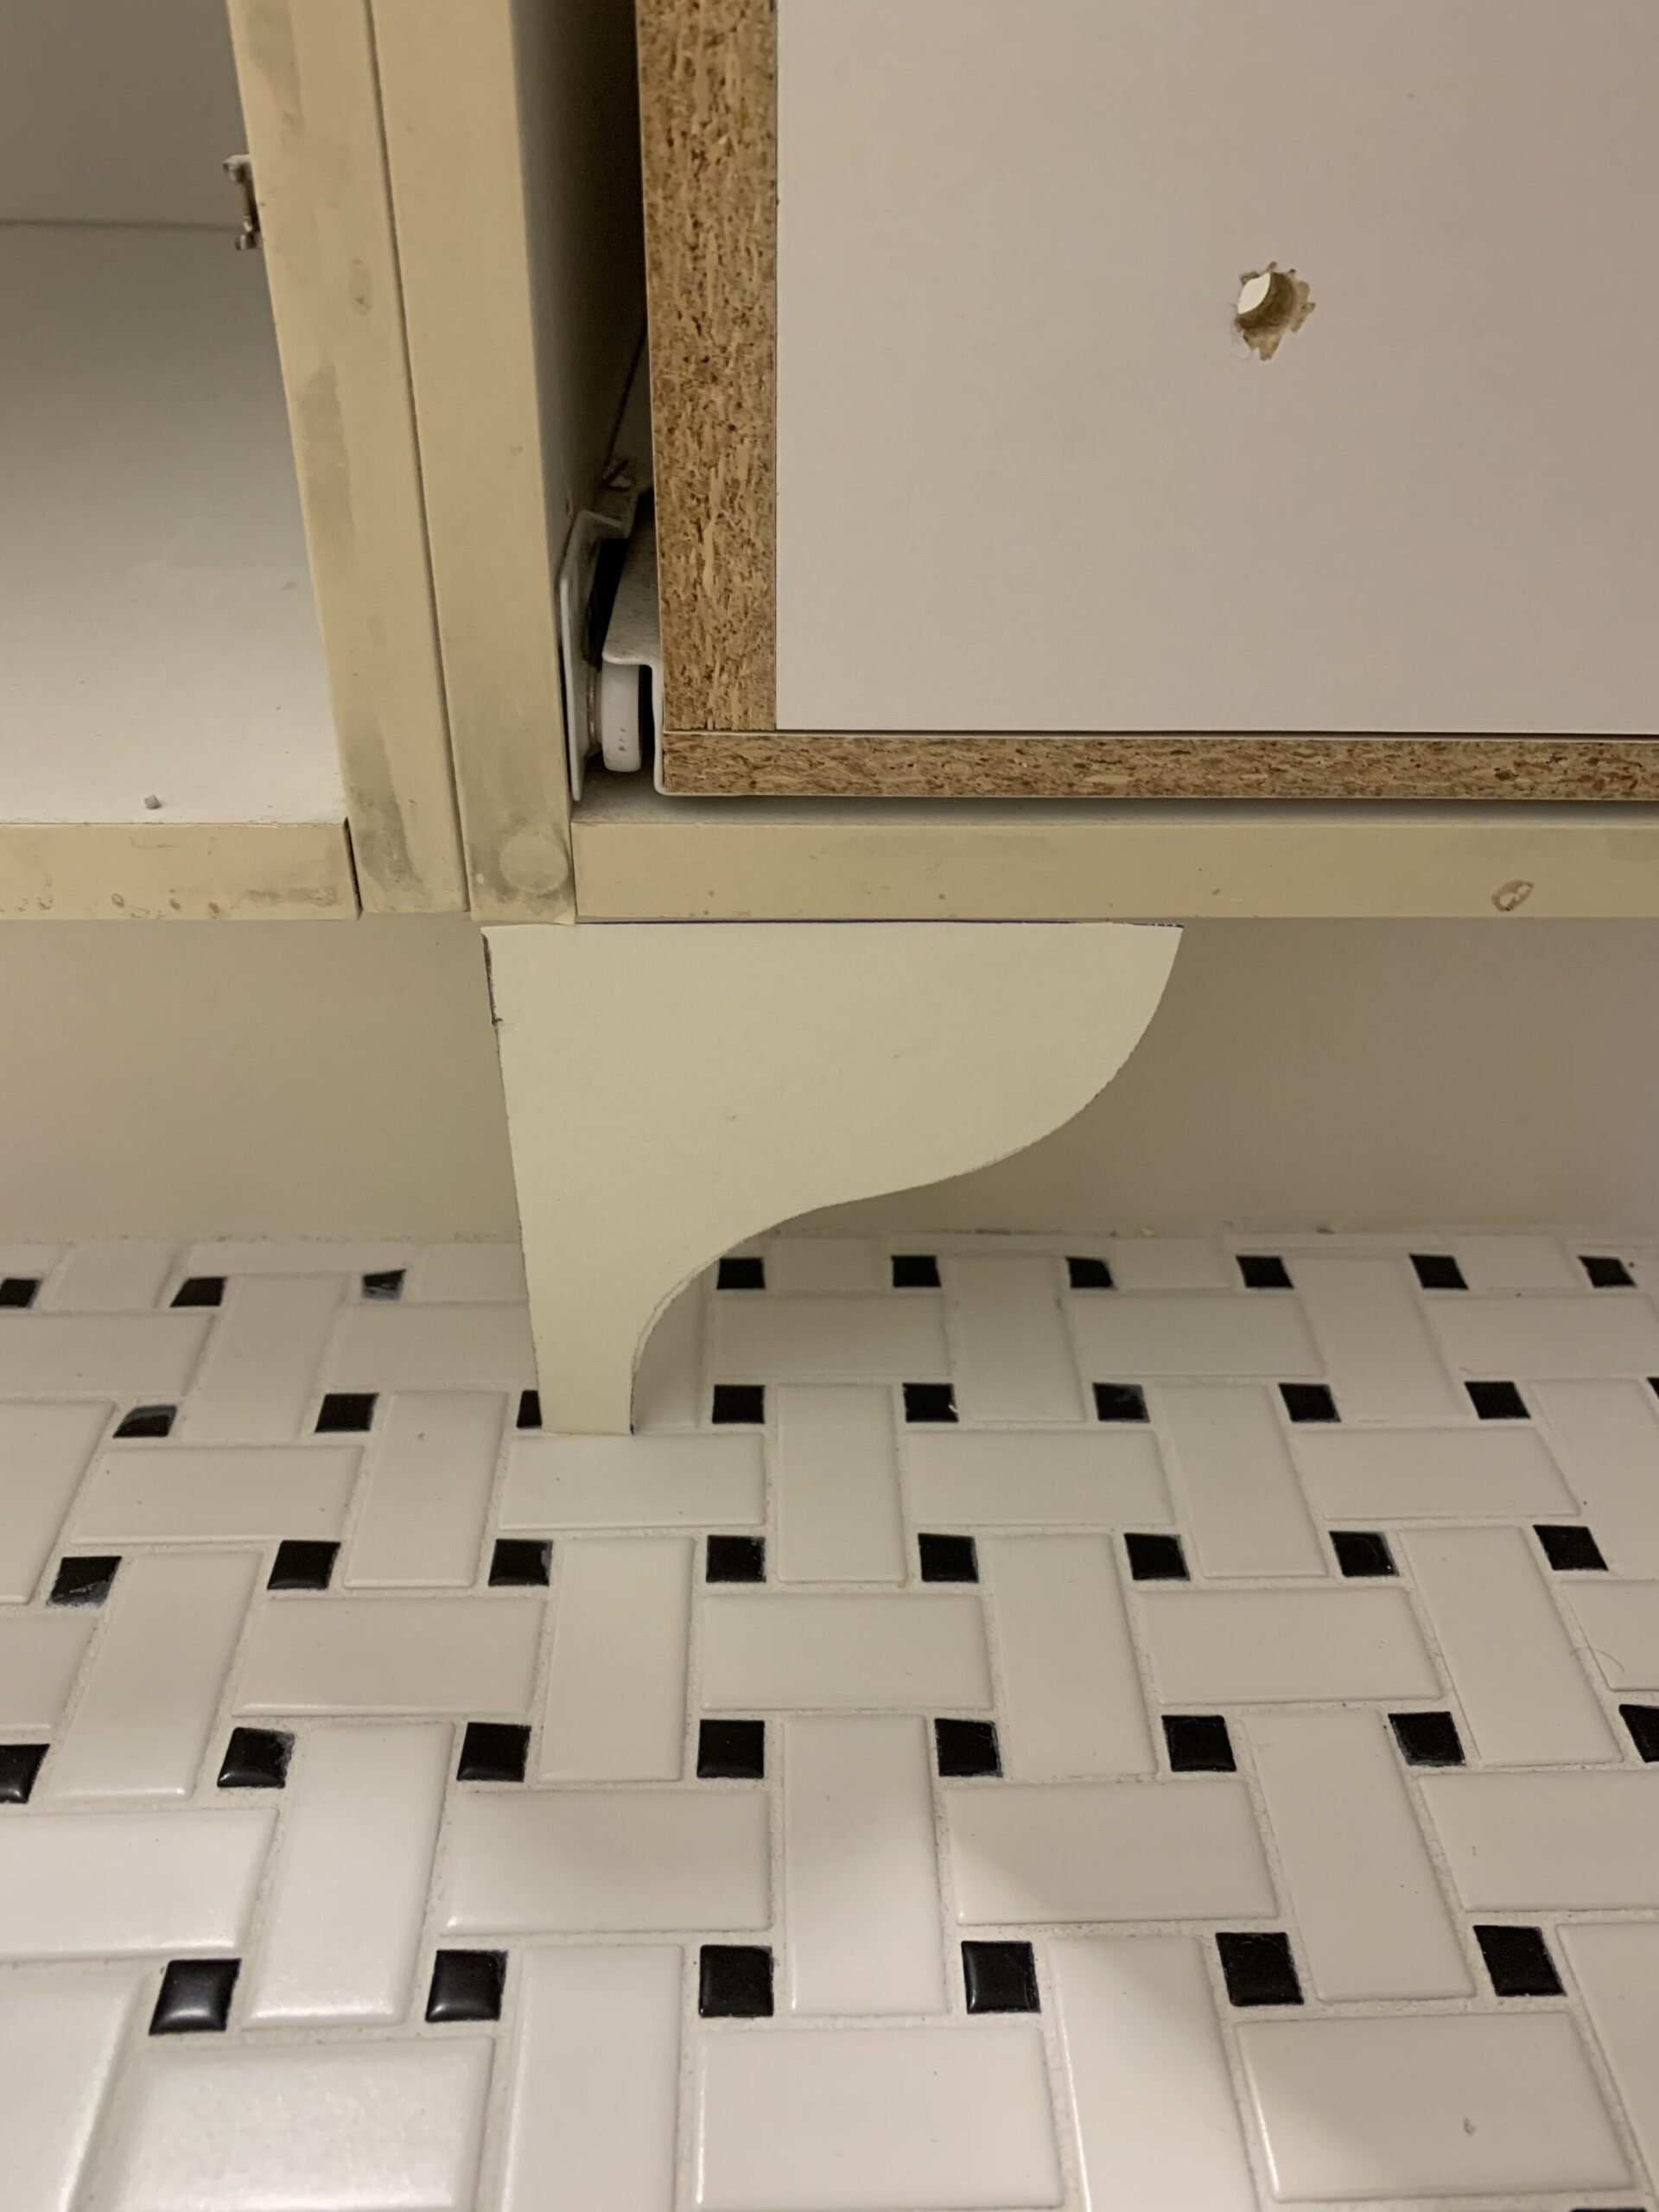
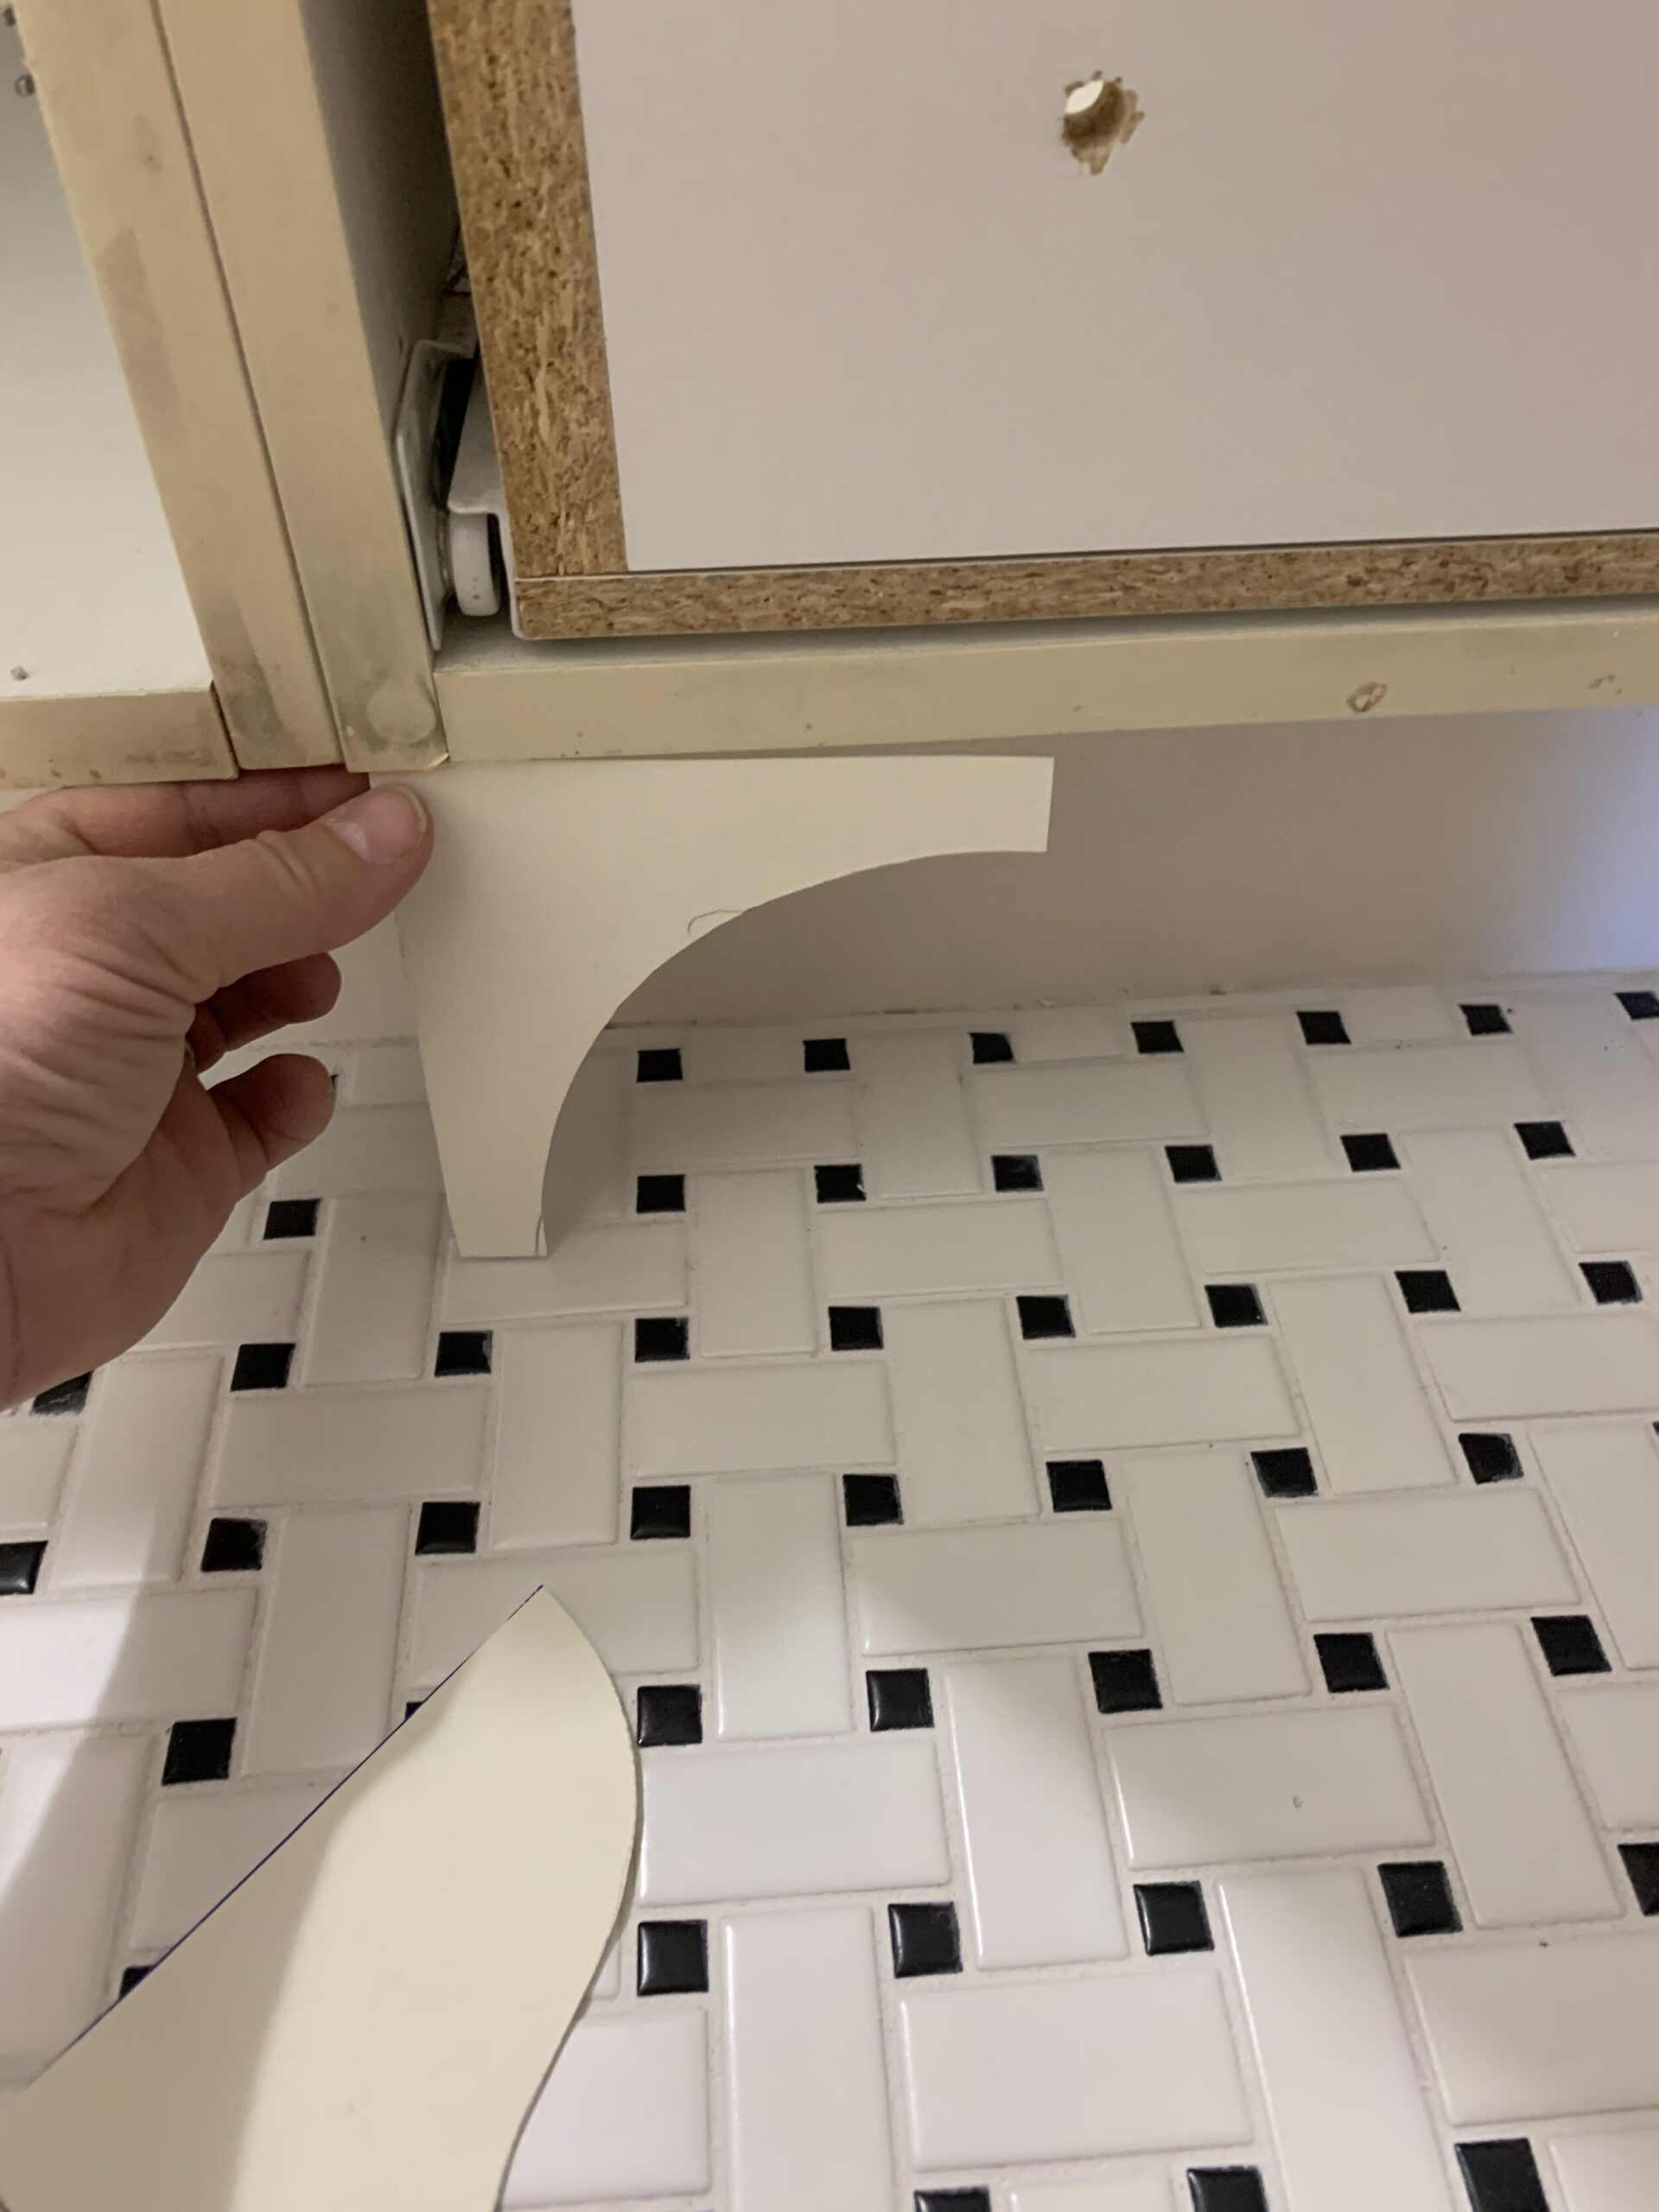
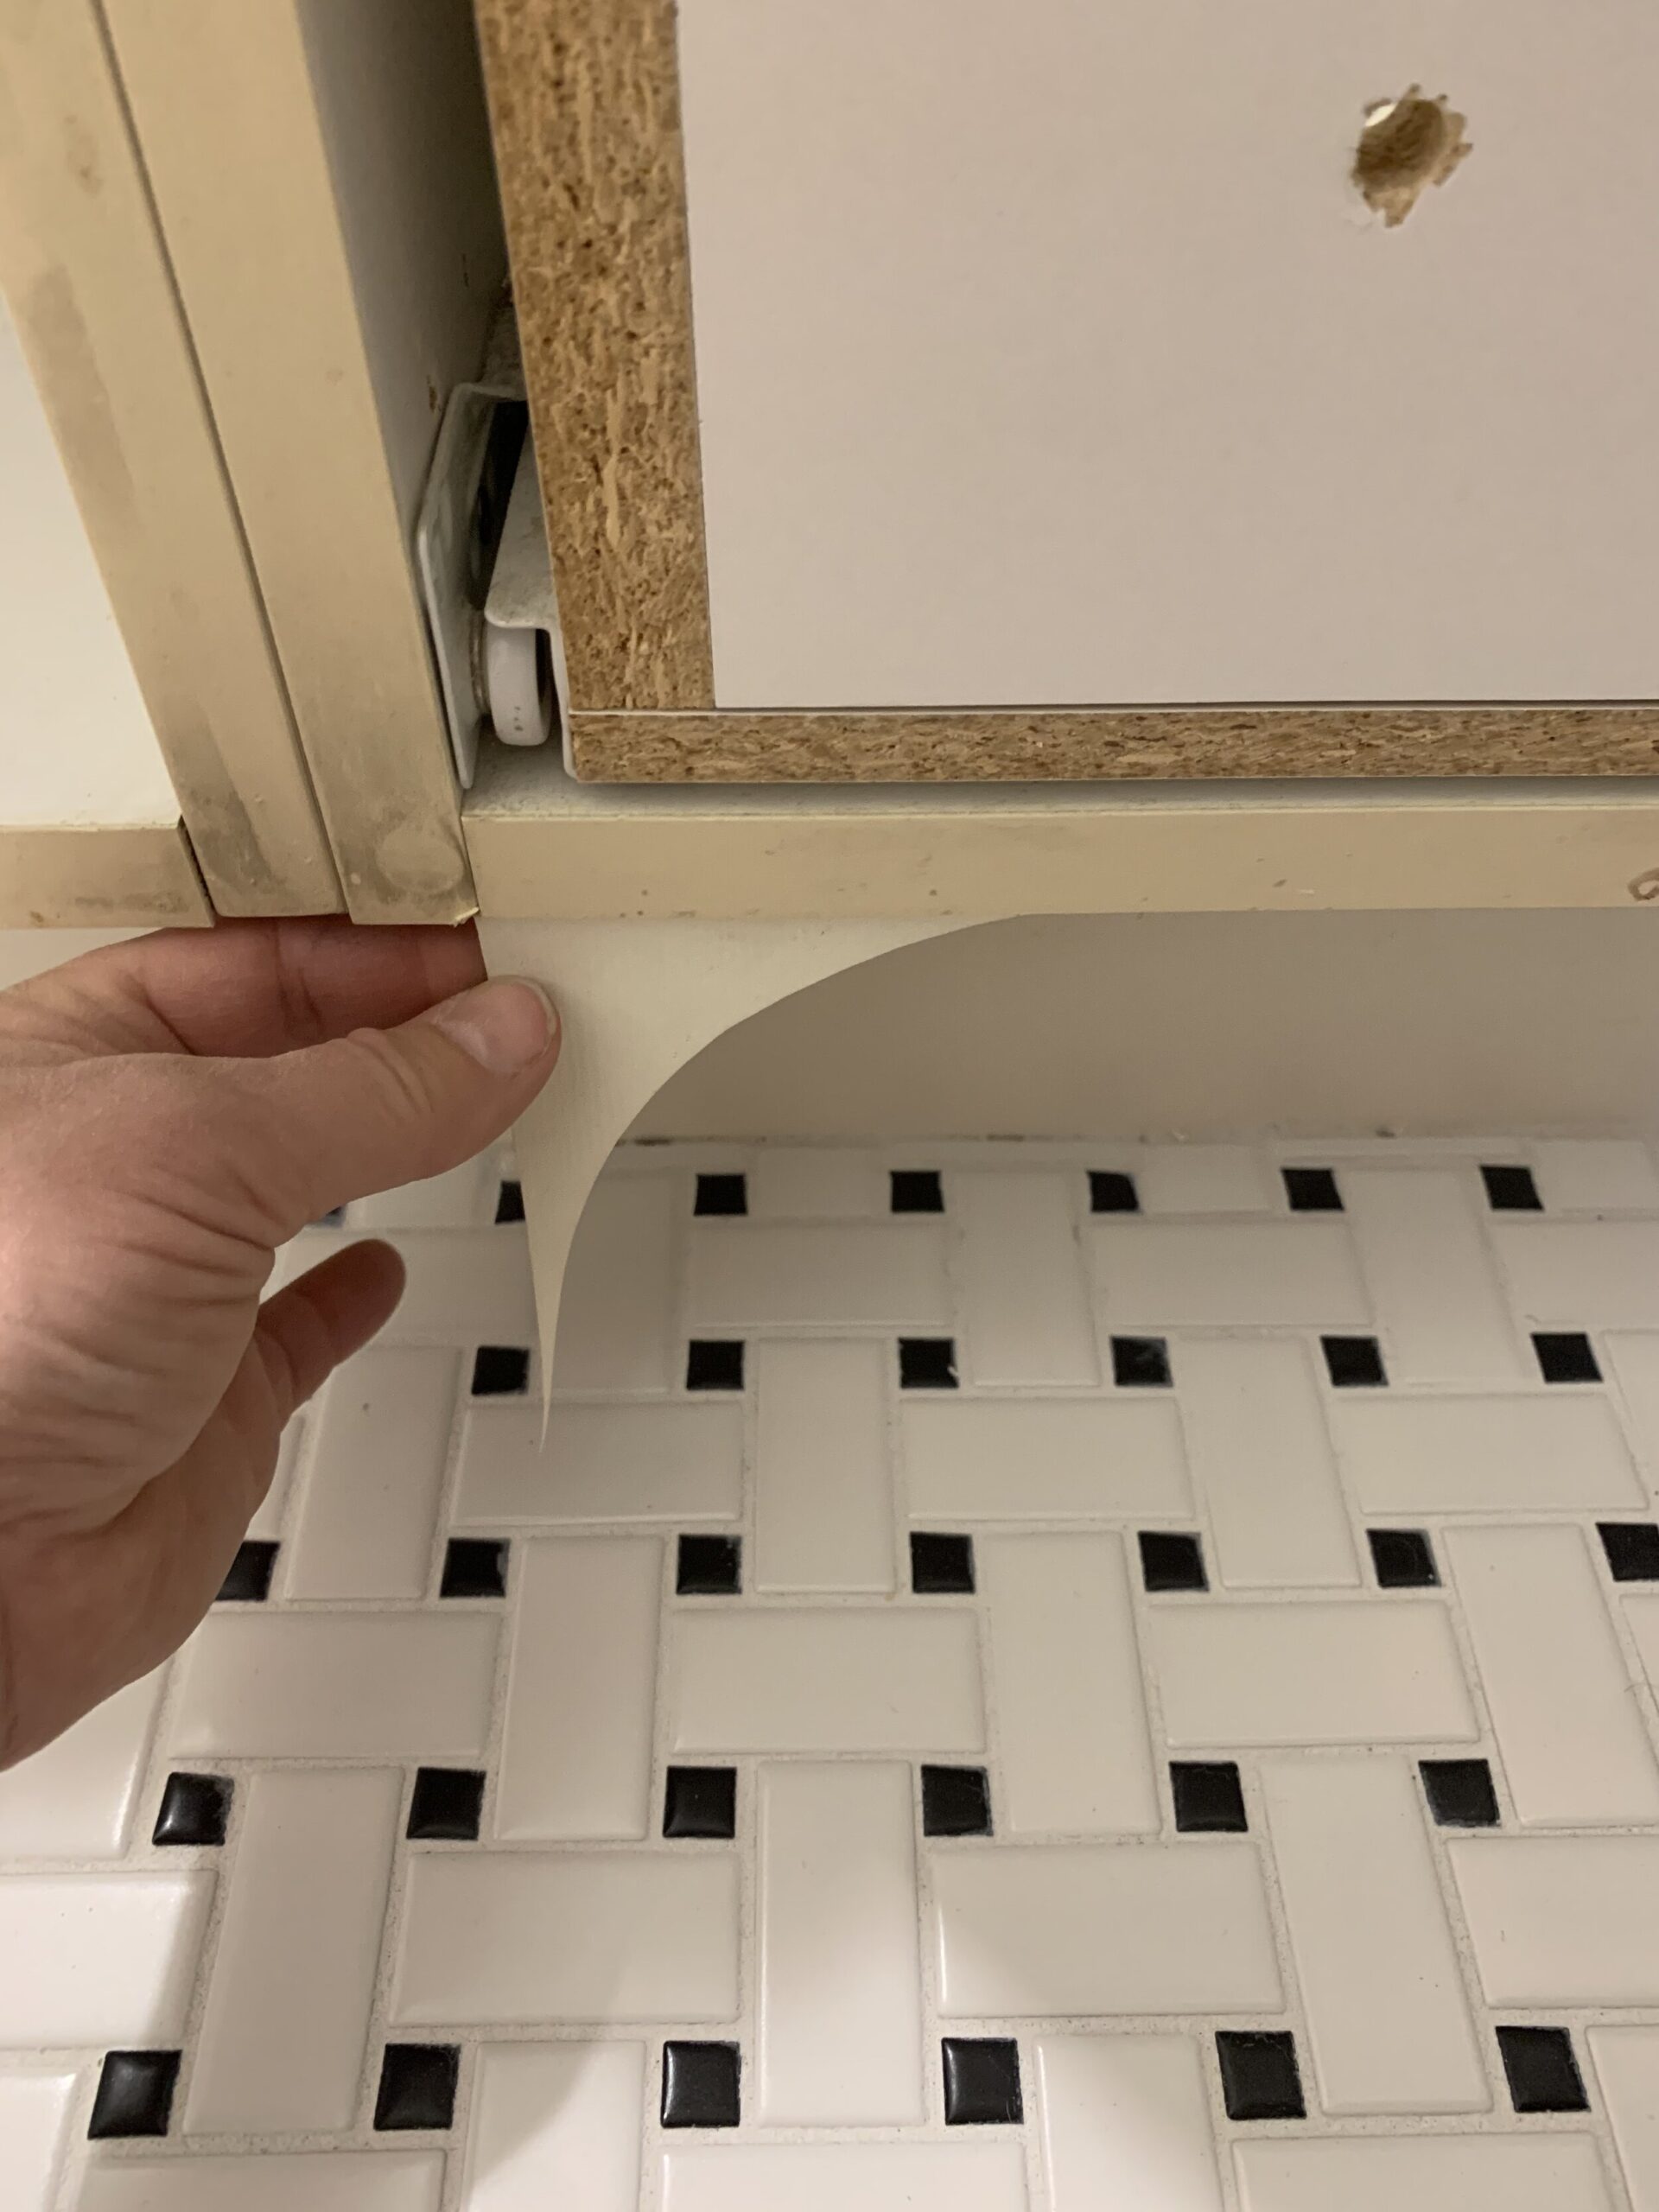
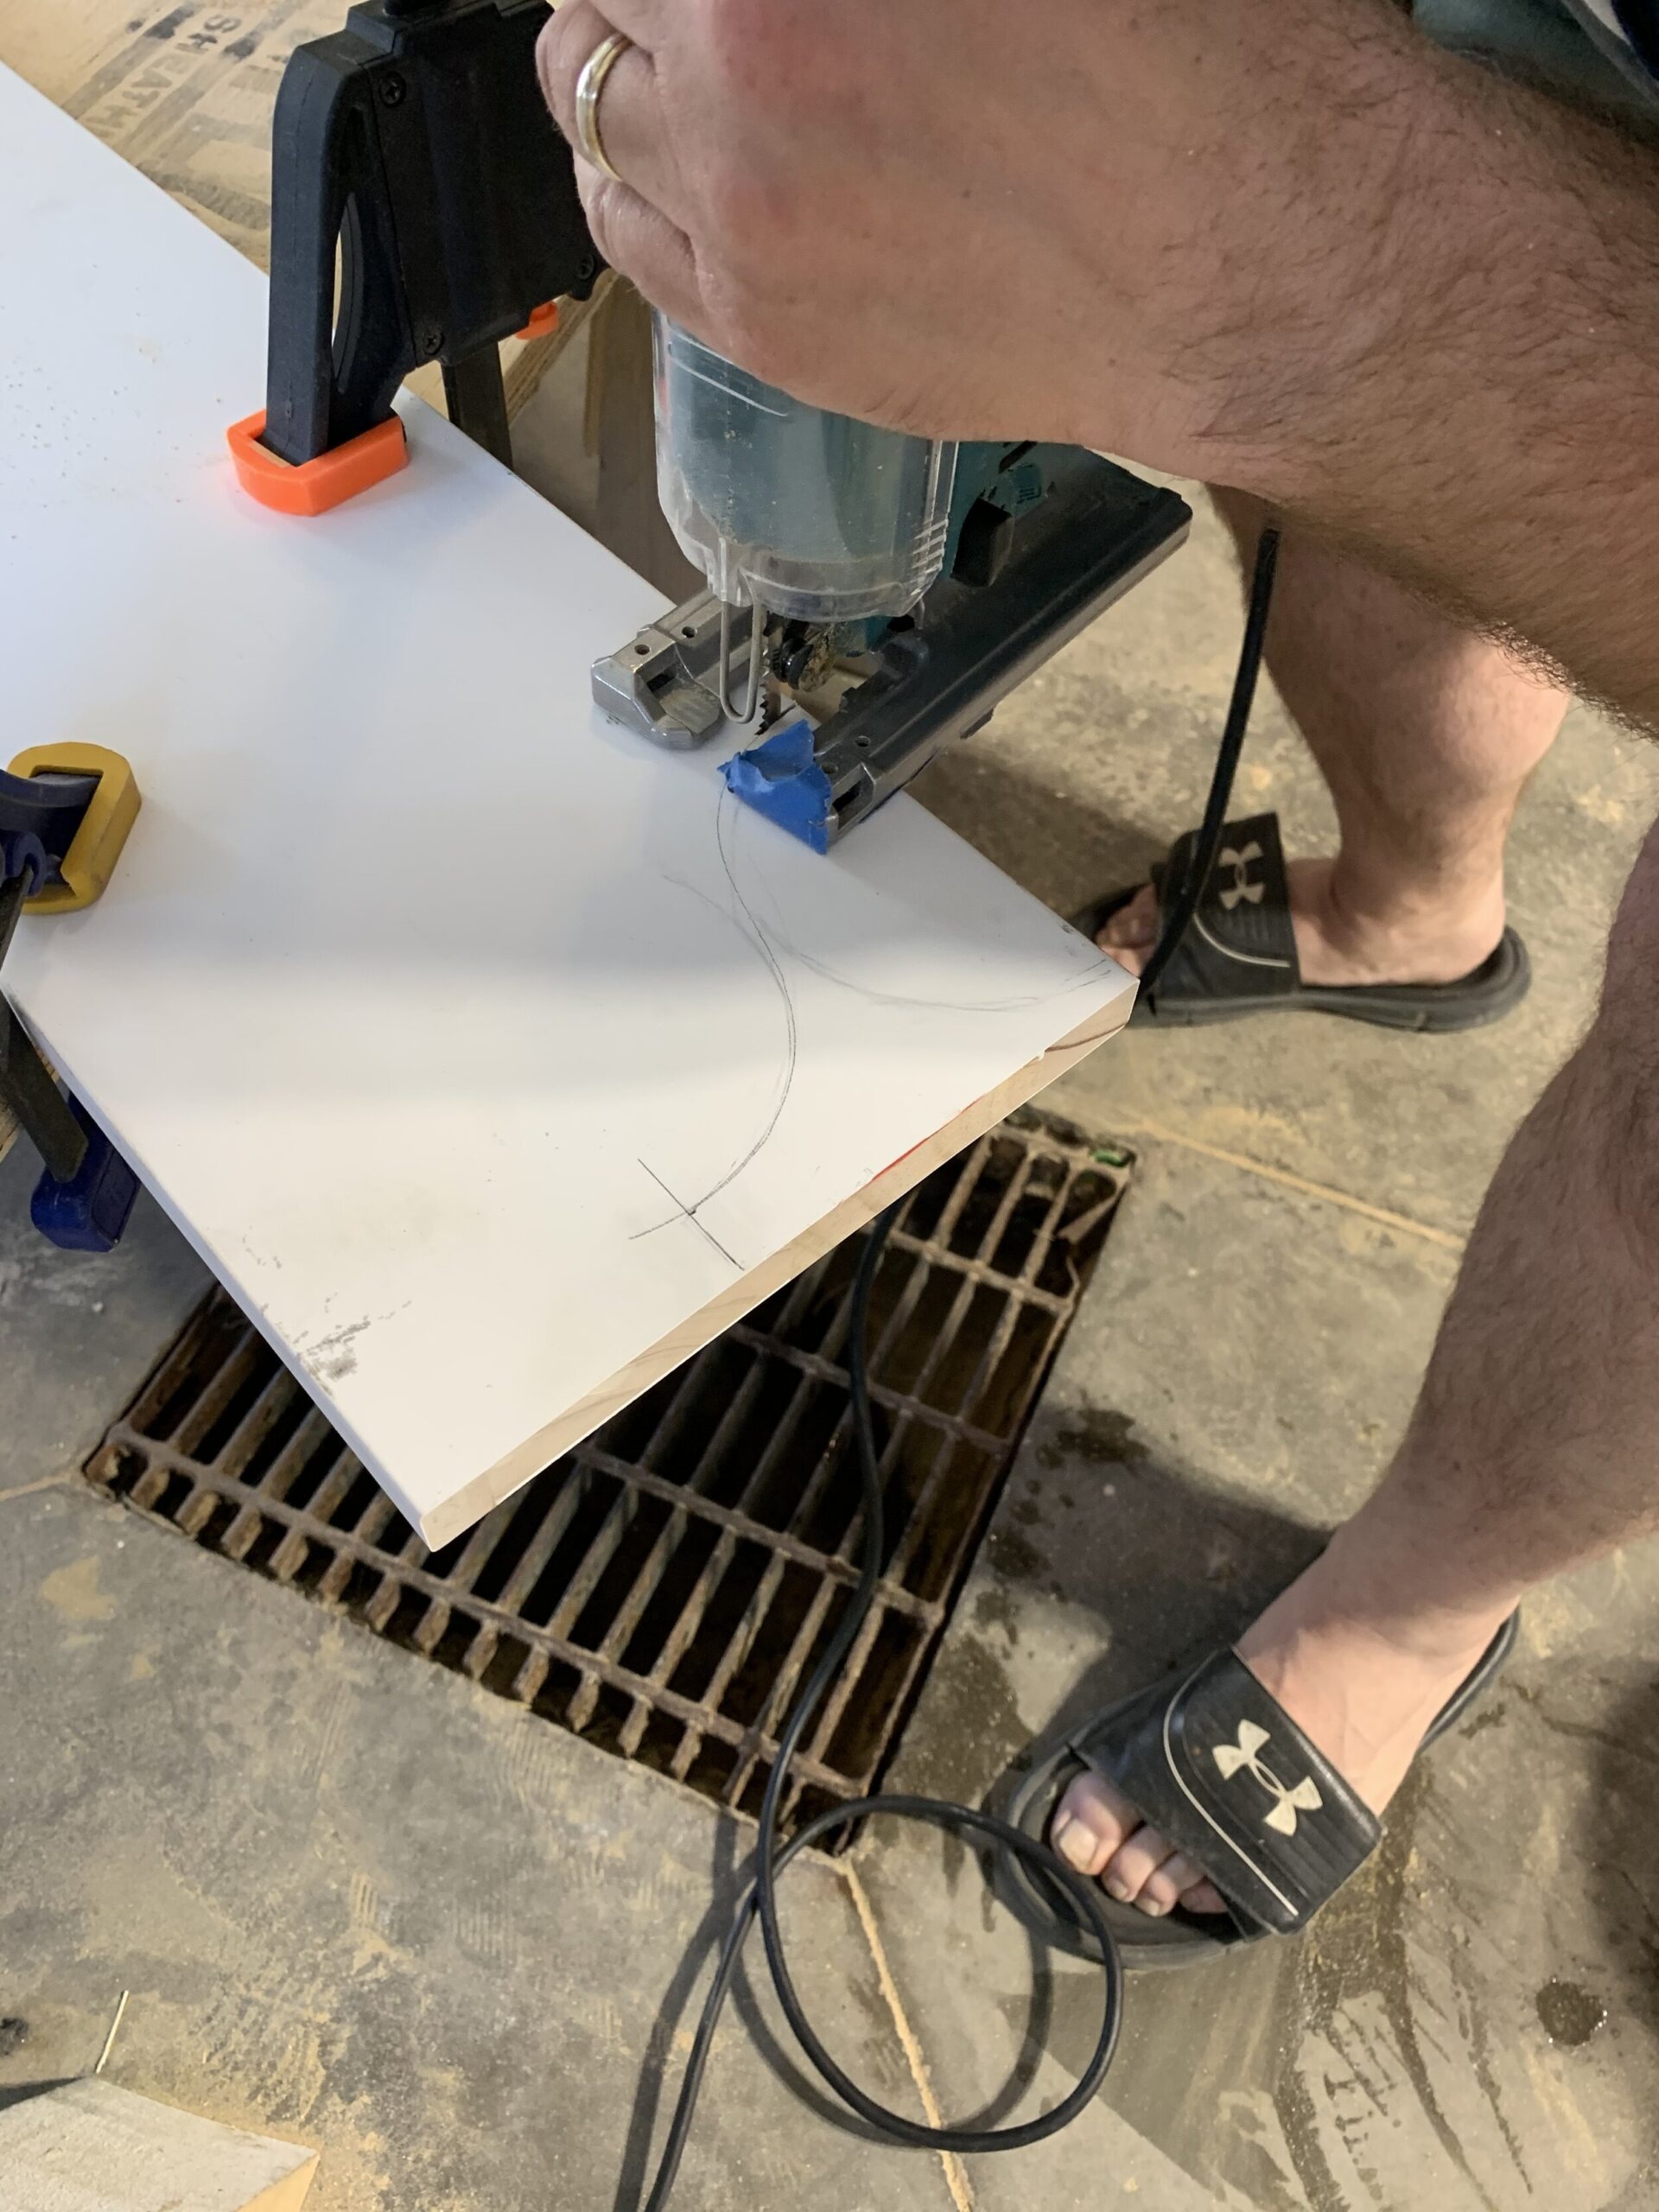
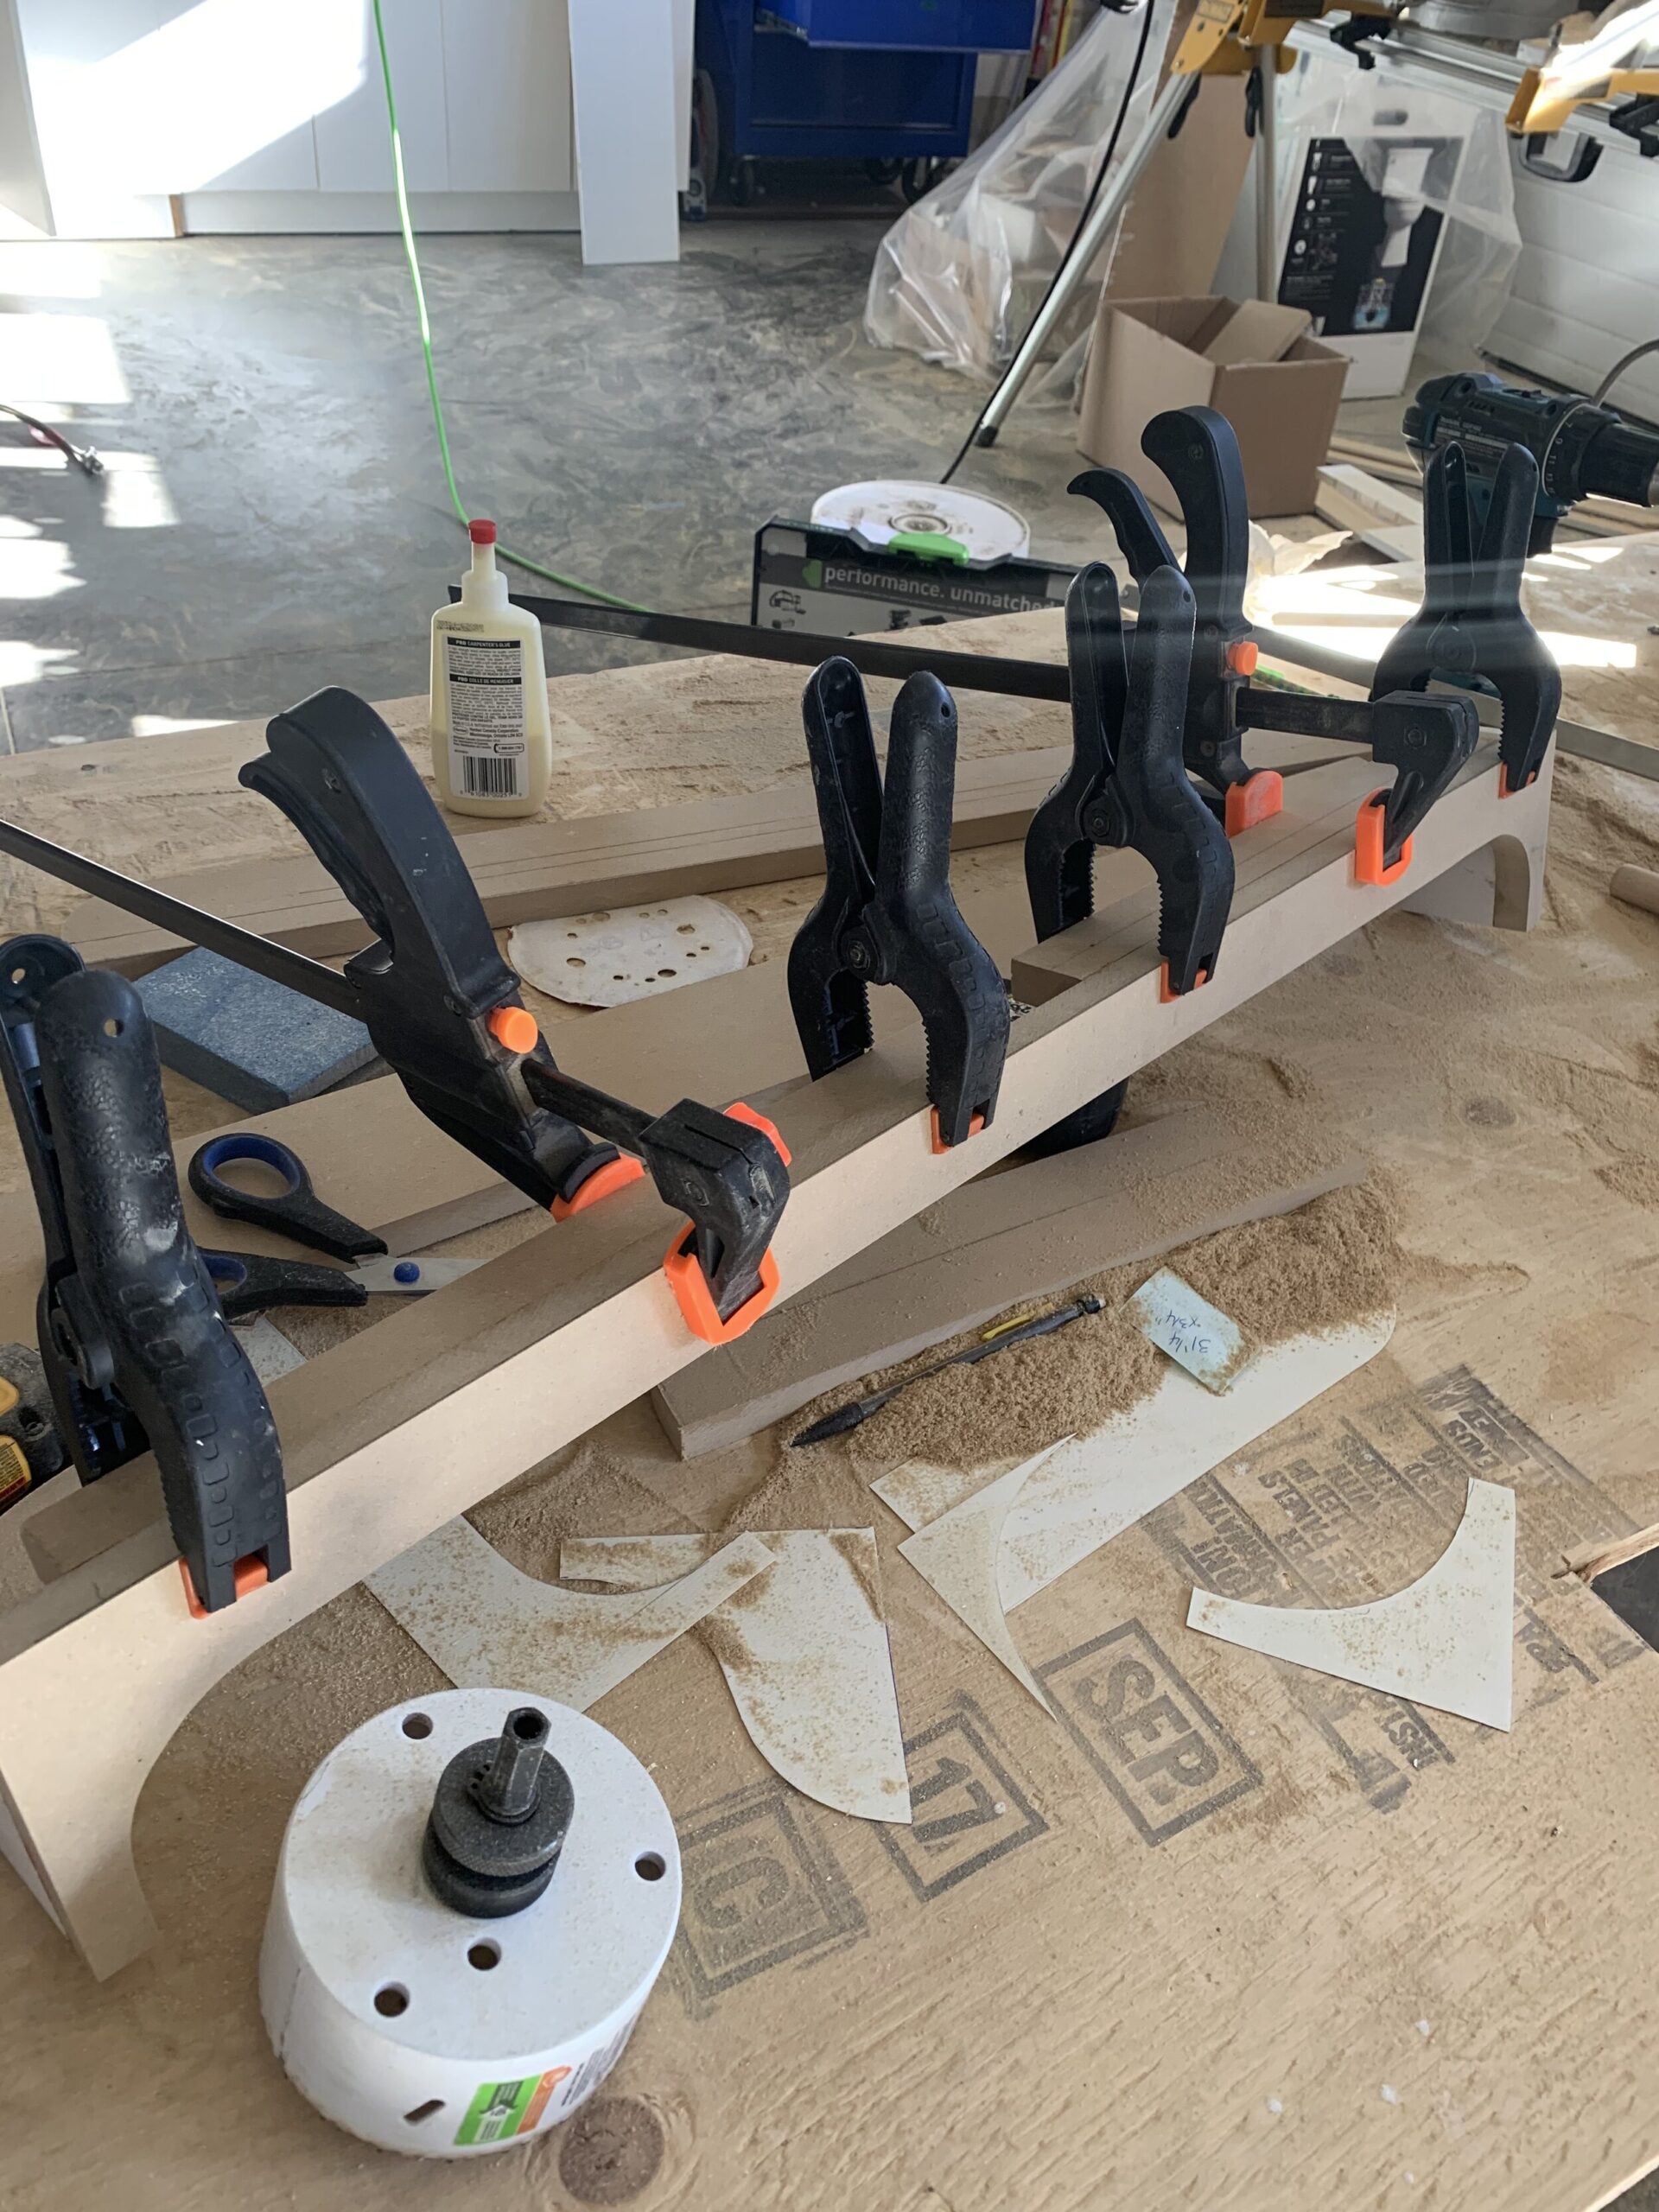
We ended up cutting a profile we liked to fit each cabinet that extended all the way across, instead of individual feet. This was just a matter of sketching the design and using various tools to cut the shape out. We used a jigsaw for the curved parts and the skill saw or mitre saw for the straight parts, whenever we could.
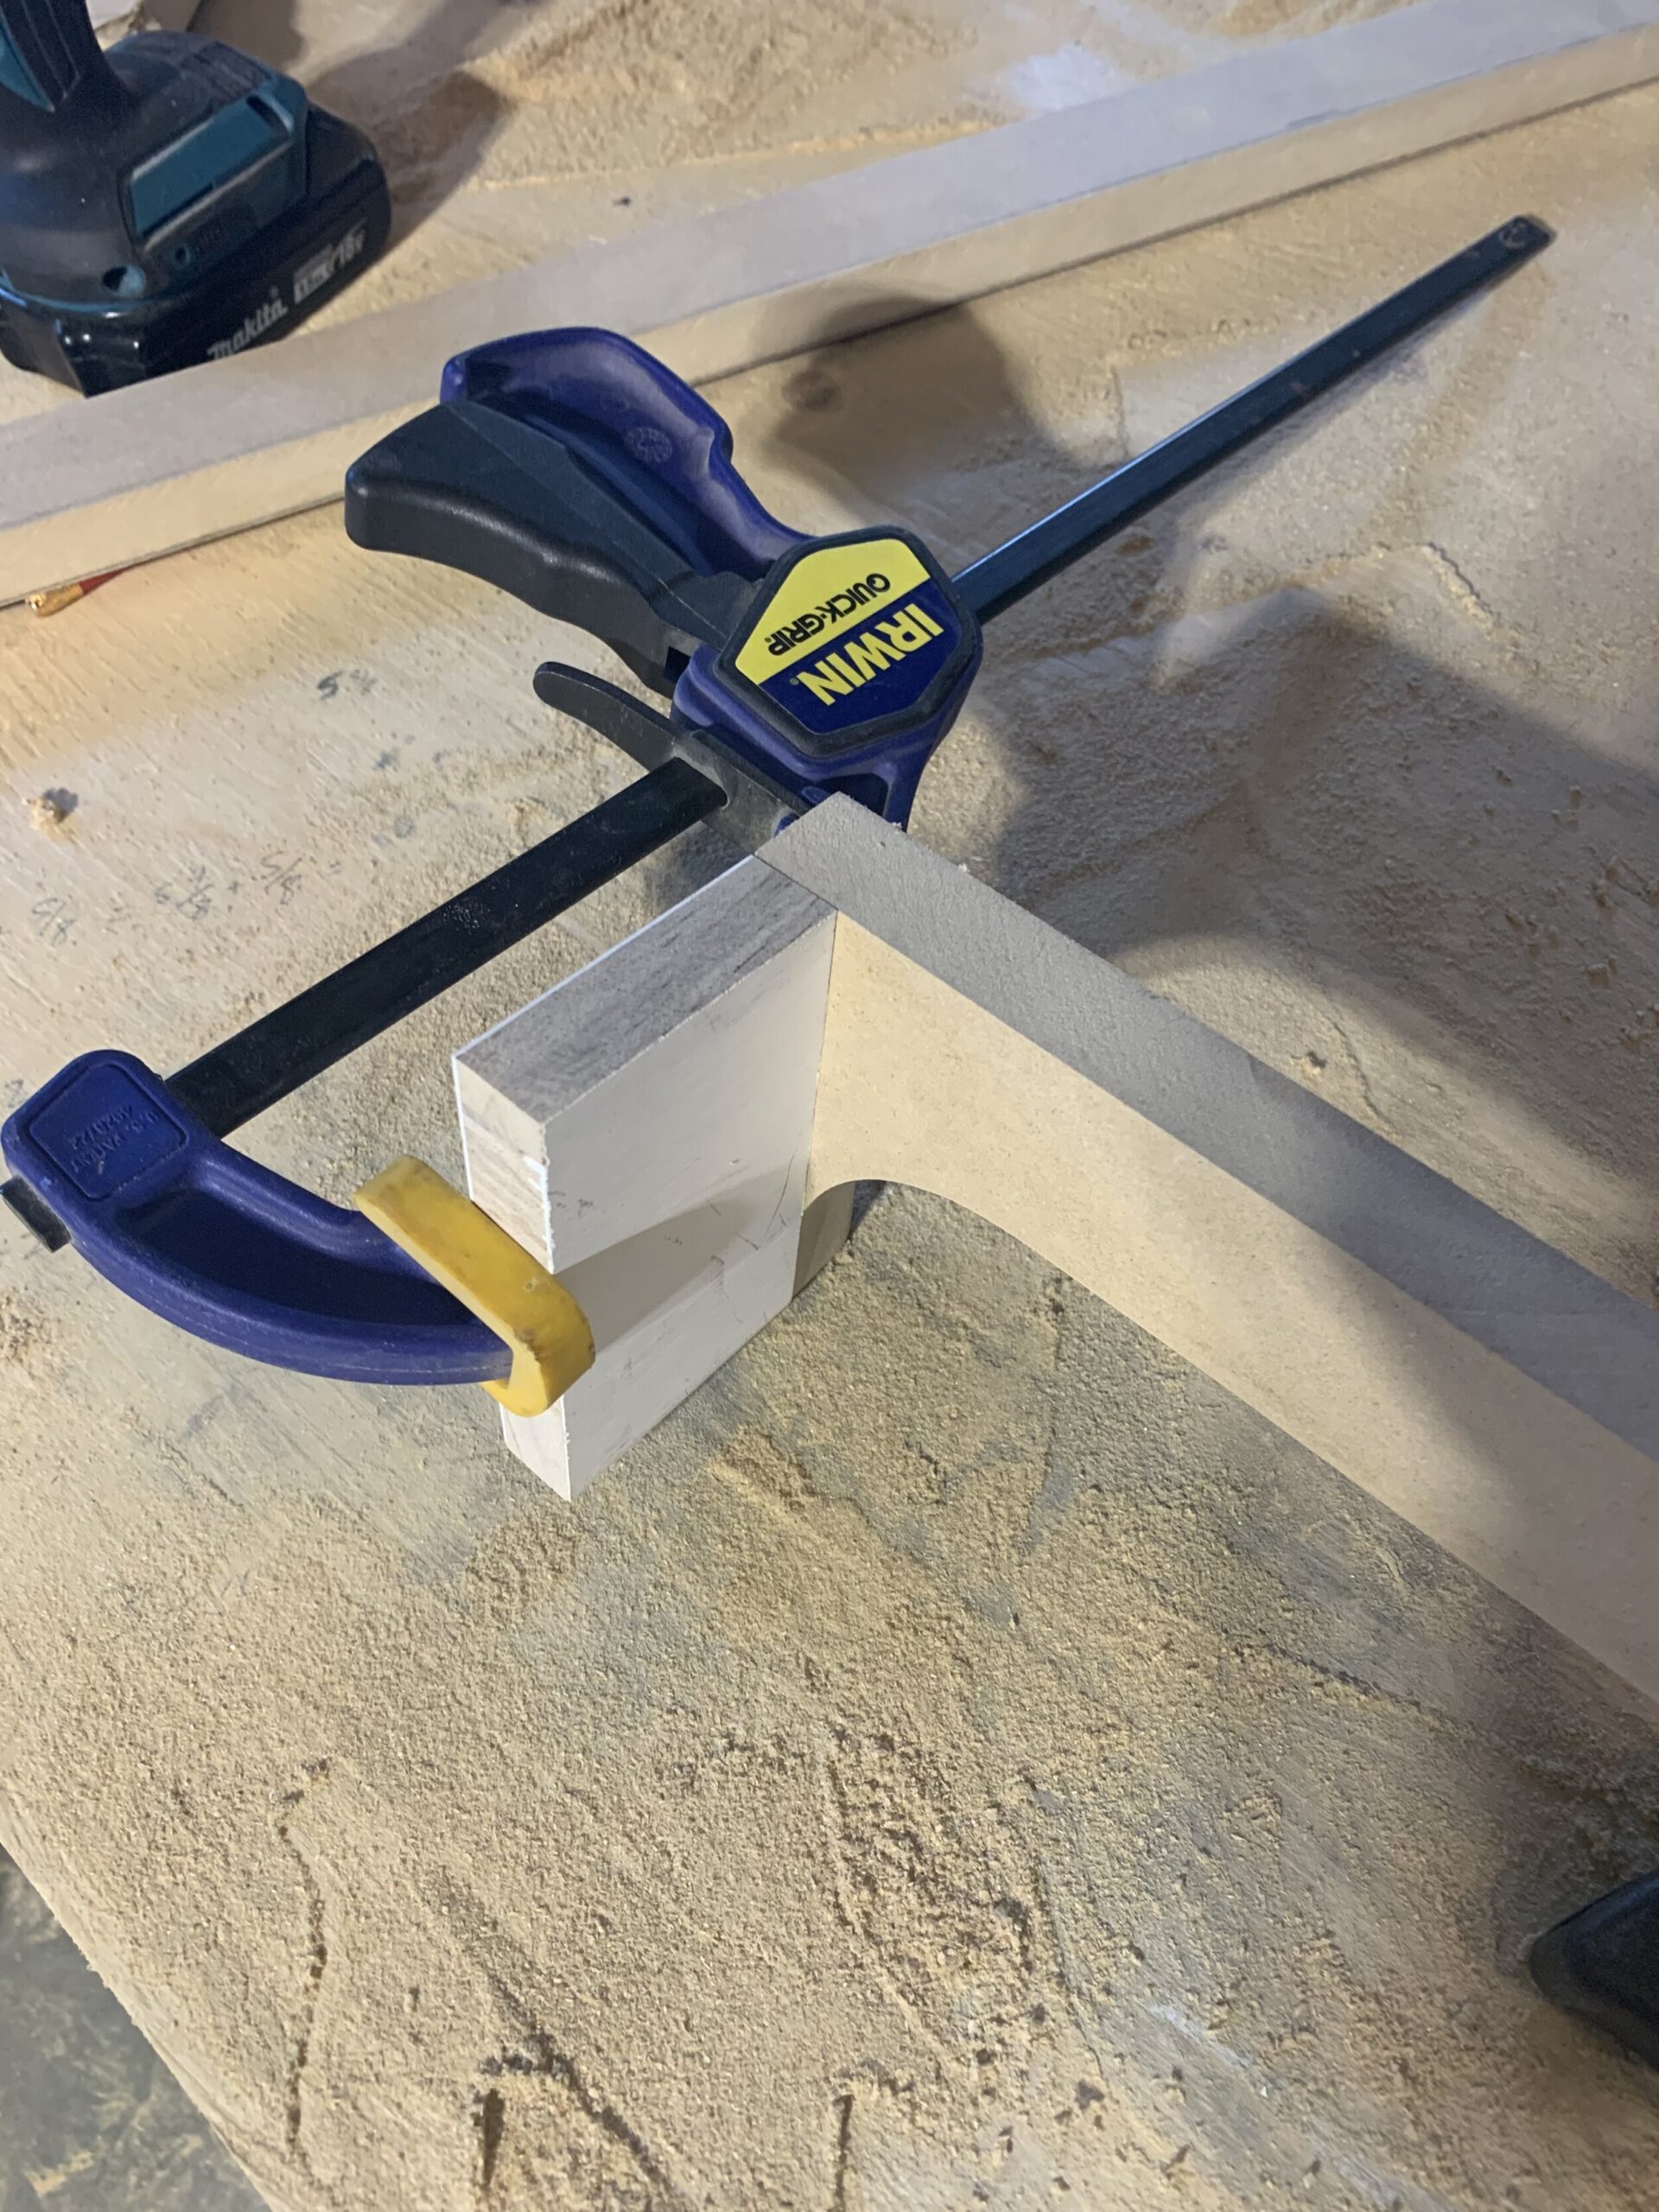
The “leg” part I made ⅝” wide, and used a ⅝’ block “behind” it so that there wasn’t a little dirt-collecting space behind the feet that you can sometimes get when you add a decorative toe kick. If you have ever had one, you know exactly the space I am talking about! So that detail was important to me, I’m so glad I found a way to eliminate that space!
We attached the block on the side to the decorative toe kick (glued and clamped) and then I also added some scrap pieces of wood for blocking (glued and clamped) to the top, so it would have something solid to attach to the vanity.

Making new drawers for our existing vanity
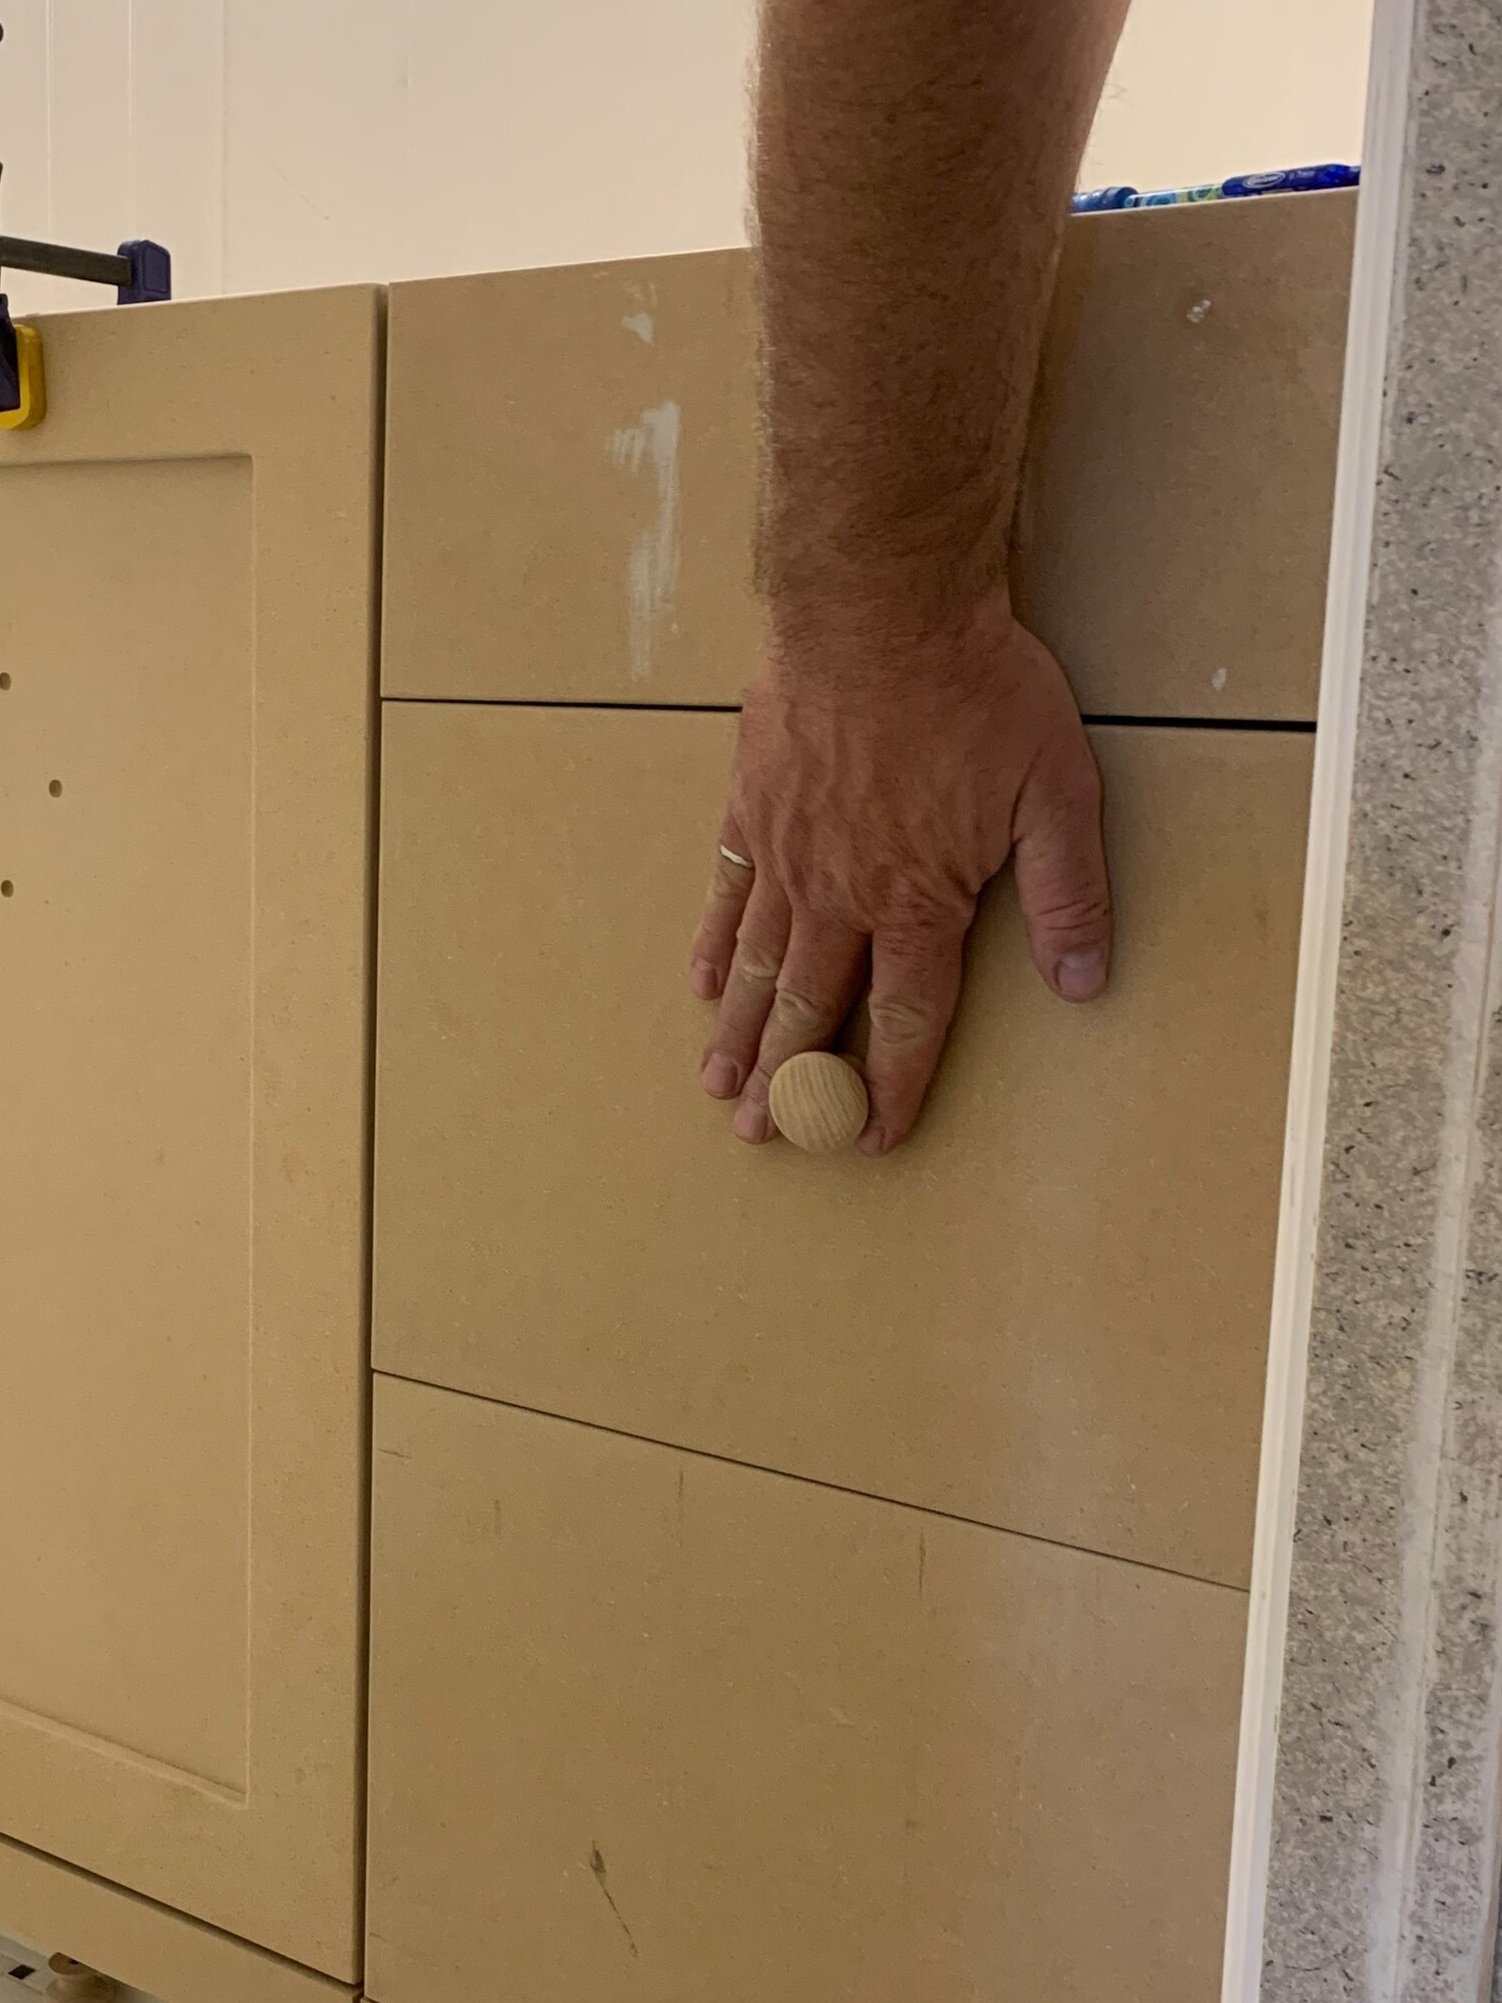
The drawers were really quite easy to do. We removed the existing drawer fronts from the drawer boxes, traced the shape onto new ¾” MDF, and cut them out. Once we had the shapes cut, we ran them through the router to round off the edges of the drawer face, and that’s it! We carefully lined them up on the old drawers and attached them through the old holes in the drawers using the hardware we saved, and they are going to be as cute as can be once they are painted and have new hardware (a little painted knob) attached!
Adding Vent Holes to our DIY Bathroom Vanity!
I really have had a crush on VENT HOLES in cabinetry for quite some time (like this)
Last year, I asked my mom if I could put some holes in her laundry room cabinets when I was making them over for her and she said, “why don’t you put holes in your own damn cabinets.” So I’ve basically been waiting for an opportunity to put holes in my own damn cabinets ever since!
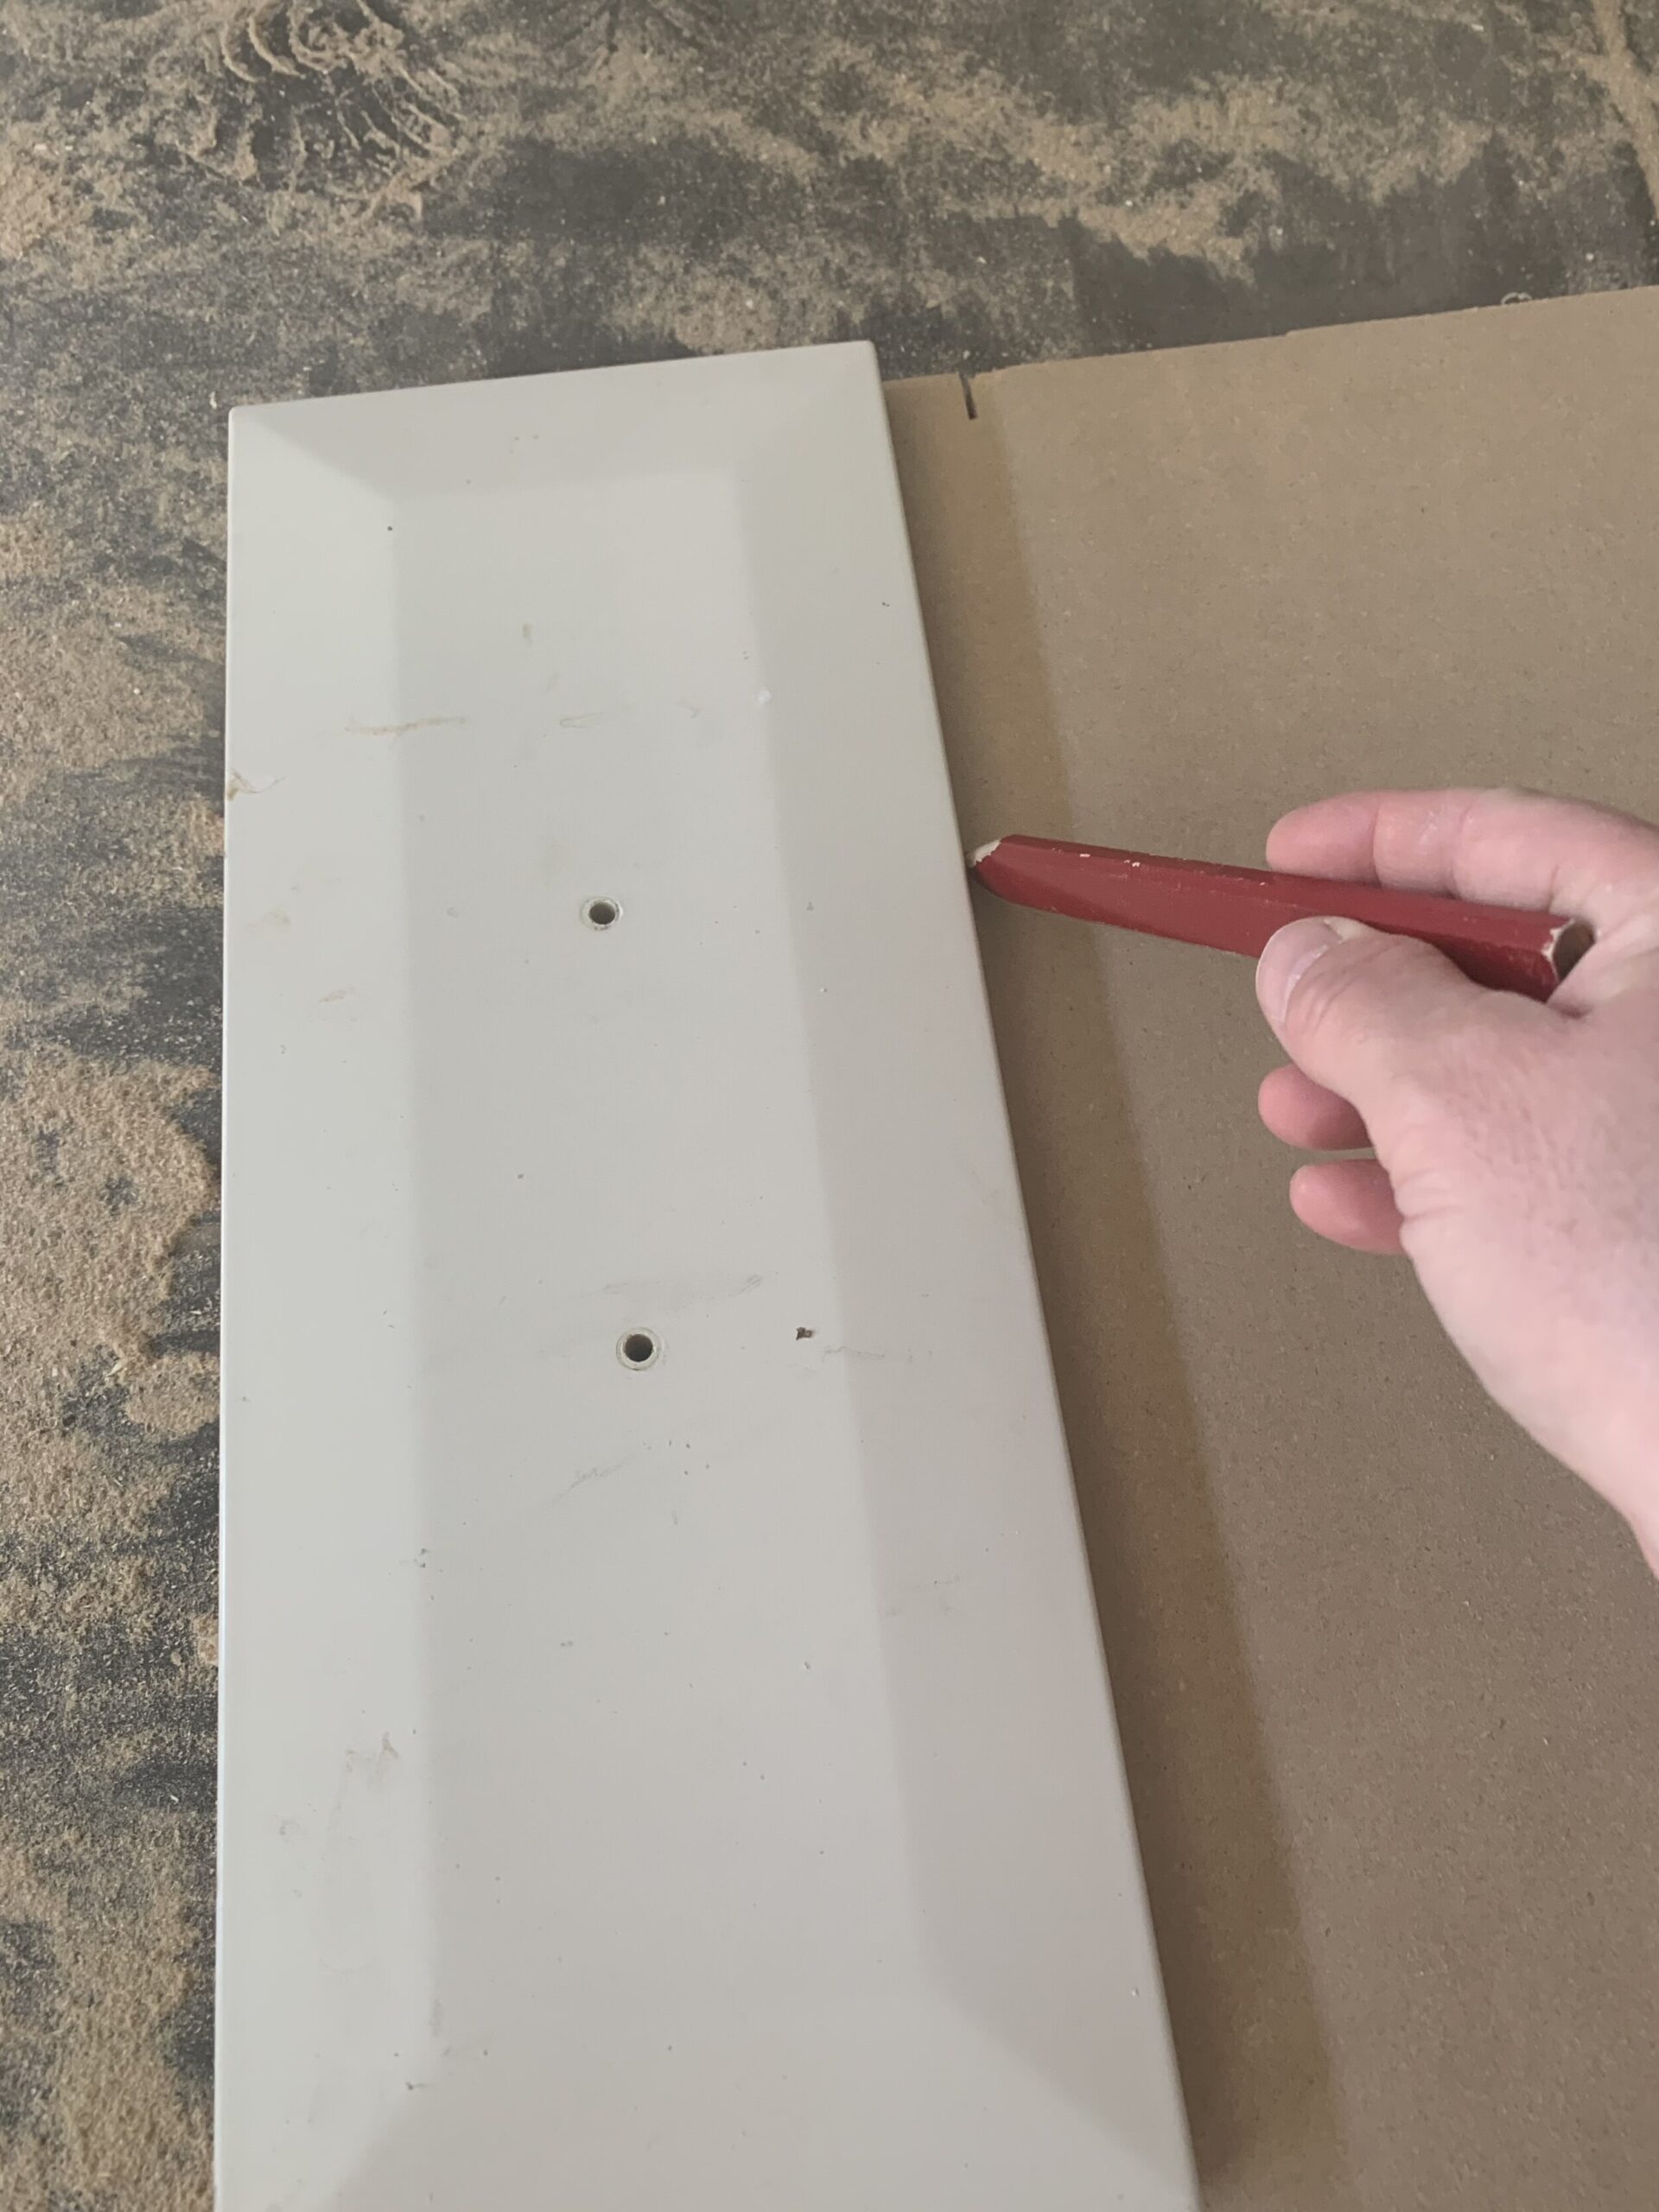
There was nothing to this, just a matter of CAREFUL measurements (and remeasurement!) because you only get one crack at this. We used a bit like this to make sure the holes were perfectly centred in the spots we marked.
We also ALMOST cut the holes in the second door on the bottom and not the top (there is a right side and a wrong side since we had the door hardware roughed in on one side) and so that was a stressful near miss! But I’m happy to report that the holes were carefully measured and drilled and now I’ve put holes in my own damn cabinets. Such cute little holes they are!
How to Complete the DIY Bathroom Vanity Makeover
And that’s a wrap! Cabinet vanity glow-up complete! (Well not totally complete, but you know what I mean!) All that’s left to do is to paint it all up and plop the top on! I’m going to prep and paint all the bits next week (if you need to know how to paint cabinets, I did an in-depth tutorial on cabinet painting here!) I plan to prime using my favourite primer and paint using Benjamin Moore Advance, which is my favourite kind of cabinet paint. (Whenever painting cabinets, it is super important to have the right paint! I also prefer to paint with a paint sprayer for the best finish.)
Next Week:
We are getting close to having a functioning bathroom for those kiddos pretty soon, pending the arrival of some plumbing fixtures I’m still waiting on.
If you follow me on Instagram, you may have seen that I scored some really gorgeous brass doorknobs from Facebook Marketplace, but as I mentioned earlier, I have a bit of an aversion to all things shiny so I just couldn’t leave well enough alone. I did a little experiment on how to remove lacquer from brass and age it and I’m so excited to show you how to do that because it turned out awesome! So you can expect that for next week’s tutorial!
Be sure to go back to the One Room Challenge website and check out what the other participants are up to! It’s a great season and there are some really creative projects happening out there. We will see you next week!

CLICK ON THE IMAGE ABOVE TO BE RE-DIRECTED TO THE ORC WEBSITE!
I also wanted to give a shout-out to the brands that are partnering with me on this project by generously providing products, I can’t wait to show you the goodies they are sending over!
You might also like:
- How to DIY Cabinet Filler Strips for a Custom Look
- The Ensuite Reveal!
- DIY Wood and Brass Spice Rack
- How to Design and Install Cabinet Toe Kicks for Your Kitchen
- The Best Primer for Cabinets
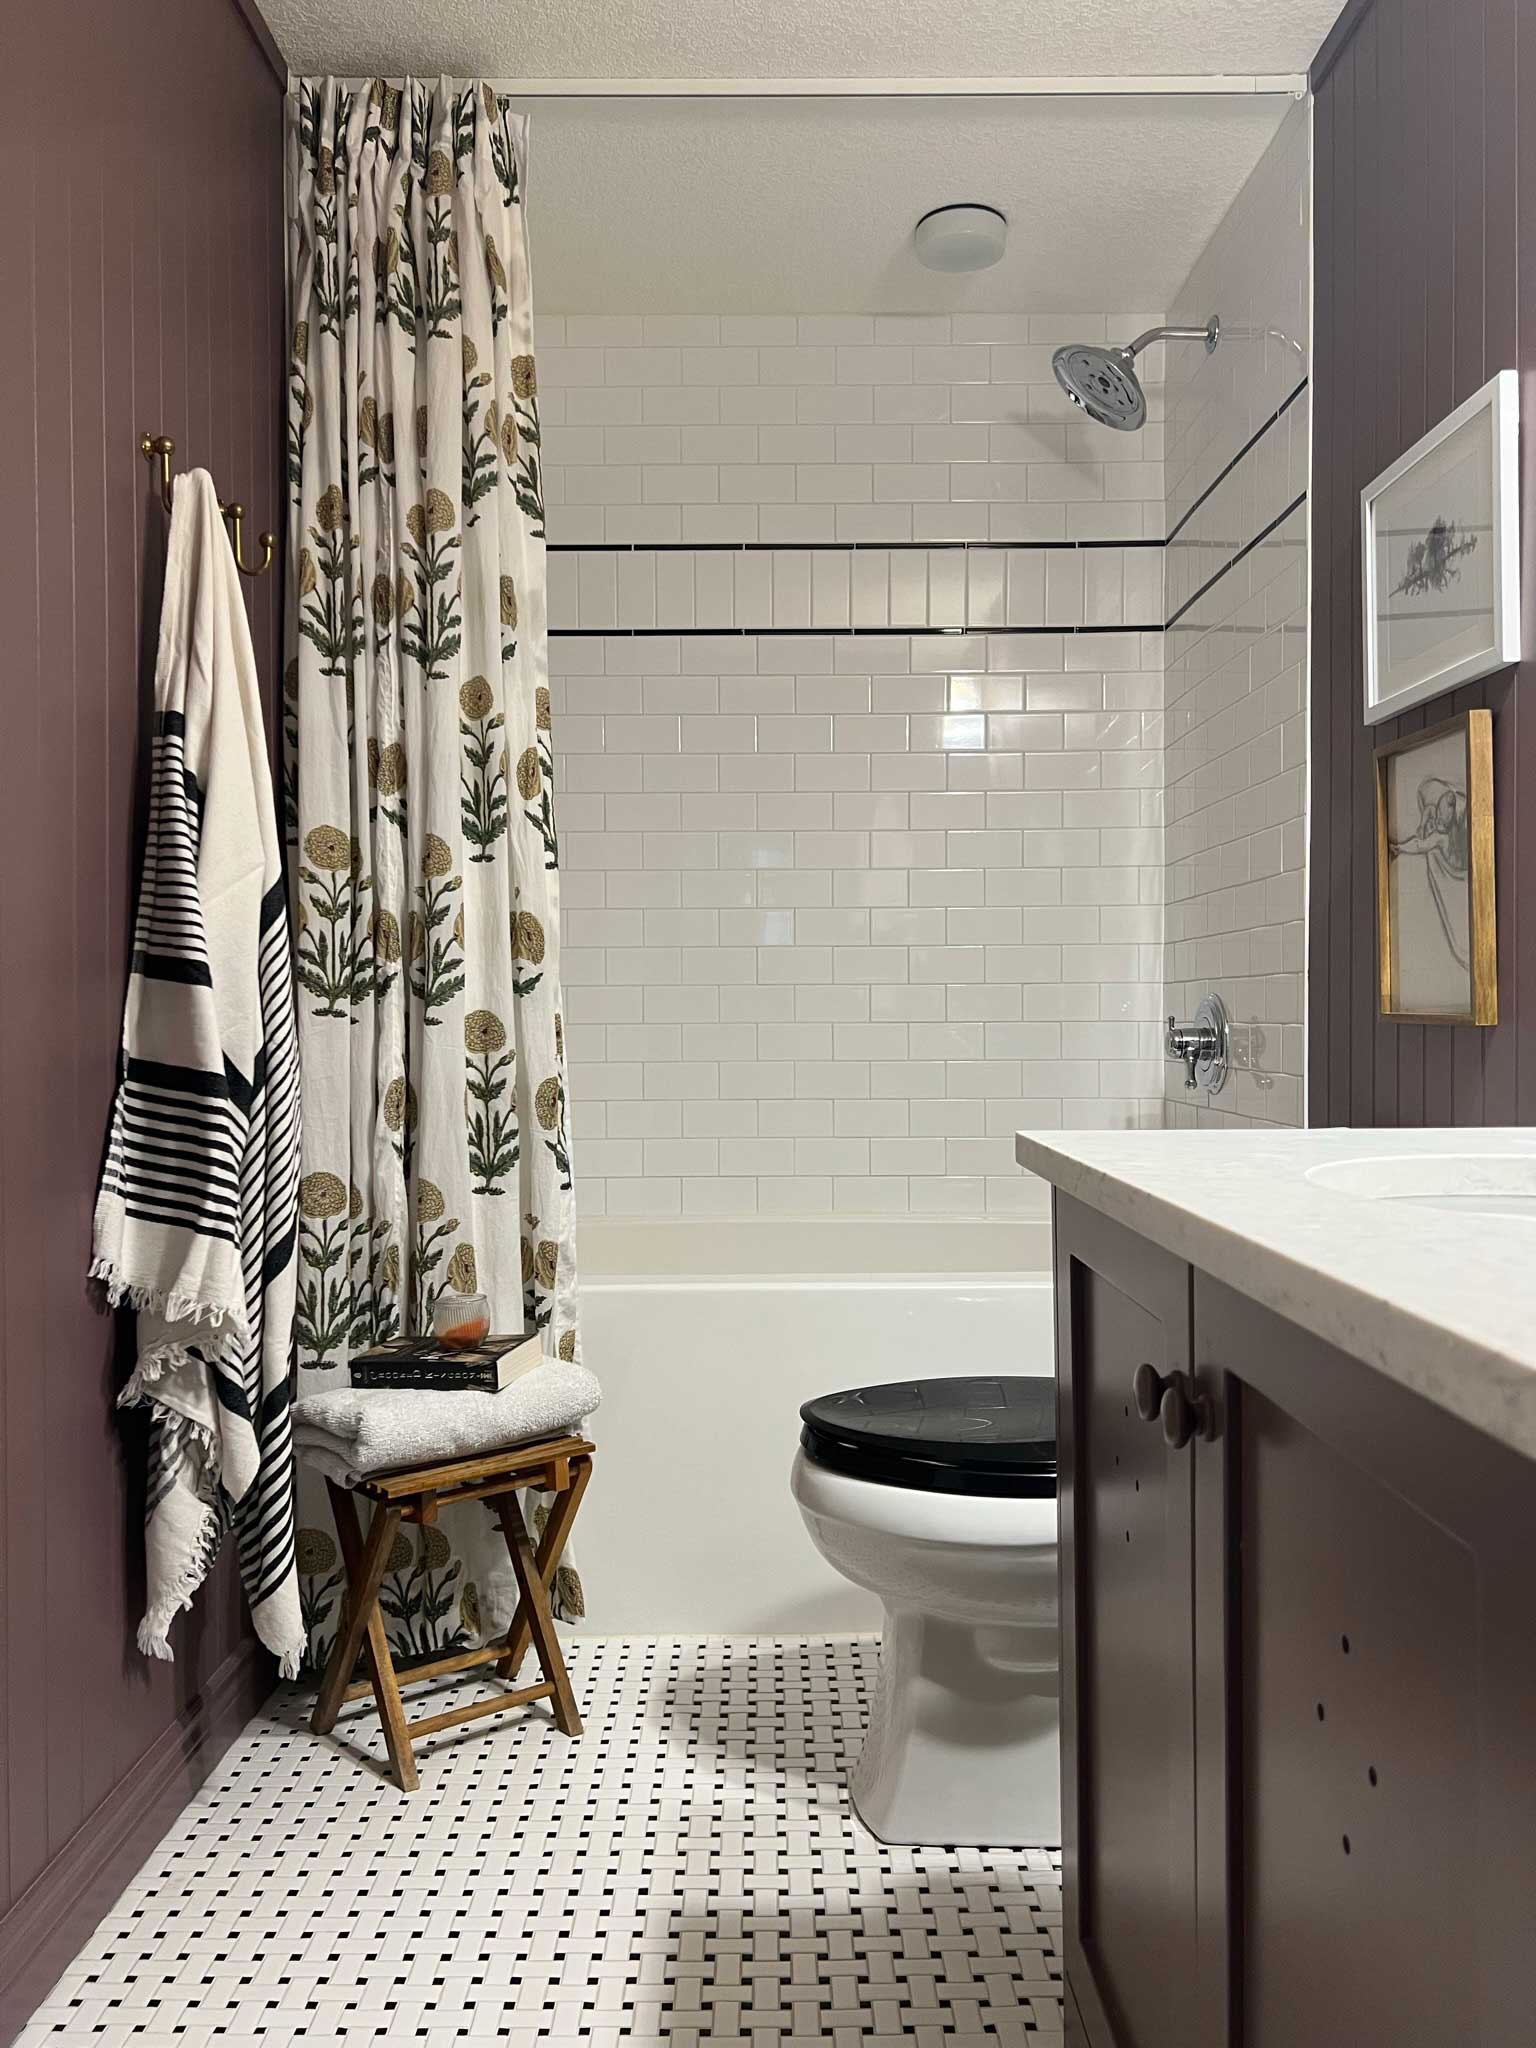
- One Room Challenge Spring 2021 – Week 8 – The Kids Bath REVEAL!
- Bathroom Remodel Checklist and Guide!
- The Easy Way to Make a Shaker DIY Cabinet Door
Looking great. Love the arcs! What a smart idea :).
This looks amazing! We’re doing a MUCH more simple vanity redo right now (just paint!) so I’m envious of yours!
That’s looking so cute Erin! Cutting holes in doors is stressful. Like when you finally install a kitchen and then the last thing to do is all of the drawer handles – nervewracking!
Thank you Jen! Yes you are right about that, and just reminded me that I have more nerve wracking holes to cut when we put the knobs on!
Thanks so much Courtney! Paint is magic, I’m sure you are going to love your vanity update!
Thanks so much Sanju!
I am LOVING the glow-up! Excited to see your space finished! Good luck next week.
LOVE the feet, Erin! All the best in week 6!