One Room Challenge Spring 2021 – Week 1 – The Kids Bath
Welcome back to another exciting season of the One Room Challenge! If you don’t know what the challenge is, it’s basically an interior design event where bloggers challenge themselves to makeover one room in 6 weeks! This season, we’ve been given a little more time due to the difficulties of renovating during a pandemic. The challenge was started several years ago by Linda of Calling it Home and has now become one of the most recognized and anticipated events in the home design blogging world! Designers makeover their rooms, cheer each other on and enjoy the plethora of newly designed rooms of all styles on reveal day. There are 20 featured designers and hundreds of guest designers, so there is always a ton of inspiration. Before I participated, I was obsessed with following along and now that I am a part of it, I always make sure to carve out time each day to see what everyone else is up to!
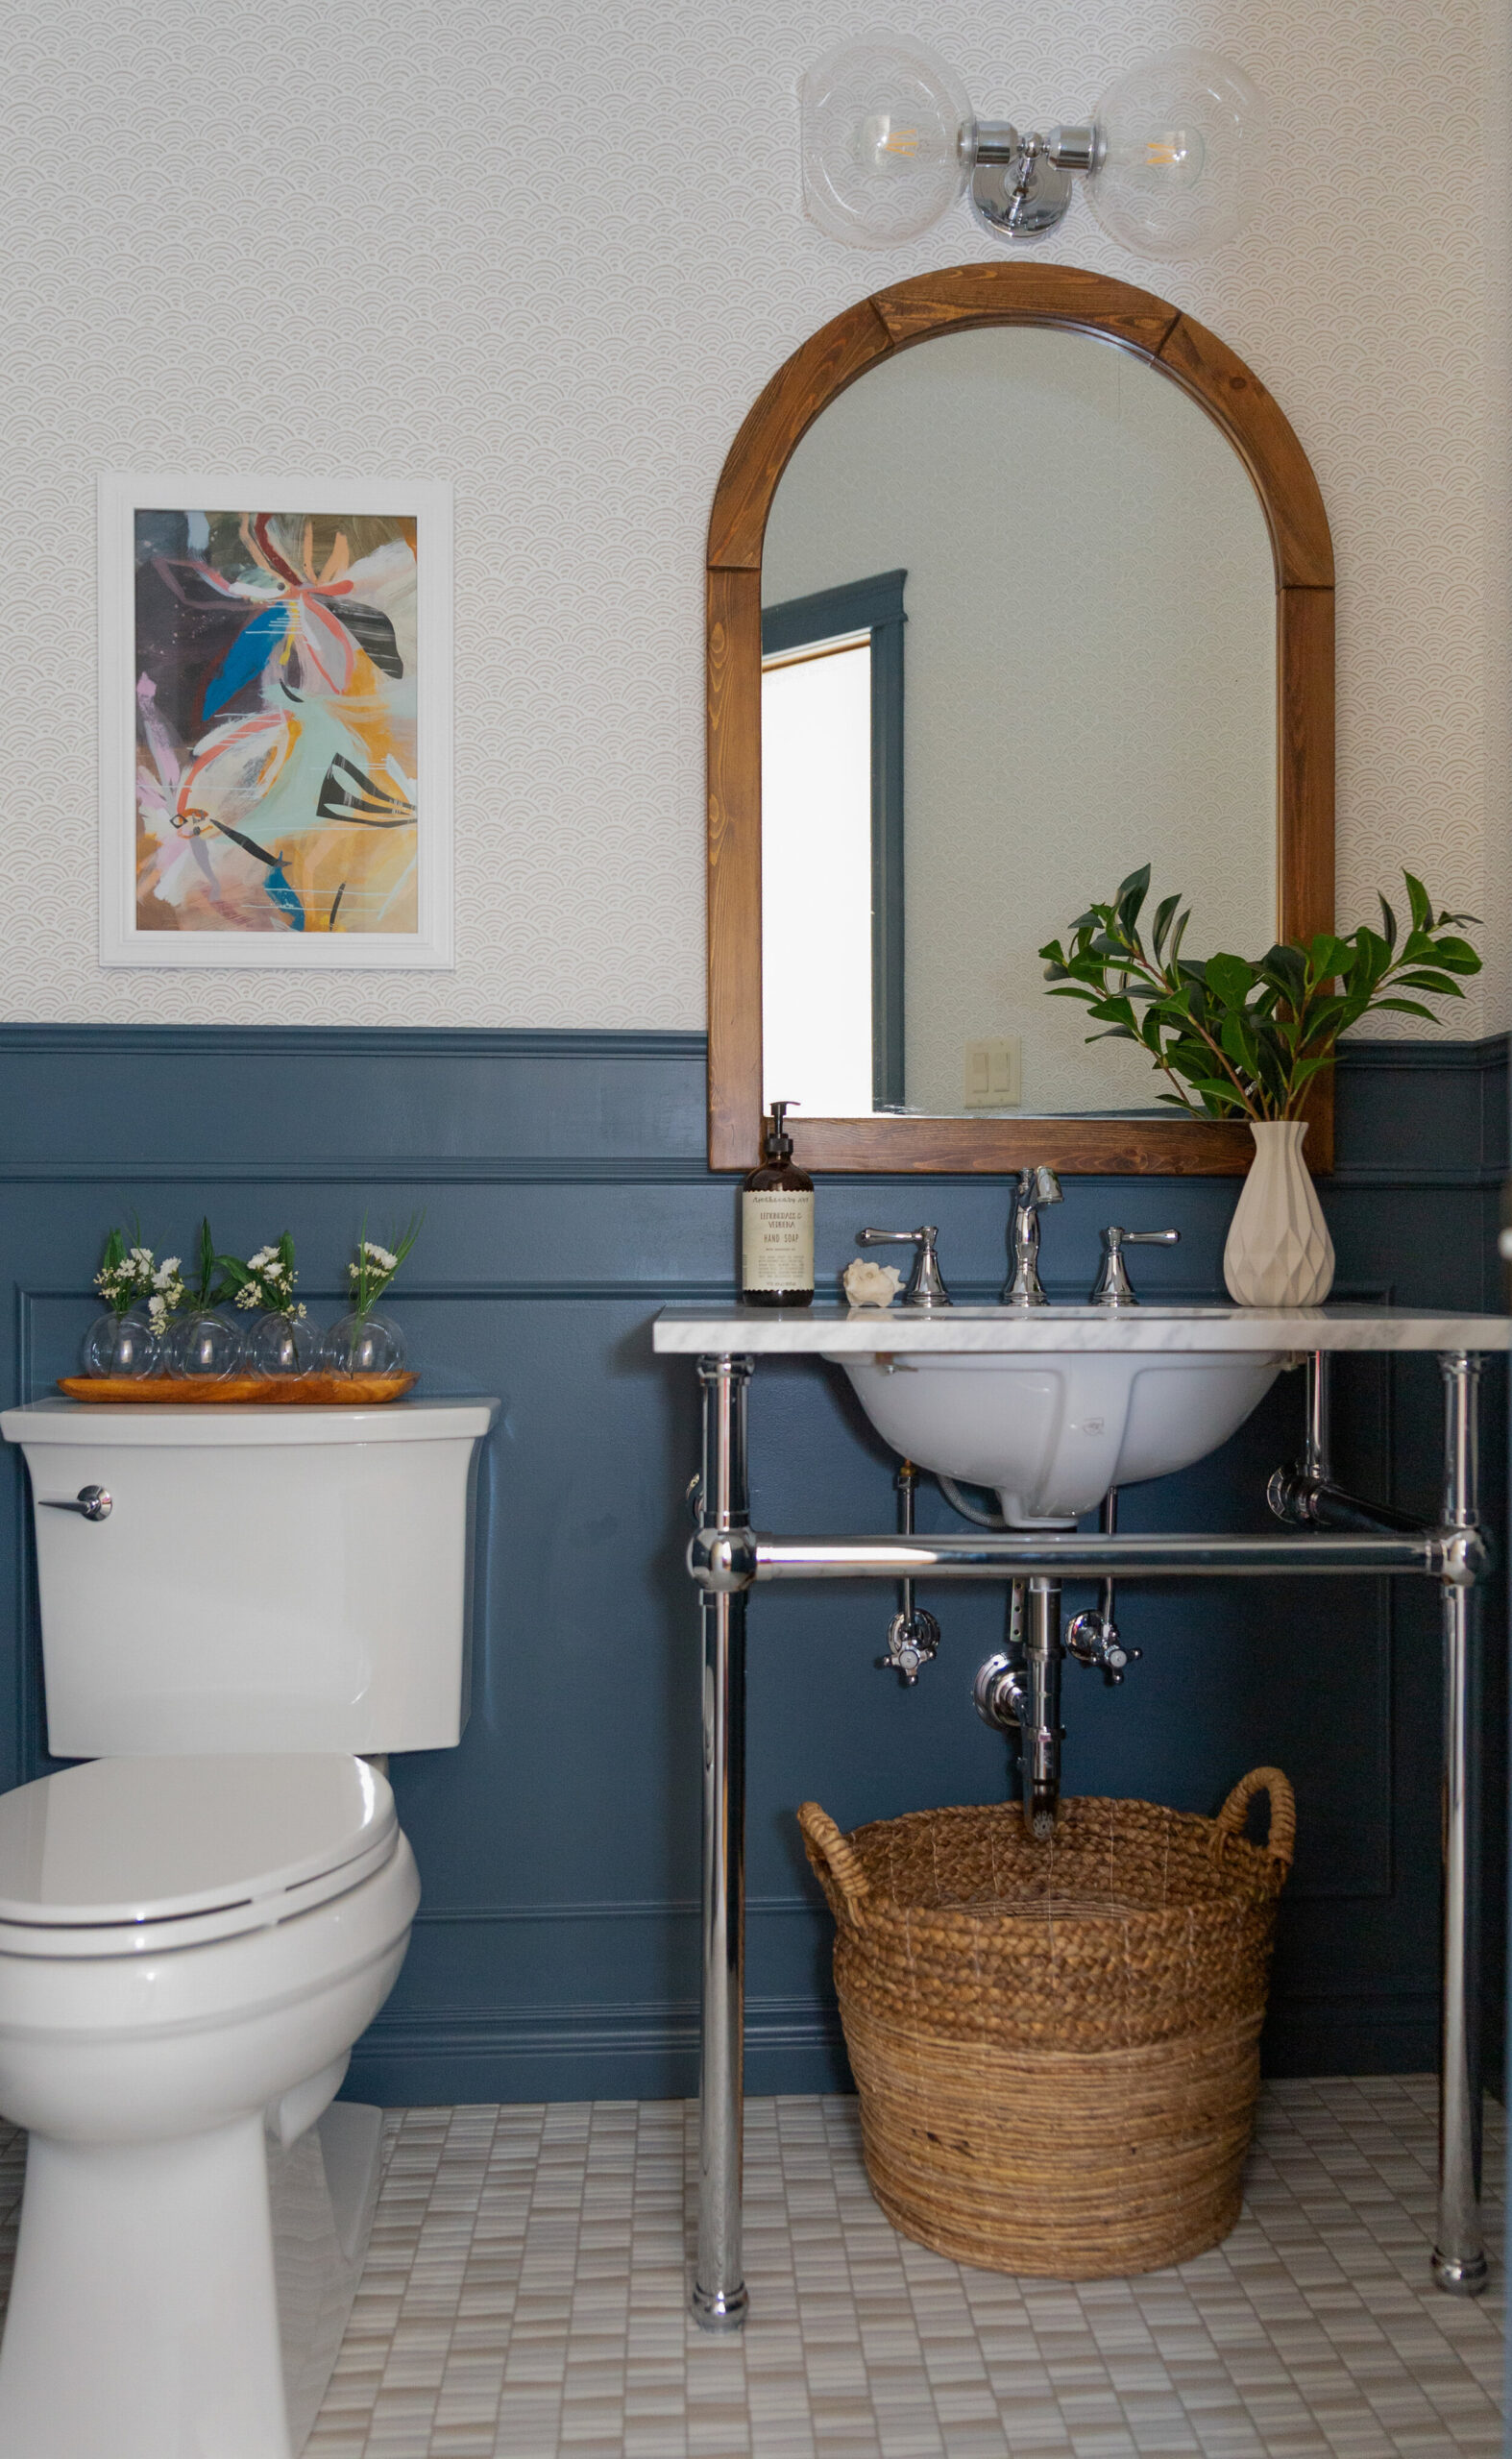
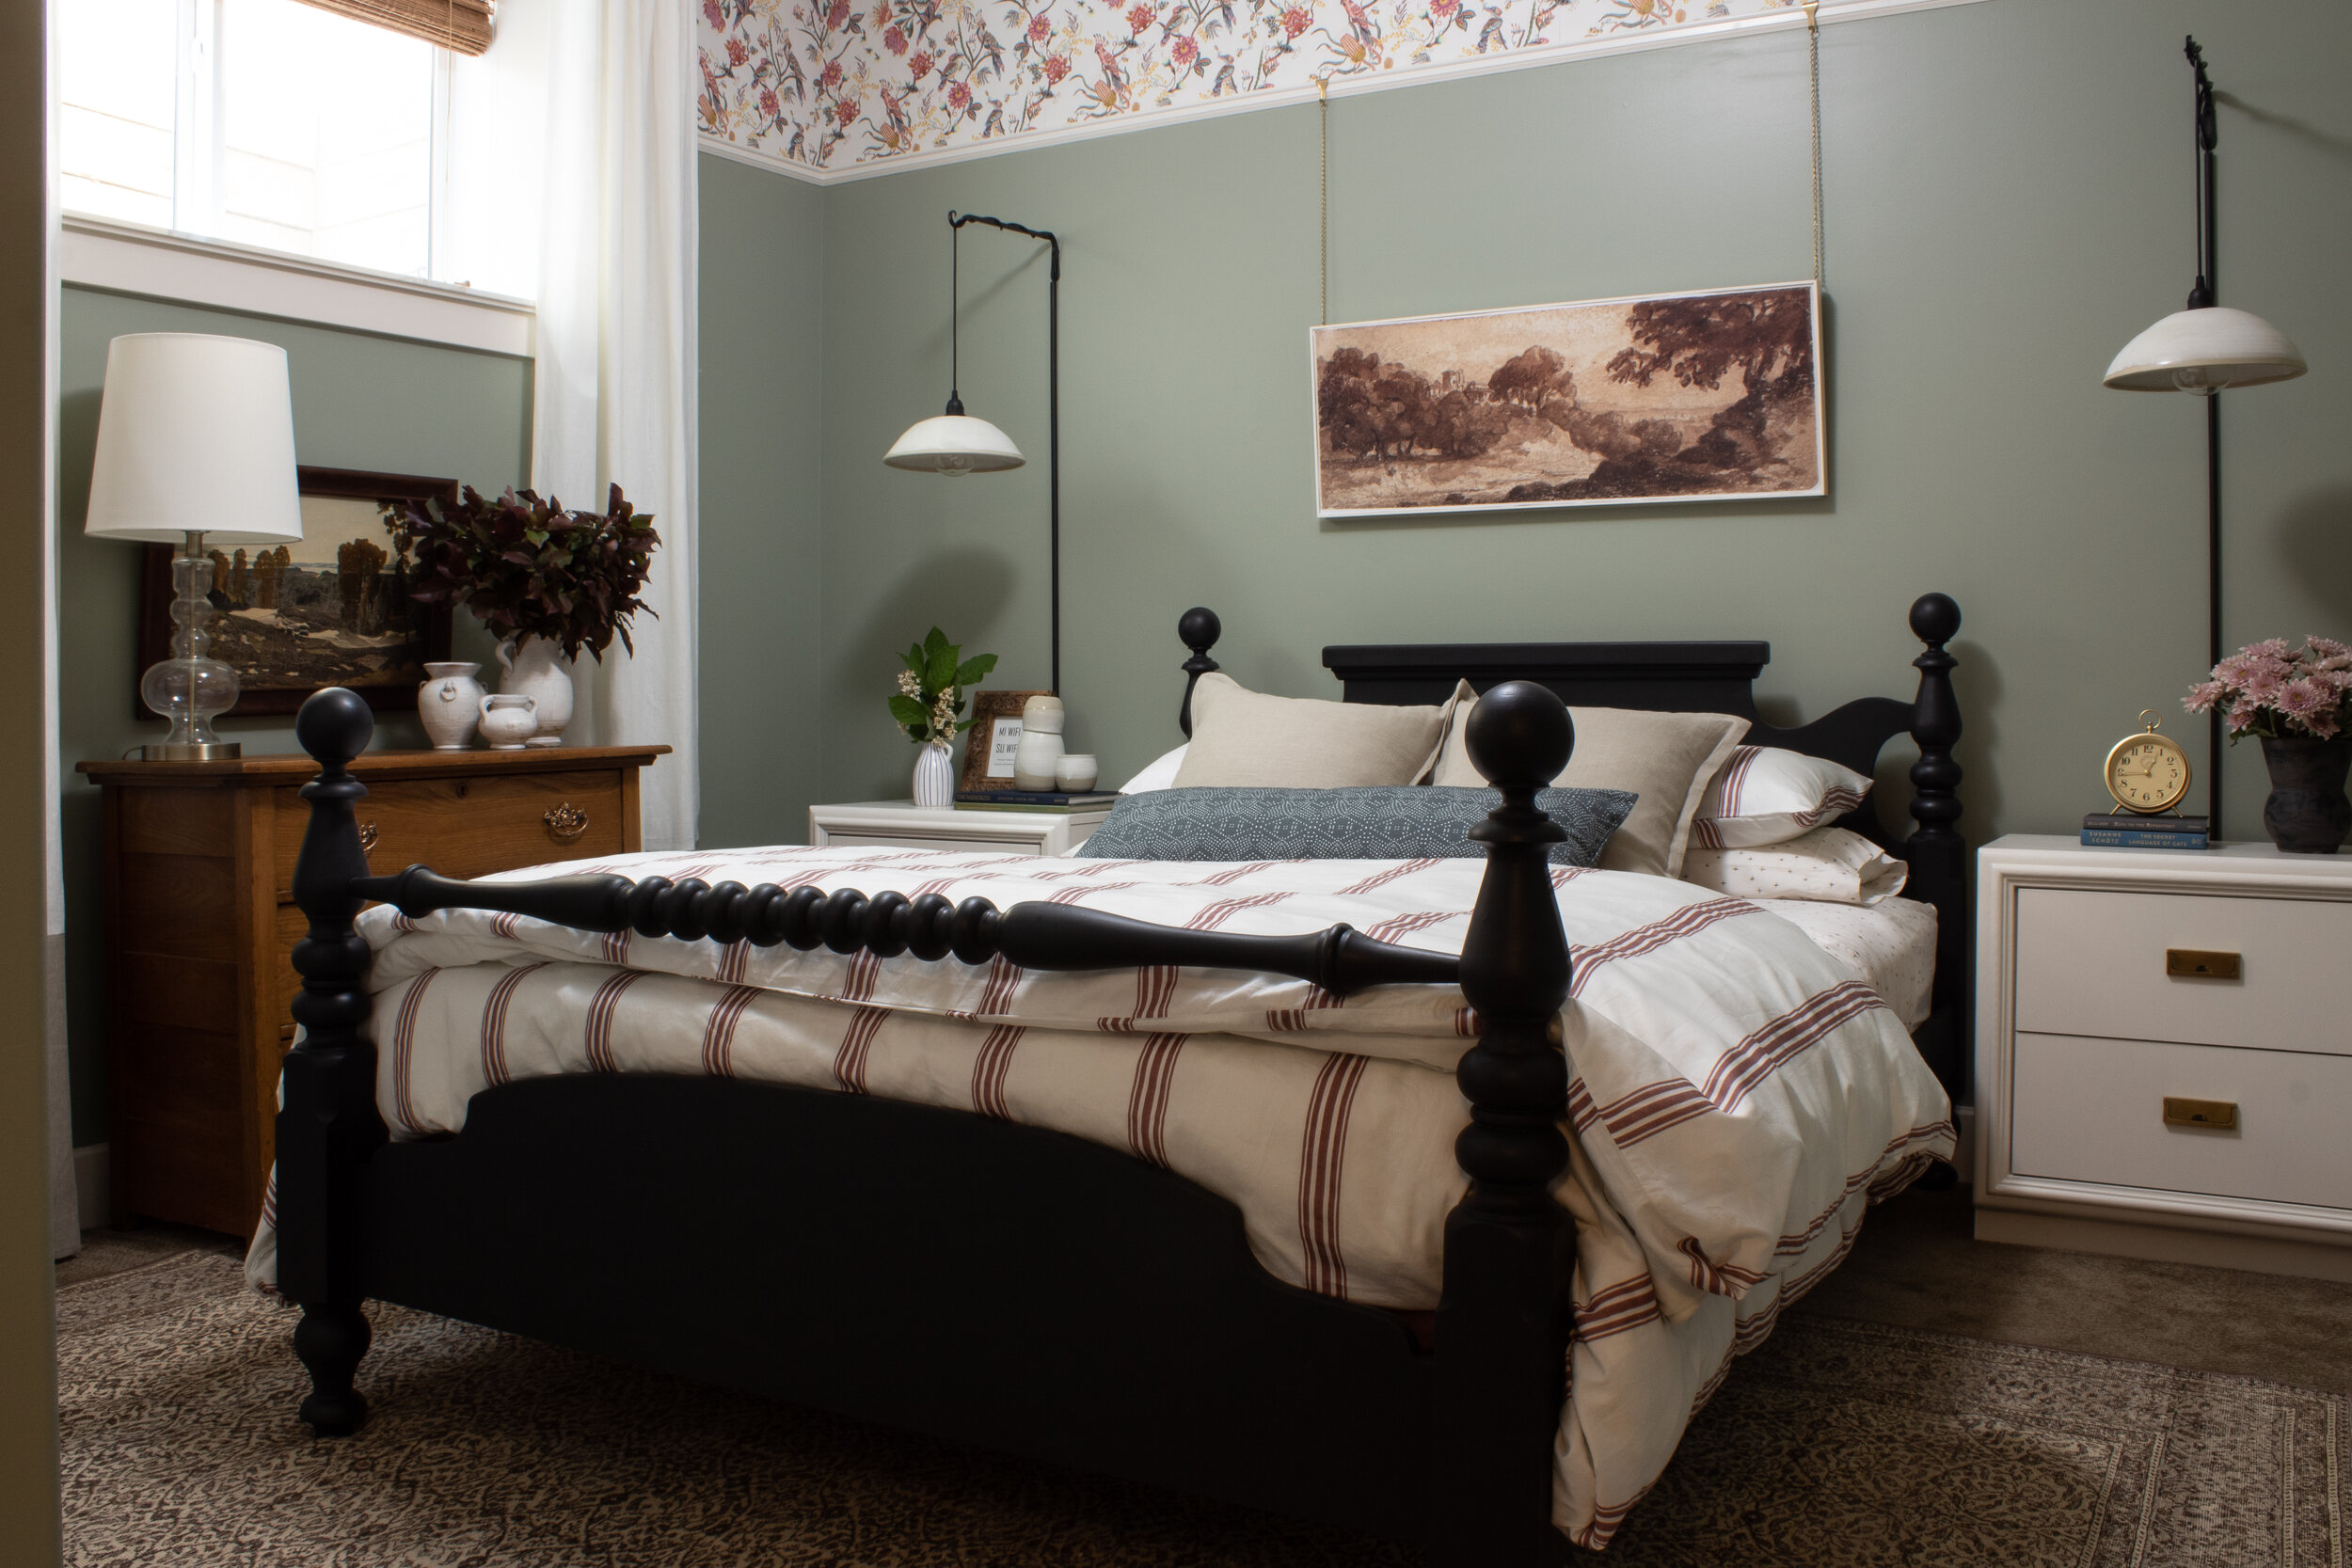
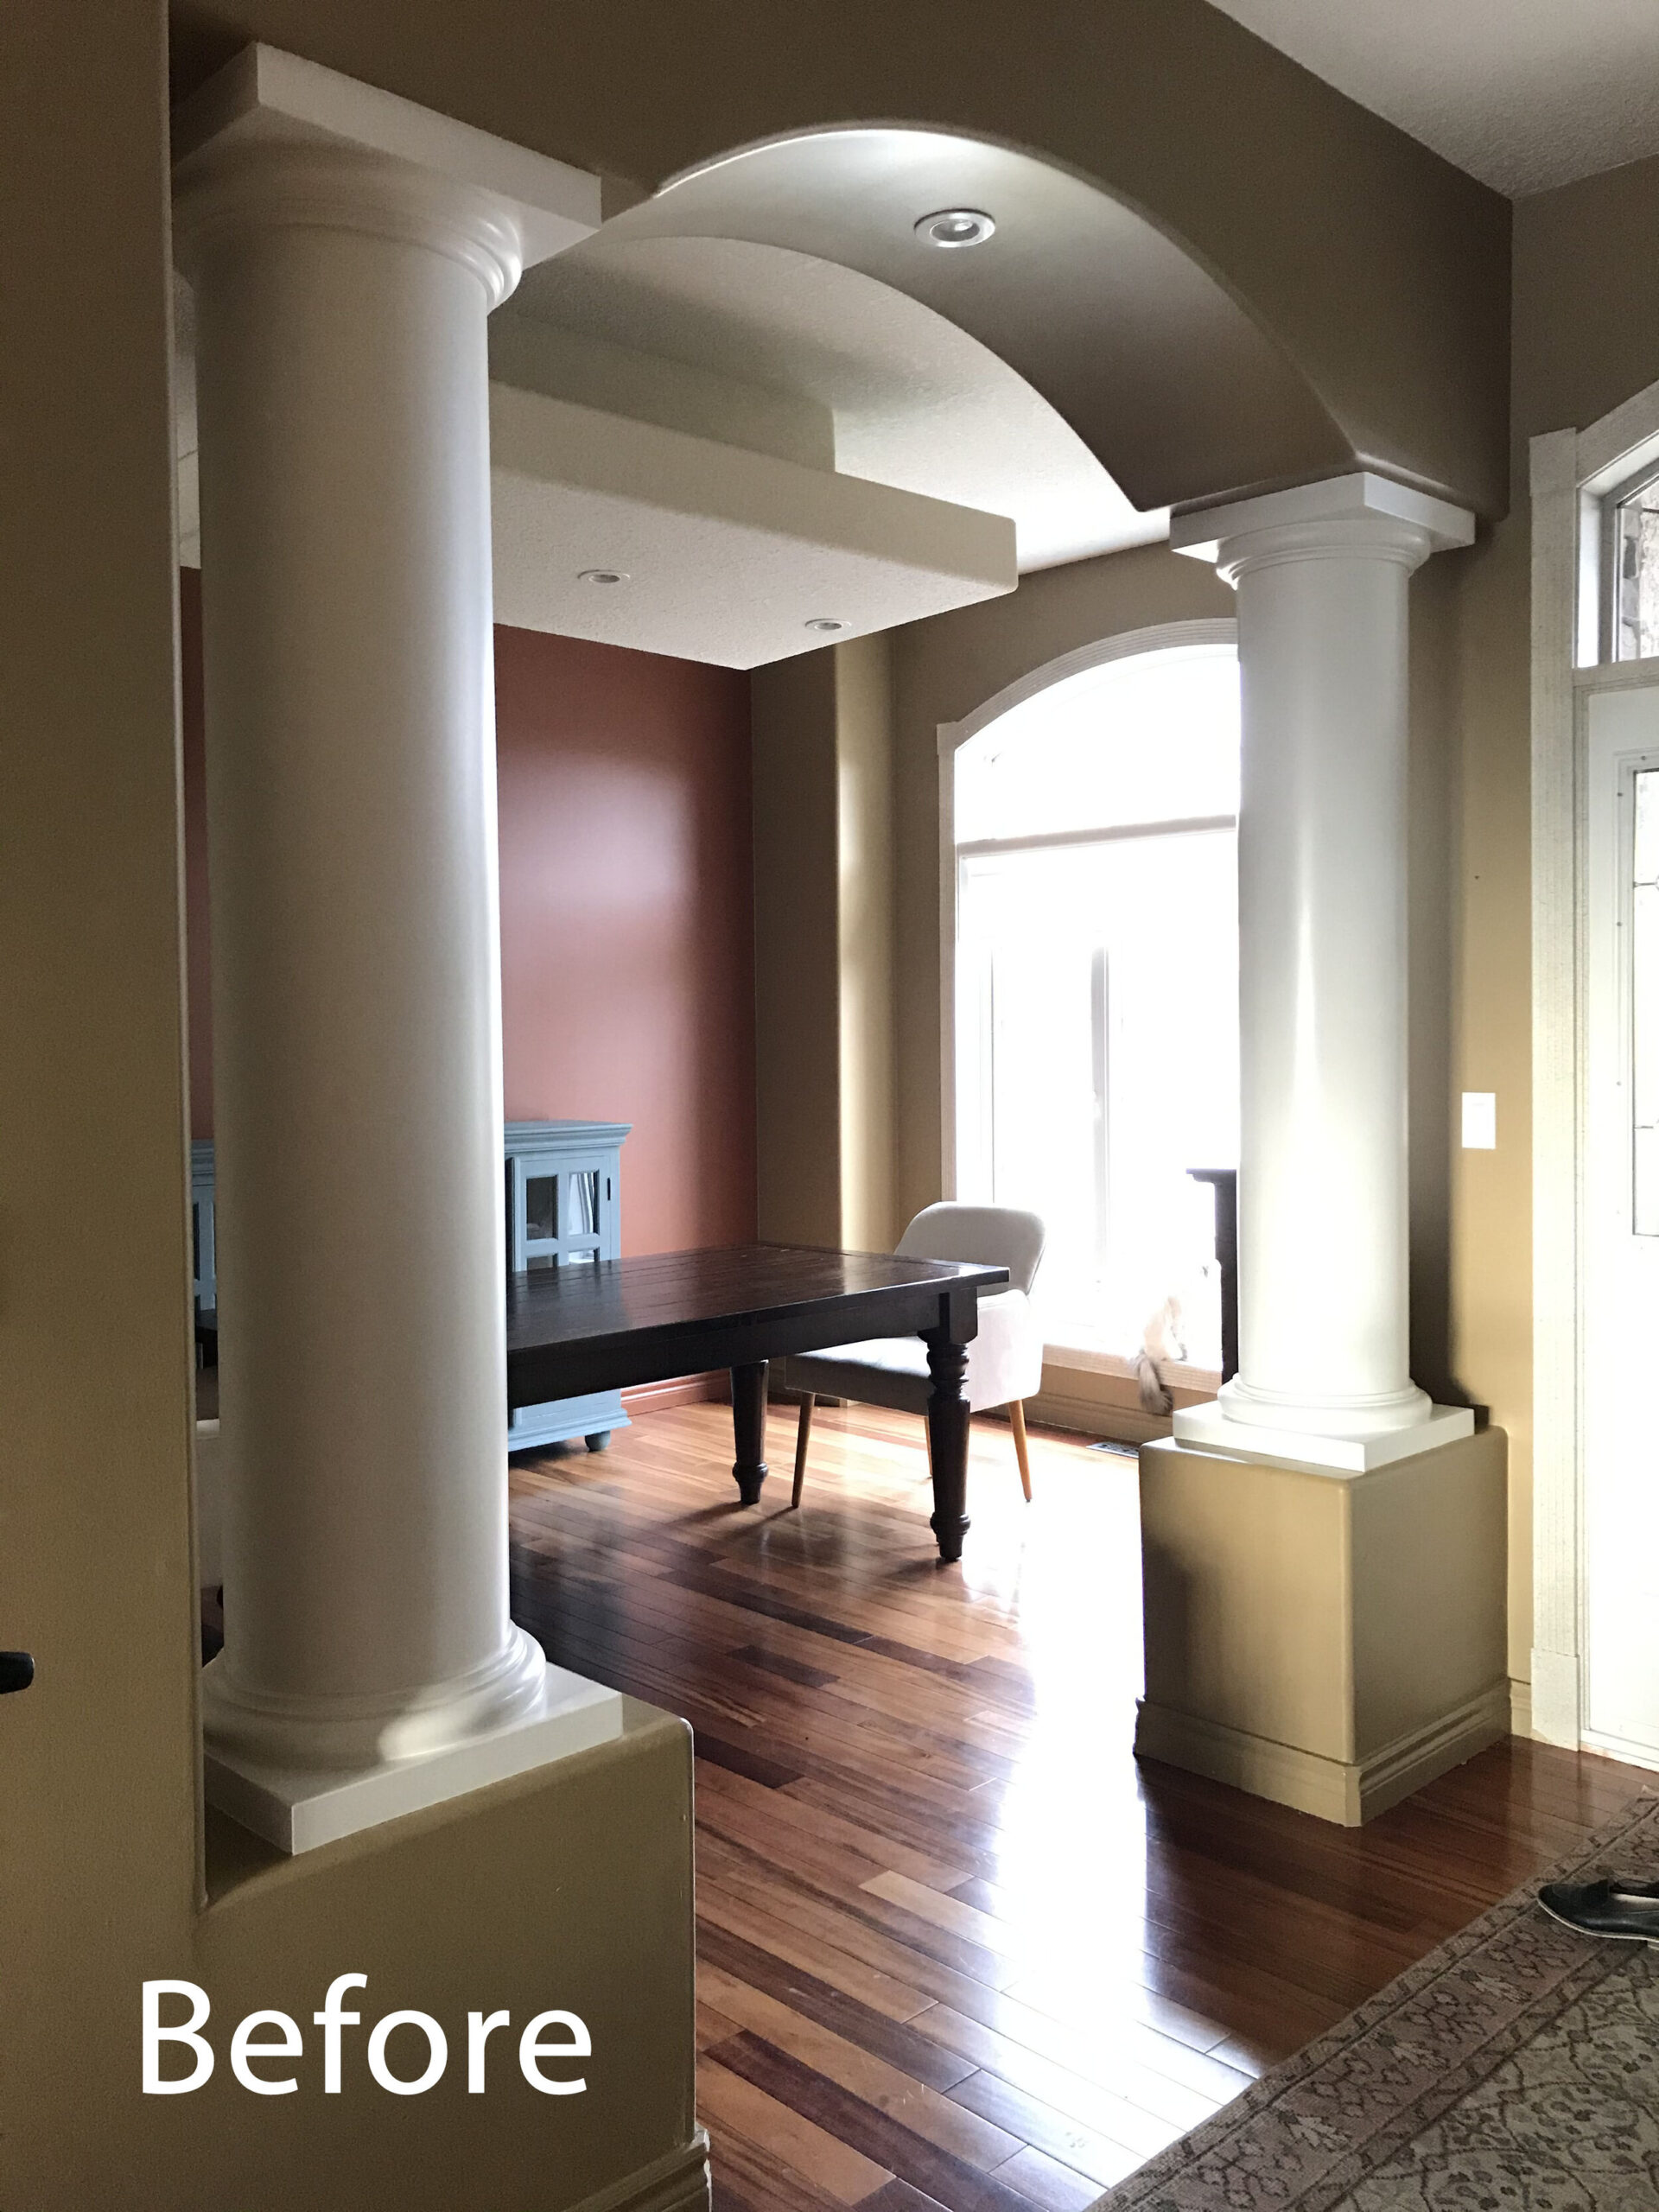
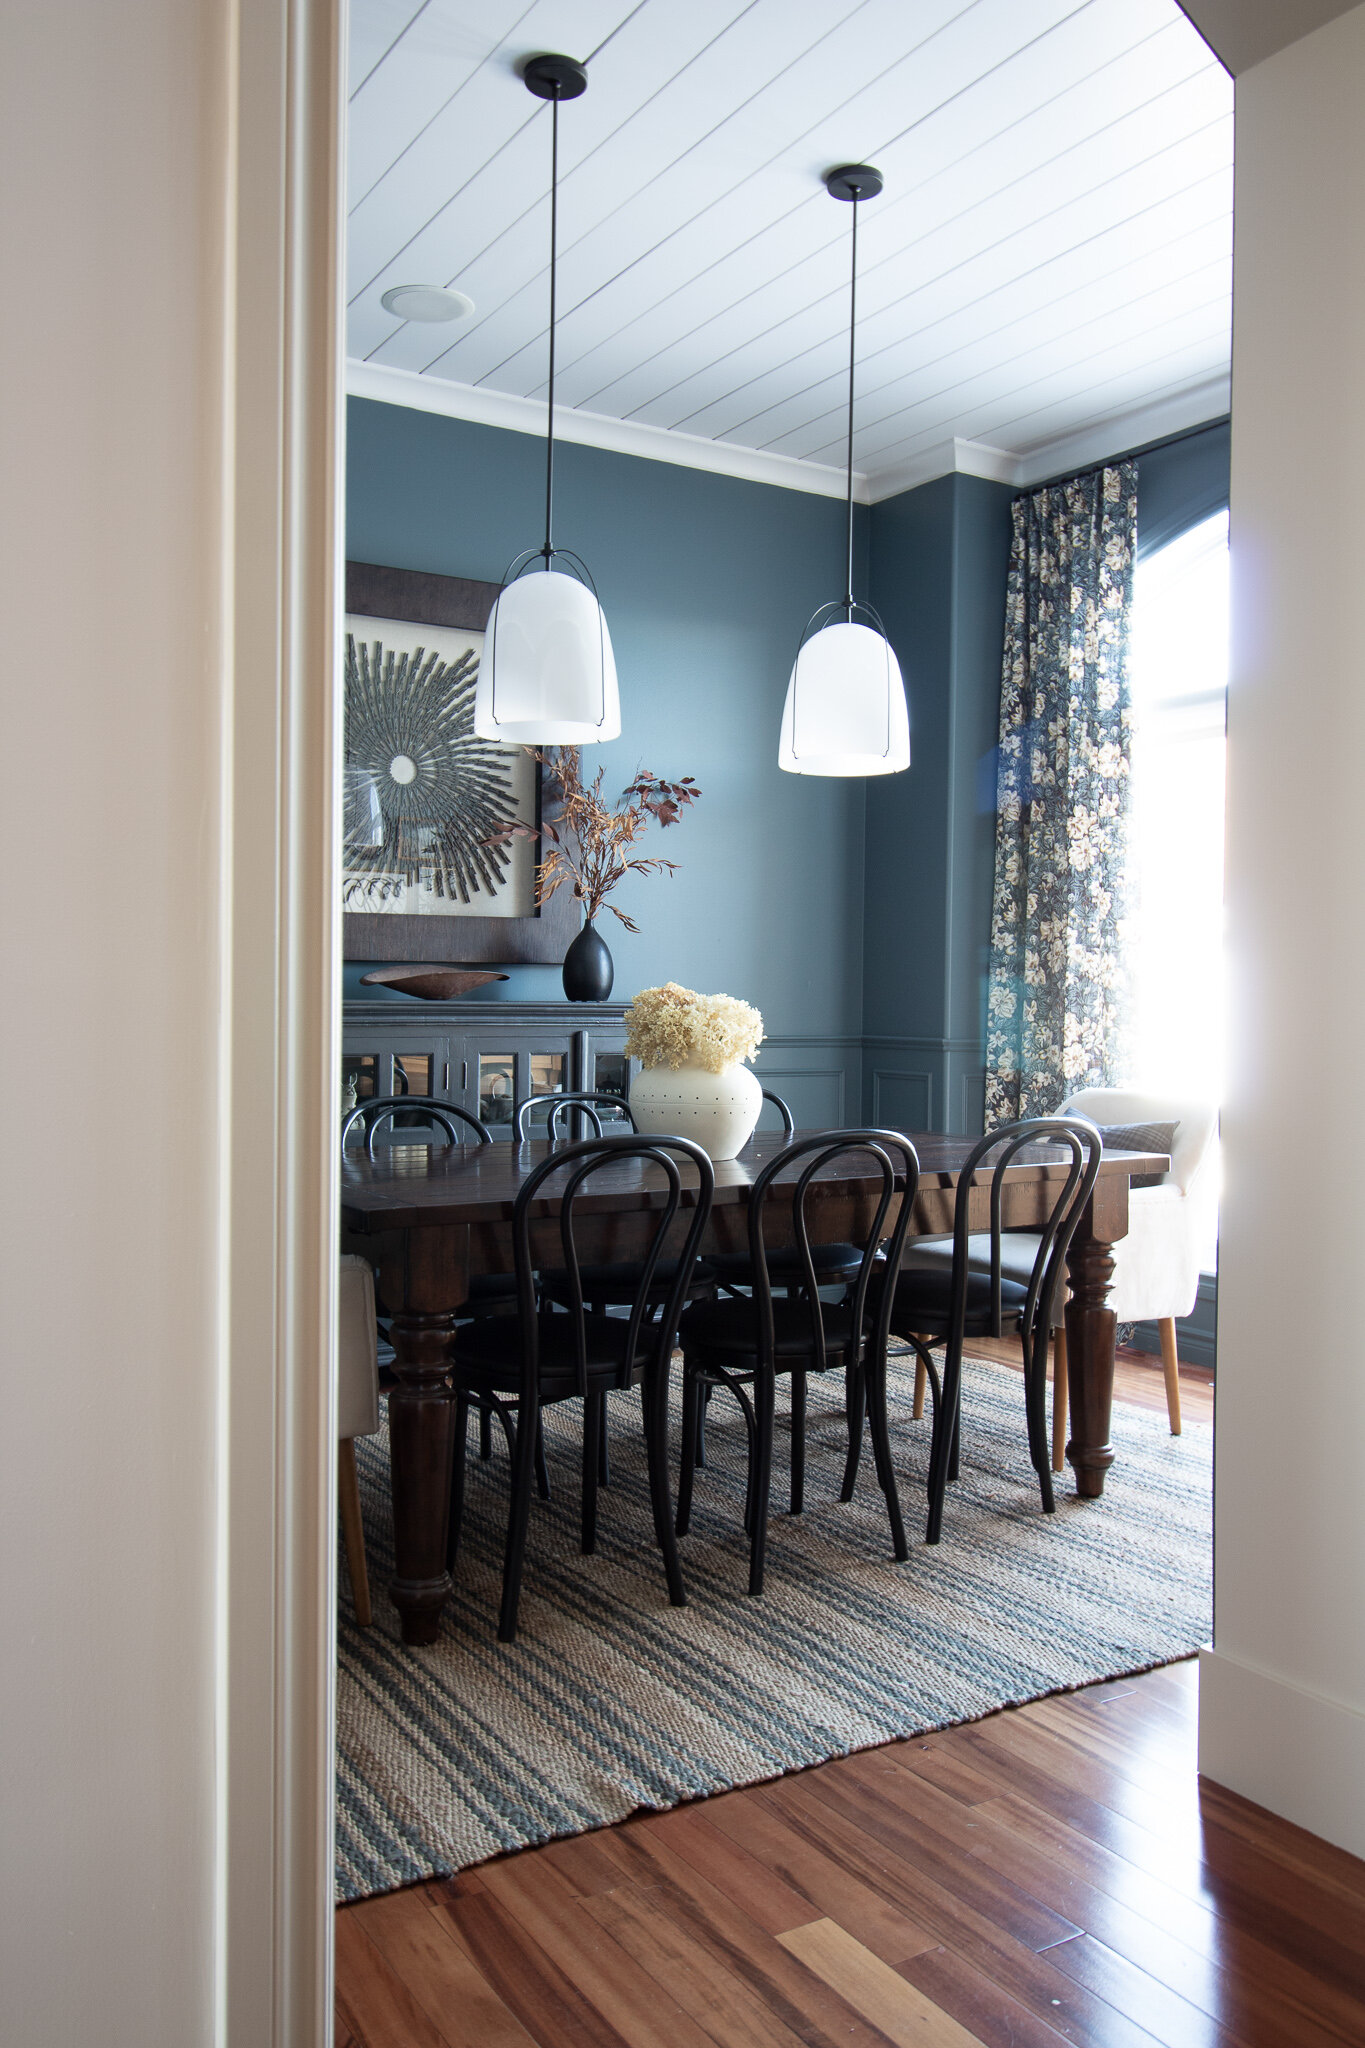
I can not believe I’m saying this but this is actually my fourth time participating! If you haven’t been following along with my past makeovers, here are a few before and afters from previous years:
This post may contain affiliate links. That means if you purchase anything from these links I earn a small commission, at no extra cost to you! This helps support my blog, so thank you!
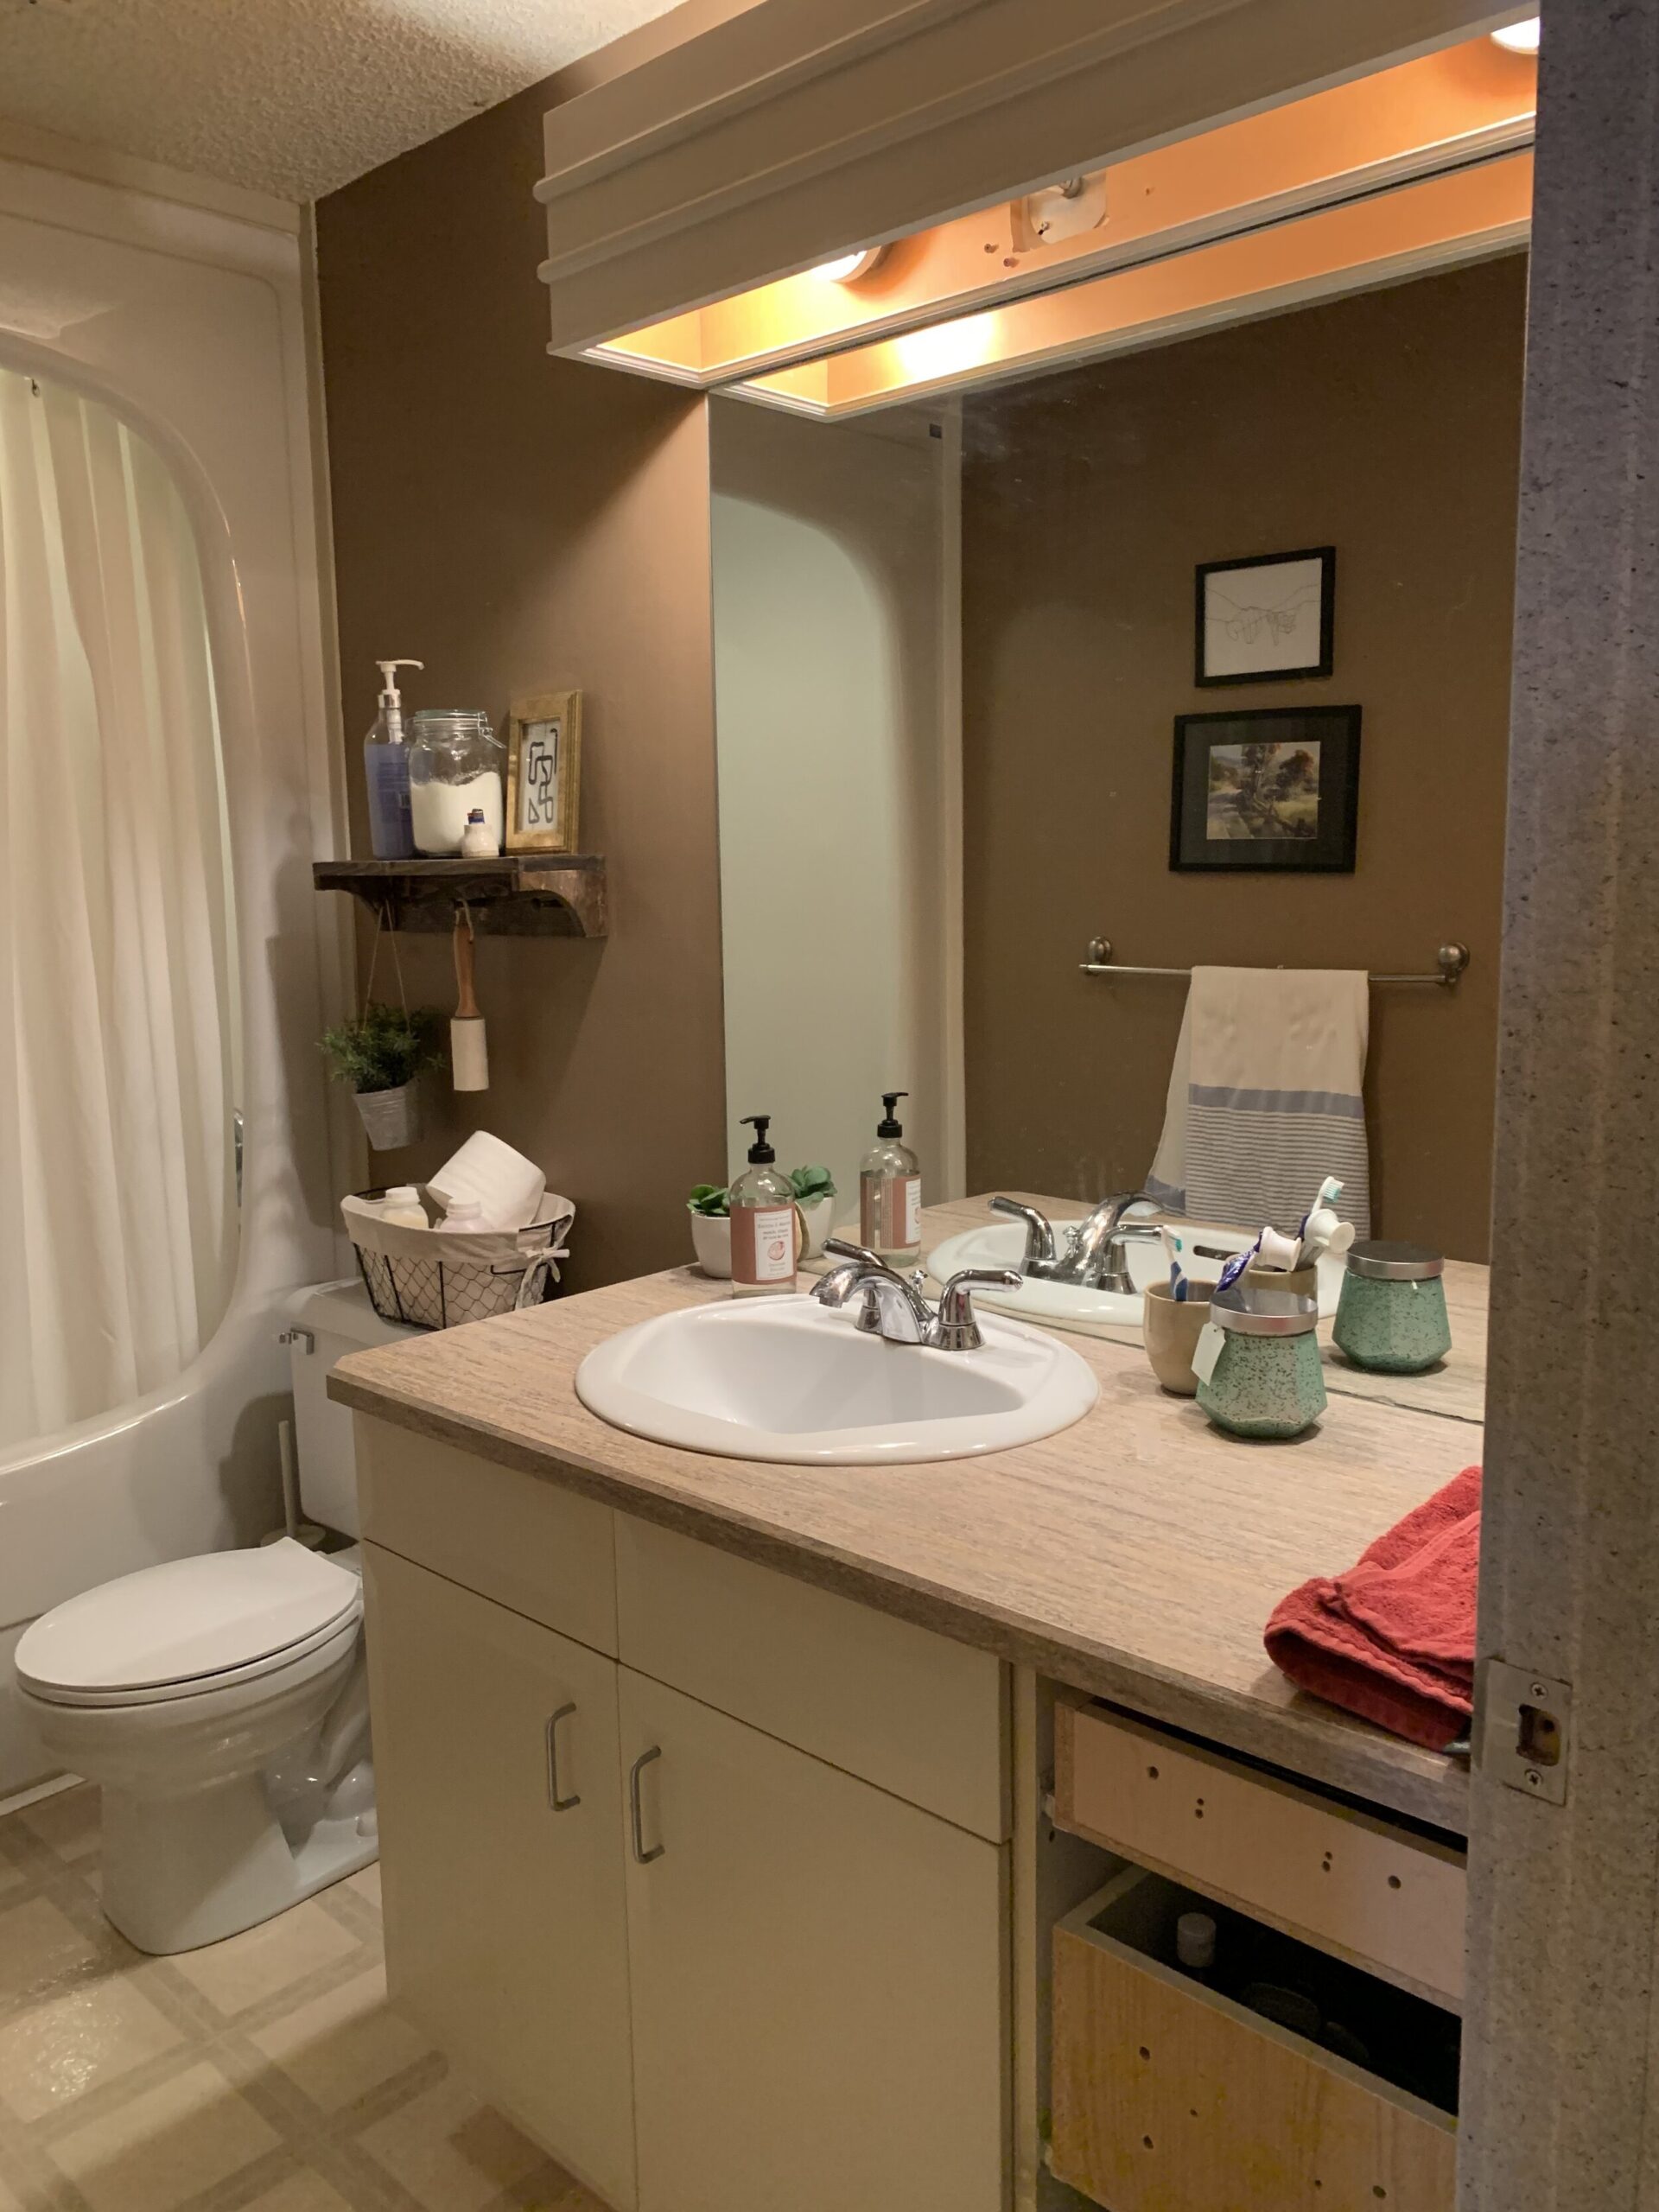
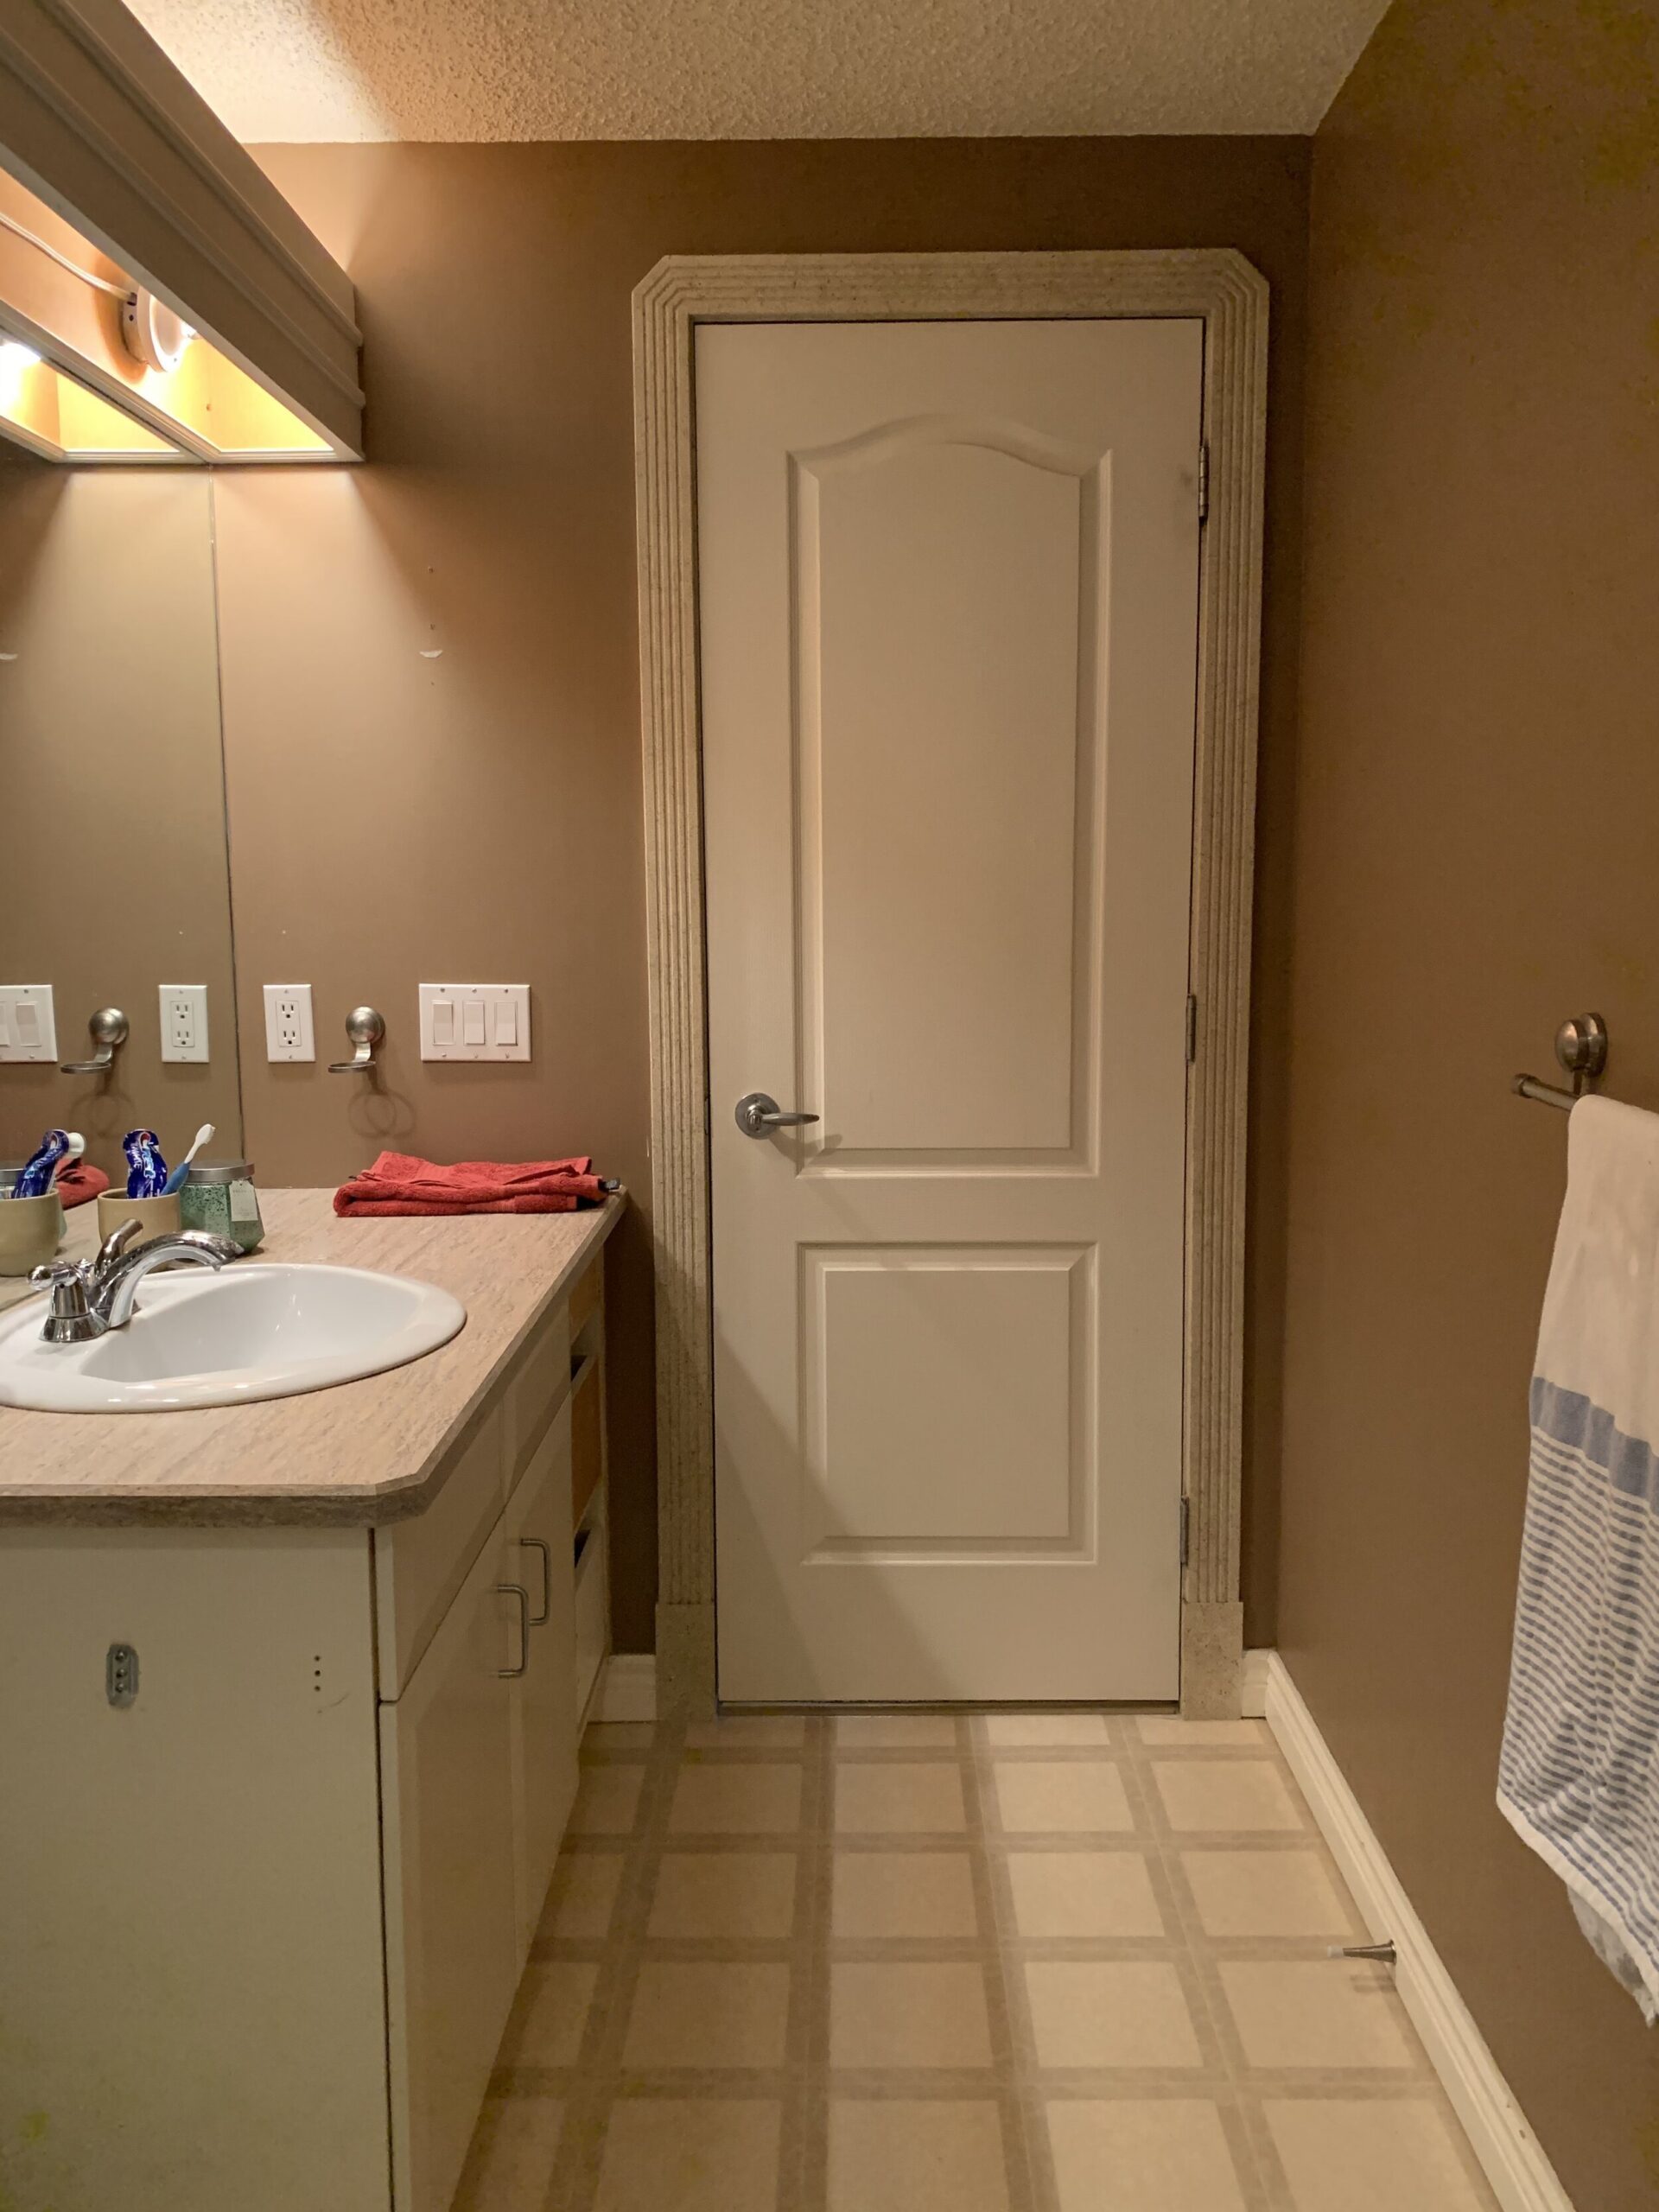
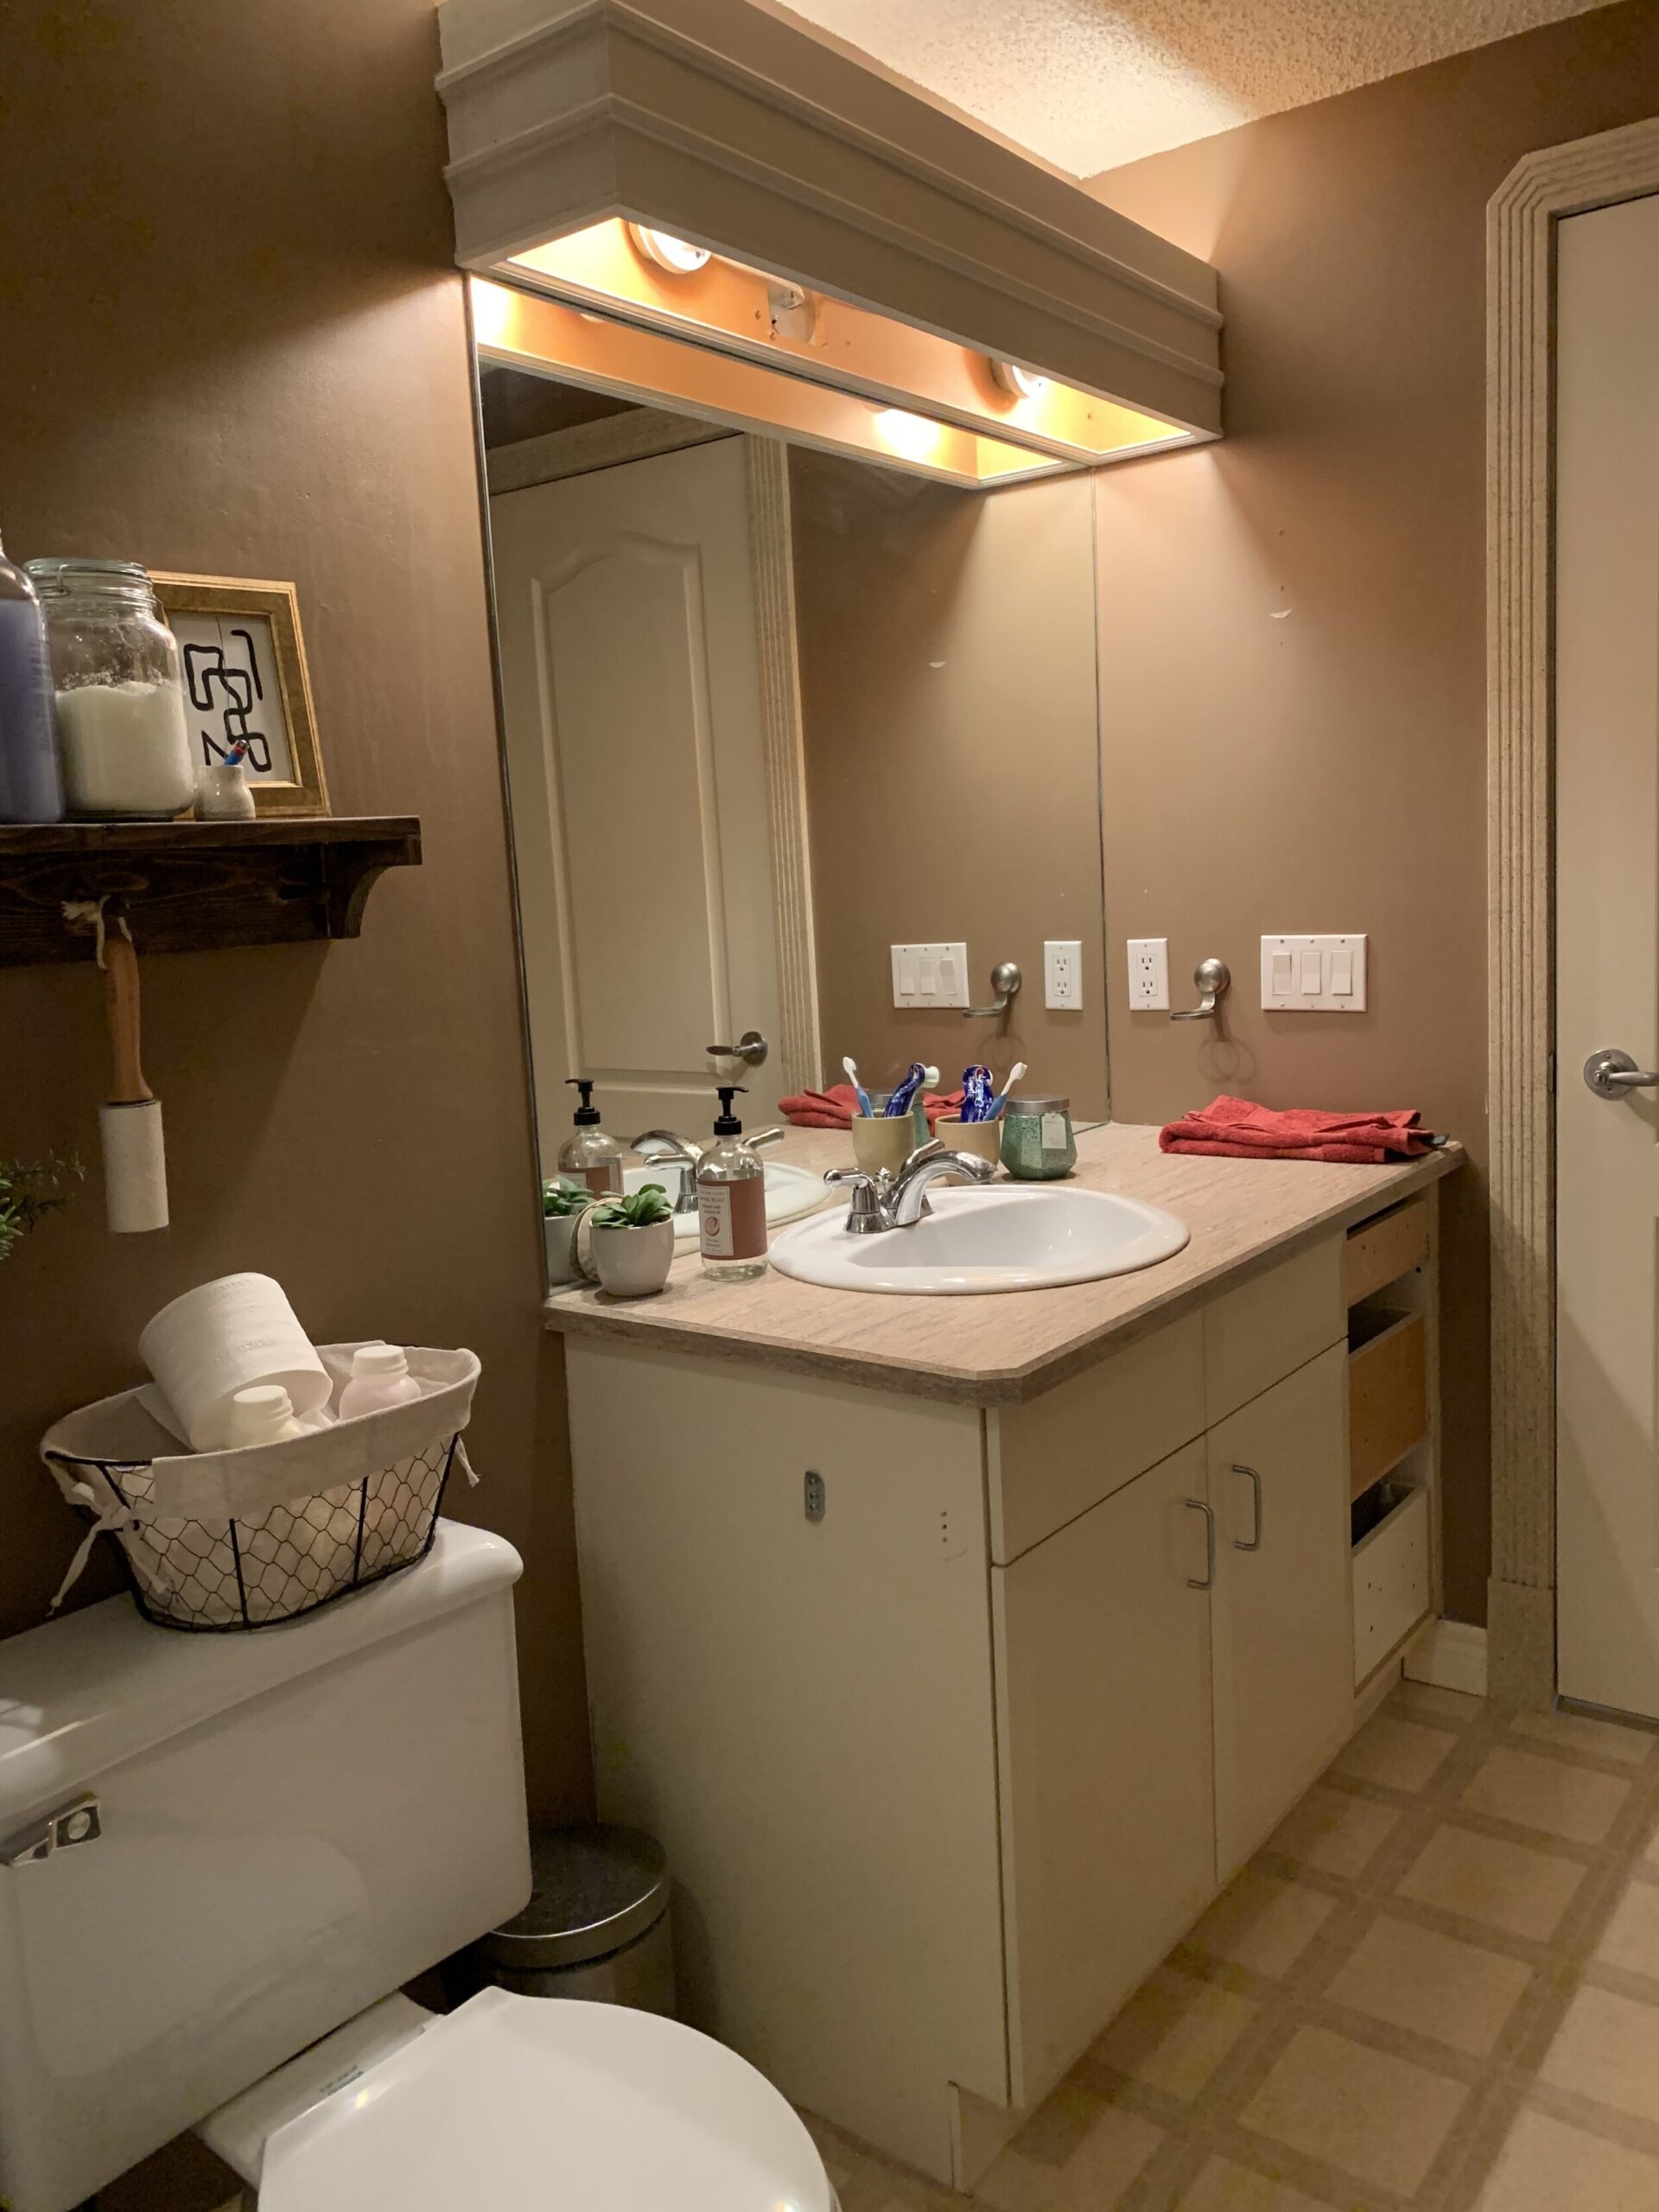
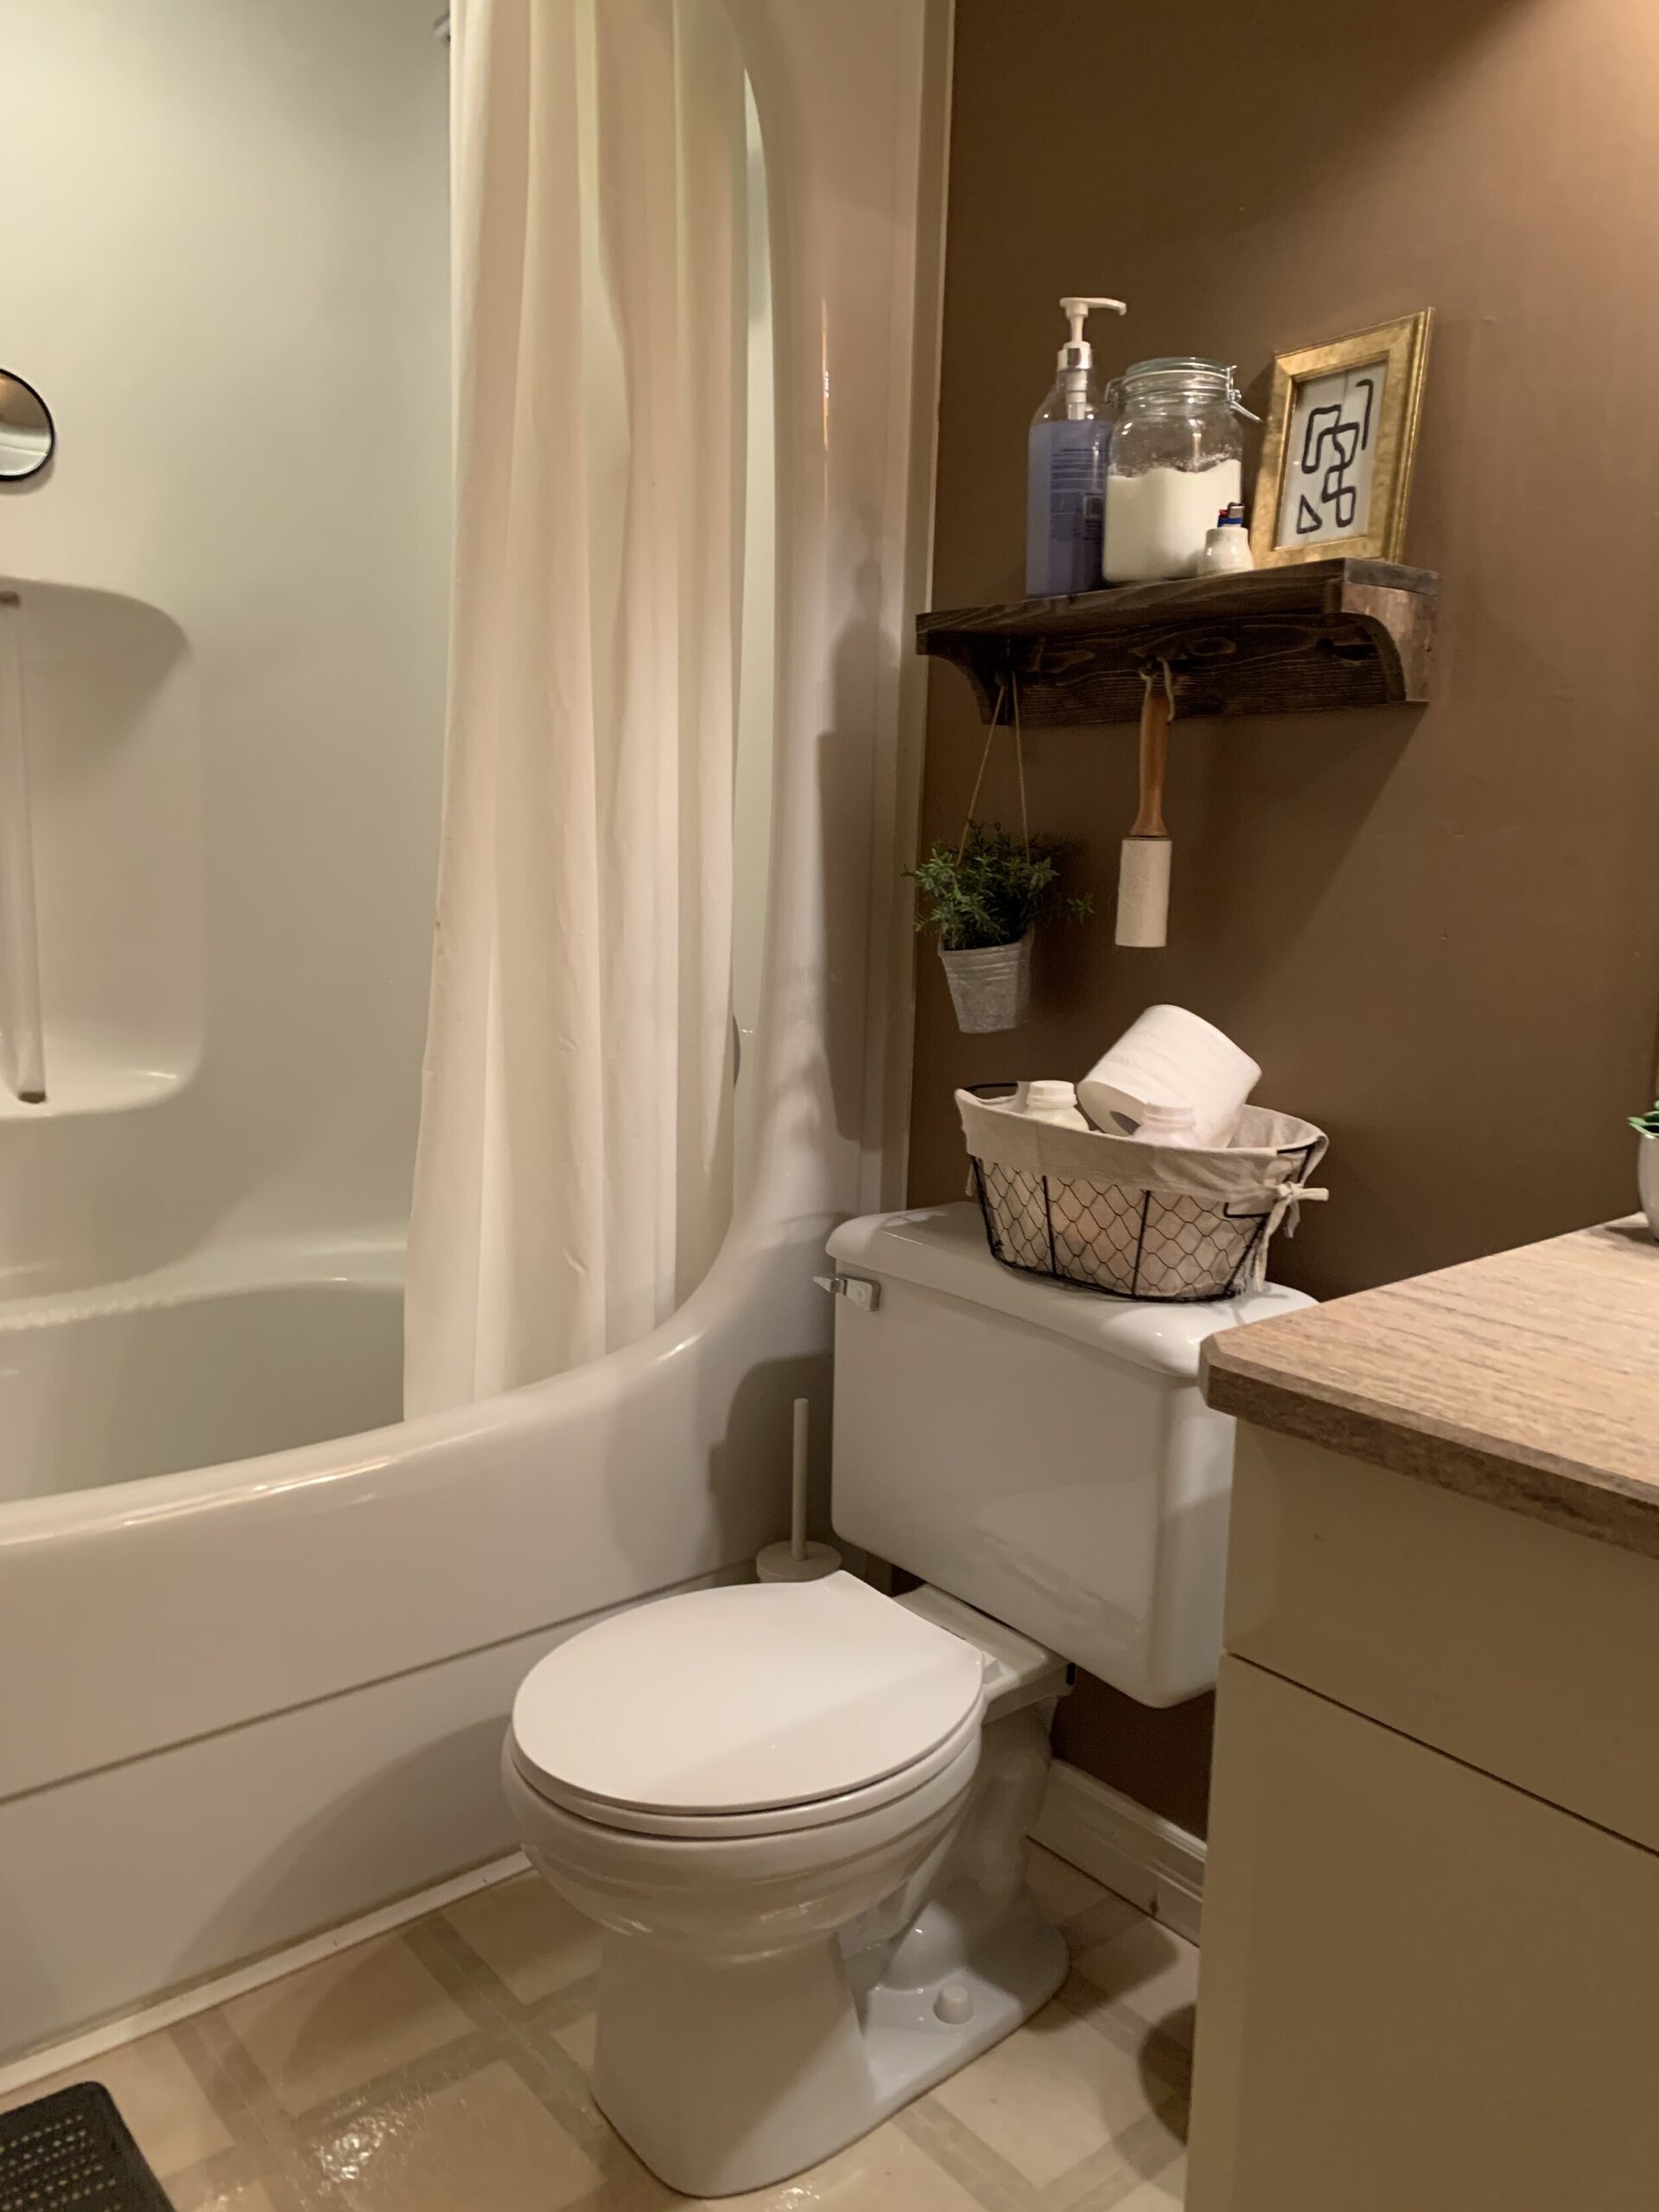
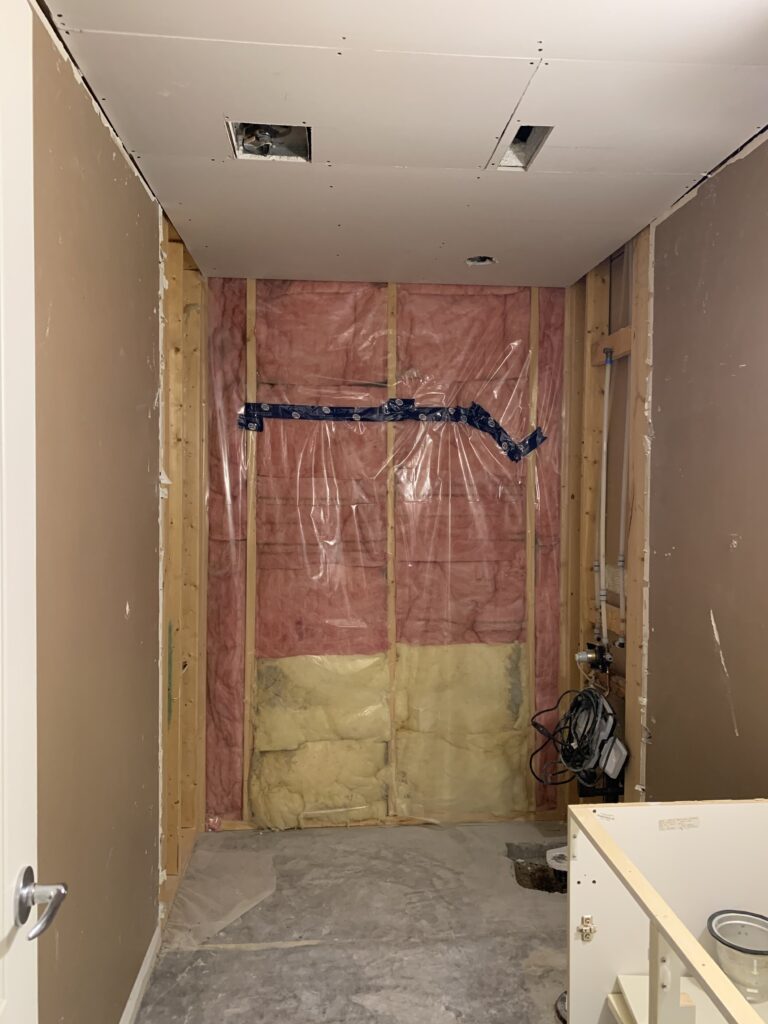
The Before
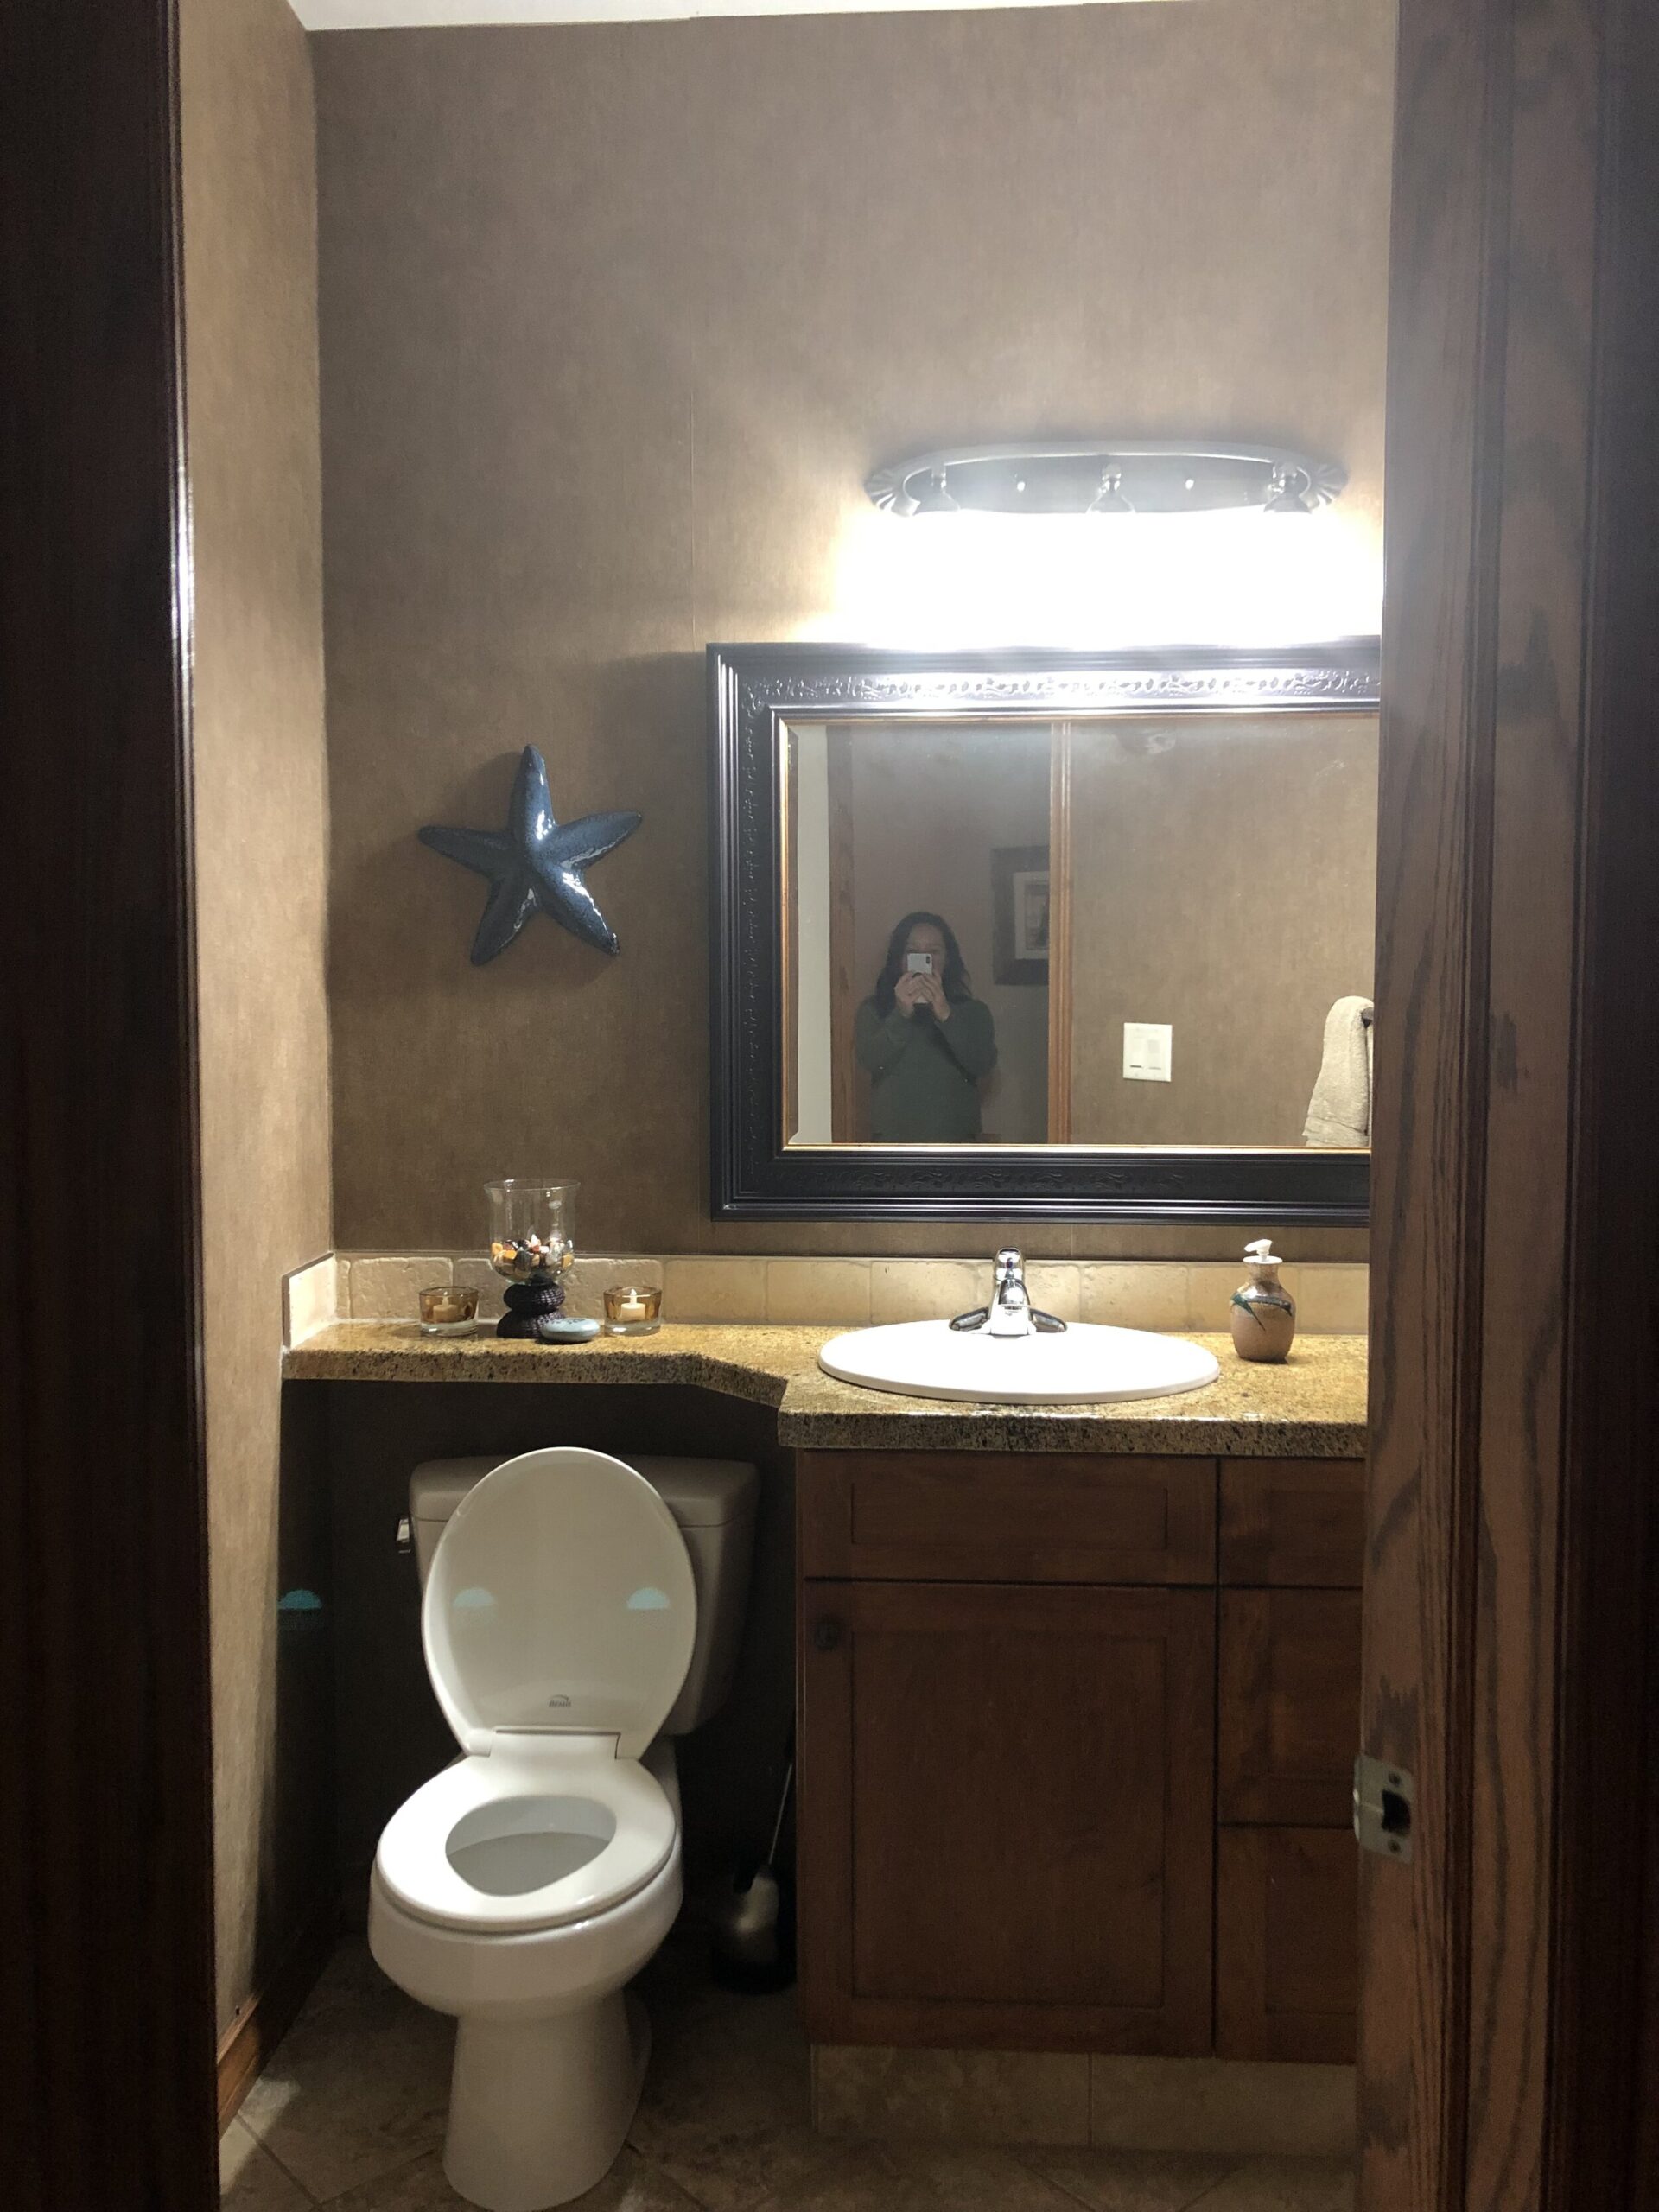
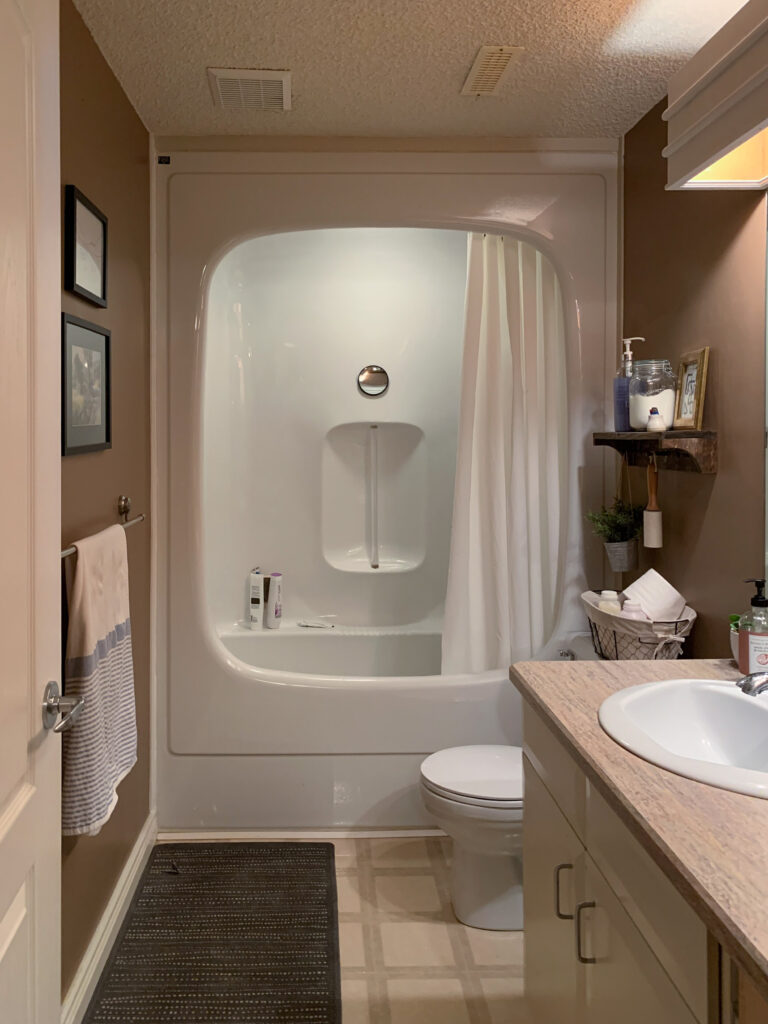
We have a lot of spaces we could have chosen for this makeover, so it was hard to decide what to do next! We moved into this house in the fall of 2020 and since then the house has undergone some major changes, and we have tackled the dining room, bedroom, living room and most of the main open living area. We have a pretty big outdoor project coming up this summer, so we needed to tackle a smaller room that could be done within the 6 – 8 week timeframe pretty easily. The kid’s bathroom is in the basement, and while functional, had a leaking toilet, a leaking faucet, and a “unique” bathtub that we wanted to upgrade and it felt like it was calling out to be next. The bathtub was so narrow it was uncomfortable to shower in (the shower curtain stuck to you!) and not deep enough to have a proper bath. My daughter loves a nice bath and frankly I was tired of listening to her complain about that tub, so we decided it was the sign we needed to put together a plan for it.
Here are the before pictures! It is a very standard size basic bathroom with a good-sized single vanity and a tub at the back, so layout-wise, everything could stay. The finishes needed a bit of an upgrade and the leaks needed to be dealt with but overall, there was a lot we could work with here.
The To-Do List
The bathtub (AKA the Bathtub Time Machine) stirred up a lot of controversy in my Instagram stories, it is the kind of thing you either loved or hated. I received almost the same amount of messages telling me to keep it as I did with people telling me IT HAD TO GO! At the end of the day, it wasn’t the most comfortable or functional tub and it gets a lot of use with two teenagers, so we decided taking it out was what we needed to do. In order to get a jump start on some trade visits, we demoed this past weekend and I’m sorry to say the tub didn’t make it out intact. RIP space-tub.
So a new bathtub and finishes aside, we thought we could definitely reuse the existing vanity. It was in excellent condition, good quality and would have been custom made at the time this house was built. So we’ve decided to breathe new life into it by adding new doors and a few custom details to make it look brand new, and save a bundle by reusing what works.
To summarize, here’s the to-do list:
Demo Bathtub, ceiling, countertop, linoleum floor, toilet, mirror and light fixture (this we accomplished this past weekend!)
Frame out a new ceiling over the bathtub and re-drywall the whole ceiling (Half-done, we have a drywall mudder/ taper coming this week!)
Move tub drain and supply lines to accommodate the new tub
New light fixture, and re-center over the sink
New countertop and sink
New plumbing fixtures
New tub and toilet
Add wall treatment and replace door trim and hardware
Rework existing vanity
New floor and shower tile
Paint
New accessories like Mirror, hooks, toilet paper holders, shower curtain, etc
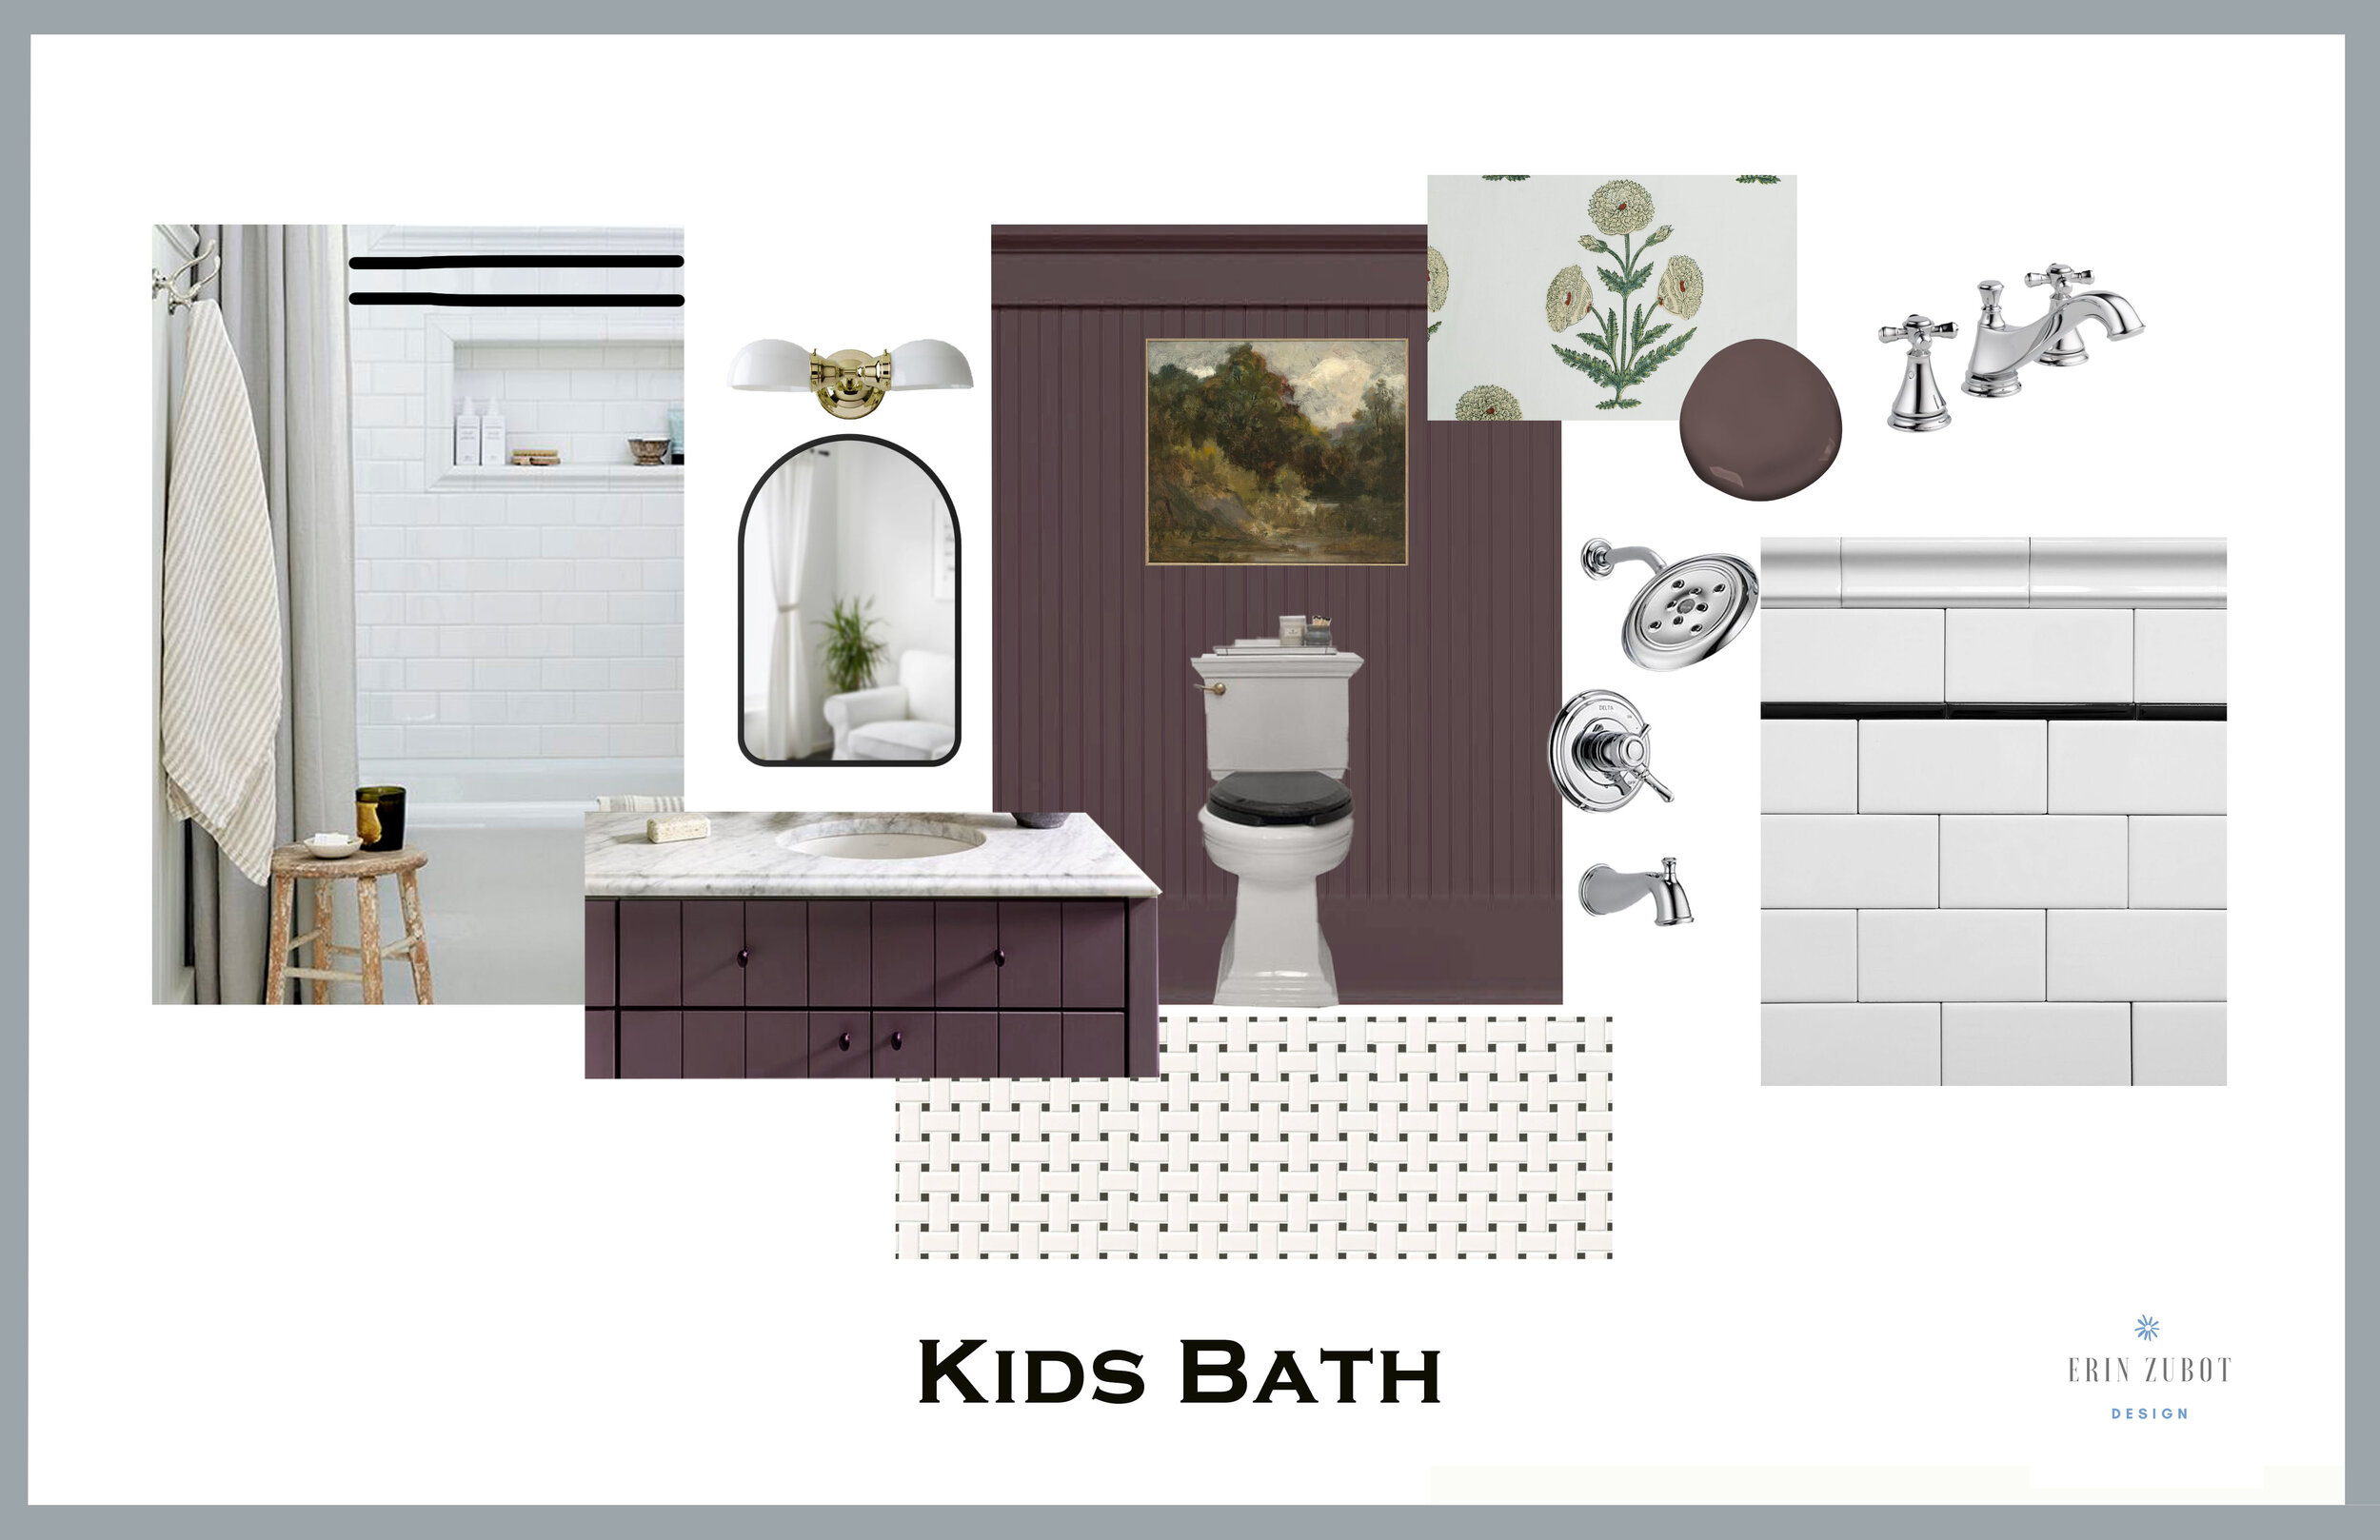
The Design
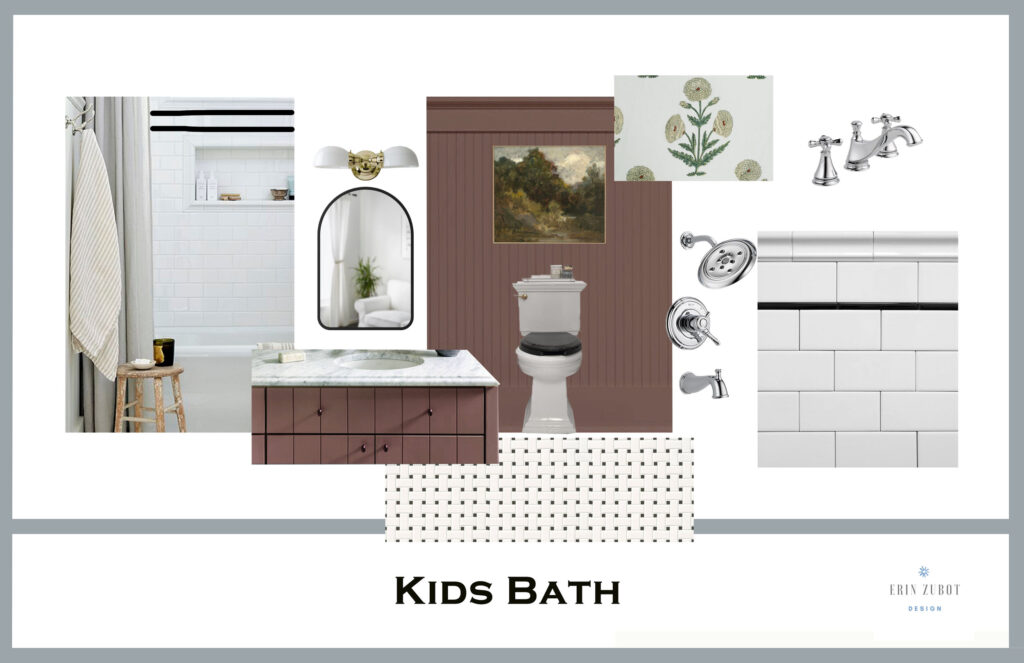
When people hear me saying that I’m doing a “kids bathroom”, they might think that I am doing some fun kid-themed space, but my kids are 15 and 18 and so the design is no different from what we would do in any other space in our home, and it needs to feel cohesive with the rest of the house, too. I put together some plans and ran them by the kids, and generally, they agreed with my ideas. Like most of my designs, it includes classic traditional details with a few modern accents. For the colour, I am going to let the kids decide. They both want a fun colour in there and are choosing between a deep purple and a brownish-red. Both colours are a little outside my comfort zone (blues and greens are more my happy place) but I like that they chose something I might not have on my own, it’s going to be fun for me to stretch my design muscle. To keep it cohesive with the rest of the house, I’m going to make sure it is a muddy-earthy muted tone, as much as that’s possible with purple and red! I haven’t yet picked the colour and I feel like that might be the hardest part – does anyone have any suggestions?
When it comes to tile choices- the sky is the limit and you can really blow your budget here. I thought back to houses I’ve lived in and tile projects I’ve done before and what types of tile I have loved for a long time because I feel like those types of choices will stand the test of time for me, and for this house. For that reason, it had to be subway tile. I know, you are all thinking: WHAT ARE YOU DOING SUBWAY TILE IS SO BASIC. Sure it is, but there are lots of ways it can be installed and details that you can add to subway tile to make it… well, not basic, and I intend to try something new. For the floor, I have always loved a nice basketweave, it is a classic tile that has been around for decades and I feel like will be around for decades more.
I am throwing in another classic material that I have loved for a very long time, and that’s beadboard. I think the first time I used beadboard was in 2003 on one of the first houses we ever owned, and I still love it. It’s had a bit of a resurgence of late, but I still think it’s a classic, humble material and fits right in with my design aesthetic. I’m going to totally clad the walls (floor to ceiling!) simply because I haven’t done that before, I’ve generally used it as a wainscotting (half wall) material so WHY NOT bring it all the way up? That sounds fun – let’s give that a shot!
For metals, I love to use more than one and in this bathroom, I’m focusing on unlacquered brass and polished nickel. I love the look of polished nickel in bathroom fixtures, they feel so luxe to me, a classic. Pairing that with a muted brass that patinas over time… that’s a perfect, timeless combination in my opinion.
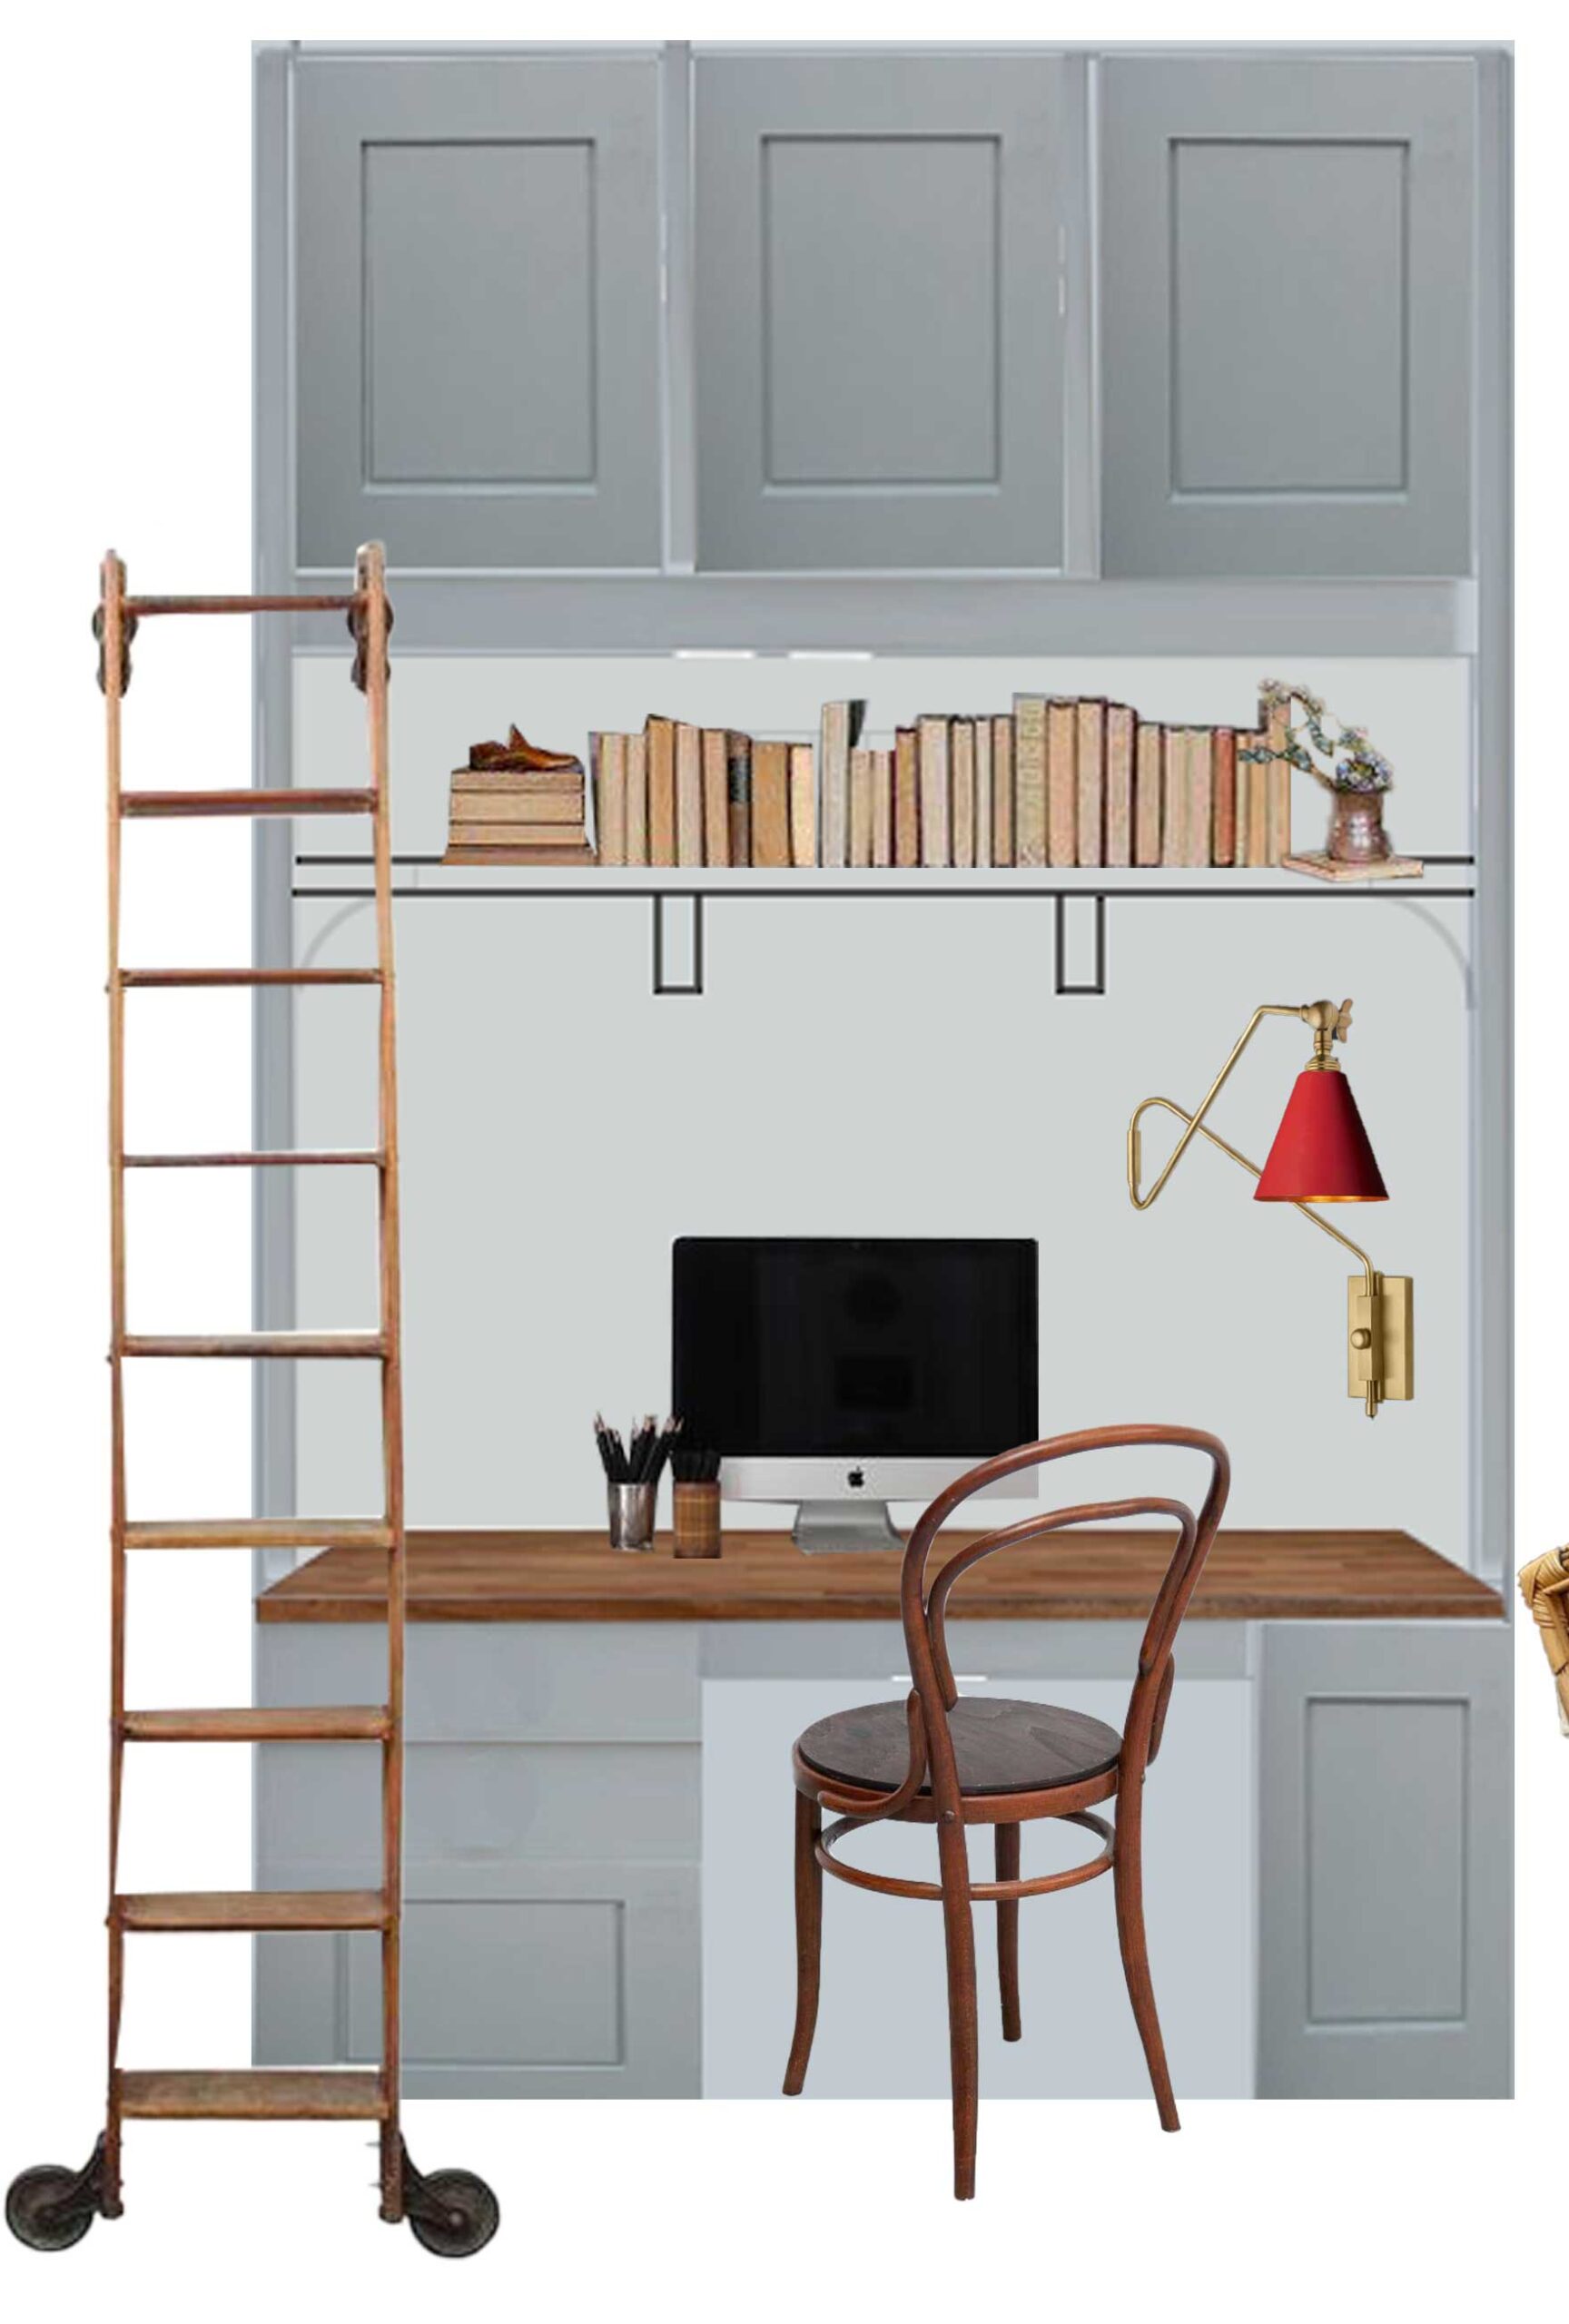
So here is the moodboard(s) – in purple and brownish-red. I’m curious, which do you prefer?

One last thing! This season, I sat down and thought about the challenges I have loved watching the most and why. For me, it’s the ones that I can learn from and that share all the behind-the-scenes, the why’s and the how’s. Since that’s what I like to follow, I thought that you, dear reader, might enjoy that as well. That’s why this season I’m doing something a little differently. I’ve decided to focus my blog post efforts on more detailed tutorials alongside my weekly updates. We are DIY’ing almost this entire thing, and I am hoping to empower some of you to try a few of these projects for yourself! (Nothing brings me greater joy than a message saying I’ve helped one of you with a project because of something I shared.) I am also going to do something ELSE I haven’t done before and share a budget breakdown at the end of the project because I know that’s always something I am curious about so it seems to me you may be, too. I have only not shared this before because my recordkeeping can be spotty with multiple Home Depot trips a week, but I will try to do better!
That’s all for today – be sure to check back next week where I will have some progress, and a tutorial for you! If you want to catch some sneak peeks follow me on Instagram (@erinzubotdesign), I’ll be sharing a lot of behind-the-scenes there. Also, check out the other designers HERE or click the ORC Logo below, there is a lot to catch up on. See you next week!
Looks like some amazing plans! Can’t wait to follow along. We are working on our attic space this ORC.
Oh, I love your design board. I think I’m in the purple, eggplant camp! But either looks lovely.
Drooling over that tile!
Oh my goodness this is going to be so beautiful!! I can’t wait to see the lovely paint color up on the walls!!
Oh Erin this is going to be so good! Loving the look of the vanity!
I am SO excited about the color you are using. This is going to be beautiful!
What a gorgeous design plan!!
Oh man, your previous transformations were amazing!! I think I’m leaning towards purple, but I love both- and your bath time time machine has be cracking up!!! That is a LEWK for sure hahahah!!
Love u ripped out space tub an like all parts of design. Is a darker color for beadvoard and/or vanity want u really want since there is no natural light?
How fun. We did our main bathroom a couple of years ago for the ORC and did the majority of it ourselves. Your main bathroom looks like it will be amazing! I’m looking forward to following along.
Definitely the purple/plum color! It has more depth (and purple has red in it, so… good compromise?). Love the moodboard!
Thank you Halena! I will check out your attic space that sounds amazing!
Thanks Leslie – it seems like purple is the popular choice but we will see what feels right when we sample paint!
Thanks Kristian! Gotta stick with the classics
Thank you so much Lindsey!
Thank you Ashley! I’ve already changed this vanity so we will see what we actually end up doing haha!
Thanks Katie! I’m nervous/ excited about the colour too – I am much more comfortable with blue or green eeeeeek!
Thank you so much Brianna!
Thank you Laura! And yes the old bathtub was a statement that is for sure! Just not the statement I wanted to make!
Thank you April! I have done a dark colour in a dark room before. A windowless room is never going to be bright so sometimes it’s better to just embrace the darkness!
Thank you so much Sheri! Yes we are doing most of this ourselves too, that’s the fun part isn’t it!
Thanks Amy! We are leaning purple for sure and that’s a good point about it having red in it!
Can’t wait to see it done! I love the black and white
Awesome, love all the info, it’s something we are trying to do as well post more videos!. We are also doing a bathroom and diy-ing most of it if not all. Love the design btw. We are sure it will turn out amazing.
Purple for my choice
I love the purple. What’s the purple paint color you used in the mood board?
Thanks Elaine!
Thanks Rachel! The purple is pretty close to Desert Shadows by Benjamin Moore, but we haven’t yet sampled colours so we will figure out the exact colour after we do that.
Bathtub time machine! I love it! 🙂 (Well, not IT! you know…) I think your plan is wonderful. I really like that black pencil tile stripe too.
Thanks Amy!
Oh awesome! There seems to be a lot of bathrooms happening this season! Documenting things takes a lot of time but it’s worth it if it helps someone, isn’t it!
So excited to follow this project. I love learning from ORC projects so I can’t wait to see the tutorials you have to share!
Erin, I’m really excited to see this bathroom! The powder room you did in a previous challenge turned out so nice! You have such great style! I think subway tiles are perfect for a timeless traditional look. I’m also biased because I used them lol.
Muddy purple – BM Amazon Soil!
I love your plans Erin! I’m gonna go with the unpopular vote here and say I’m more drawn to the red! BUT both are gorgeous and I’m confident you’ll choose the best one for your home! I can’t wait to follow along!
I love your plans Erin! This is going to be stunning!
Possibly my favorite part of the ORC is seeing all the unique/strange room features in the before pictures — also why I love Zillow browsing, haha! Your tub definitely tops the list this time! Good luck with your bathroom, and I’m team redish-brown here!!!
Thank you Stacy! I’m excited to use that black pencil tile too!
Thanks Mel! I hope you find the tutorials helpful!
Thank you so much Marie! Subway tile is always a good idea.
Oh thank you – I have that one on my list to sample actually! Glad to hear it’s also recommended by you!
Thanks Robyn! I am nervous about the purple myself but letting the kids take the lead on the choice.
Thank you so much Sanda!
Haha yeah my house is full of some very colourful before photos! And I’m partial to the reddish brown too, but the kids are going to make the final call I think!
Loveee these design plans!
So excited to see this transformation! I am in camp #ditchthetub 🙂 Love your design plans and can’t wait to see which color you decide to go with!
Thanks so much!
Thanks so much Deanna! I’m glad you agree that the tub had to go!