How to Install Tile in your Bathroom Shower, Step by Step
I can’t believe that week three is already here, this challenge is flying by! If you’ve just hopped over from the One Room Challenge Website, welcome! I’m so glad you are here! You can catch up on our One Room Challenge project here:
This post may contain affiliate links. That means if you purchase anything from these links I earn a small commission, at no extra cost to you! This helps support my blog, so thank you!
Table of Contents
This Week’s Progress
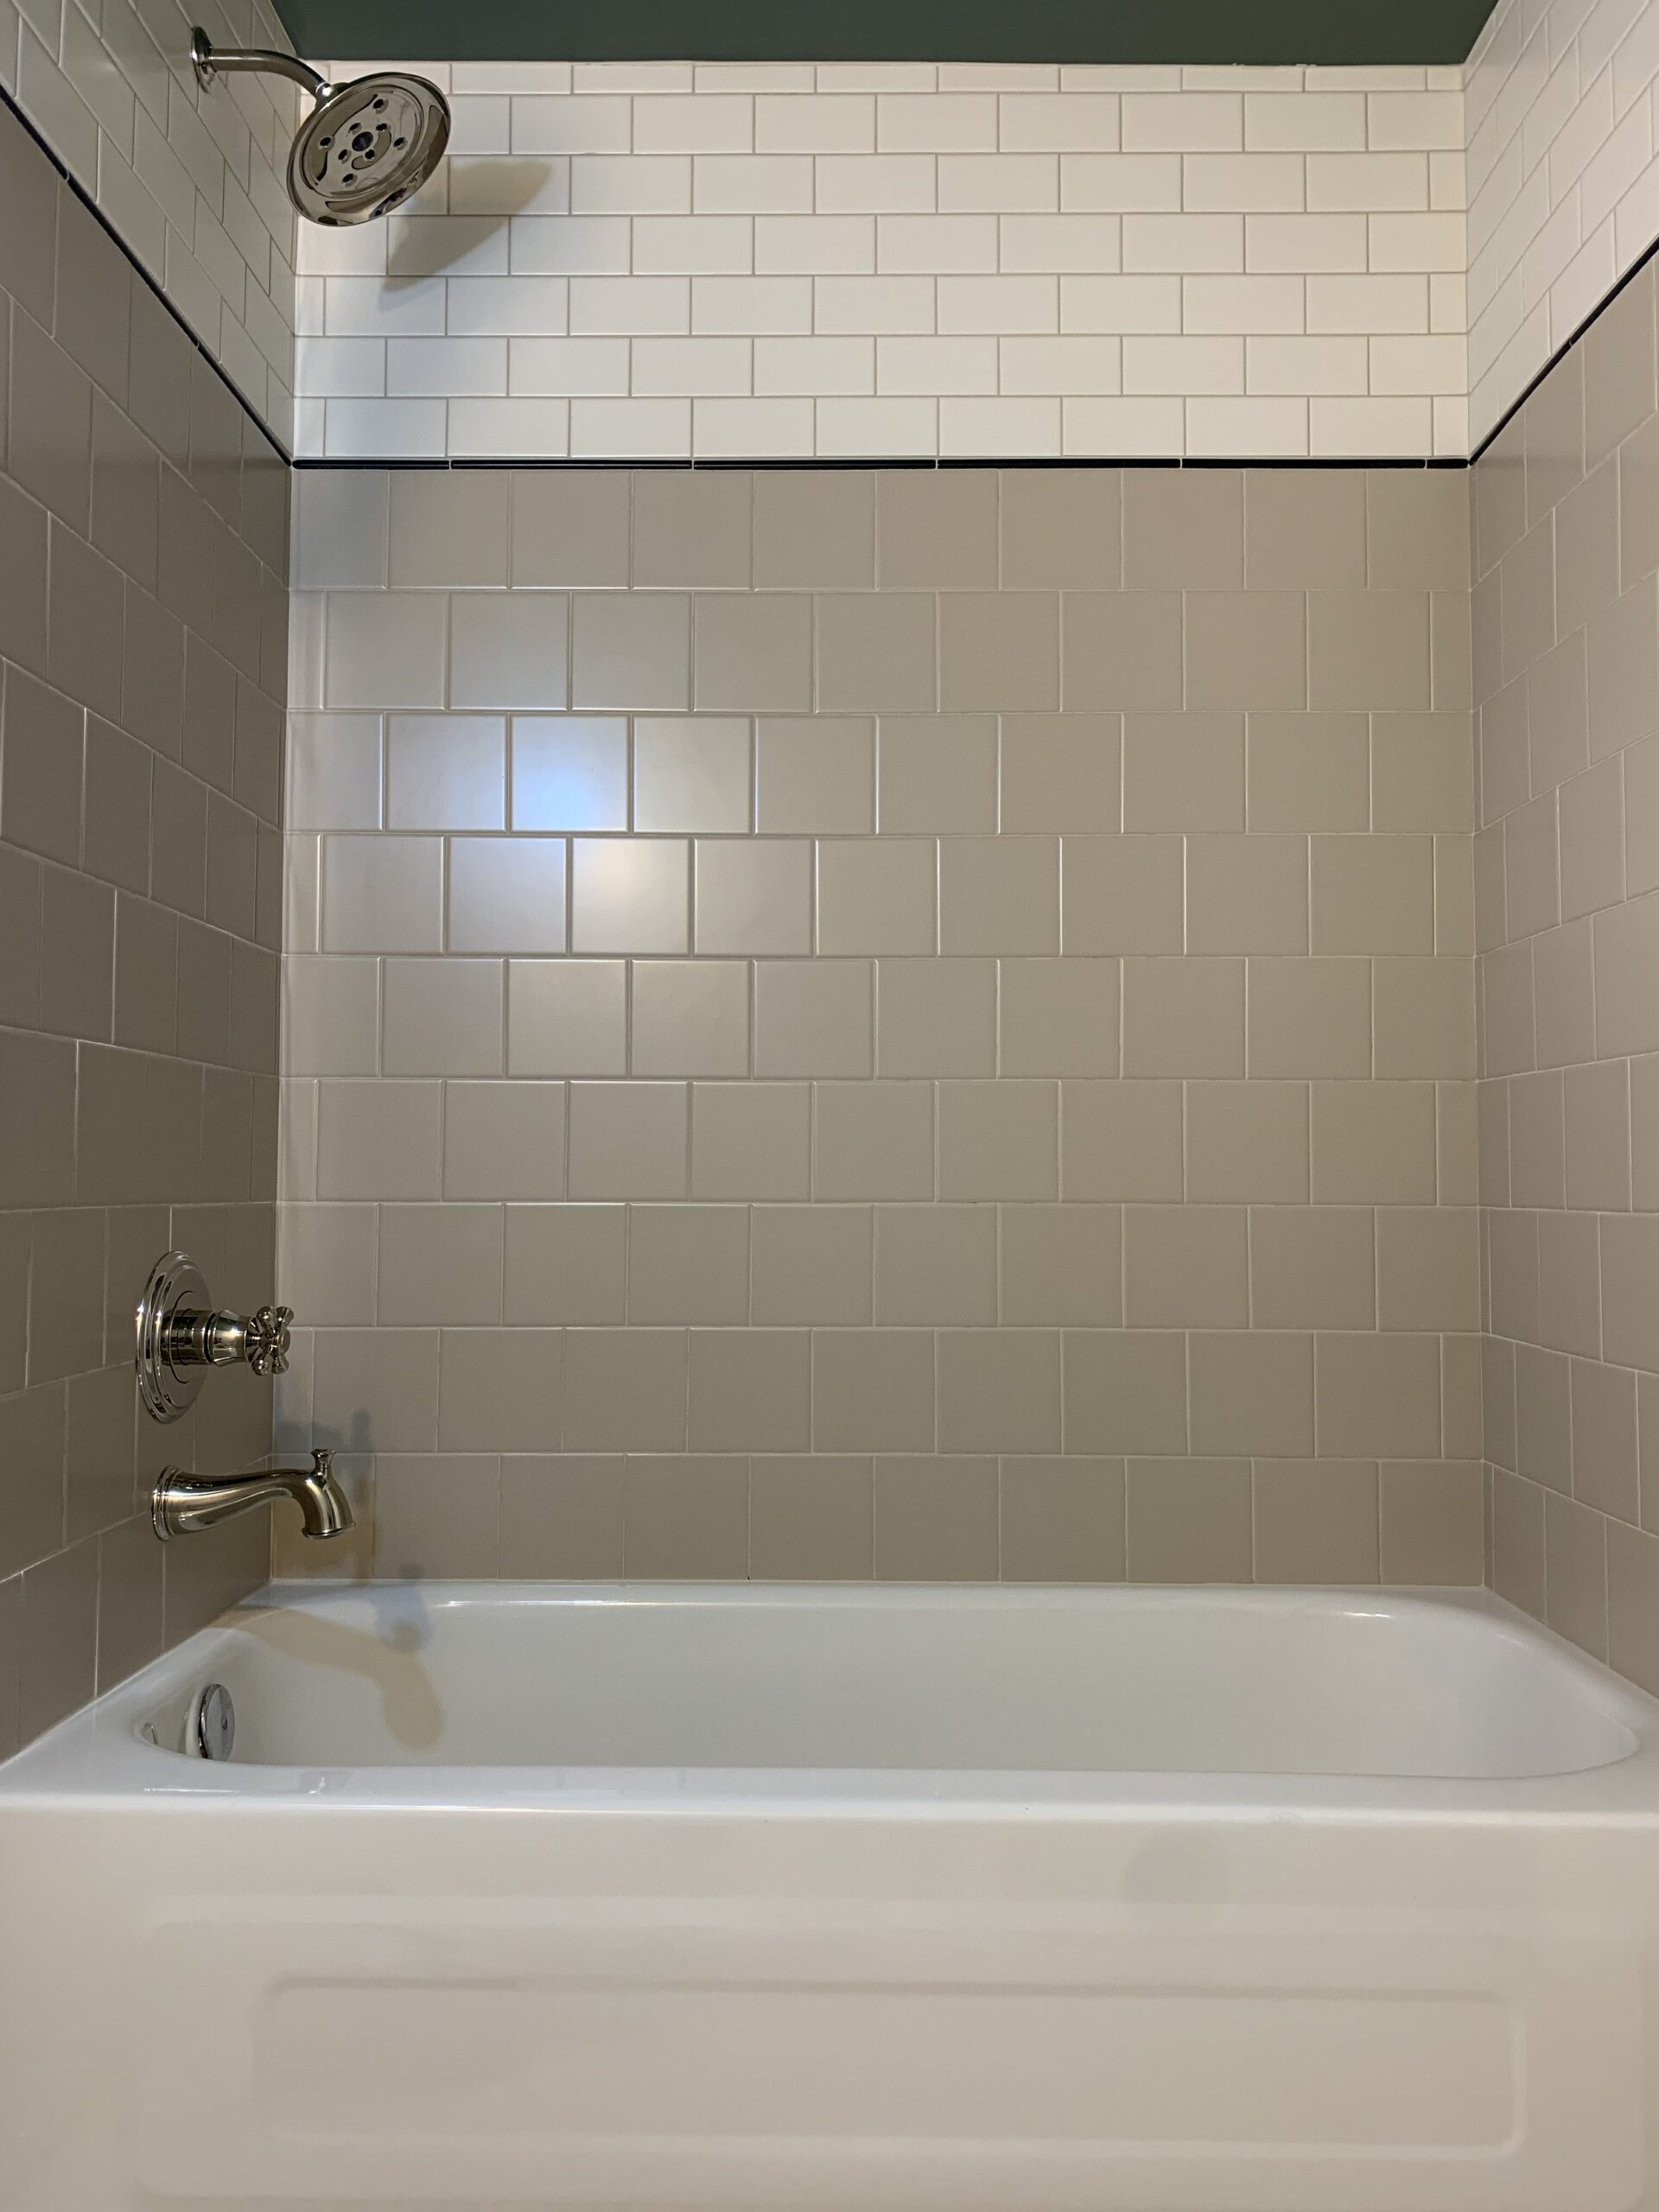
This week was all about the tile! I tiled the tub surround on the shower walls and it took me WAYYYYY longer than I thought it would, I foolishly went into the weekend thinking I would have the whole shower done and grouted and thought I might even get to the bathroom floor tile. HA! Fat chance! By the end of the weekend, I had not yet finished tiling the shower or grouting it and wasn’t even considering the floor yet.
I ended up choosing a sort of challenging tile border around the niche which took me the better part of a day to install around, and I also underestimated the time it would take to install all those bitty tiles. Although installing subway tile is relatively easy, there are a lot of those little guys so it takes some time!

Tile Design
This year, I’m promising a tutorial with every single One Room Challenge update and so this week’s tutorial is obviously how to lay tile! But before we get into that, I do want to talk a little bit about the tile I went with.
After choosing a pretty trendy tile in my last house’s bathroom and regretting it not that long after, I knew that a more classic type of tile would be something I could live with and love a lot longer. Being a kid’s bathroom located in the basement, I also knew that I was not going to be choosing an expensive tile, so I was looking for budget-friendly options. I searched online for examples of vintage and classic bathroom tile and the ones I was the most attracted to included subway in one form or another.
I have always loved subway tile, and while popular opinion may be that it has “had its day” due to its popularity, and maybe its overuse in recent years, I feel like it is truly a timeless material that when used right, will never go out of style.
I found a great blog post by Room For Tuesday which talked about how to make subway tile sing, and I got some great inspiration from her post (and her guest bath which uses subway ceramic wall tile in such a beautiful way). The subway tile installations I was most attracted to had some kind of detail in them to make them a little more special, and I thought to myself, why don’t I just do a subway tile surround but make it fancy?
When I’m looking to add interest to a room I look to moulding, so why not consider “moulding” style details in a tile installation? So that’s what I did! I talked to my tile supplier about what types of trim tiles I could get and also looked at coordinating ceramic tiles for the floor.
I settled on a basketweave for the floor that my tile supplier had in stock at a good price, which is a classic tile pattern I’ve always loved. The basketweave had black dots so I came up with a little pattern using some black trim pieces to tie that in.
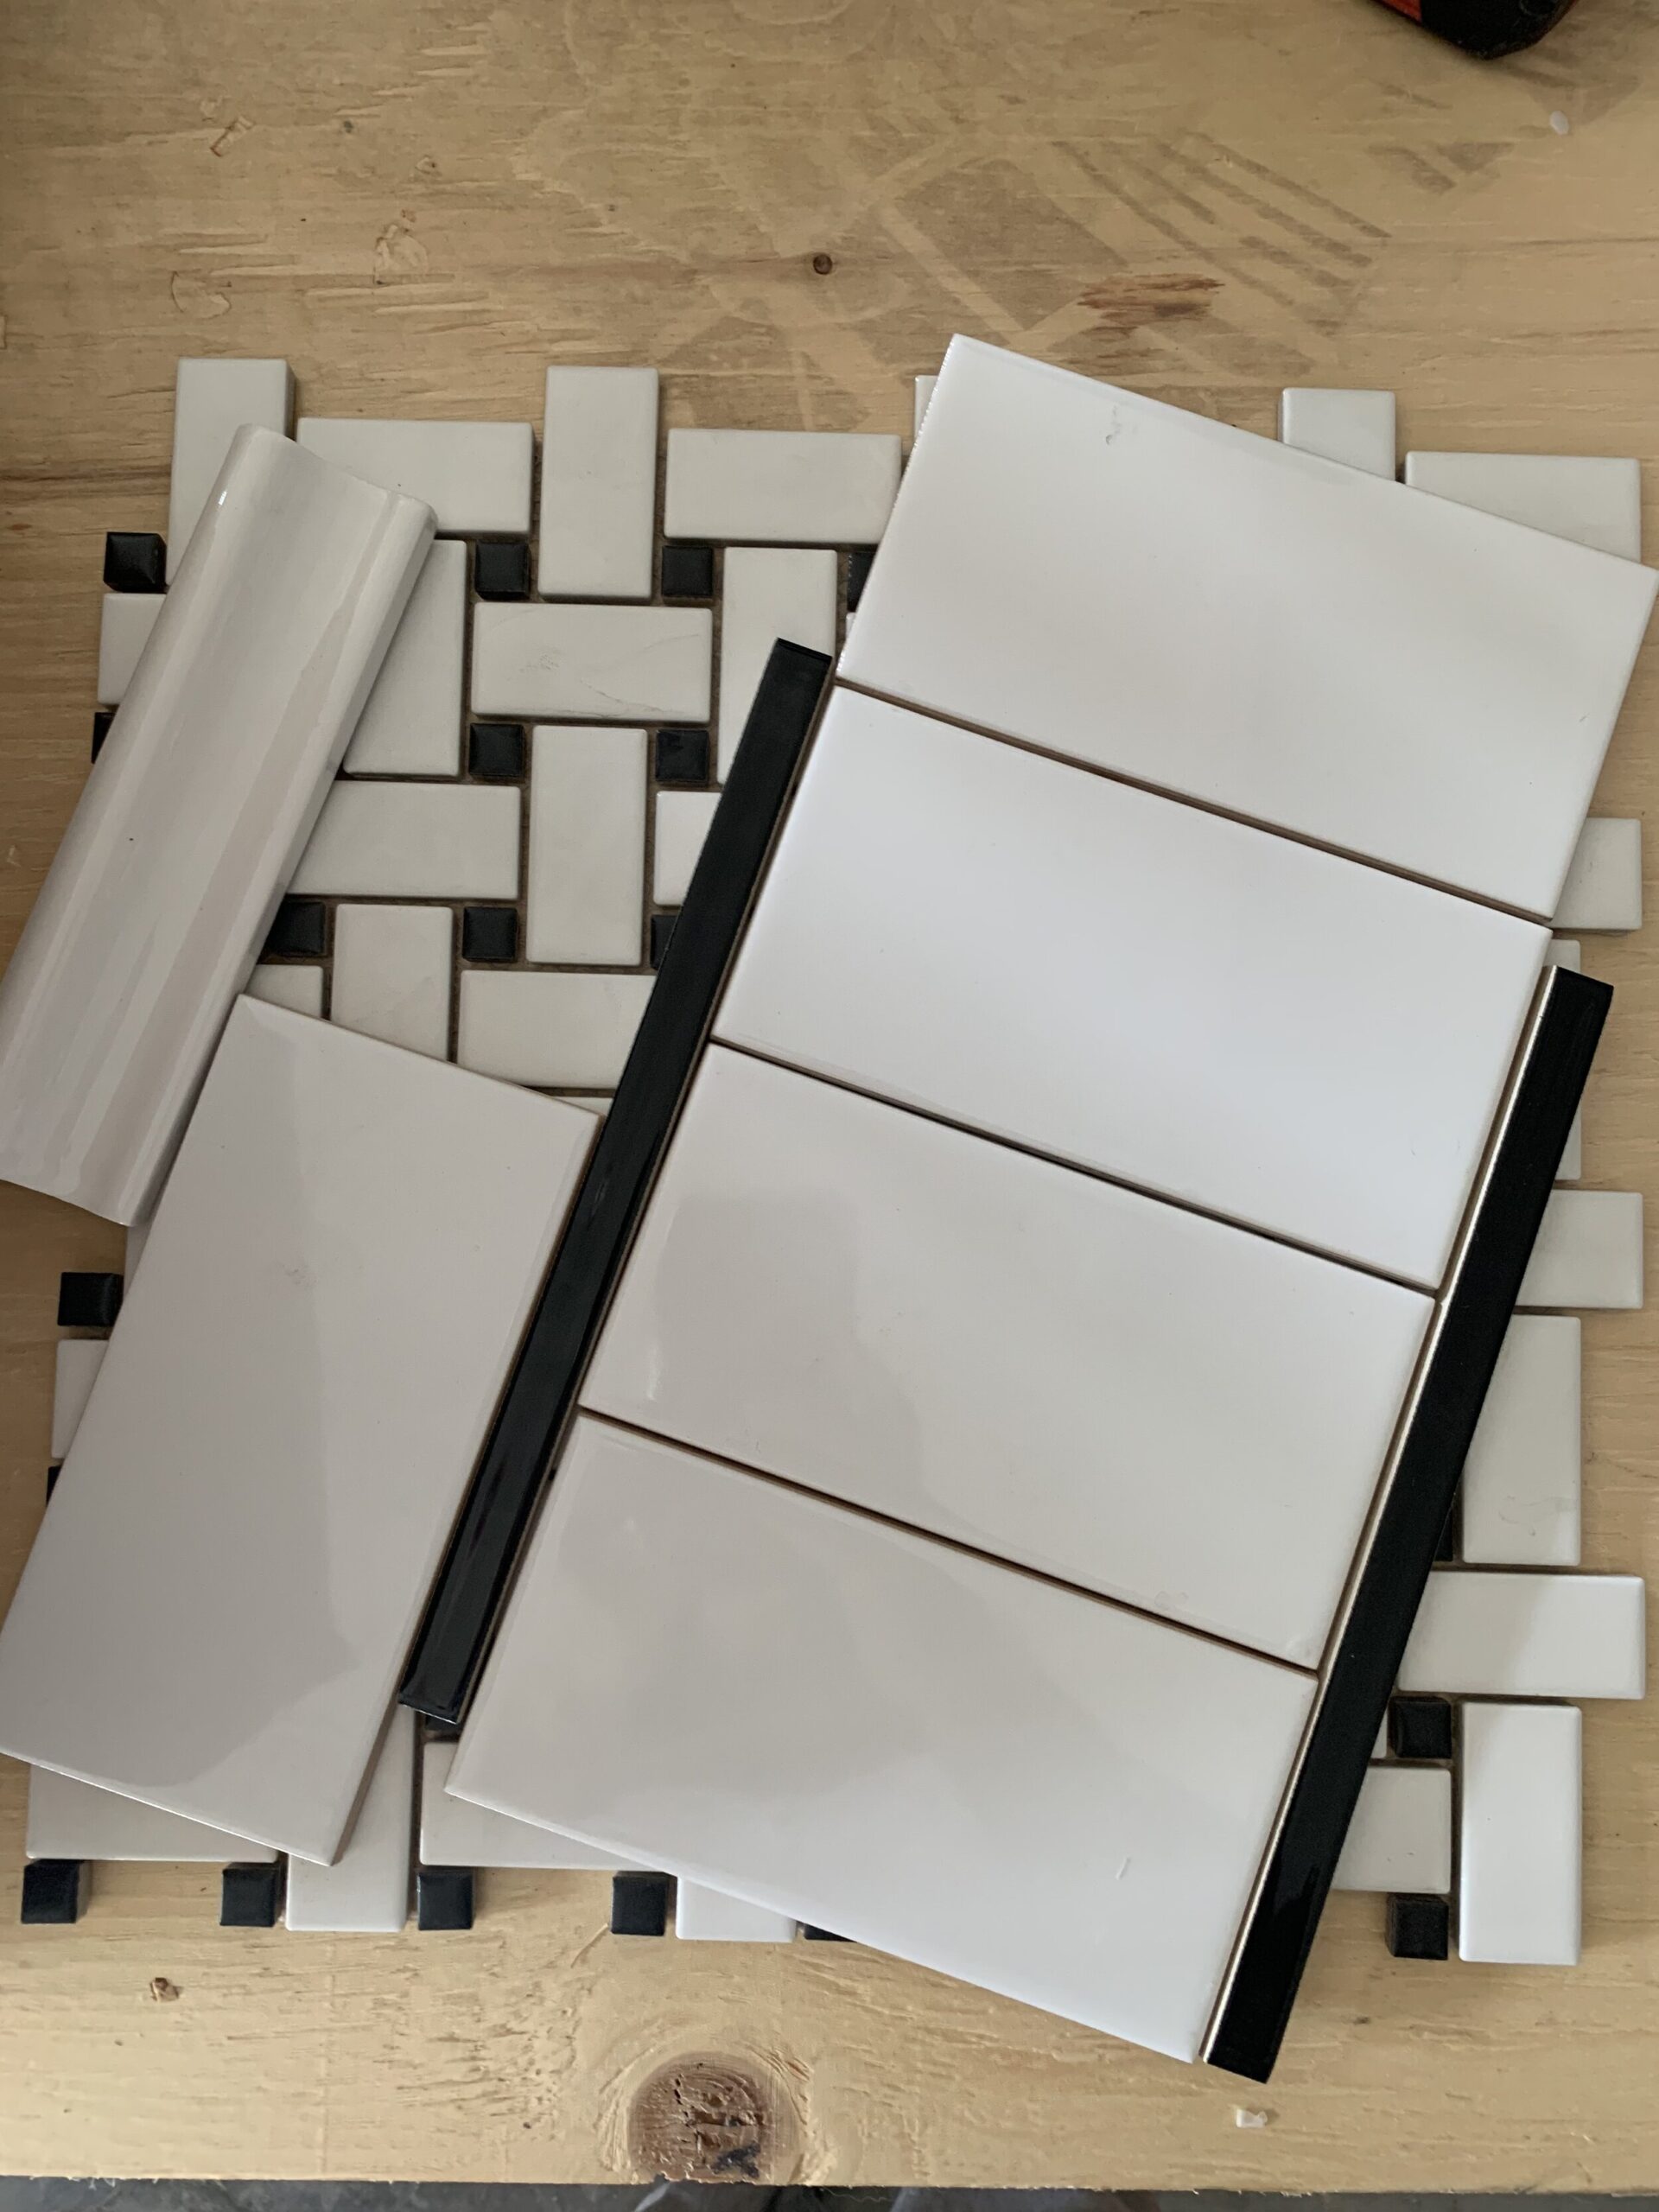
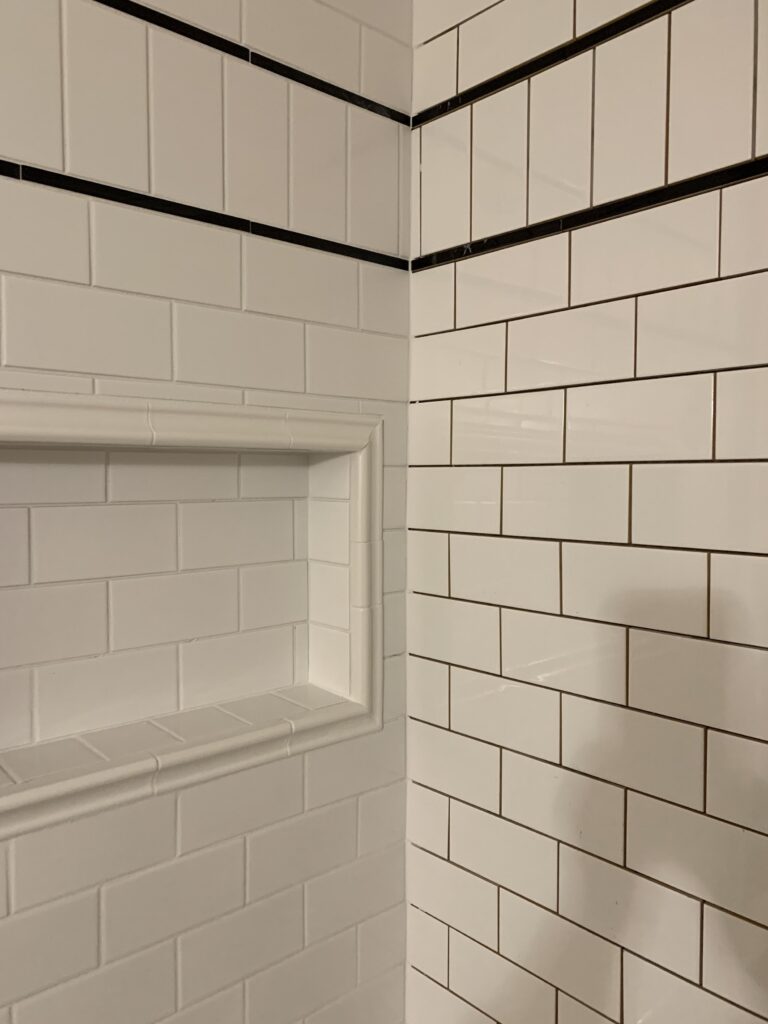
I’m so pleased with how it came together it’s got just a simple detail that elevates the look of the plain subway just enough to be not too basic, but it’s not over the top. I also went with a simple black and white – it makes it easy to change this bathroom up if, down the road, we tire of purple paint! I like to keep my permanent finishes a little more neutral, for this reason.
I opted to use a bullnose trim around the niche, to dress that up a bit. I’ve never installed a tile like that or done a bevel cut on tile so I really took my time to do a good job of it (which probably explains why it took so long!) But in the end, I’m glad I took the extra time to carefully install that because I’m so thrilled with how the niche now looks… a little bit fancy!
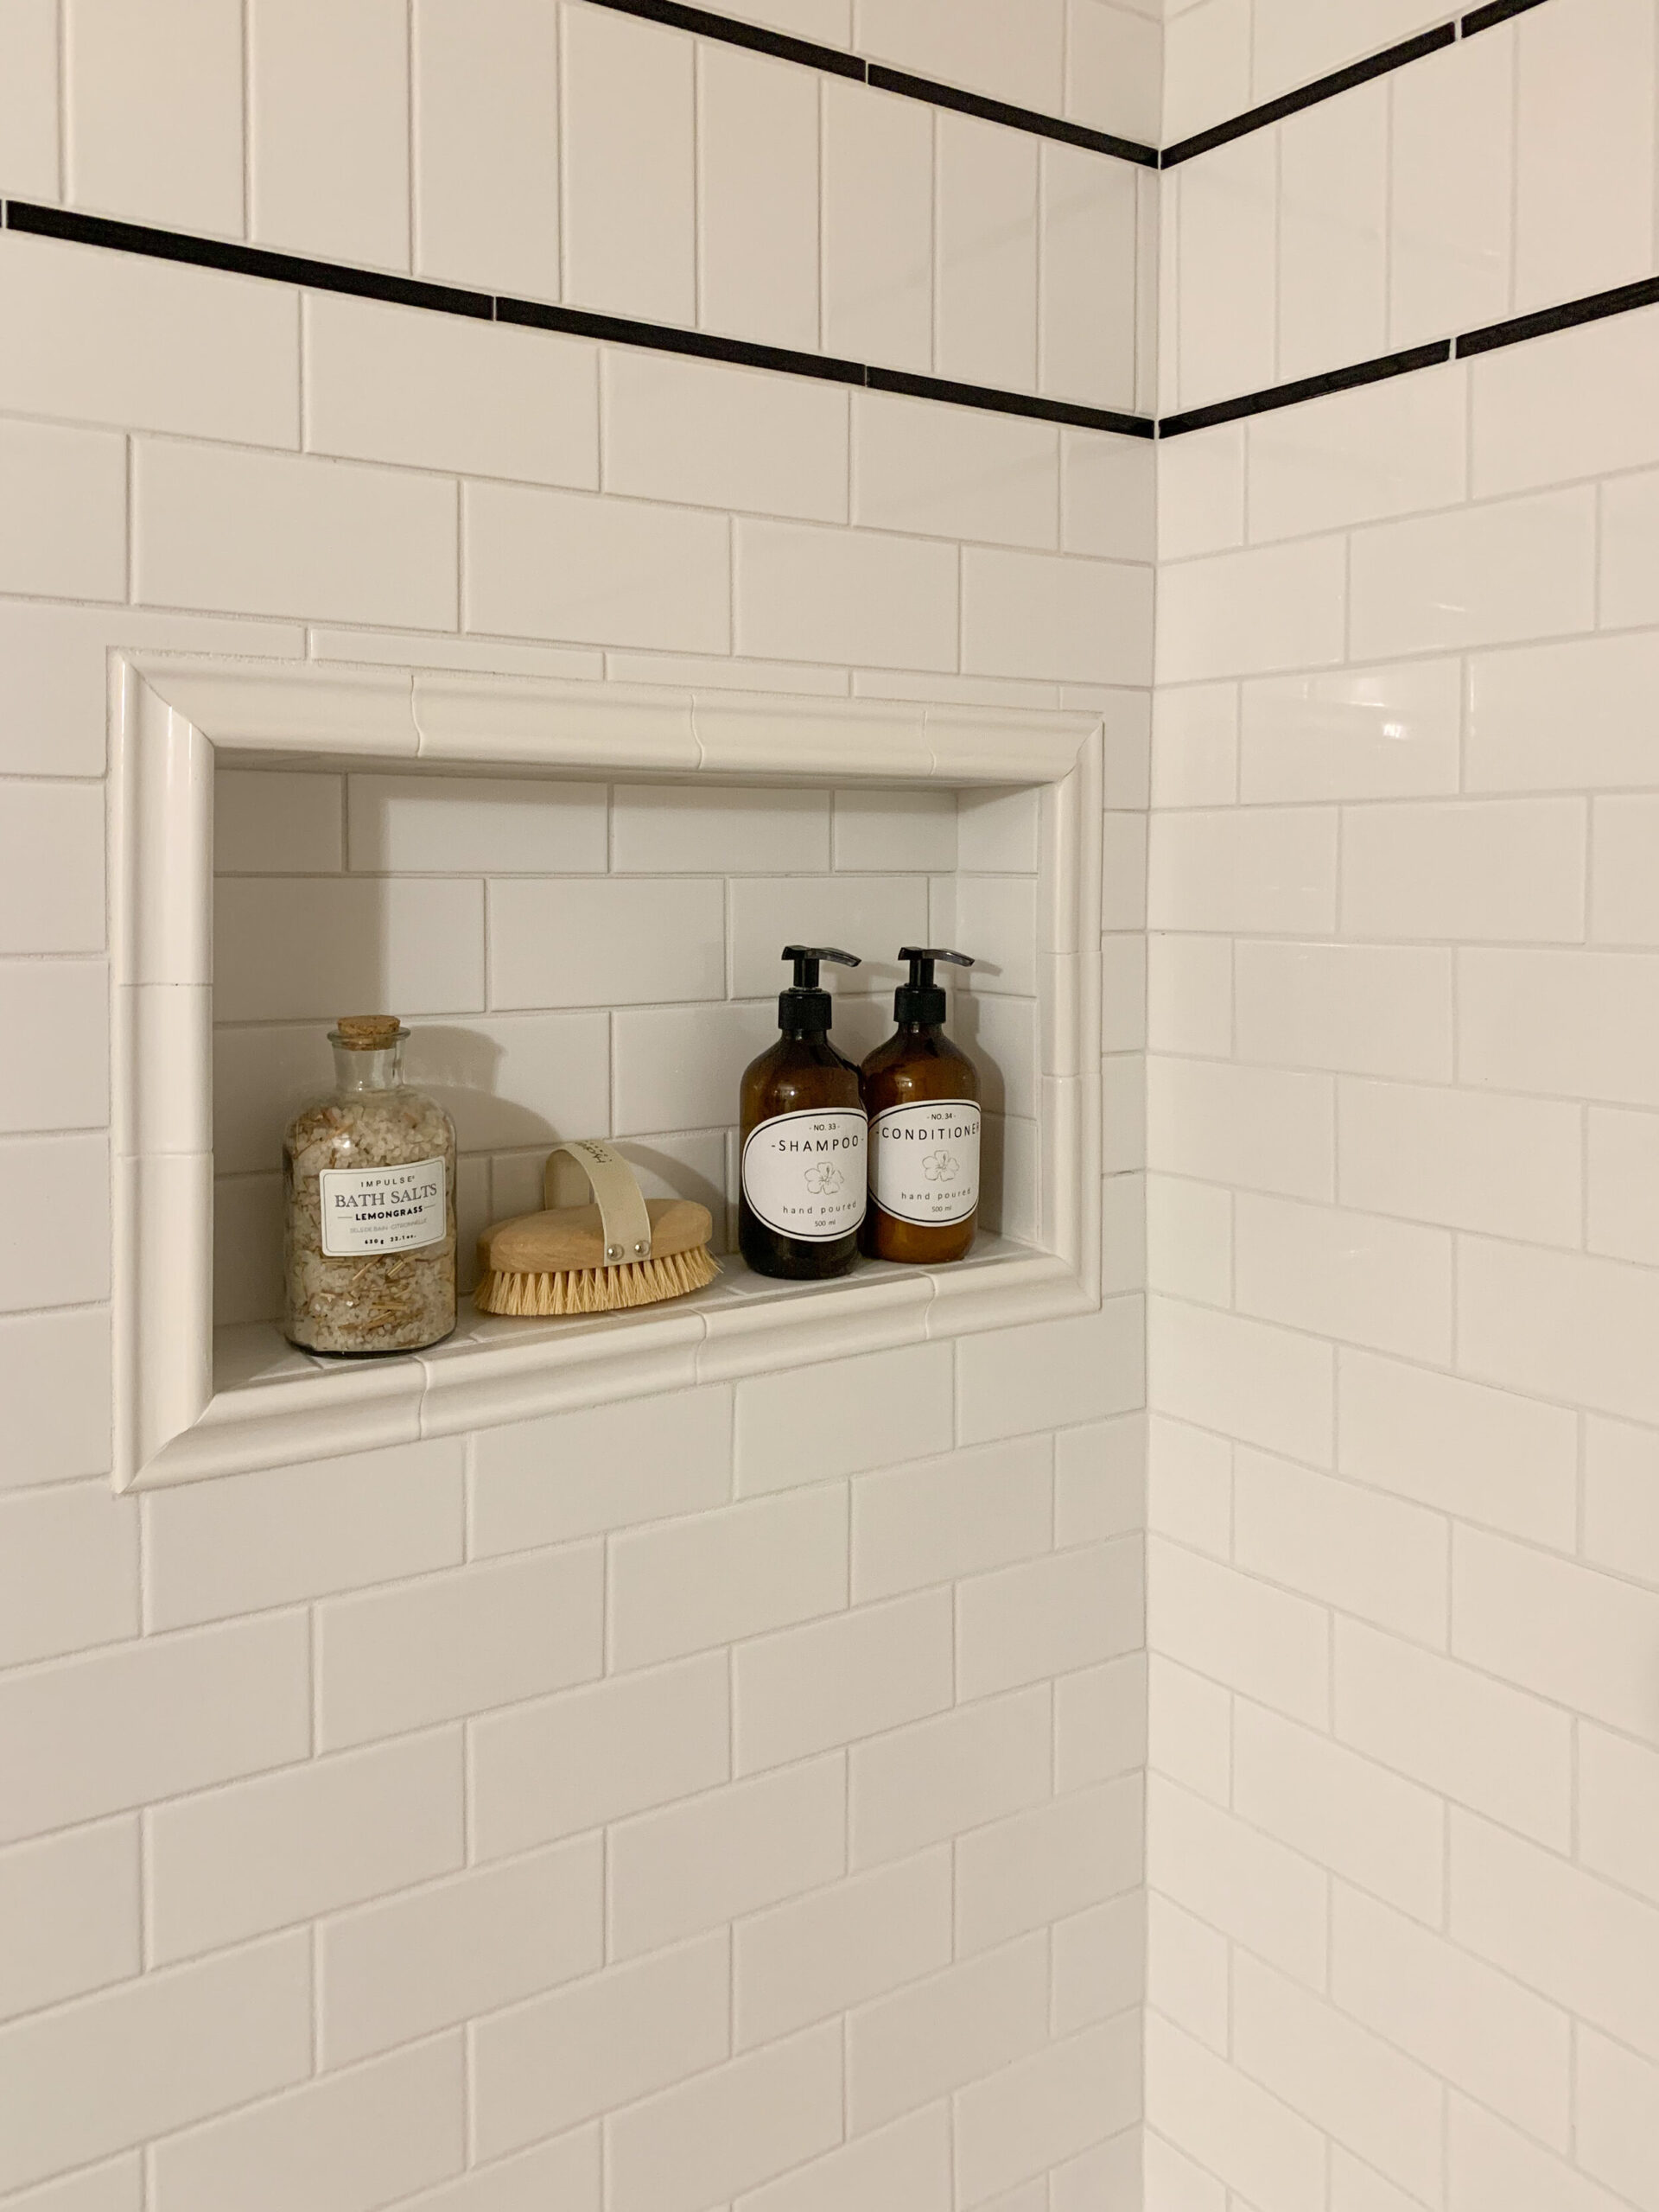
If you’ve ever considered subway tile before, or any tile installation really, think about different ways you can lay it, accent tiles you can add, or other details like that that can make a basic material feel really custom and unique to you! (Click directly on the images below for links to similar tile to what I used, my tile was from a local tile supplier.)

How to Install Tile
So if you’ve come here to find out how to lay tile, so let’s get to it!
I’m going to specifically talk about installing subway-sized ceramic tile in a shower surround because that is what I did, but this method of laying tile really is the same no matter what your tiling project is. On a backsplash, on the floor, kitchen walls, the bathroom walls, the method is the same.
There may be some different tips and tricks to watch out for depending on the type and size of tile (large format tiles, for example, are a little more tricky), so be aware of that and always gather as much information as possible before and get some expert advice before starting a project!
Plan the Tile
The first step, before you do anything, you figure out the best way to lay out your tiles, or measure, to see where you want your tile to start and end. If you start at one side and work your way to the other side and end up with a full tile on one side and a sliver on the other side, that’s not going to look very good.
A lot of the time you are going to want to center the tile pattern on your wall (or floor, or whatever) so the cut tiles on the end will be the same size. In my case, I had a full tile on one side and almost a full tile on the other (just short by 1/2”) so I opted not to center my tile and just work from one side to the other, as you can’t see that 1/2’“ difference. Also consider the floor-to-ceiling height, as you don’t want a sliver at the top, either.
If you are tiling a wall, you need the bottom row to rest on something while it’s drying so it stays in place and doesn’t slide down the wall. As you add more tiles above it, they all rest on the ones below and so it’s pretty important that that first row is stable.
I checked my tub level and it was not level, so installing my first row resting against my tub would have resulted in crooked tile. It’s very important that the first row is level because everything else builds off this.
You can shim the bottom row to be level, but if you do that, it’s probably a good idea to shim it and then let it set up before you continue because it would be very easy for shims to get knocked as you are working. Also, if you have to shim a lot, the different width in the grout line is going to be very noticeable.
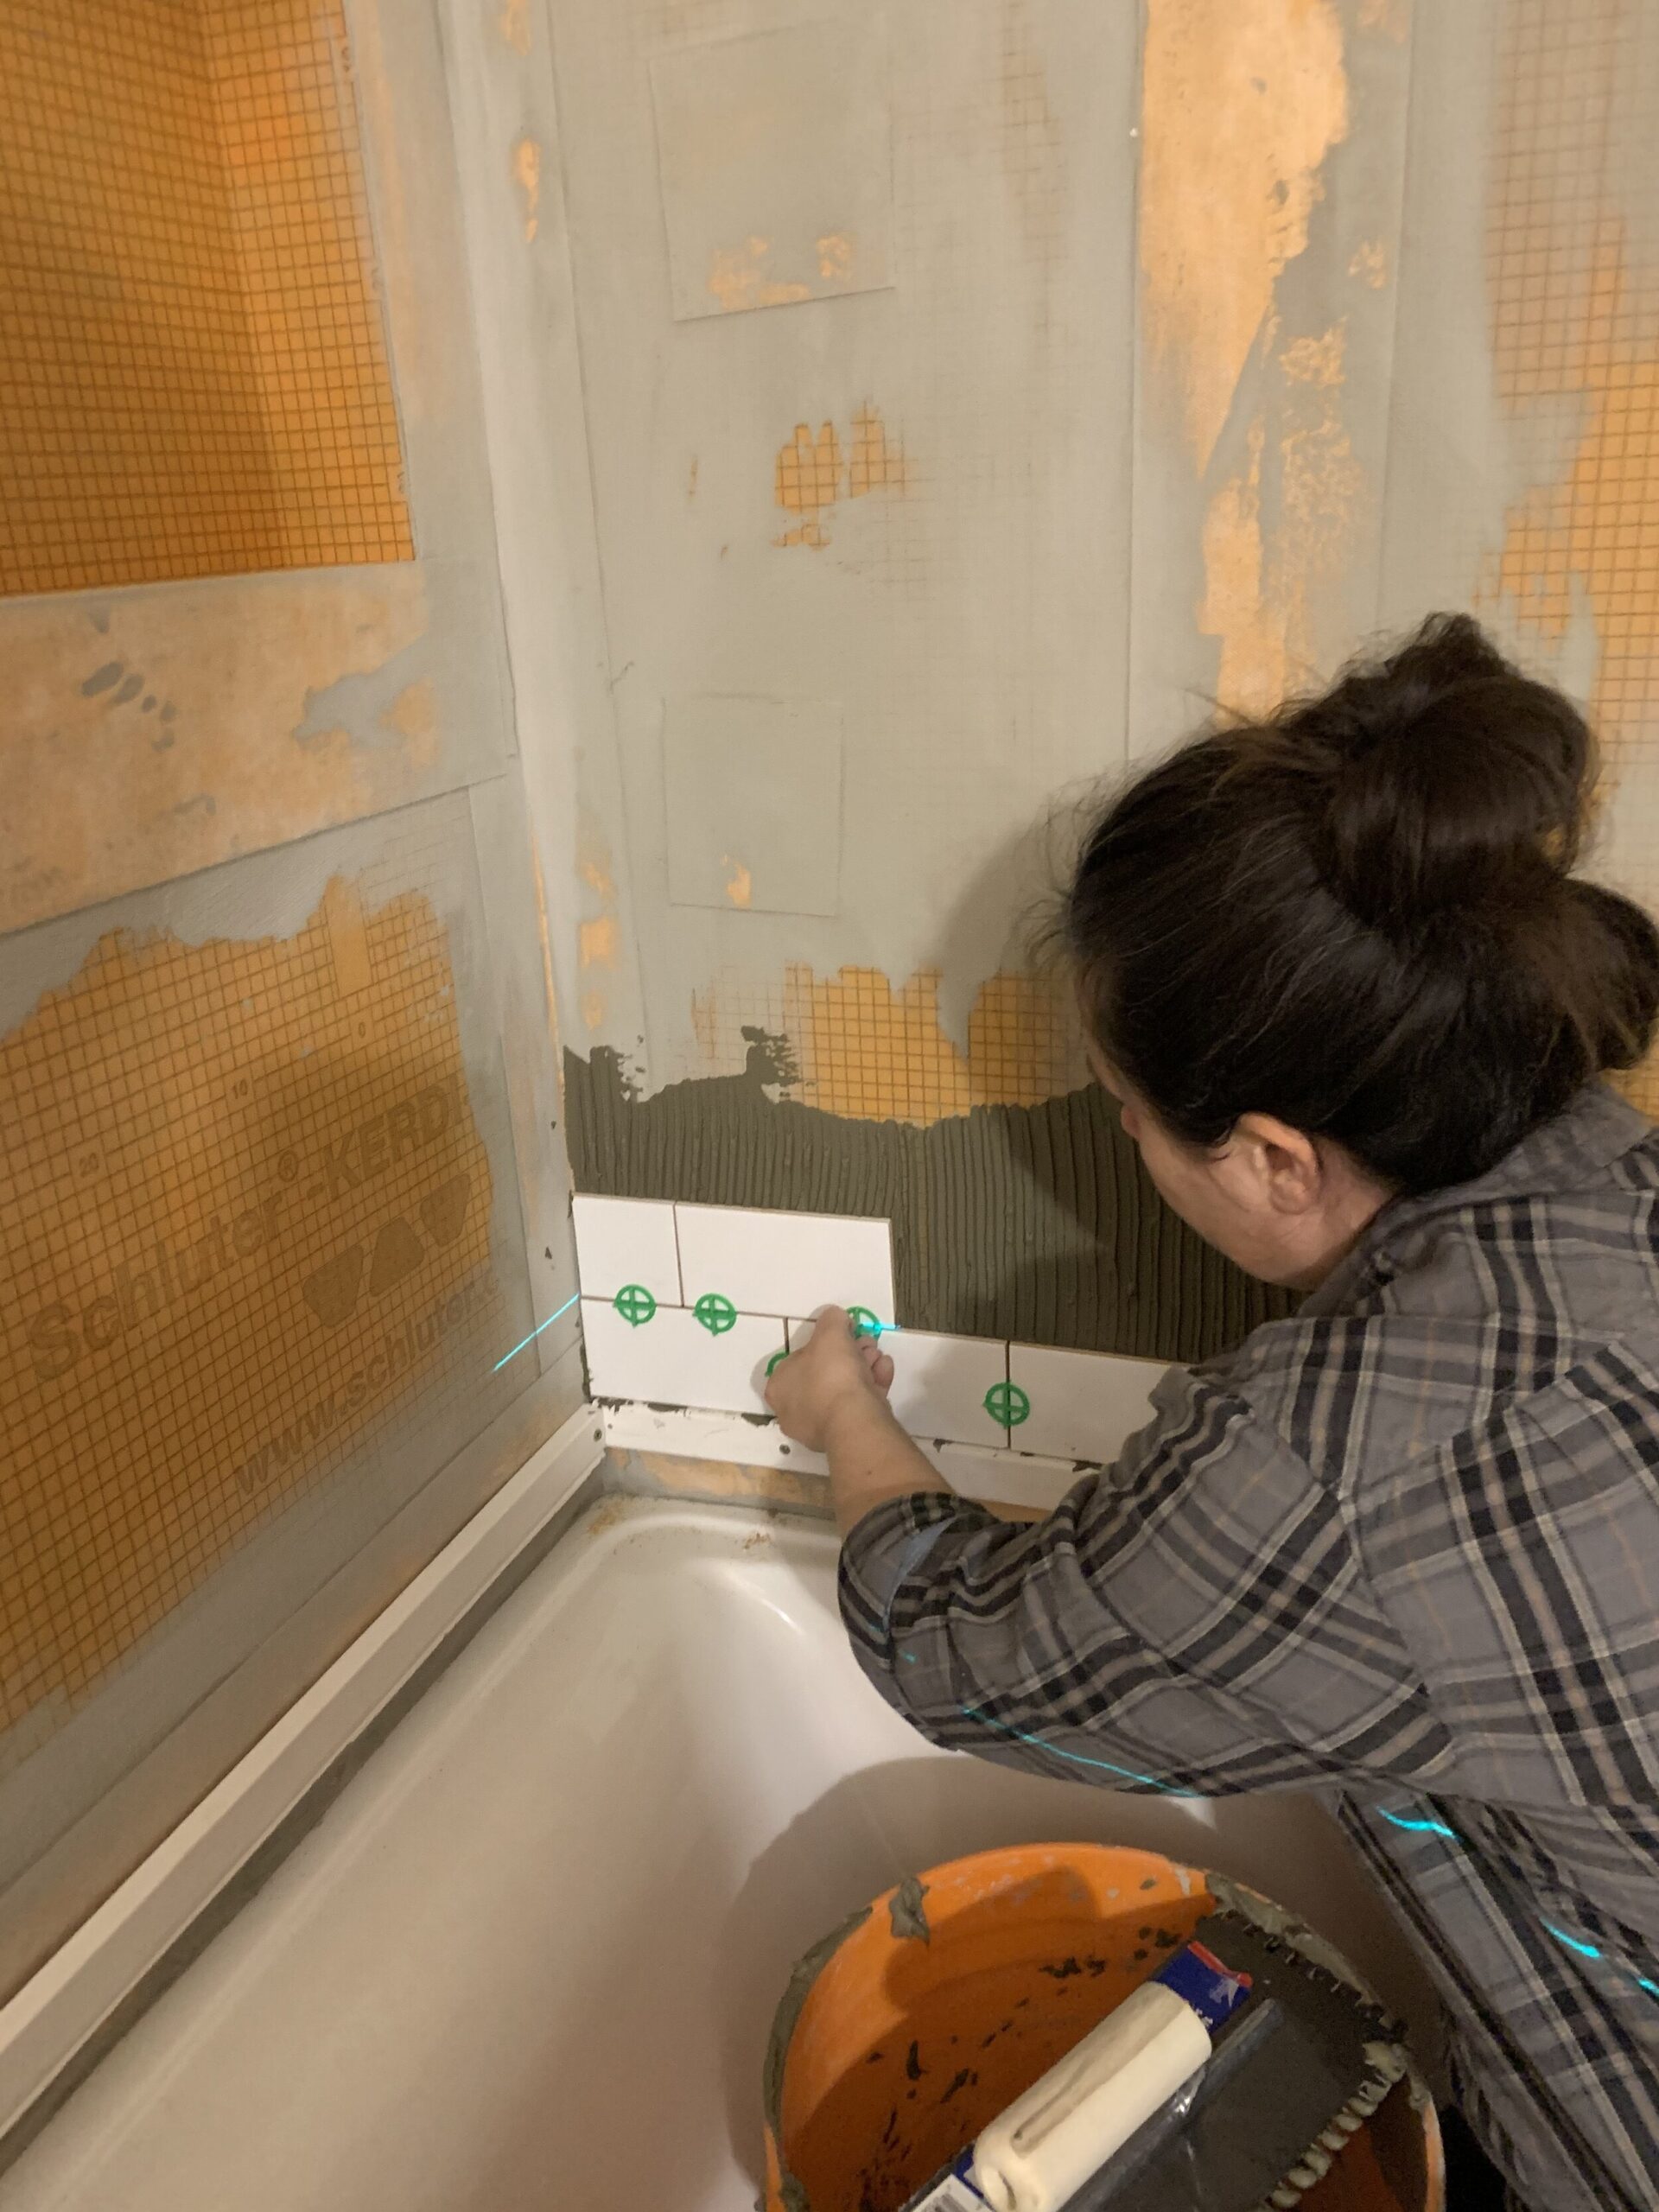
In my case, my personal preference was to add a ledger board (basically just a straight piece of scrap wood) to support my second row. I planned exactly where the second row would start and put the ledger board there and started working up from that. Then, after that tile was set, I would remove the ledger board, waterproof the holes left by the screws, and fill in the bottom row, which will involve trimming some tiles just slightly to fit.
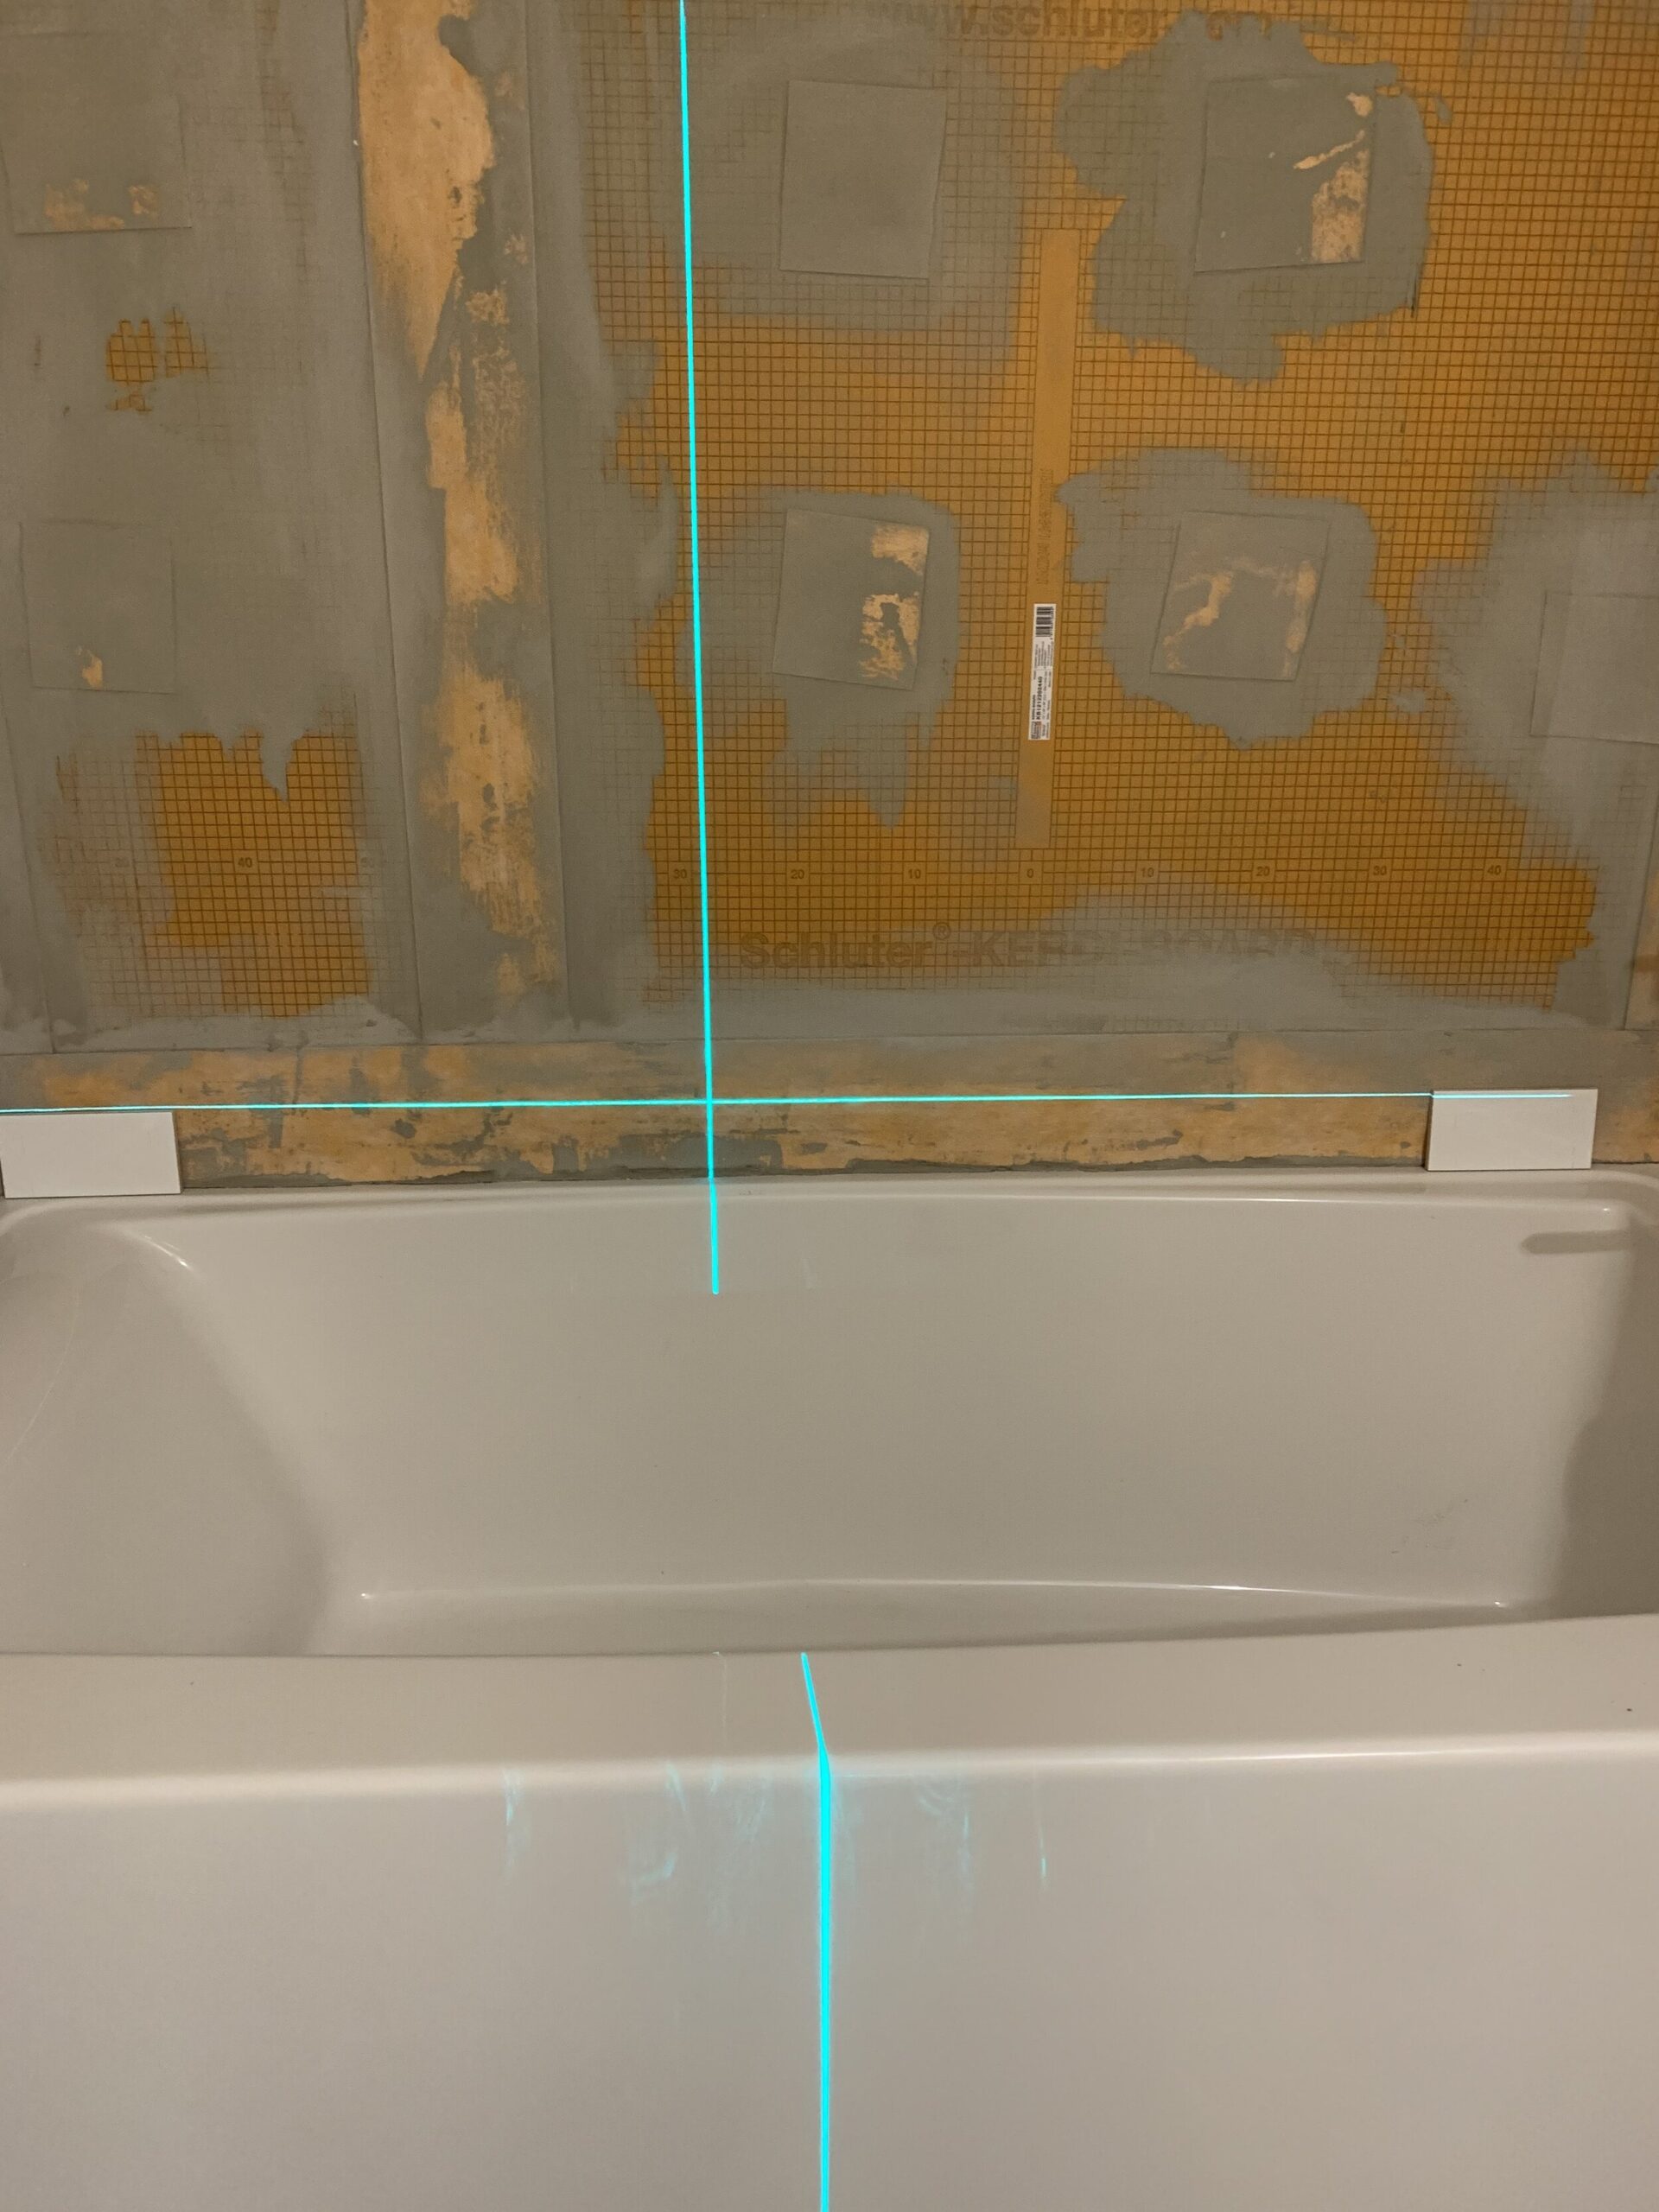
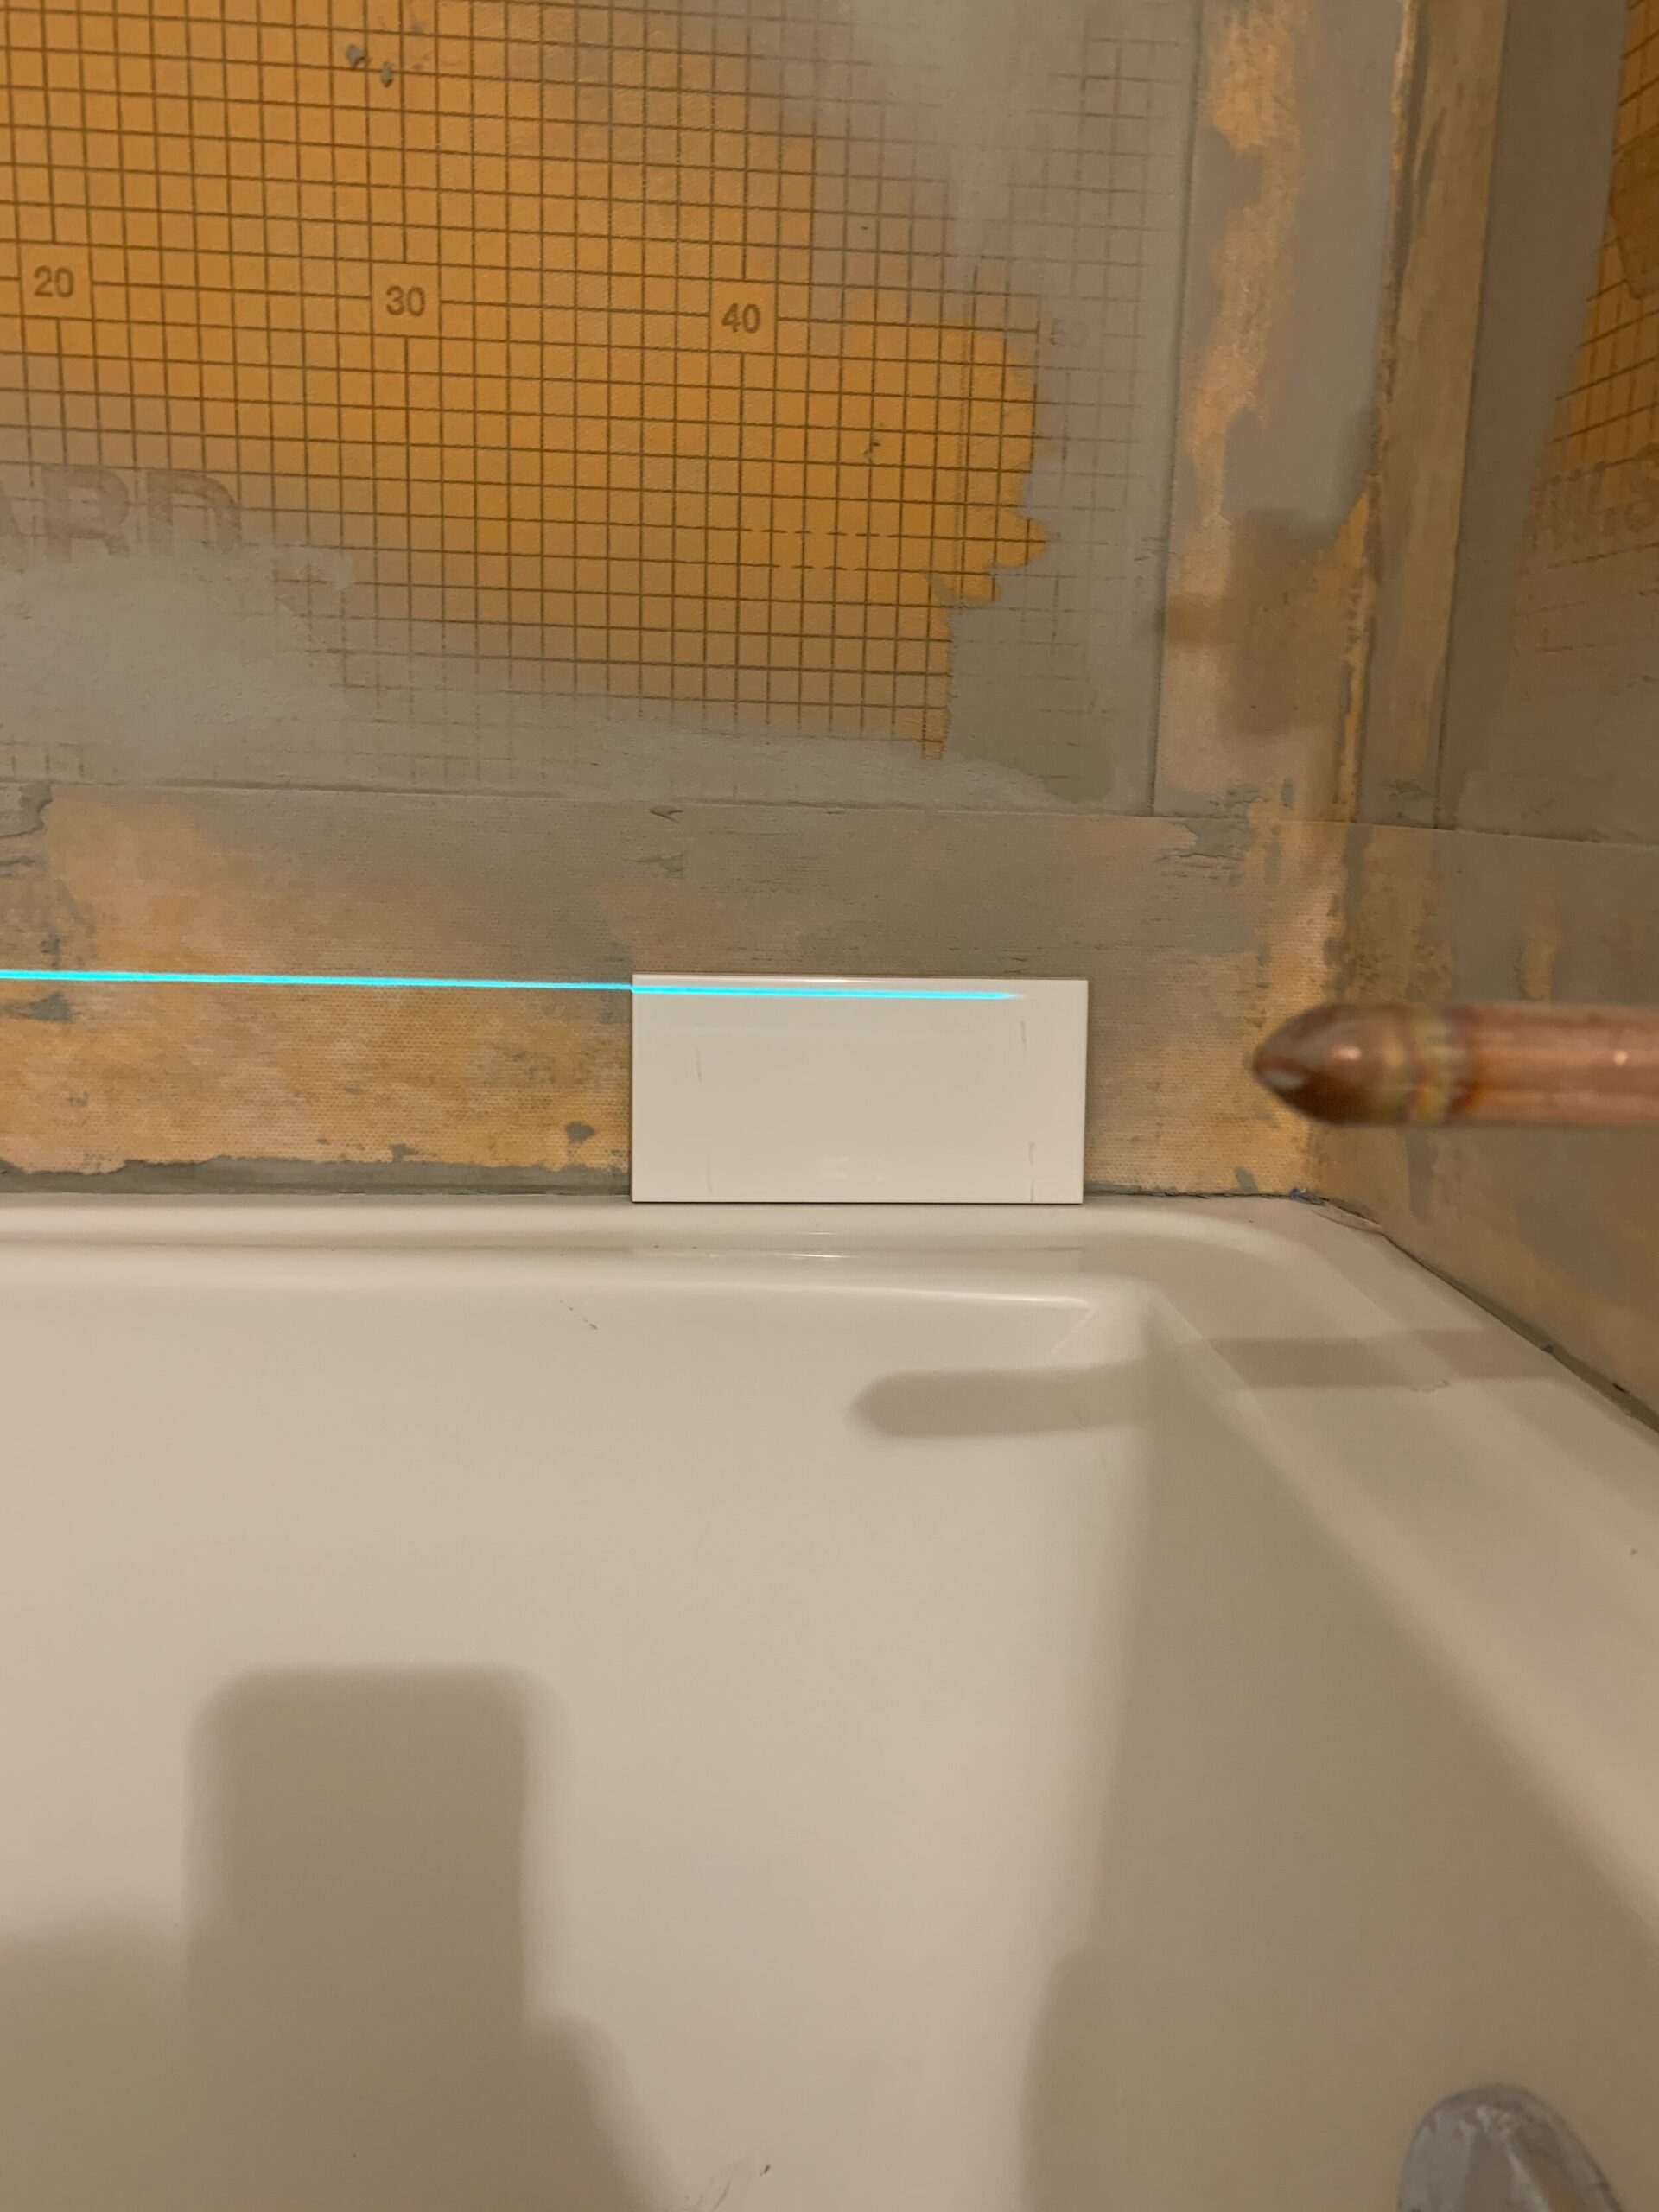
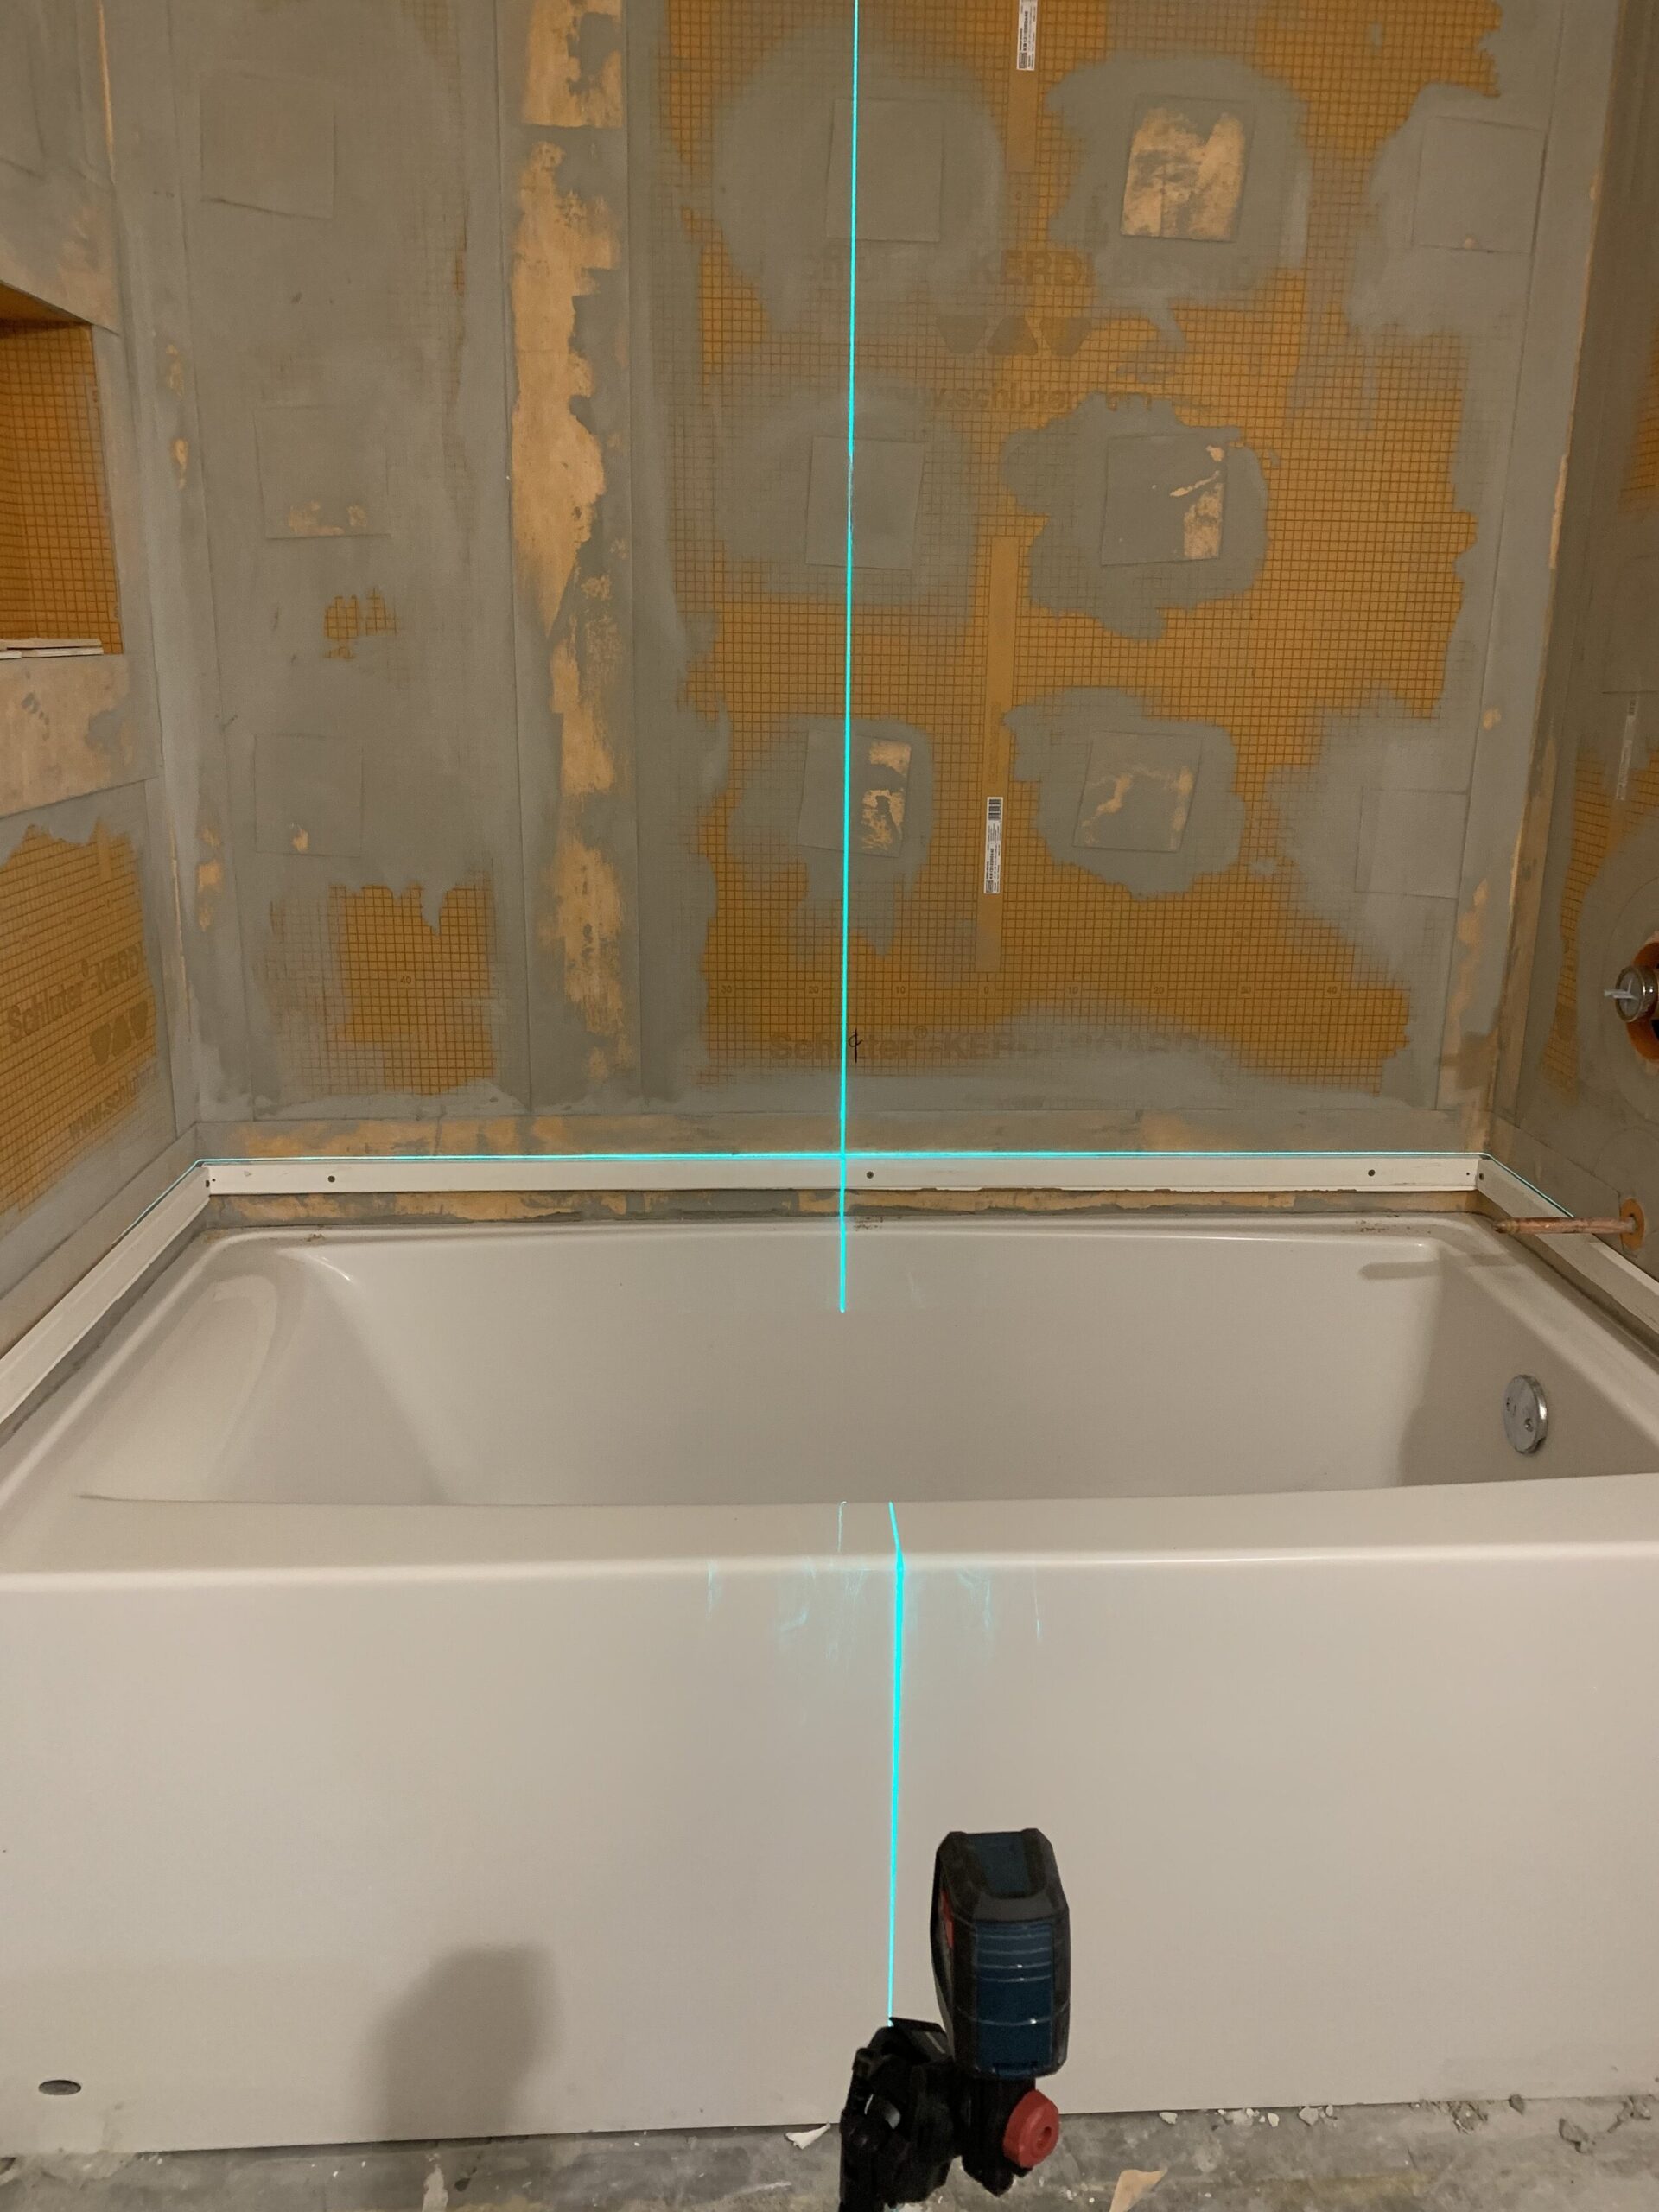
Whatever you decide to do, the most important thing is that that first row, the starting point, is dead level. A laser level is invaluable for tile work, it is very hard to mark level lines on the wall when you are constantly covering the wall with mortar, and checking level and straight lines with a hand level can be difficult too without getting the level all covered in gunk.
I use a laser level for so many things, it’s an essential tool in my book! You are saving a lot of labor costs by DIY’ing this so invest a little in the right tools. This is the one I have and I love it. I set up the first row and moved the level up as I was working to make sure things were staying nice and straight.
Mix the Mortar
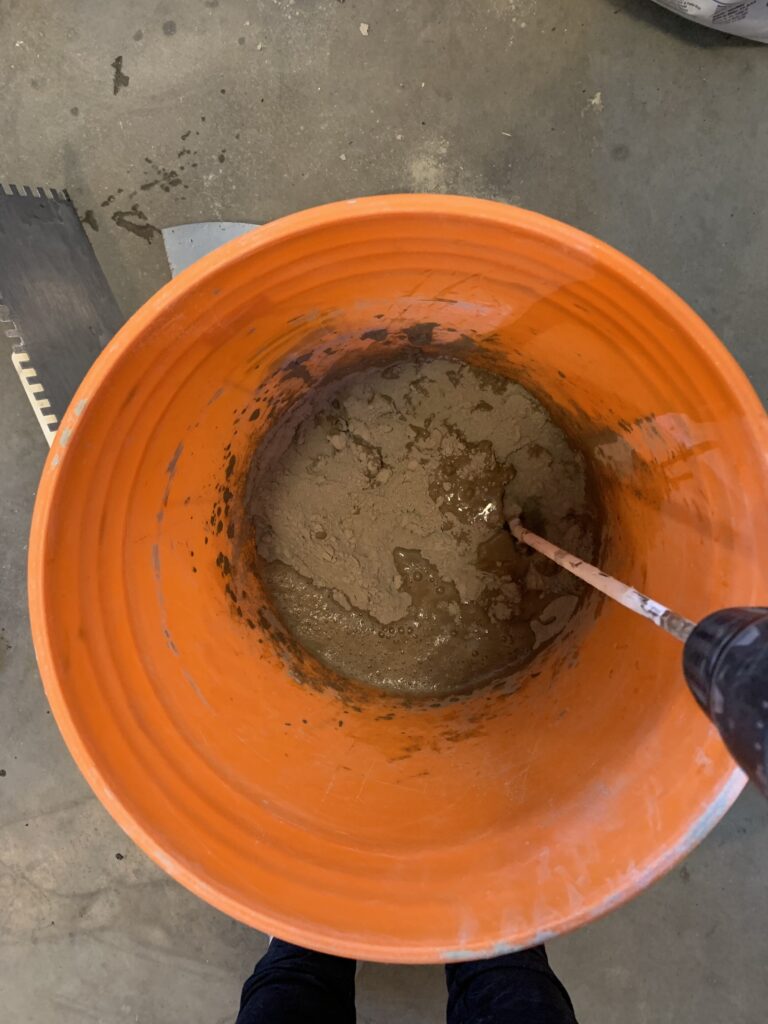
Now that you have your level ledger board installed (if that’s what you are using as I did) You want to mix the thin-set mortar to a consistency where it stays on the trowel without dripping off but is still spreadable. Once you mix a batch or two, you will quickly get the hang of it.
Mix it according to the manufacturer’s instructions, and mix it up in small batches so it doesn’t dry on you as you are working. There are different types of thin-set for different types of tile, use one that is made for your specific tile type.
Start Tiling!
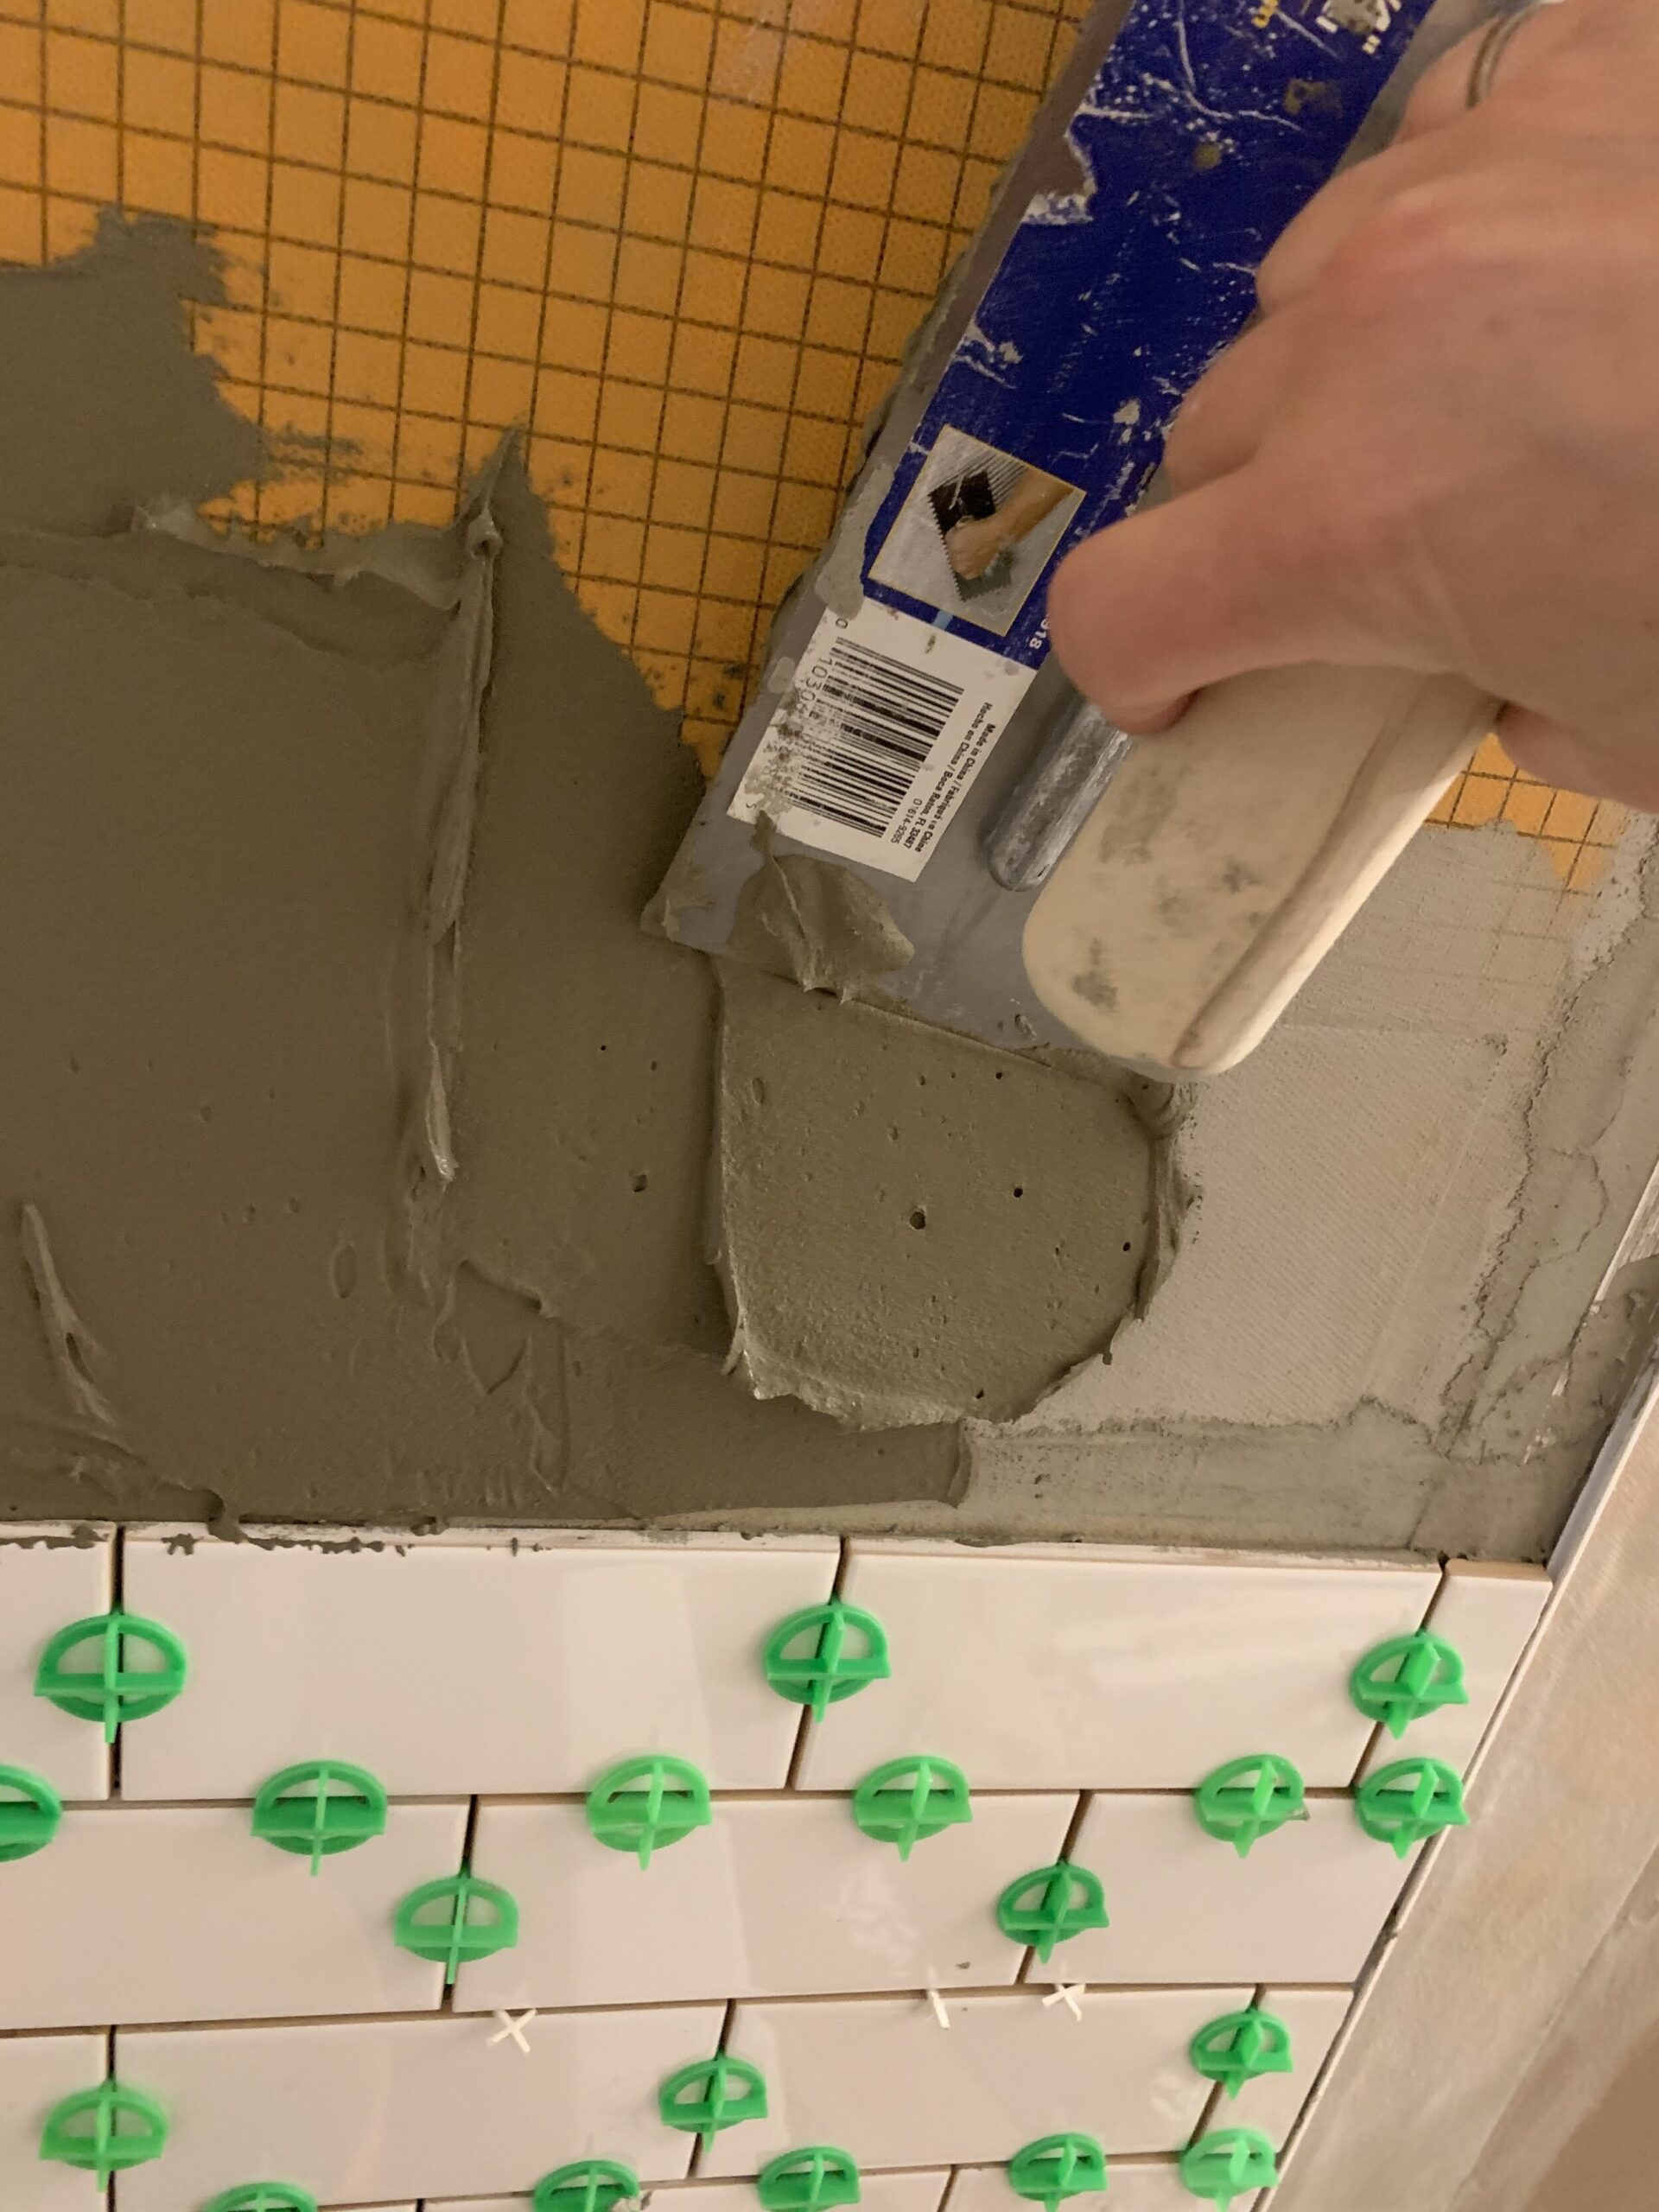
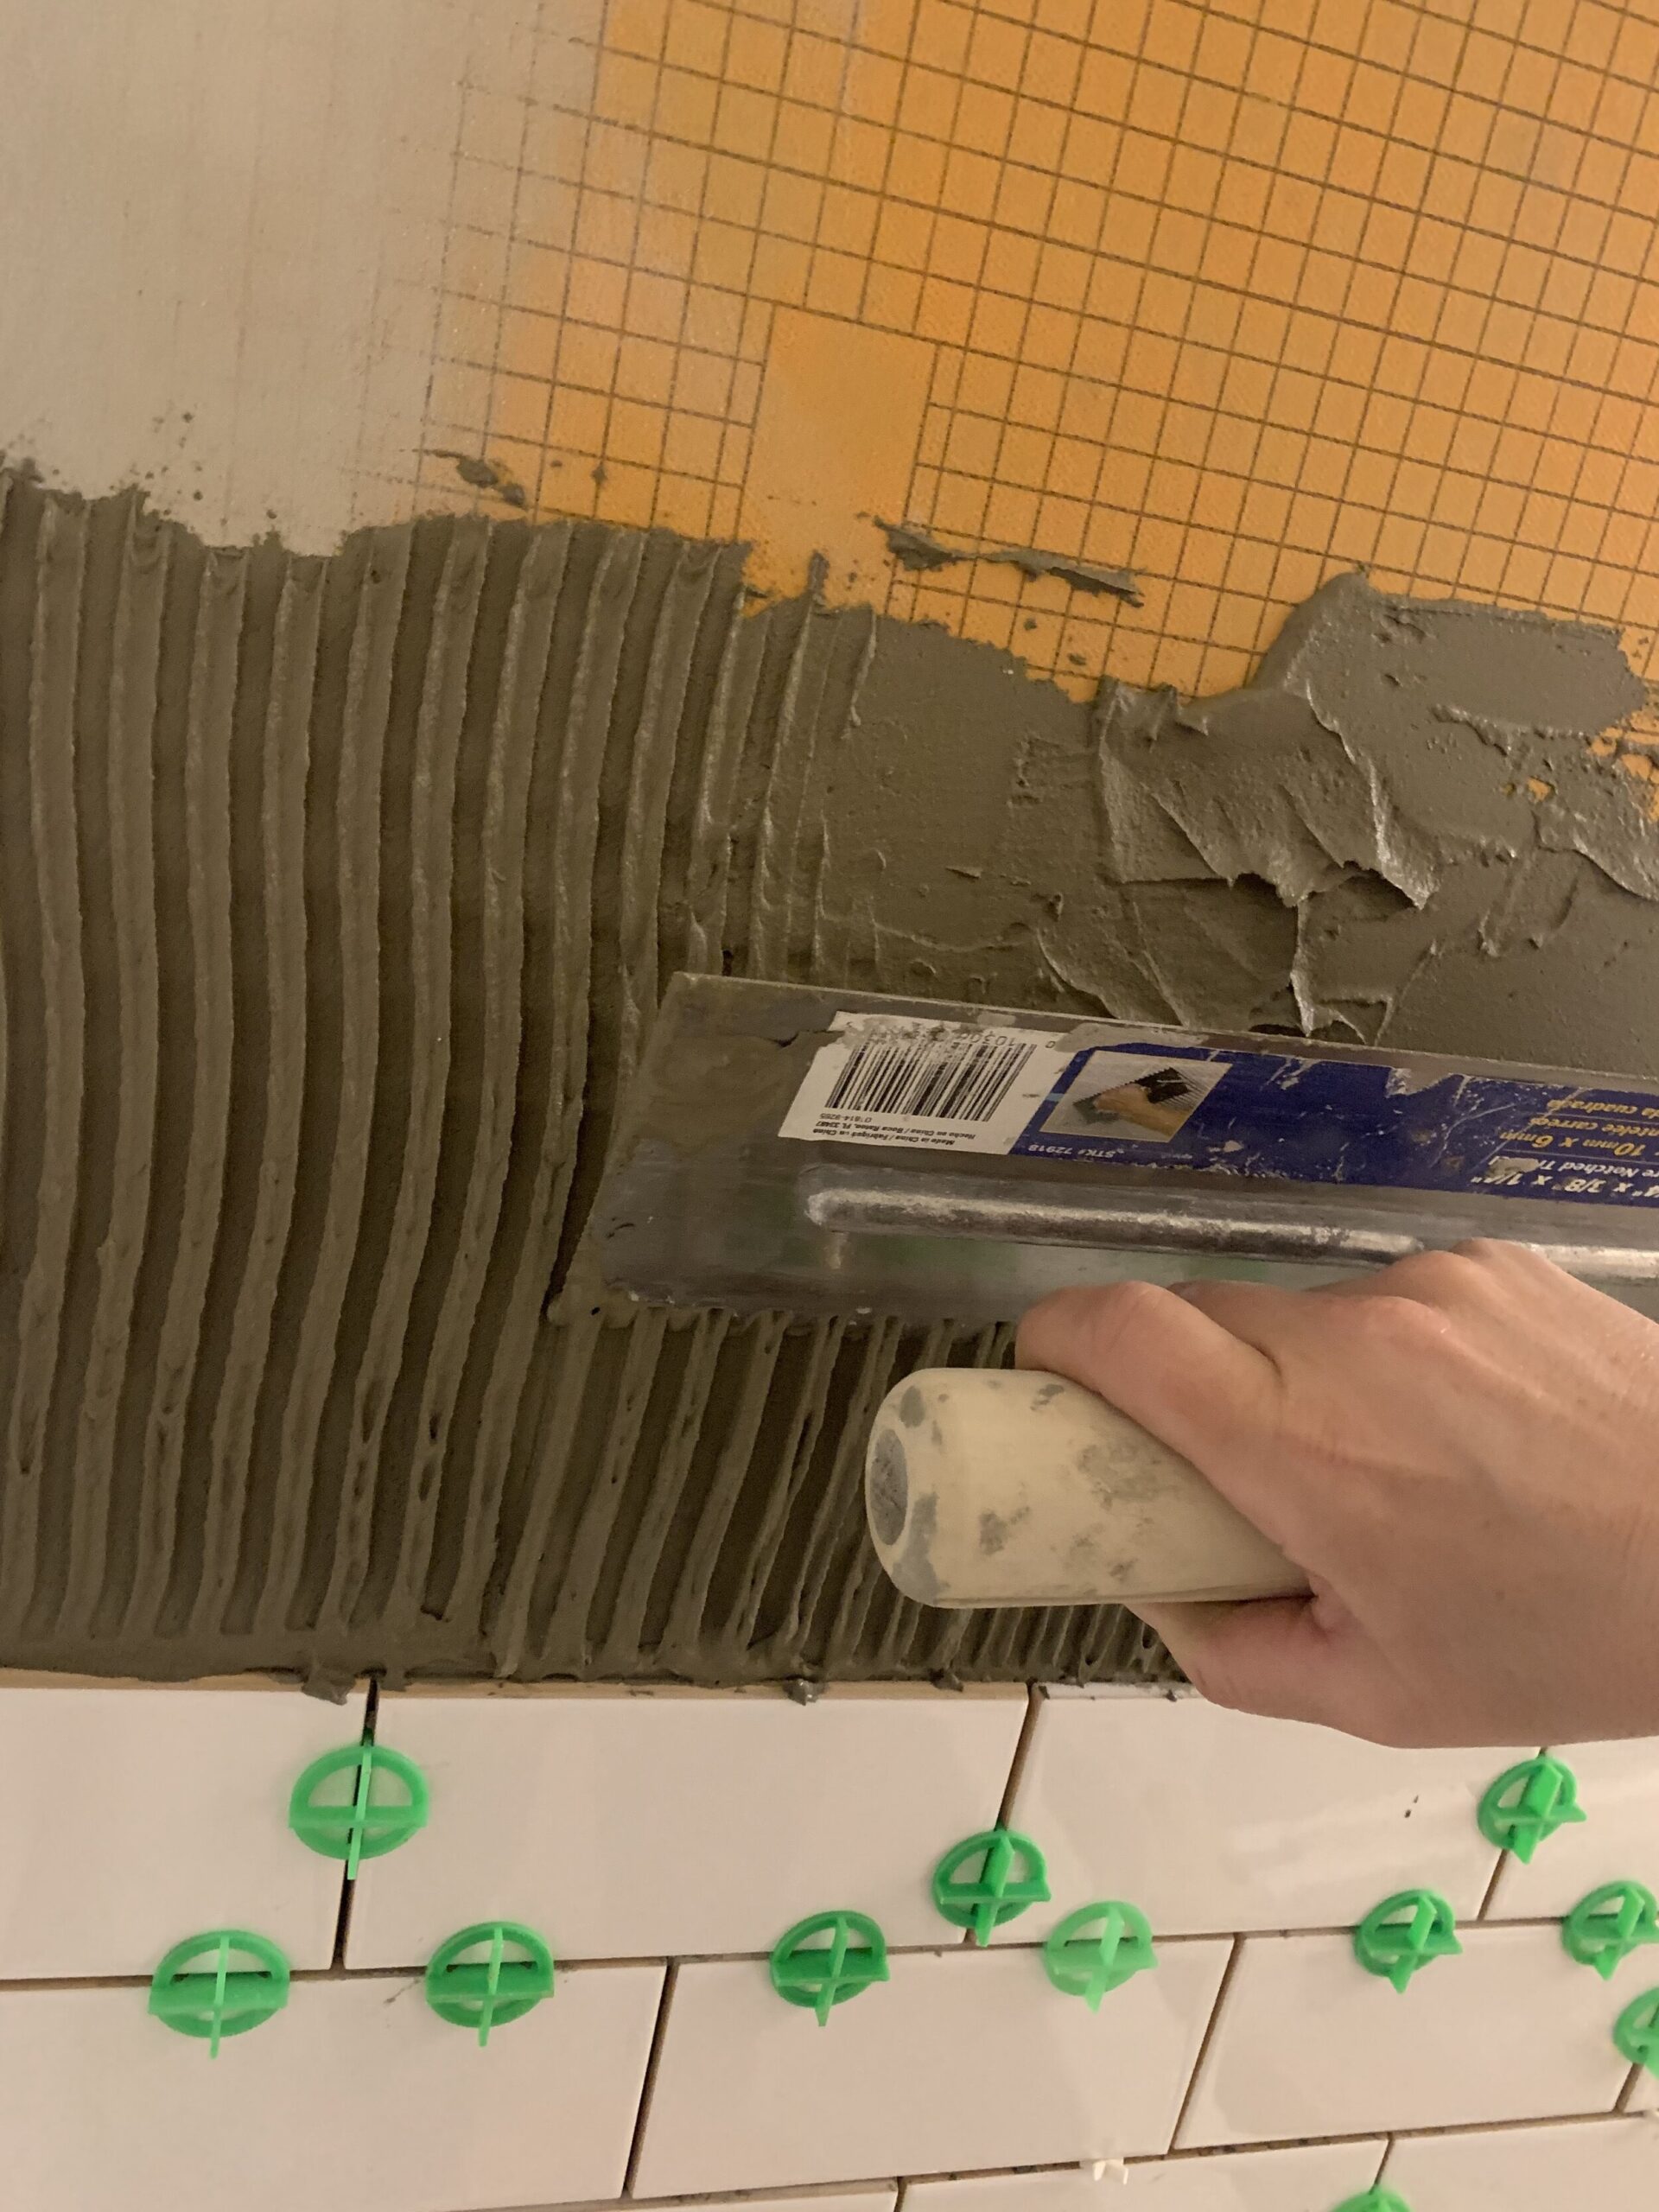
Spread a layer of mortar on the wall using the flat side of the trowel. Depending on how fast you work, you might want to spread enough to do a few rows of tile at once. Once the tile is spread, use the notched side of the trowel to put a groove into it. If you don’t have enough mortar, you won’t make much of a groove, so add some more and try again. If you have too much, the notches in the trowel will remove the excess.
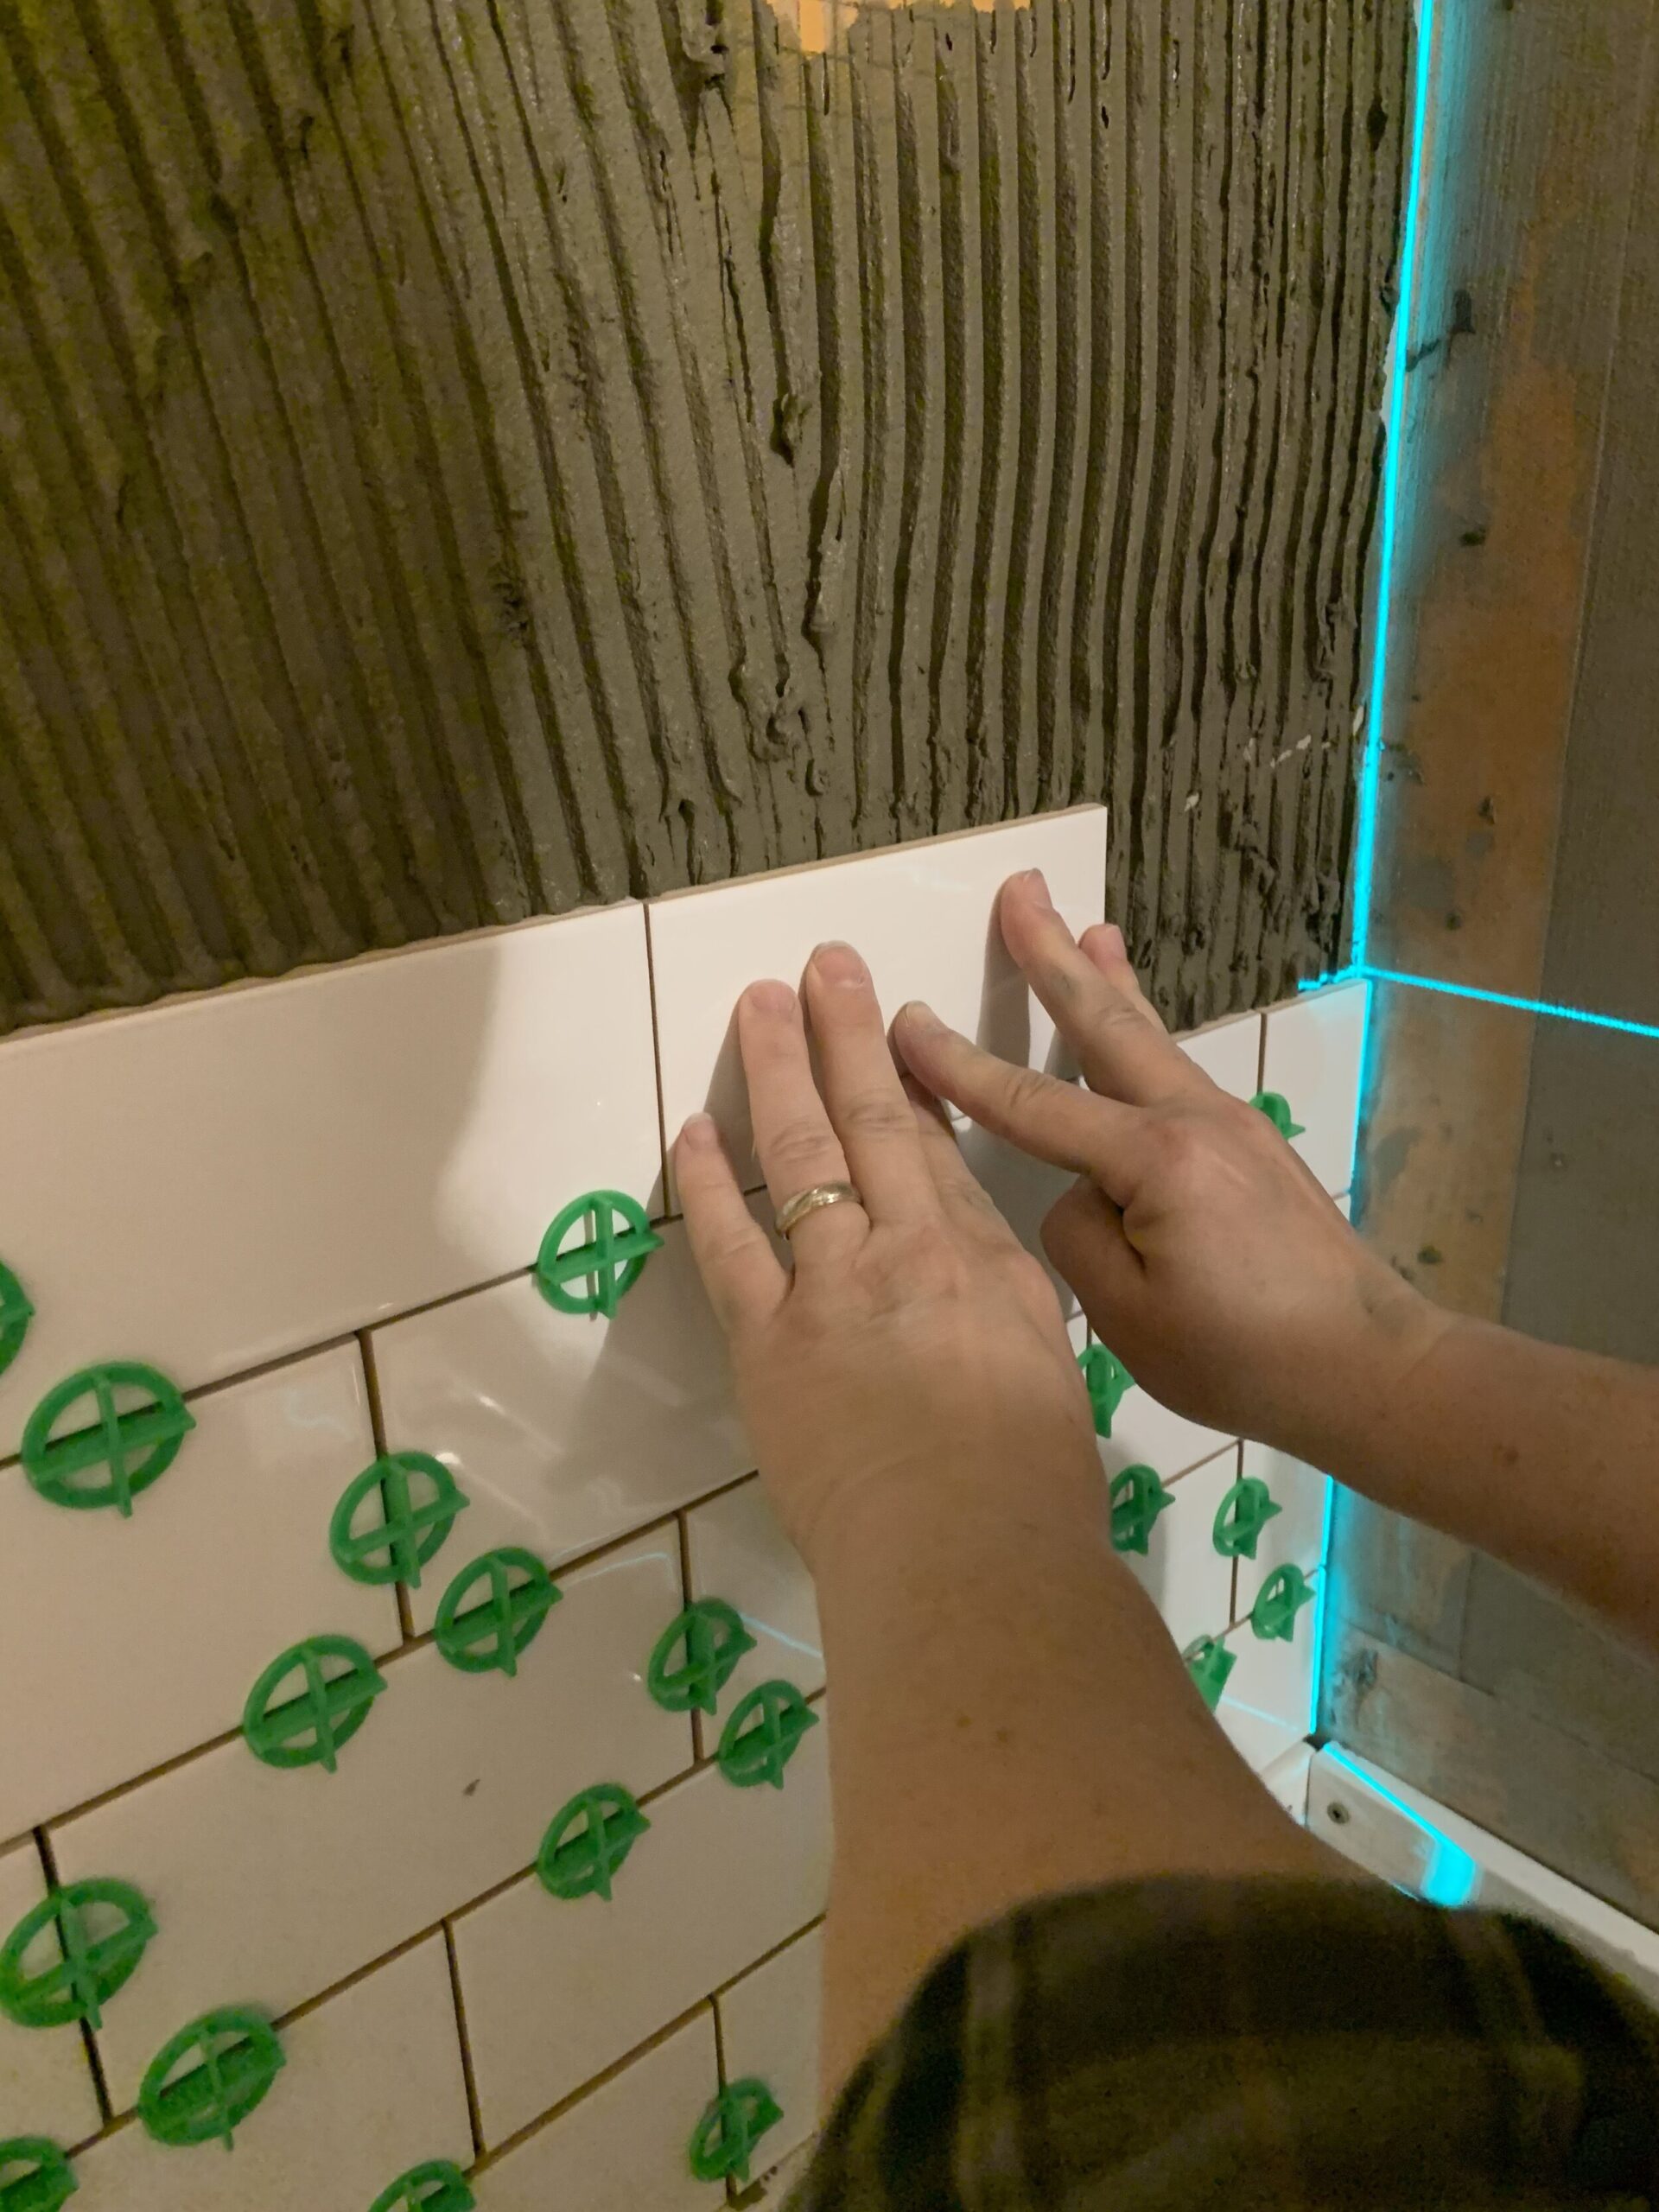
Once you have the tile adhesive on, you can start tiling! Set the tile into the mortar, giving it a little pressure to make sure it’s set into the tile. Small, ceramic tiles are pretty easy to tile and pretty small, so back buttering (spreading mortar on the back of the tile) isn’t really necessary, in my opinion. If you have larger format tiles, you should consider back buttering. (Larger format tiles are also a lot harder to get level, so I won’t talk much more about them as that is a tutorial in itself!)
Make sure you use tile spacers at your desired width to space the tiles apart, I wanted fairly small grout joints so I used 1/16” spacers. Add your next tile tight to the tile you just installed, and use the spacer to press between the tile, which pushes the new tile away from the old tile. (If you push the tiles towards each other, that will push mortar up into the space and you will have to clean that out later, which trust me is the worst job ever!)
Pay attention to how level the tiles are with each other, particularly on a floor where you will really feel if the tiles are uneven (these are called toe-stubbers). The levelling spacers I bought also helps to level the tiles to each other.
If you have a tile that is too low, you can pry it off and add a bit more mortar behind it to build it up a bit. If the tile is too high, press it down a little more and squeeze out a bit of the mortar. Try to keep the tiles level with each other as much as possible.
Sometimes if there is a bump or a bit of unevenness to the wall/ floor this can be the hardest part of tiling, so starting with a very level surface is always the easiest if you can. (You will note that before we waterproofed, we shimmed a few studs so that our Kerdi board was super straight and level, and this is the reason!)
Continue along in this manner until you get to an obstruction, like a wall, where you need to cut a tile. (Some people cut all their tiles ahead of time and dry fit before they tile, but I have never done it that way, I just cut as I go.)
Cut the Tiles to Fit
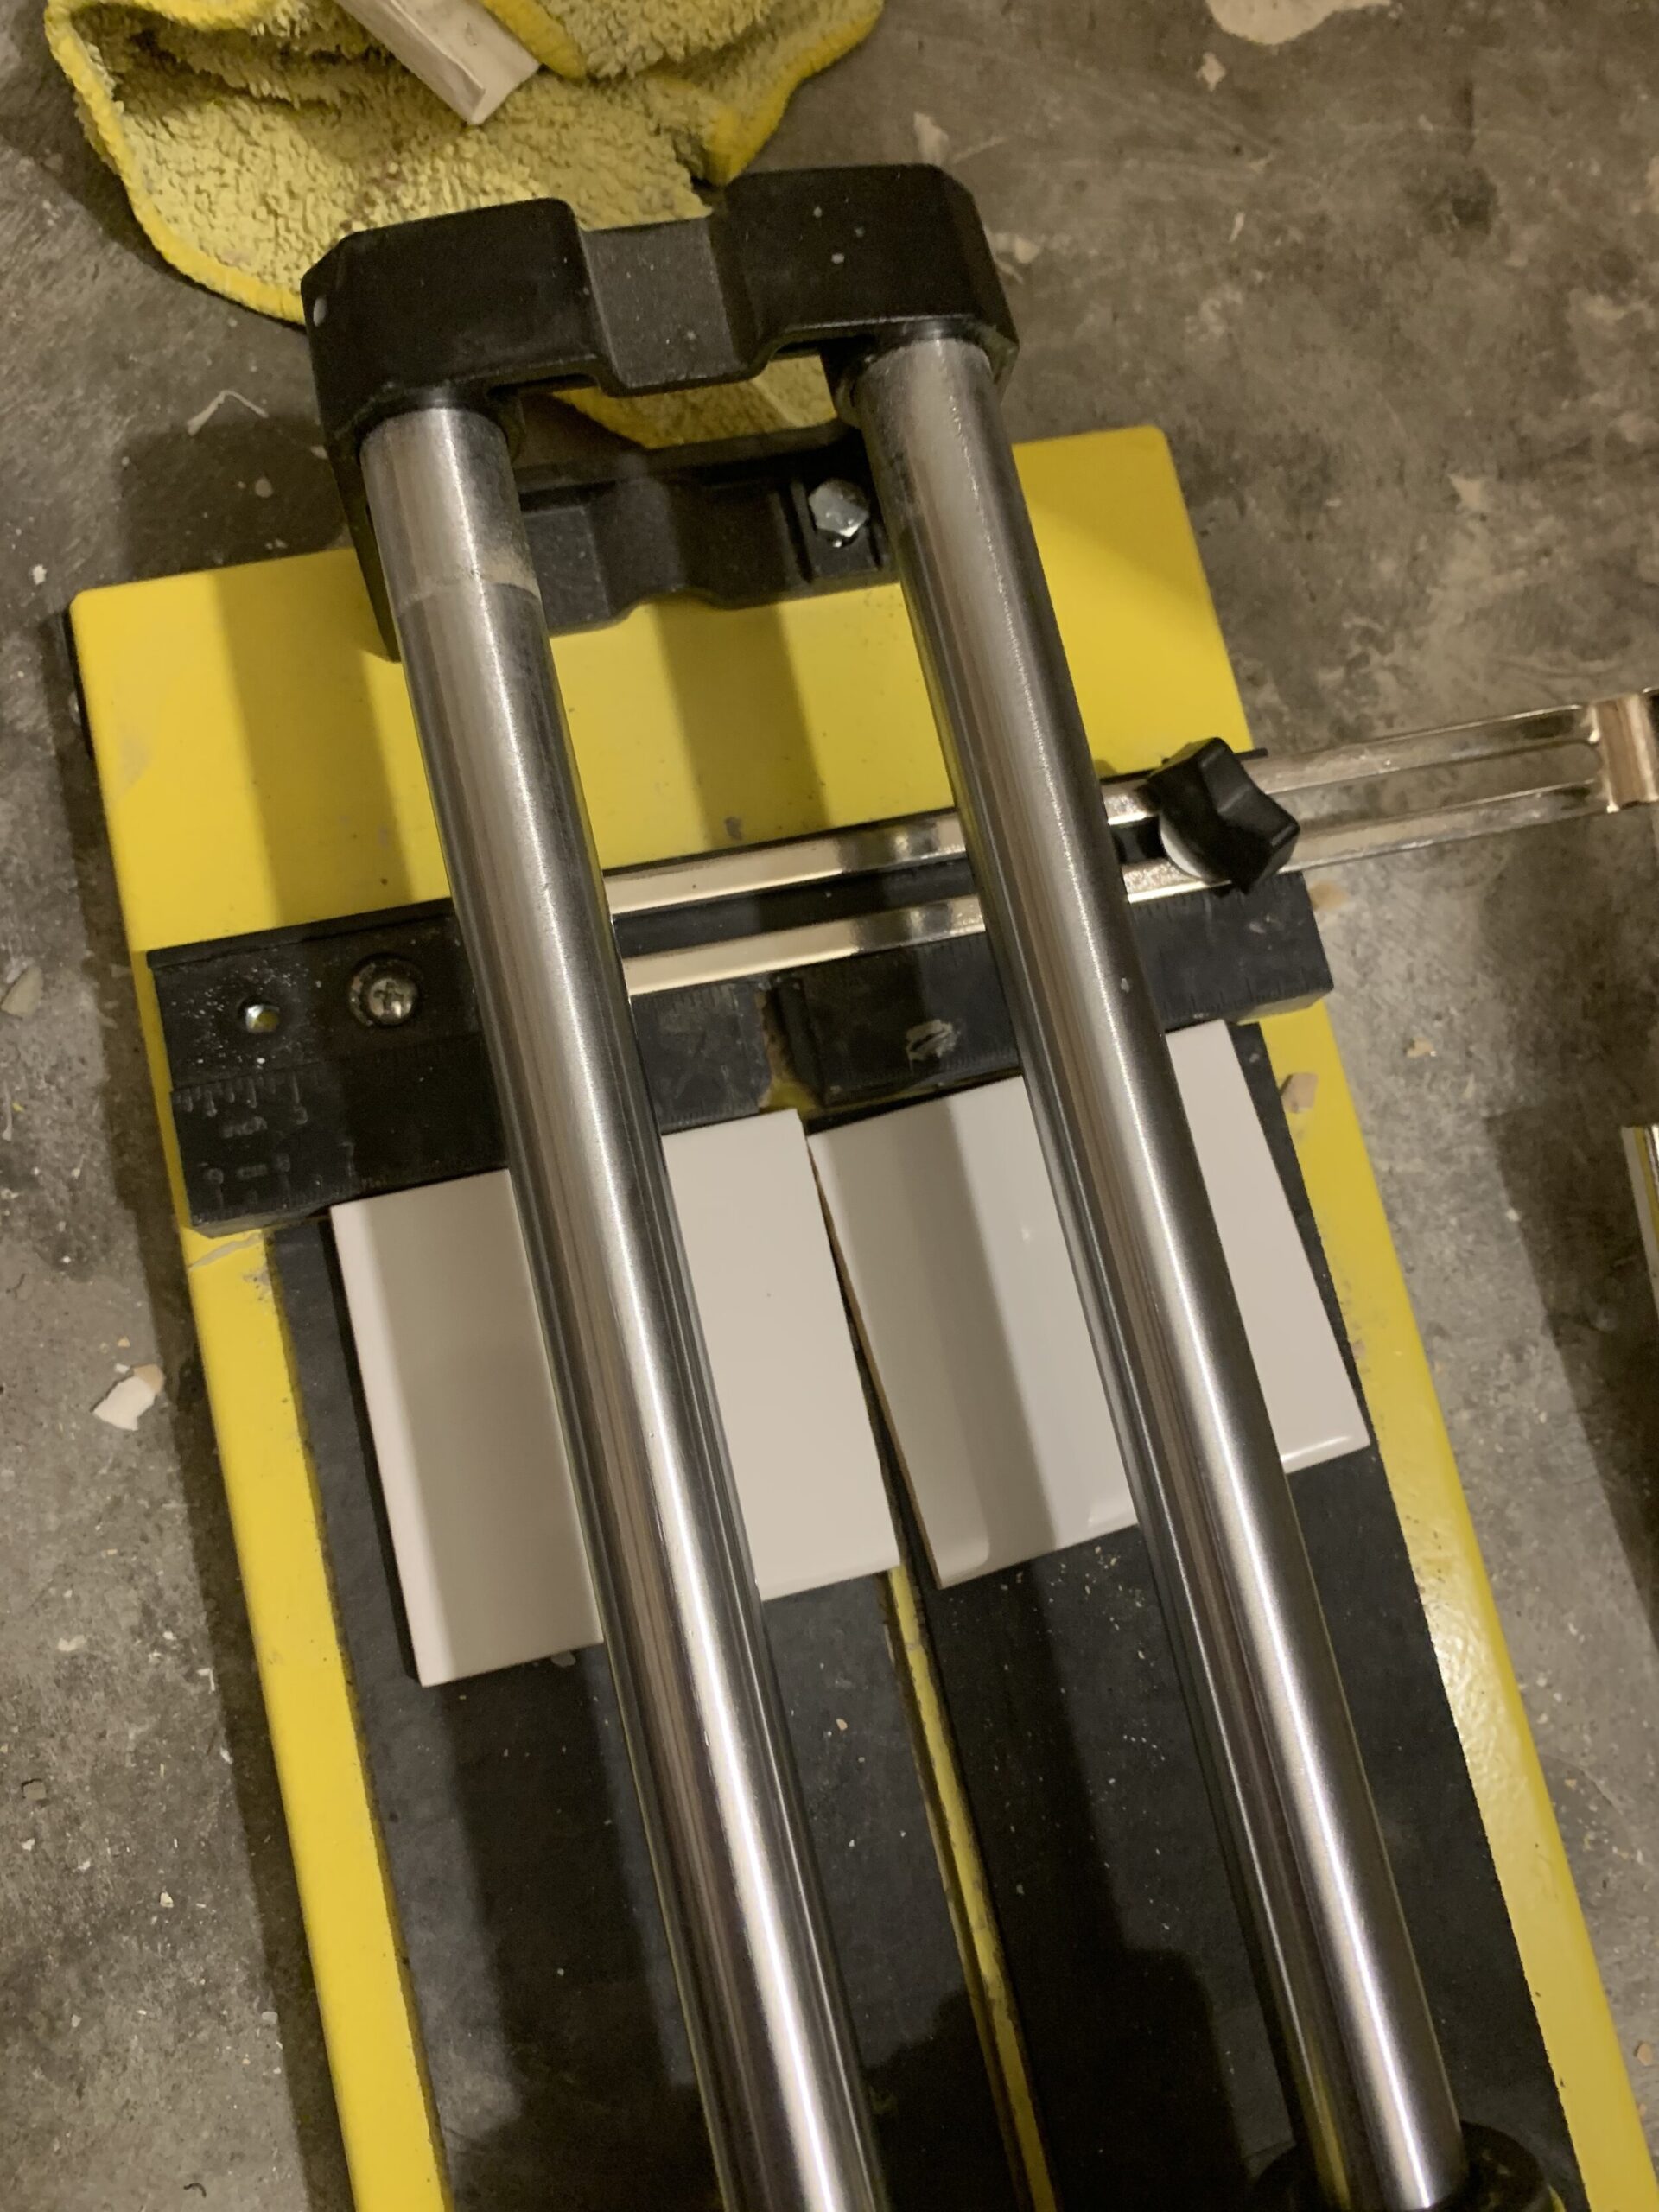
I used a couple of different methods to cut the tile in my case. If you have a fairly simple run of flat ceramic tile (like a backsplash, for example) you can use a tile snap-cutter to cut tile and it works quite well. They are inexpensive to buy and easy to use. (My 15-year-old daughter was the tile cutter, I showed her how to do it and she cut almost all the tile for me on the snap cutter!).
Mark the tile size on the tile, place it on the snap cutter. Slide a little wheel along your line and that scores the tile, and then the cutter pushes down on the two sides of the scored area and snaps the tile along the line you just made. We made most of our cuts on the snap cutter, because we were able to do the cuts much quicker and right there in the bathroom instead of running outside to the wet saw every time we needed a cut.
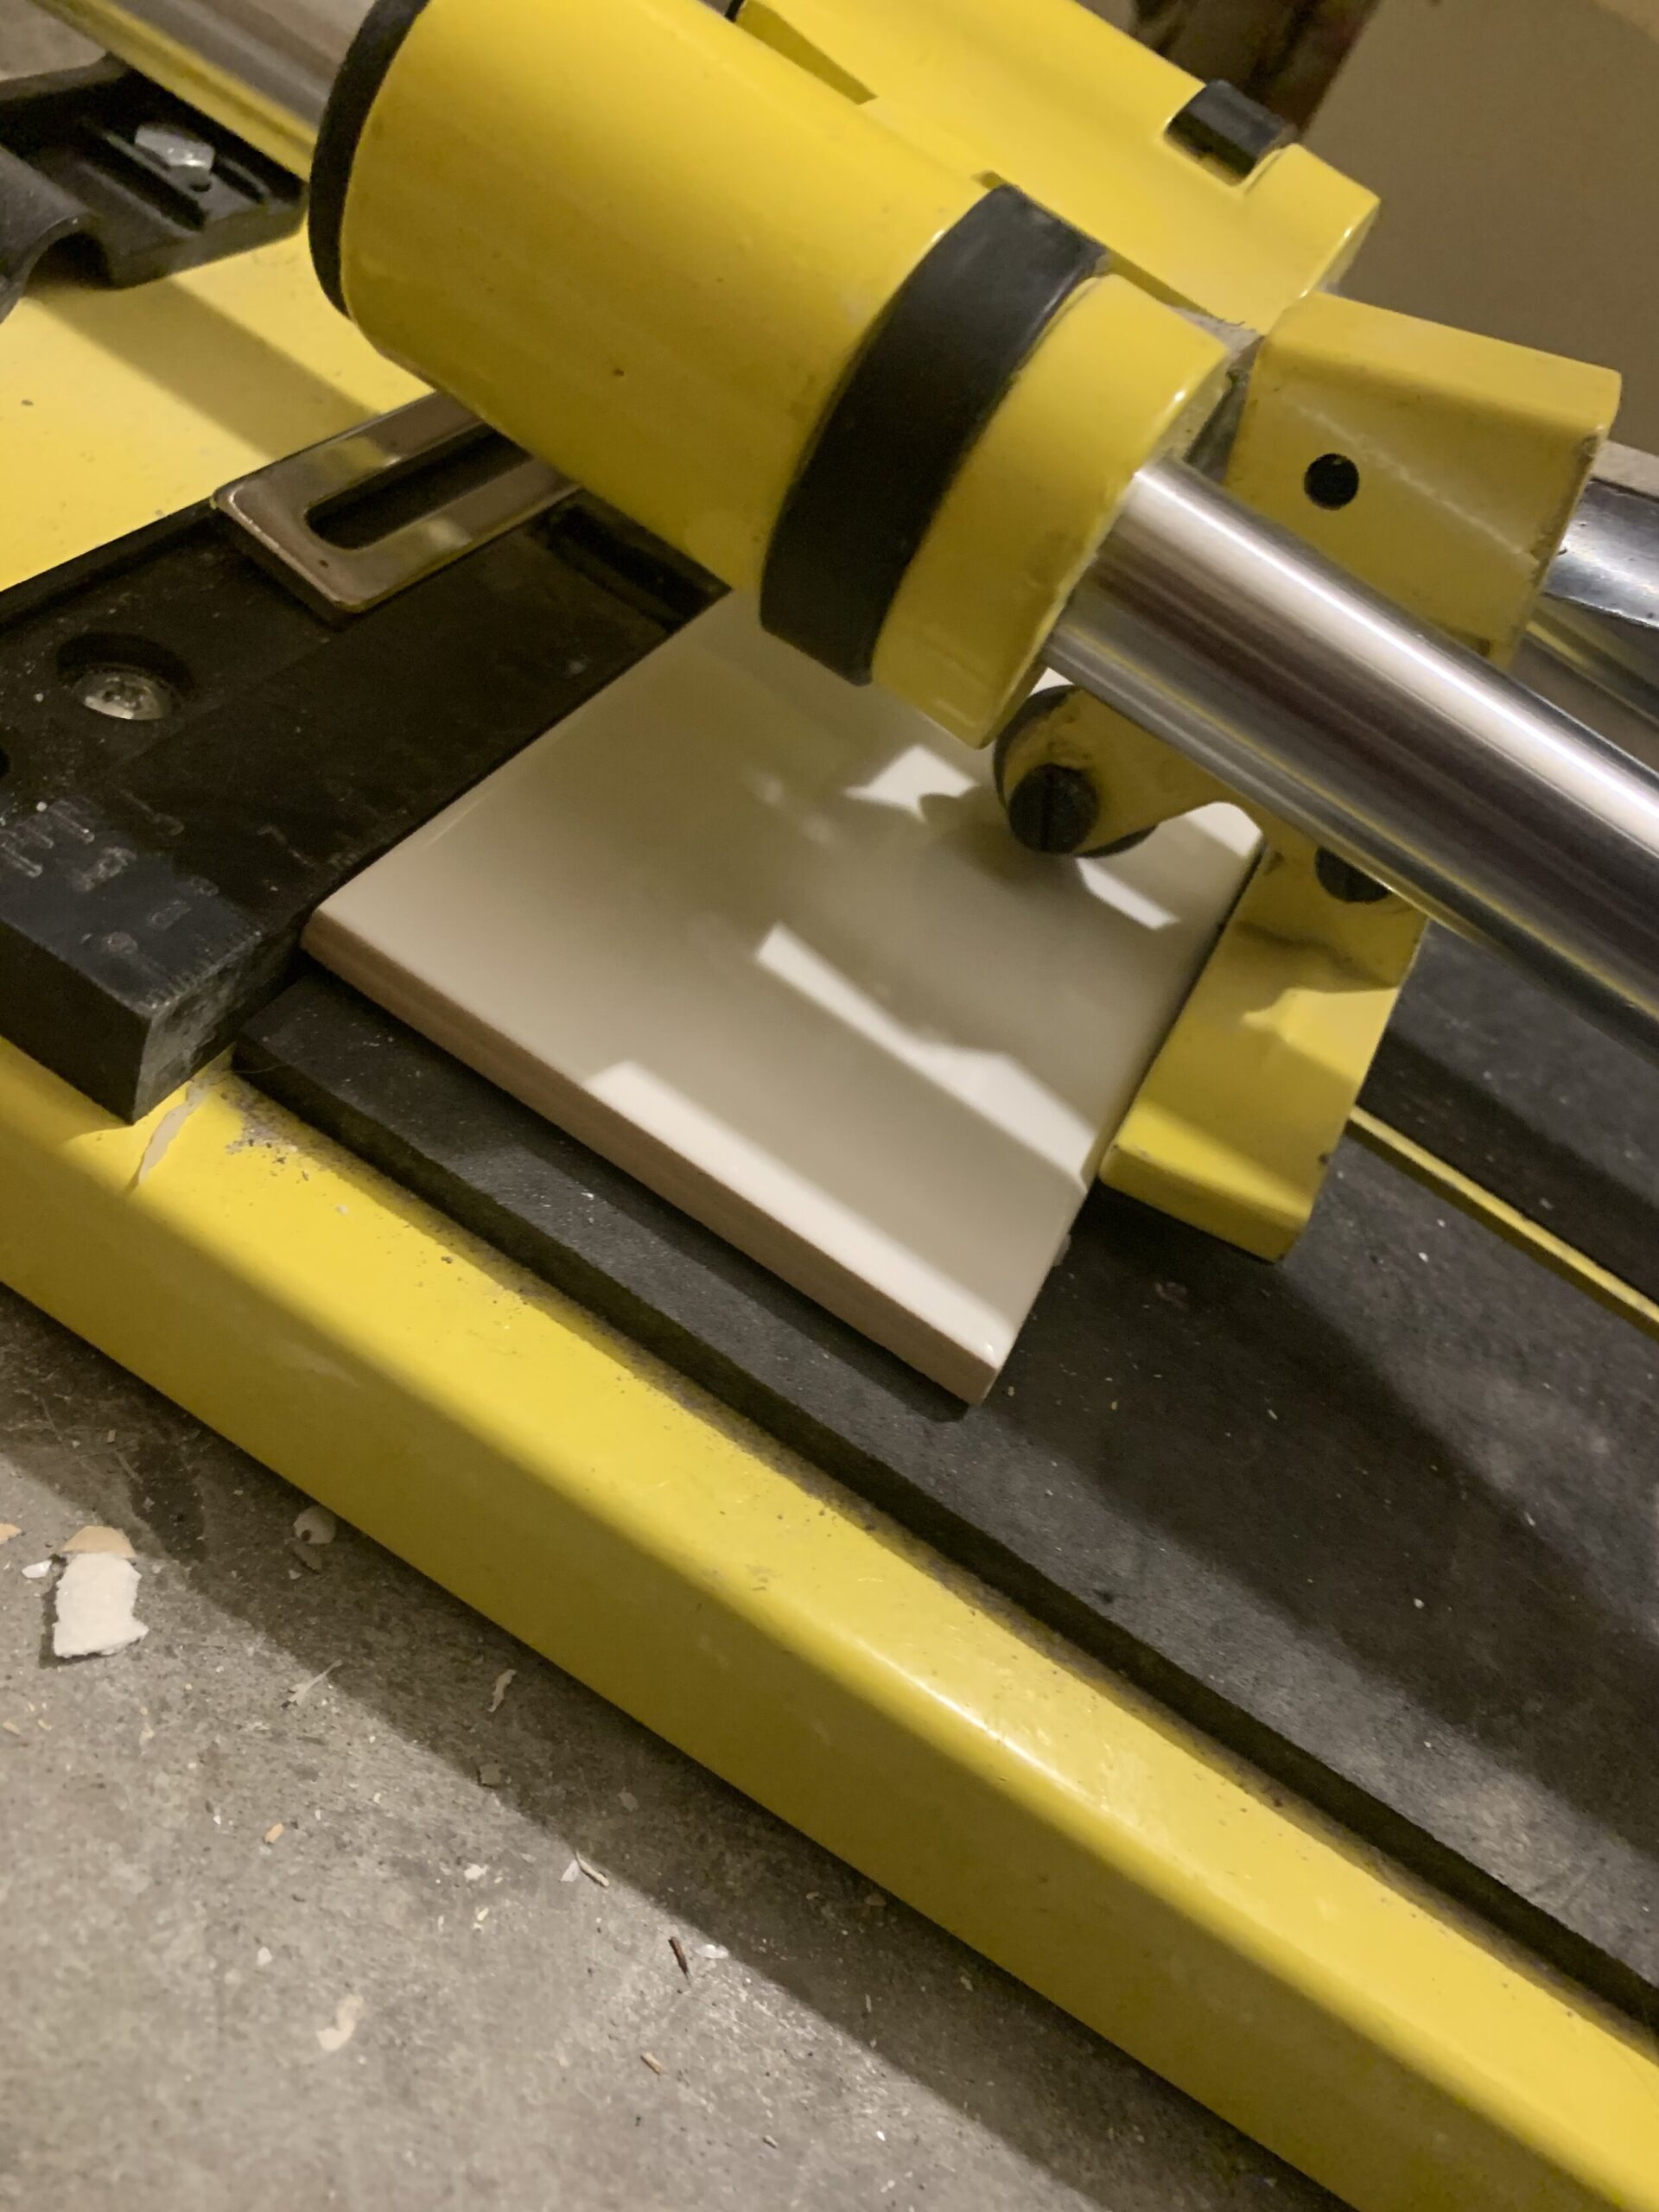
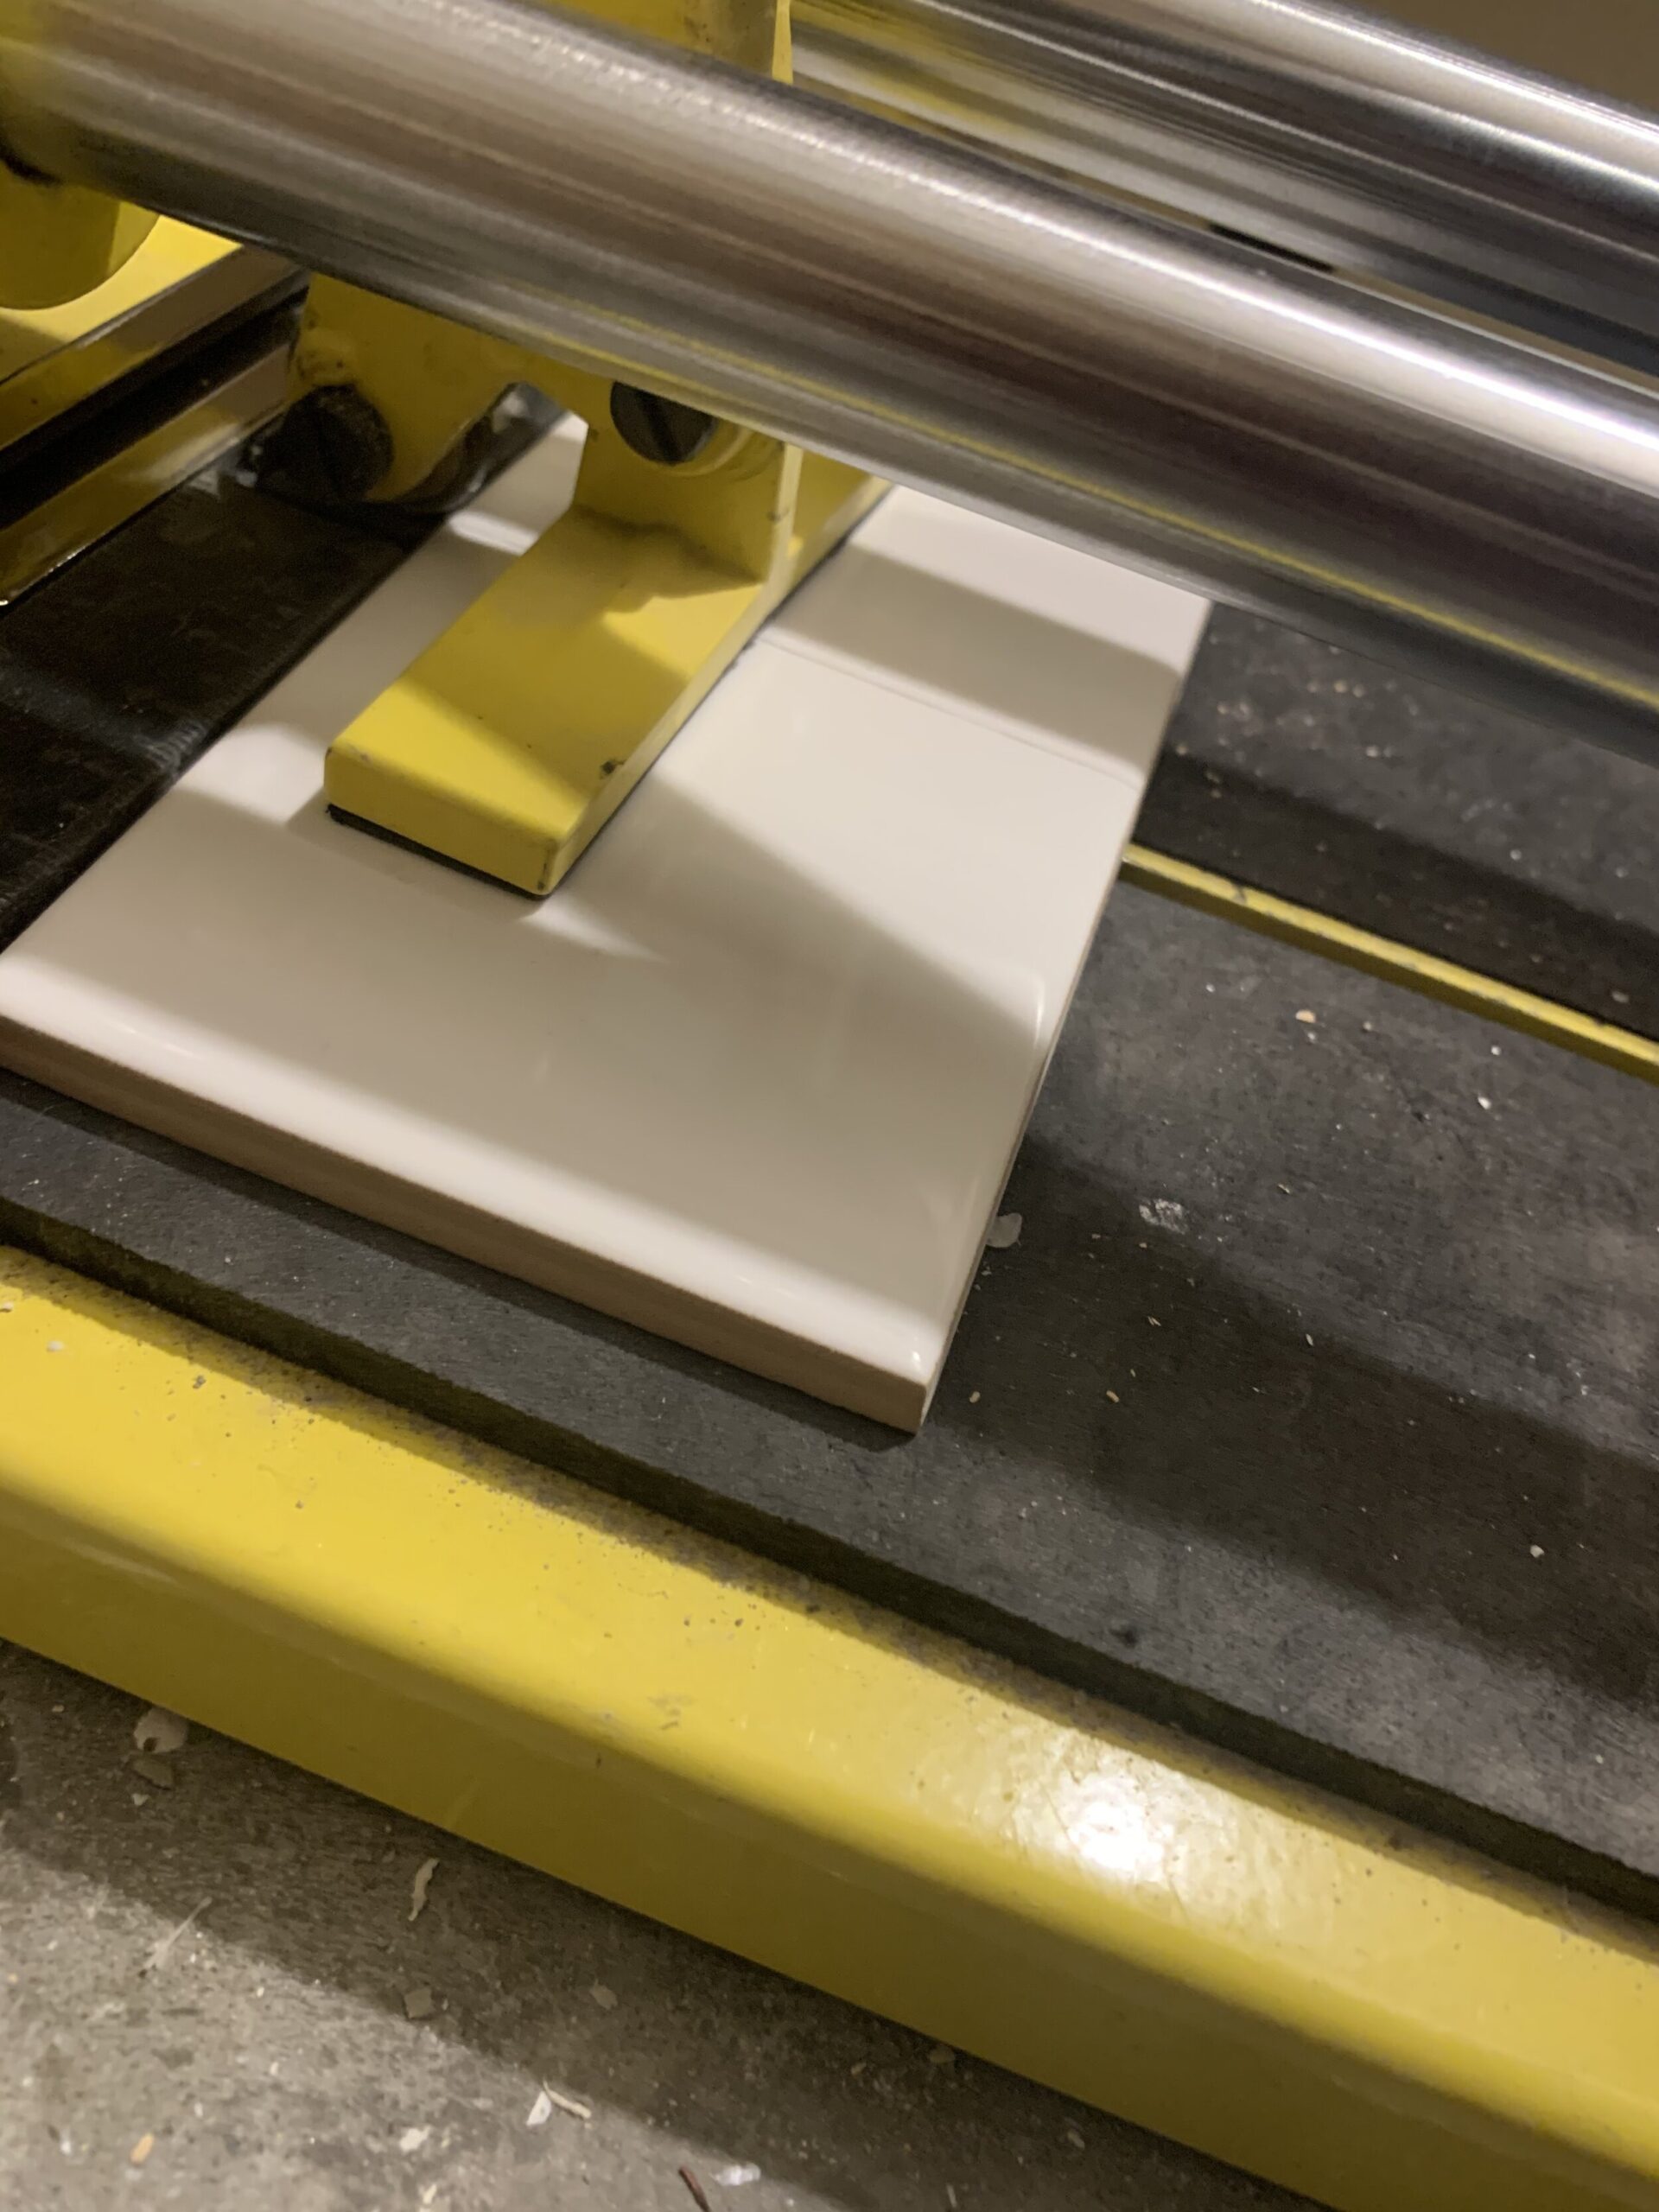
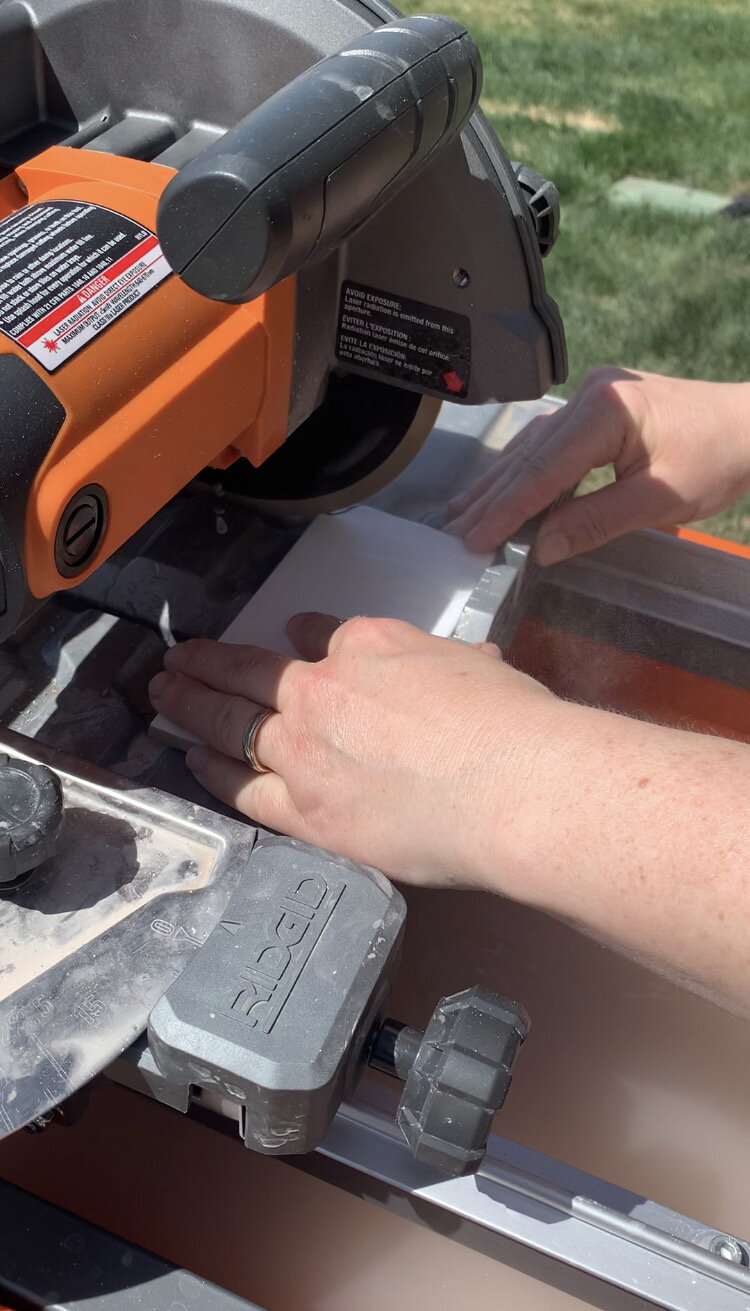
If you have more complicated cuts, or very small slivers to remove, you will need to use a wet saw. Wet saws can be rented at your local home improvement store. They operate much as a mitre saw, but they have a tray of water that circulates over the blade to keep the blade cool and they are very messy! If you use a wet saw, put it outside if you can or in a garage where you can protect the surrounding area.
That’s about all there is to it! Another tip, clean as you go. It is much easier to remove mortar in its wet state than in its hardened state. Enough said? Wipe it off the tile fronts, the tub and floor you WILL drip it on, and in between the tiles as much as you can.
Prepare for Grout
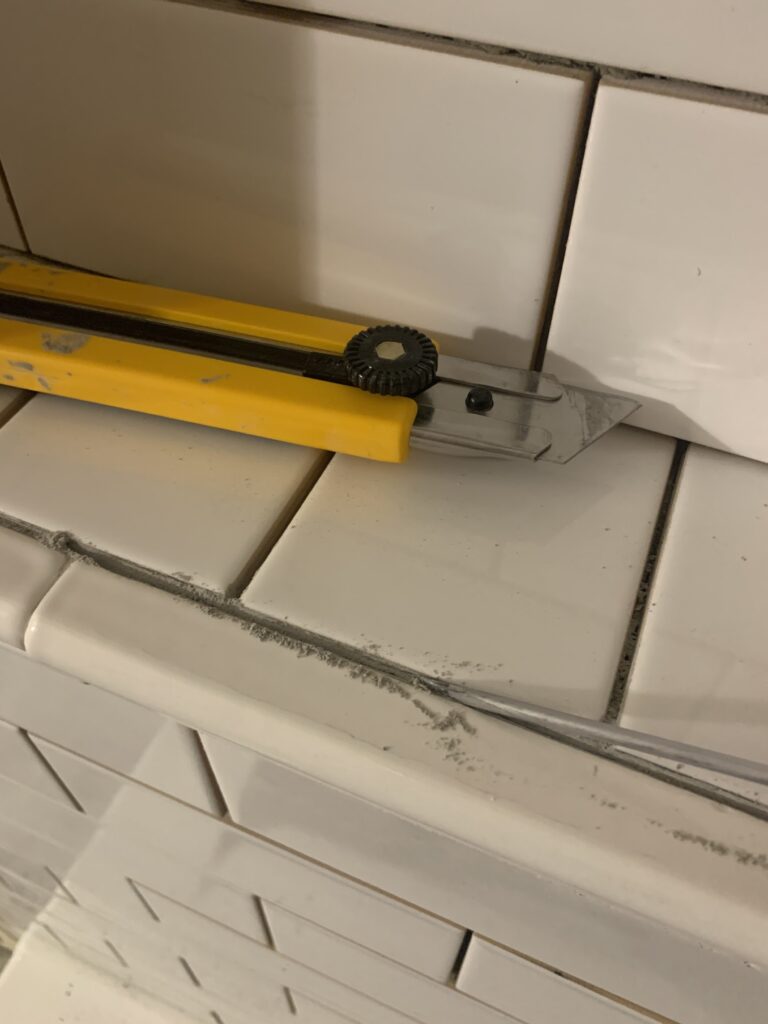
You can remove the spacers the next day after the tile is set and grout. But before you do, you need to give the tiles a good cleaning to make sure there is no mortar on the fronts of them, and also have a look-see at all the spaces in the grout lines to see if there are any high spots where the mortar sticks up too much, where the grout won’t cover it. Especially if your mortar is a different colour than your grout, this is going to be super noticeable after the grout is in.
Take the time to look it over and pry out any high spots in those spaces with something like a small screwdriver. Remember when I said to clean the tiles when it’s wet? Yeah, this is why, because this job SUCKS. But it’s so necessary!
Grout
The homestretch! I watched a DIY show once where a guy said grouting is so easy a monkey could be taught to do it, and I don’t disagree!
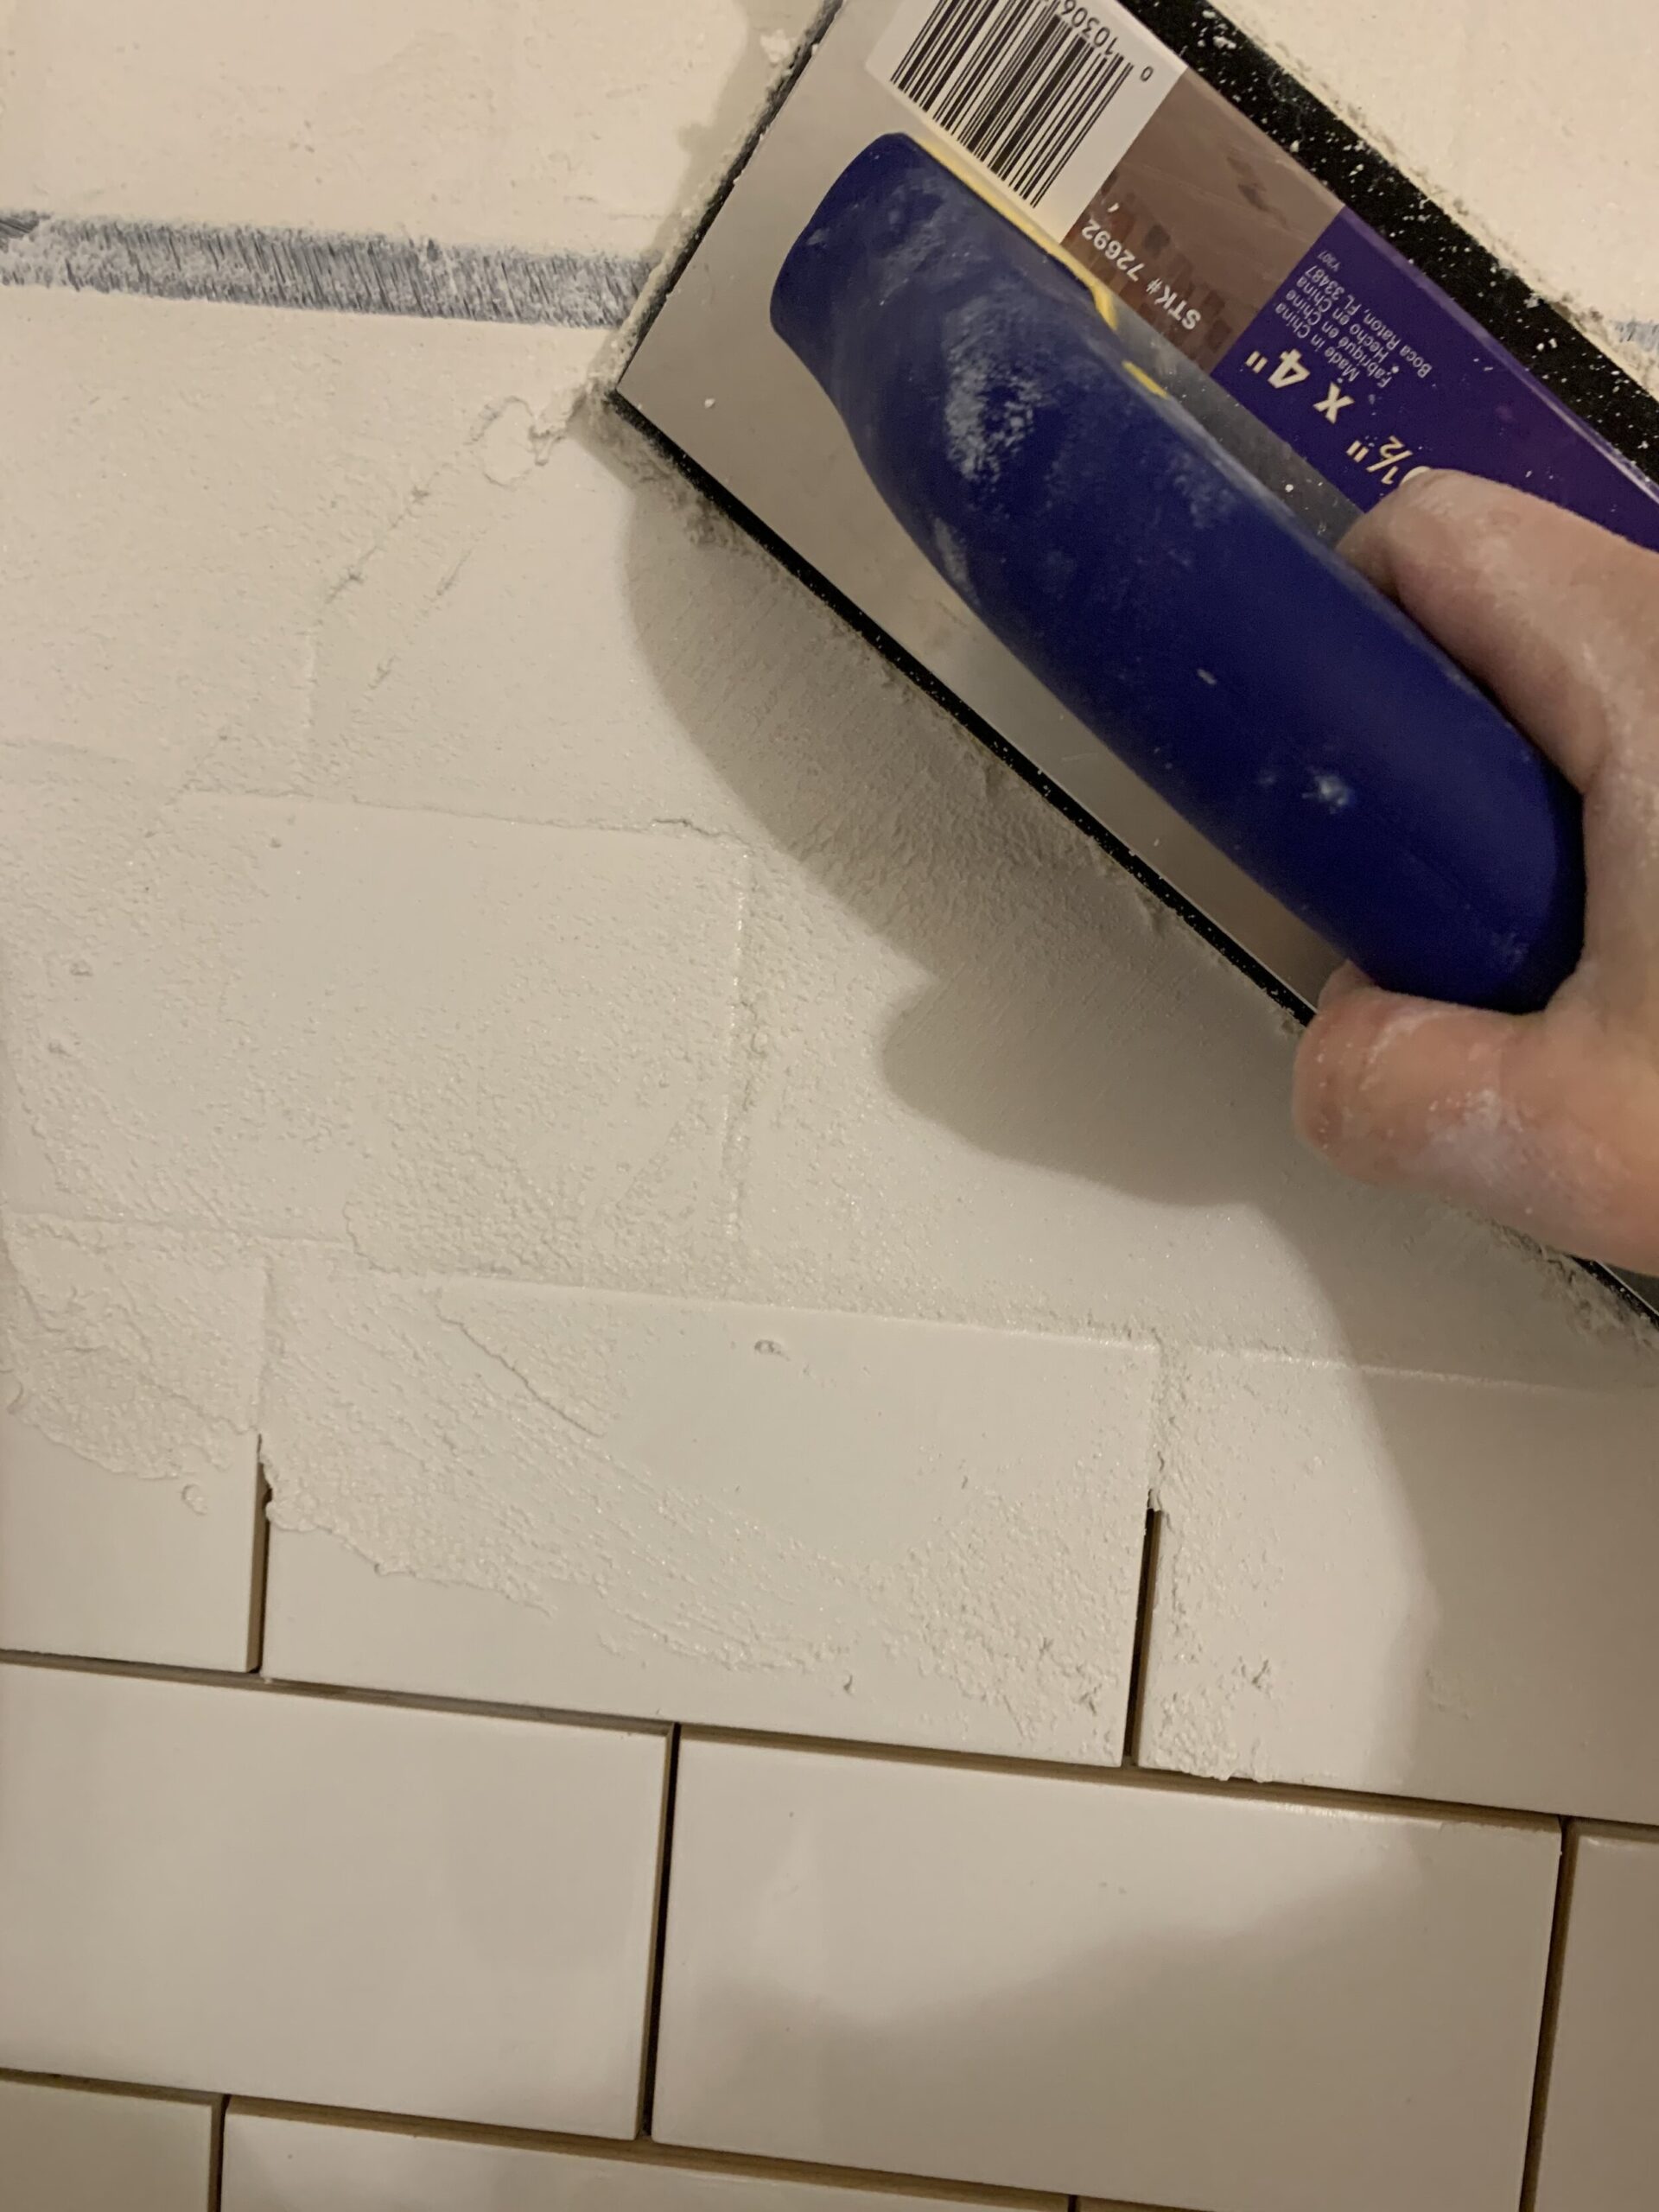
Mix up the grout according to package directions (or use pre-mixed epoxy grout … so nice!) and take a grout float and spread some grout all over the tile. it’s super messy but sort of fun. You want to use the trowel to really push the grout into all the spaces, making sure every little spot is filled.
Then, you take that float and run it at a 45-degree angle to the spaces, removing the excess grout. Finally, you take a wet sponge and wipe the top of the tile off, taking care not to remove too much of the grout that’s in the spaces in the process. I like to wipe in a circular motion, especially for the first wipe, as it helps work the grout into the spaces. Work in small, manageable sections and this part is done in no time. You may have to wipe the tops a few times.
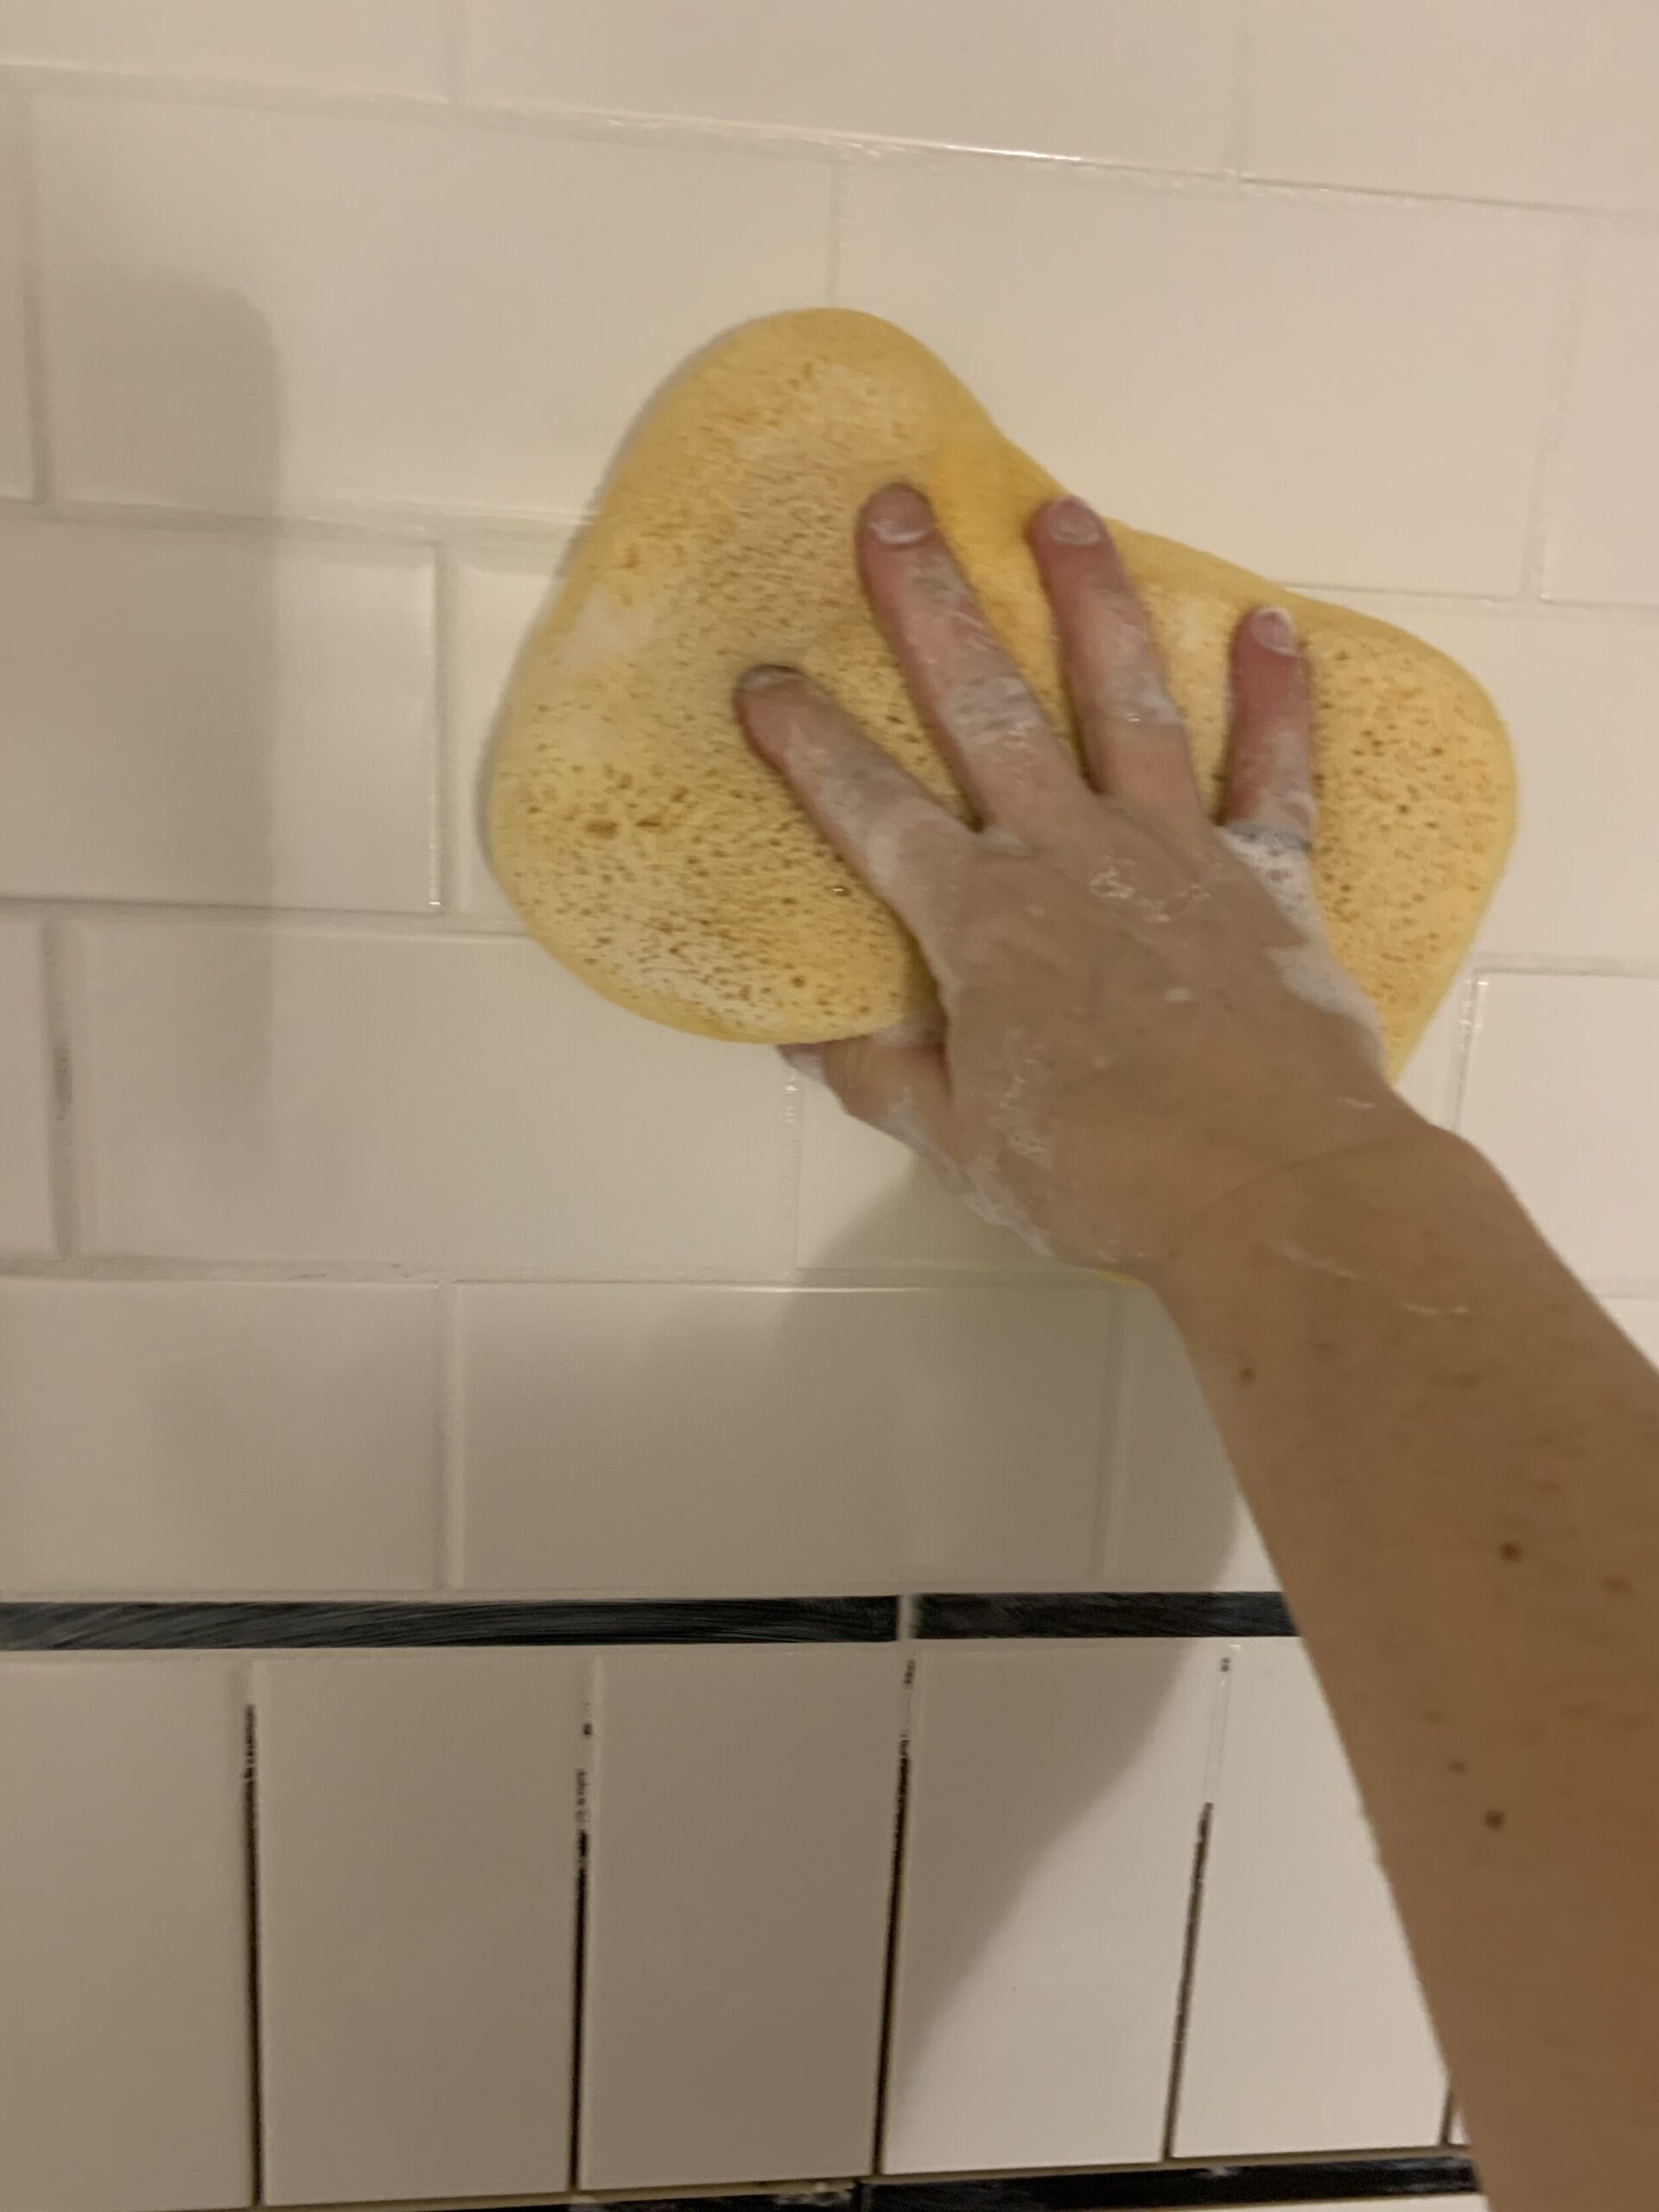
Follow the package directions for dry times and times between grouting/ wiping, but after a time (usually the next day) you can come back and give it another cleaning. Even though you wiped the grout off the fronts after it dries it will have a “grout haze” which sometimes takes a few washings with the sponge to totally remove.
What a difference grout makes! You can really change the look of your tile by choosing a contrasting colour or one that matches the tile. Just look at this photo of the grouted versus the ungrouted side! My family at first thought I should have used a darker grout with more contrast but now that it’s all done, they are digging the softness of the white grout.
Let’s take a minute to discuss white grout. I was nervous about using it but I really wanted the low-contrast look, especially for the floor tile, so I talked to my tile supplier on what she recommended, and she sold me THIS which she swears will not stain (TBD!).
I read some reviews and a lot of people talked about how hard it was to install and I don’t disagree! It dried really fast and I really had to keep on top of the wiping or it left a very difficult to remove sticky mess on the top of the tile. The directions on the package really stressed “clean as you go” and I found that to be very true. With normal grout, you would leave an area for about 10 minutes before wiping so it had some time to set up a bit, but I found with this one, if you did that you had a very difficult time removing it and I ended up working in small sections and sponging it off almost right away.
So as with anything, read the directions for the product you use and follow those! I’ll let you know if this is truly a no-stain white grout in a year or so!
Seal
Depending on your tile and your grout the next step may not be necessary. The grout I used has a built-in sealer, and ceramic tile does not need to be sealed so I did not need to do this step. If your grout or your tile requires a sealer, be sure to follow directions or you could end up with stained grout or tile down the road.
Now sit back and enjoy that newly tiled shower/backsplash/ floor!
Coming Up!
Next up, I will be popping some Advil and installing the floor tile, start working on putting the trim and beadboard up, and working on some DIY vanity upgrades which I’m super pumped about!
Make sure you go and check out what the other participants are up to by clicking on the logo below. There are some amazing participants this season so be sure to check them out!

CLICK ON THE IMAGE ABOVE TO BE RE-DIRECTED TO THE ORC WEBSITE!
This tile combo looks so good – just the right nod of vintage style but super chic
Erin, I love your choice of classic black and white tile. It’s so chic and timeless. Love the border bull-nose tile too, it looks so professional. Thanks for your tips, I learned a thing or two. Good luck, We are anxious to see your completed bathroom.
Thank you!
Thank you so much Michelle, and I’m glad you found it helpful!
You’re so talented! Fun to see the "preview" on IG and then come over here to see the full deal. Just lovely.
Thank you so much Marie! I’m glad you got a little something extra out of the blog!
Hi Erin! Do you have a link for the bullnose tile used? The photos aren’t linking for me and I would love to use this style for our bath reno!
Hi Amanda, I just updated the links, sorry they weren’t working!
“How to Install Tile in your Bathroom Shower, Step by Step” is an absolute gem! With its clear and concise instructions, it’s like having a skilled handyman right by your side. Whether you’re a seasoned DIY enthusiast or a novice, this guide makes tiling your shower a breeze. A must-read for anyone looking to transform their bathroom into a stunning.
This article on installing bathroom shower tiles is fantastic. It breaks down the process into easy-to-follow steps, perfect for DIY enthusiasts. The clear instructions and accompanying visuals make it beginner-friendly. Great resource for anyone looking to spruce up their bathroom without hiring a professional. Highly recommended!
Thank you Angela!
The decision to go for a basketweave pattern on the floor is fantastic – classic yet distinctive.
Thank you!
Any update on the white grout?! I love the look of basketweave with white grout for a floor but not sure how it would hold up.
The grout I used is pretty stain resistant and it’s still looking great!
This looks great! Can you tell me what brand tile you used? I’m re-tiling my classic 1930s b&w bathroom and I can’t find that thin black pencil liner anywhere! Thanks!
It was Daltile!
What an absolutely fantastic tutorial! Your step-by-step approach to subway tile installation is incredibly thorough and encouraging for any DIY enthusiast.
Glad it’s helpful!