One Room Challenge Spring 2020 – Week 7 – Finishing Touches
If you have clicked over from the One Room Challenge Website, welcome! I’m glad you are here! I am an interior designer and serial DIY’er based in Red Deer, Alberta, Canada! You can catch up on my One Room Challenge project in the last week’s posts here:
Week 1/ Week 2/ Week 3/ Week 4/ Week5&6
Be sure to follow along on Instagram for more behind the scenes, and subscribe to the blog at the bottom of this post so you don’t miss the weekly updates!
Let’s talk accessories; they are the finishing touch, the final dressing, the jewelry, the often overlooked and underestimated final finesse to add to a room that can take a room from good to FANTASTIC! Today I’m going to focus on a few DIY and hand made accessories and tutorials for them, and next week you will be able to see all the accessories come together in the final reveal!
This post may contain affiliate links. That means if you purchase anything from these links I earn a small commission, at no extra cost to you! This helps support my blog, so thank you!
Handmade Pottery Pendants
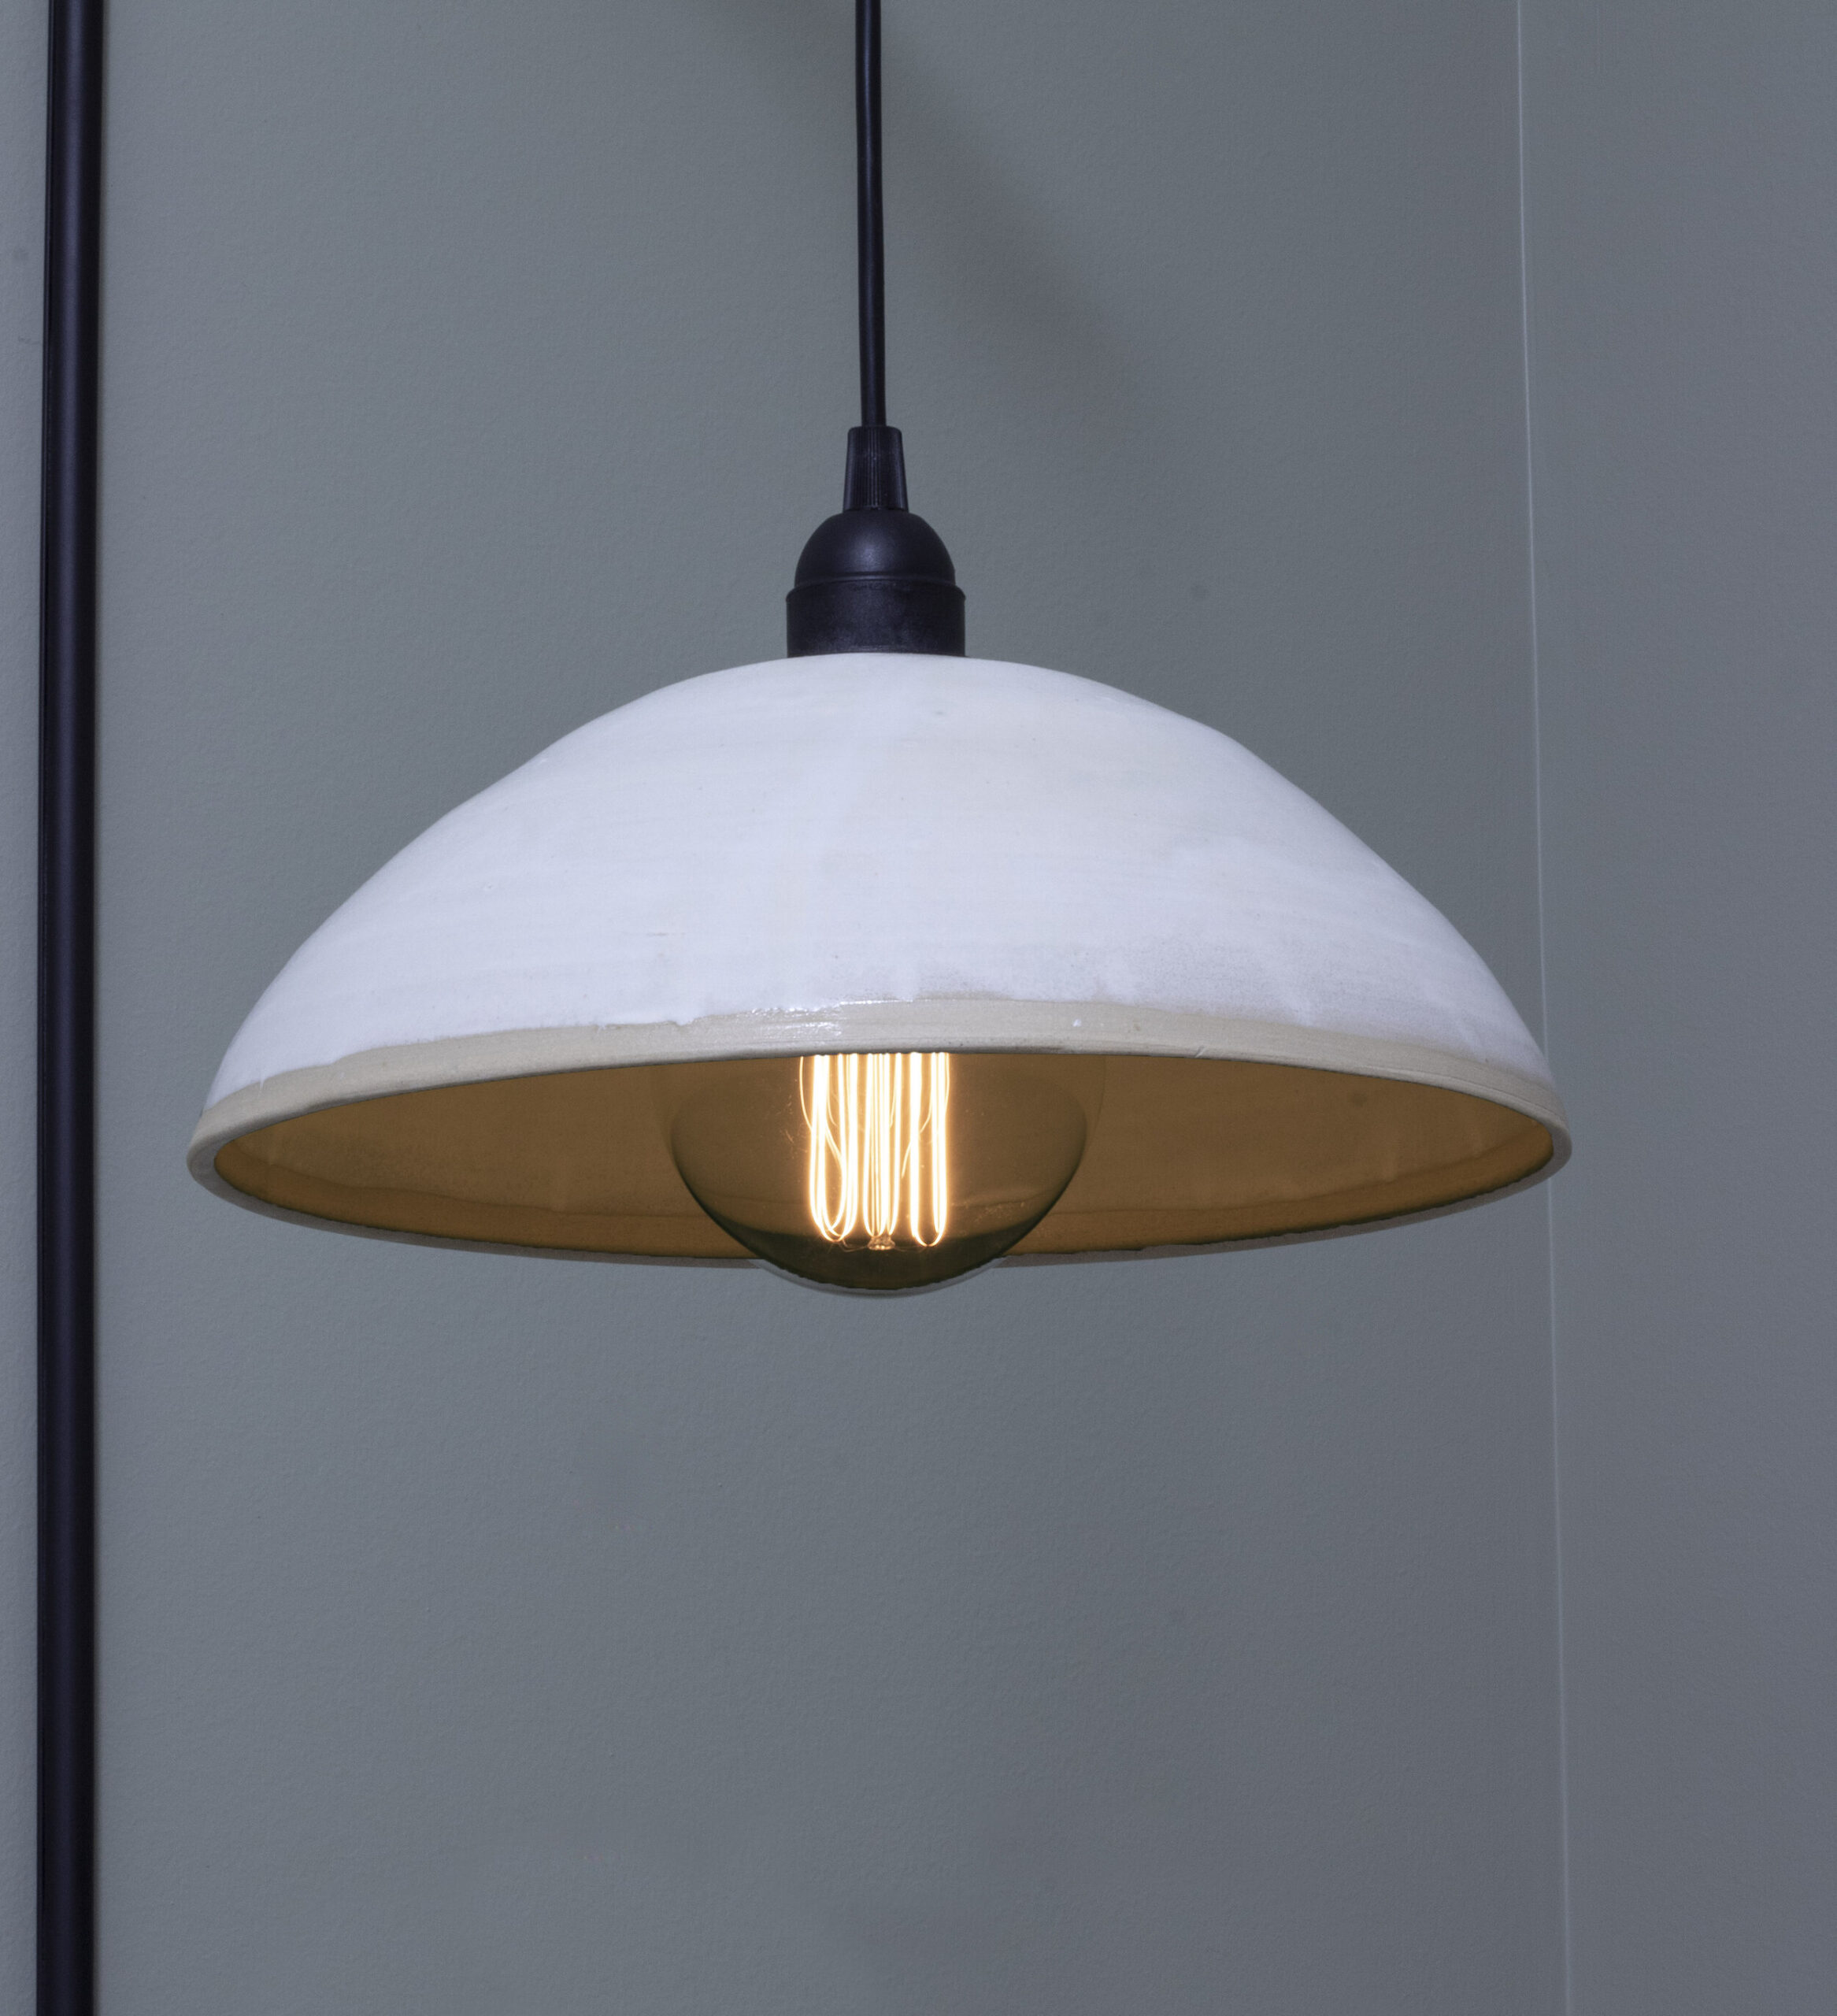
First of all, the sconce pendants. Let’s just get the oooo-ing and awww-ing out of the way. Aren’t they a work of art? Here they are:
I had actually ordered some sconces months ago but they never arrived due to shipping issues. So I got to talking with my artist/ potter of a sister and showed her an image of a beautiful ceramic light I had seen on Etsy, and asked if it was something she could do. She thought that she could, so I asked if she WOULD. She happily agreed (or she agreed, I don’t know how happy she was) to give it a shot. We talked through a few of my inspiration images, and sizes and glazes, and decided on a simple bowl-shape and simple white matte glaze.
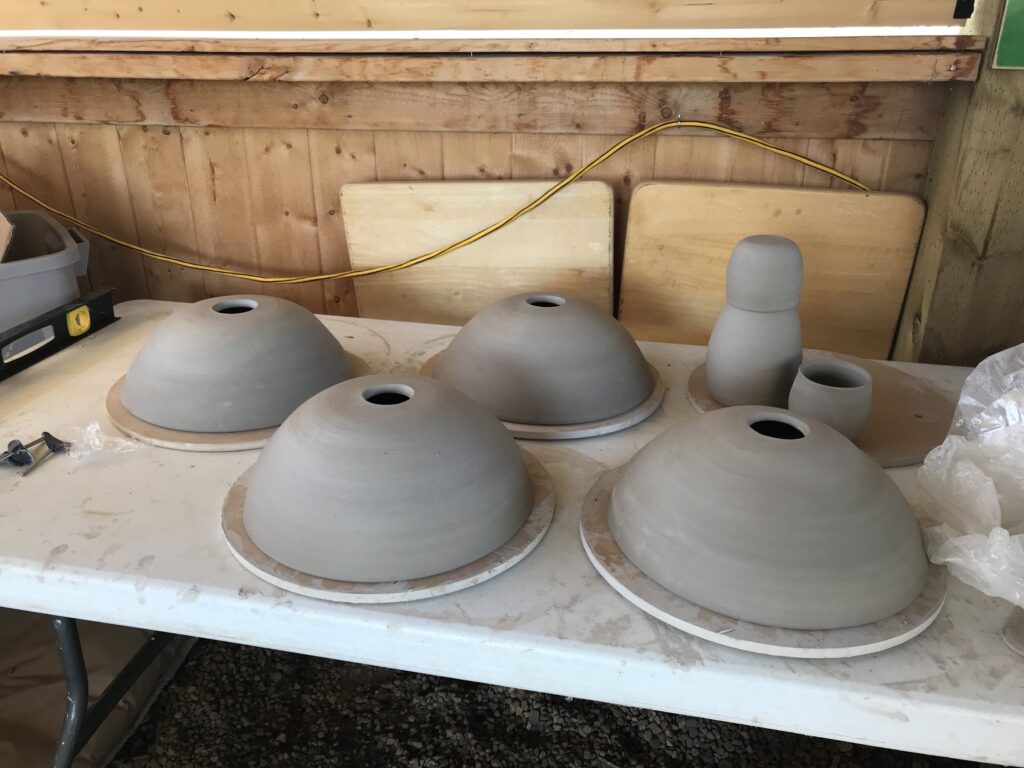
Had I known how hard these would be to do I would not have asked her to do this that is for sure! They were a FEAT. She started by making a whole batch (seven!) and didn’t end up with a matching pair out of all of those that would work. It was difficult to get the opening for the light kit exactly right as there is shrinkage of the clay that happens with each firing. As you can imagine, there is a very small tolerance for having the light kit fit in the hole correctly. Too big and it falls right through the hole, and too small and it doesn’t fit at all. She also was not used to throwing something so big (these are about 12” in diameter!) and needed some trial and error to figure out how to fire them while glazing without having them warp. Several warped or broke in the kiln. At this point I told her to forget it, that I would buy some sconces – I was realizing that this was a pretty big ask! But she said she knew what she did wrong now and was confident that she would be able to do it the next time, and she said she liked the challenge. So she made me a whole other batch, and this time they all worked! I ended up with a bunch of gorgeous hand made pottery lampshades so I picked two that looked similar (although because they are handmade, each is a little different – yay!) to use in the room.
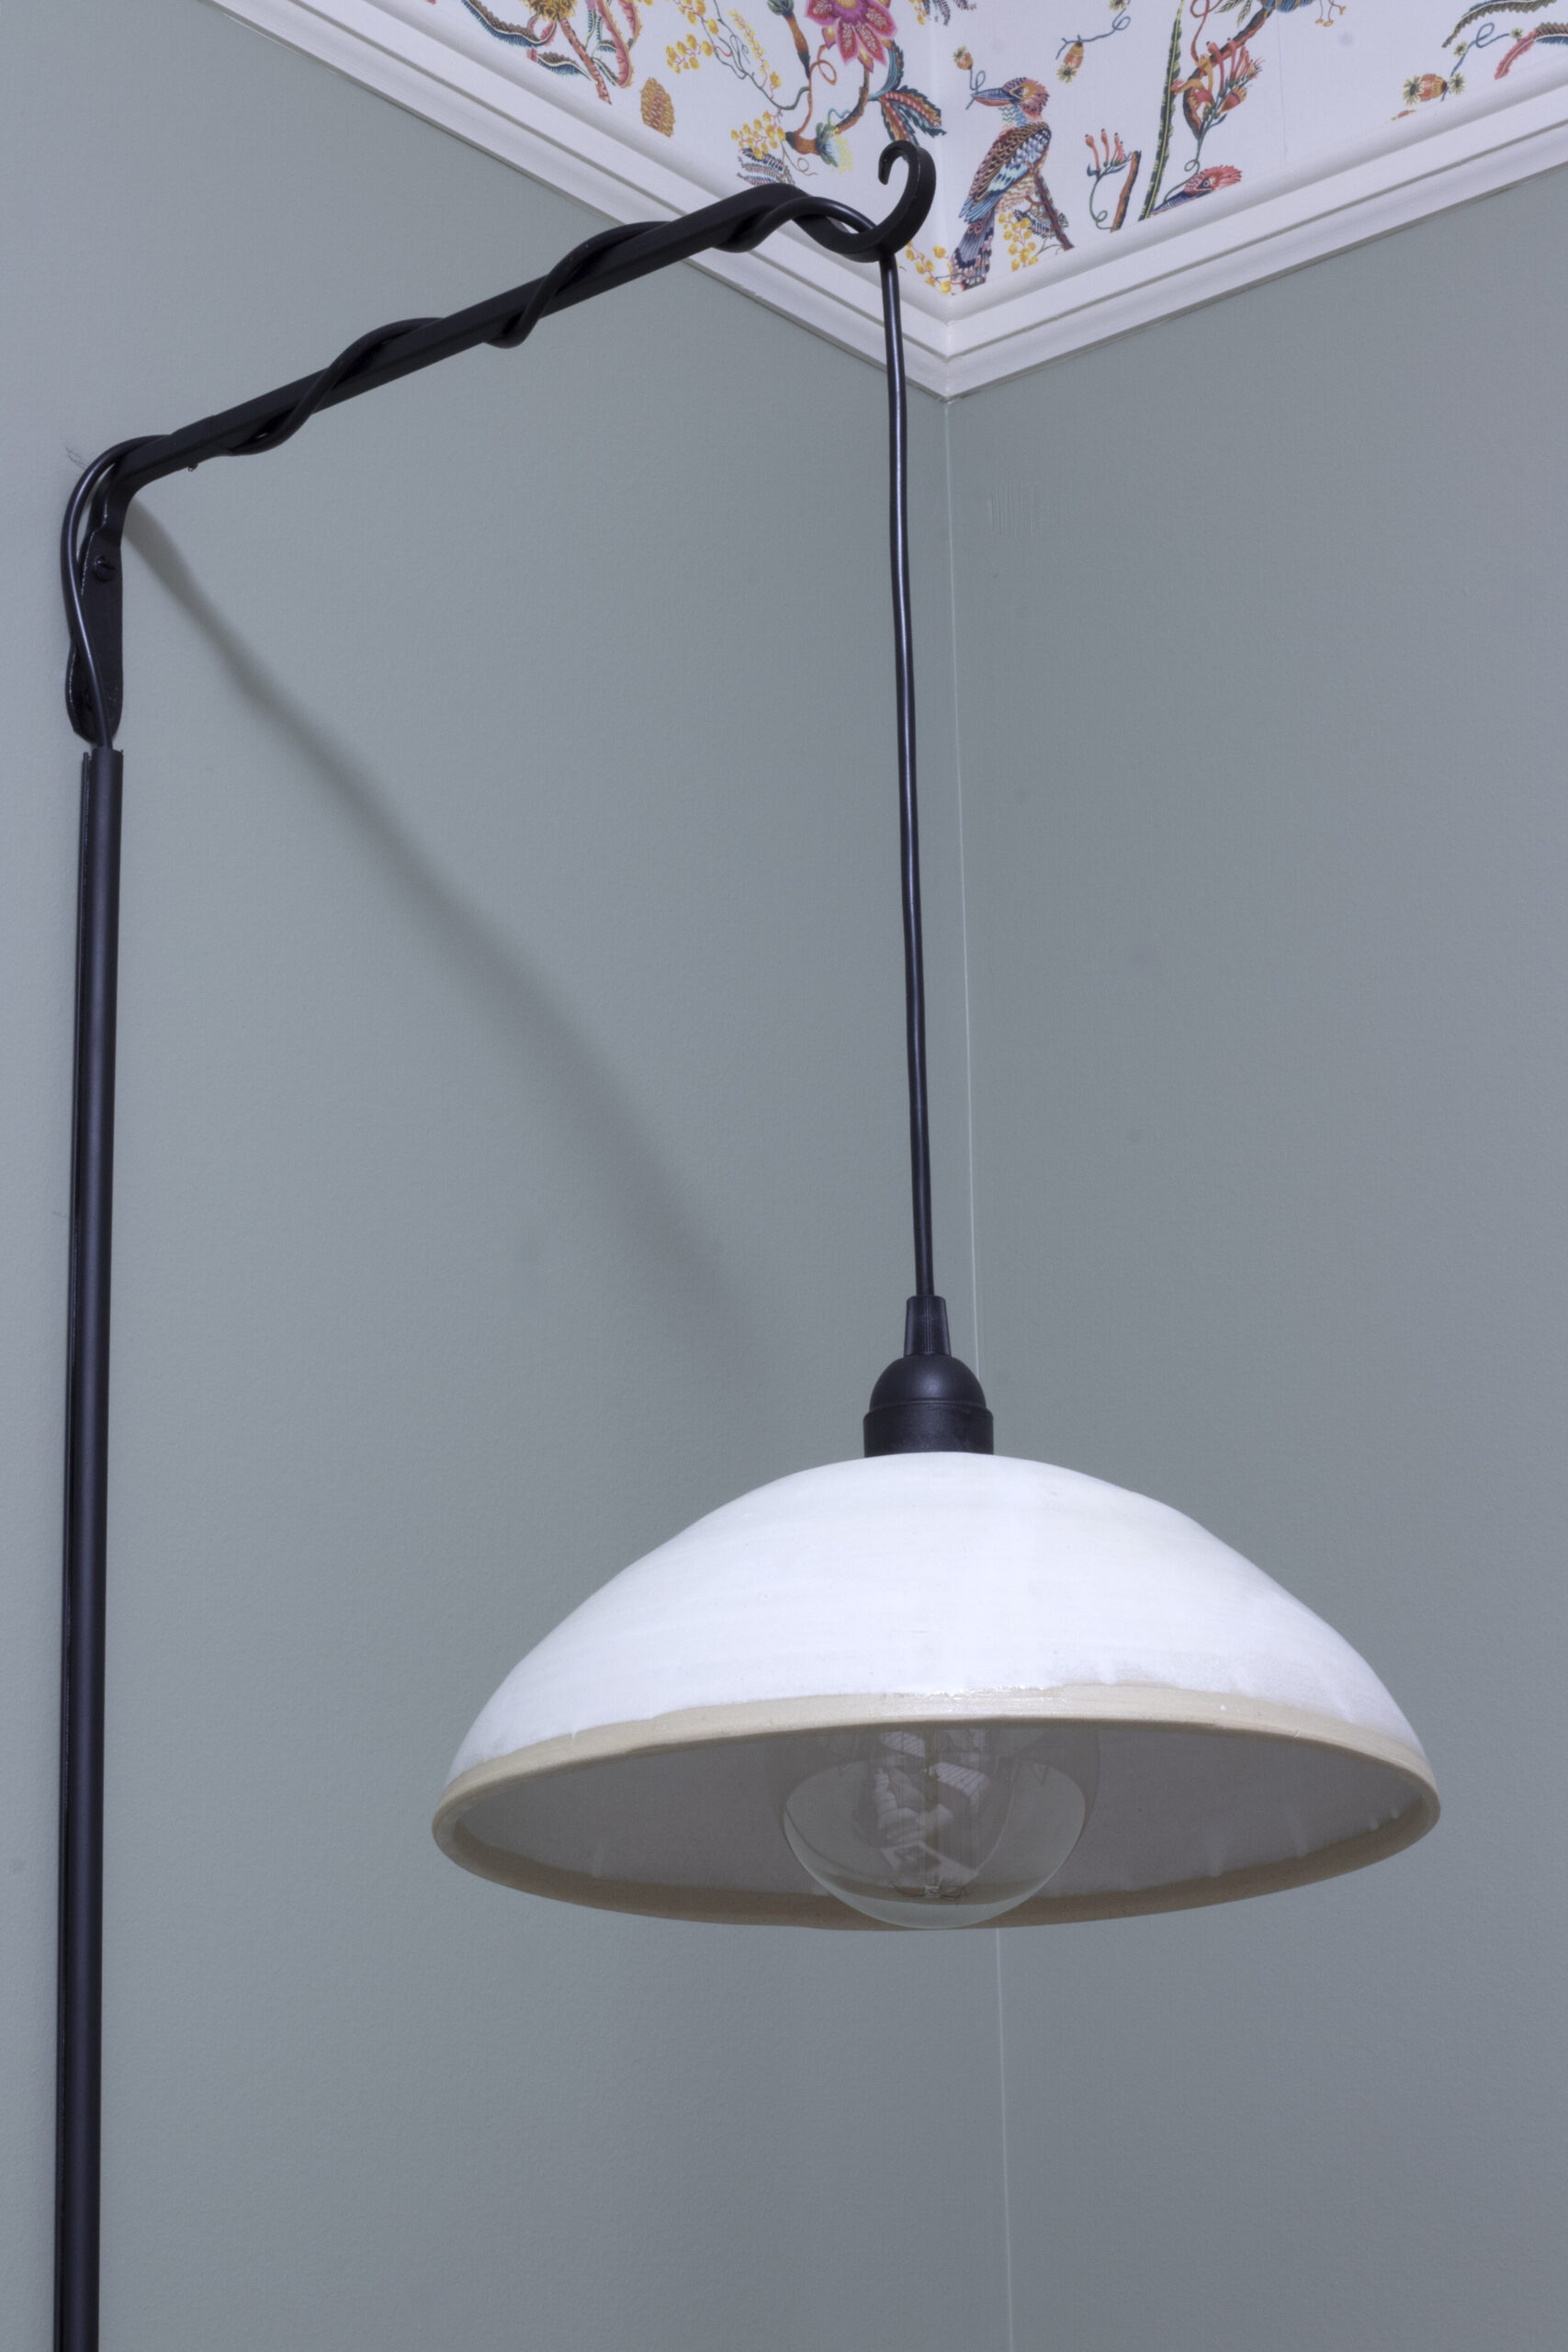
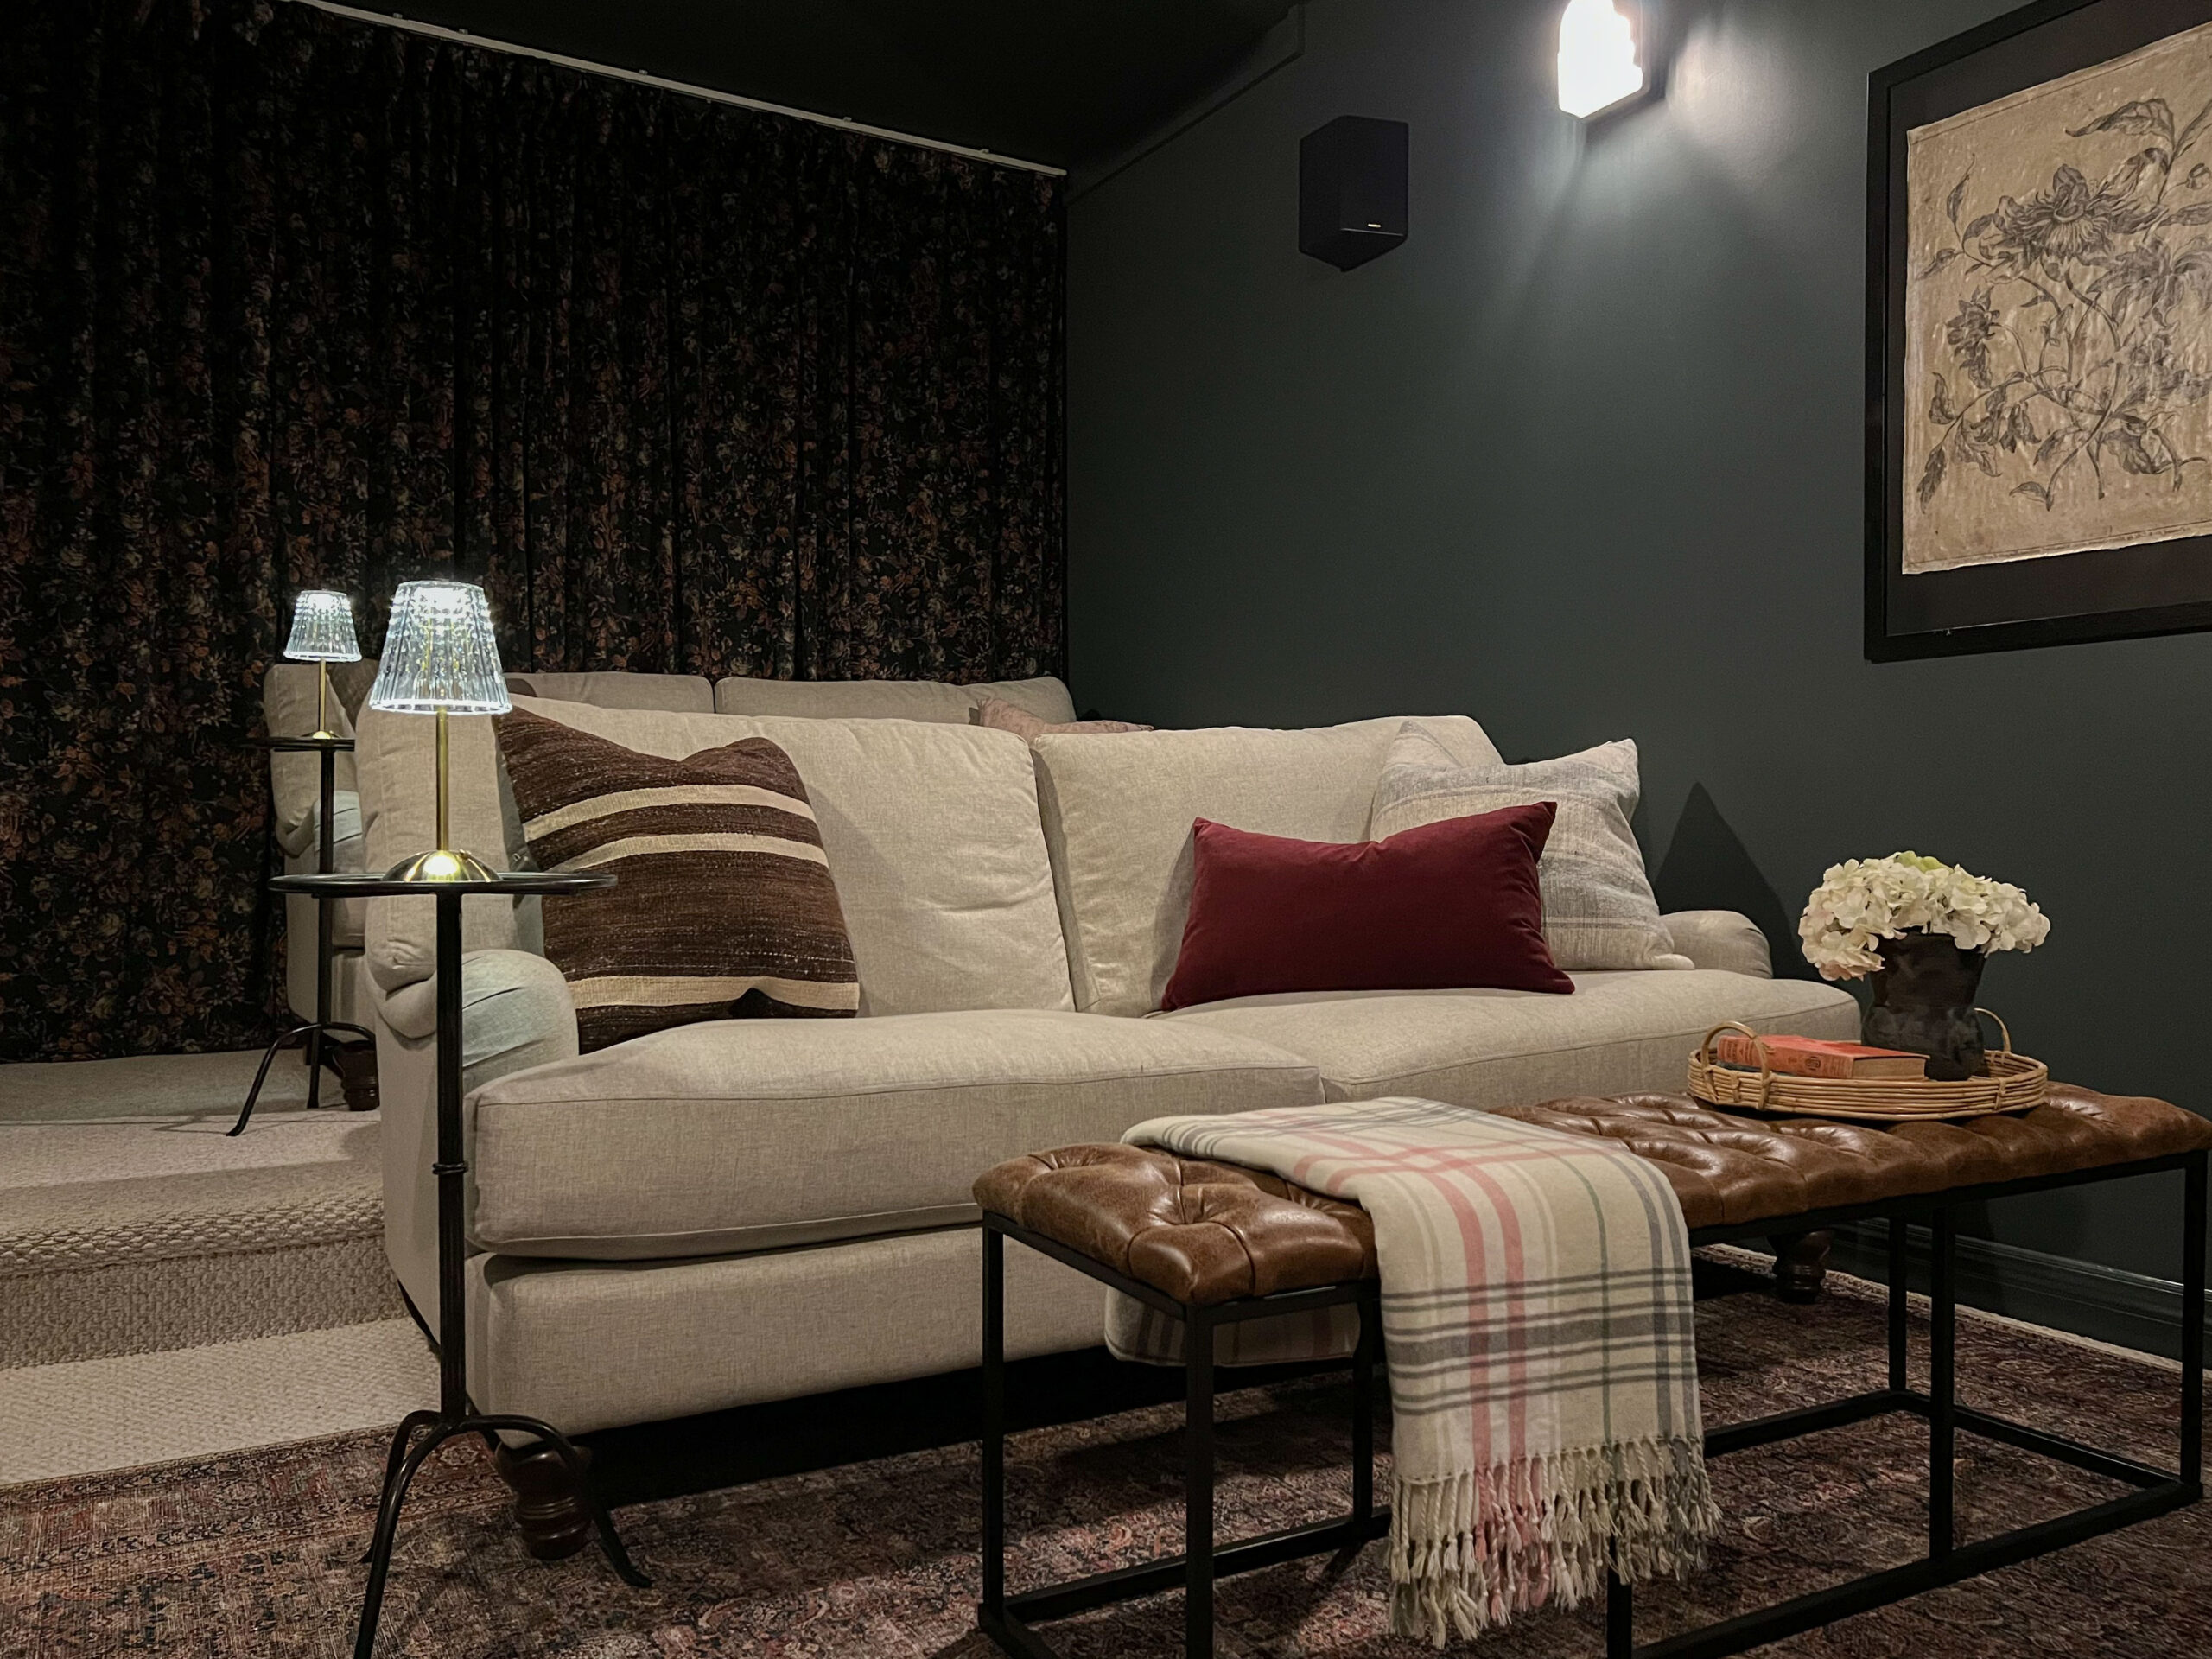
OK, so how was I going to hang these suckers up? I had purchased a couple of plug-in lamp kits from IKEA pre-pandemic, so that was what I would be using for the light part. But should I hang these from the ceiling? I saw this inspiration image on Pinterest and I really liked the casual nature of them, although they were too coastal for my room (and heck, way too expensive). But it sparked an idea so I started searching for some type of simple iron bracket.
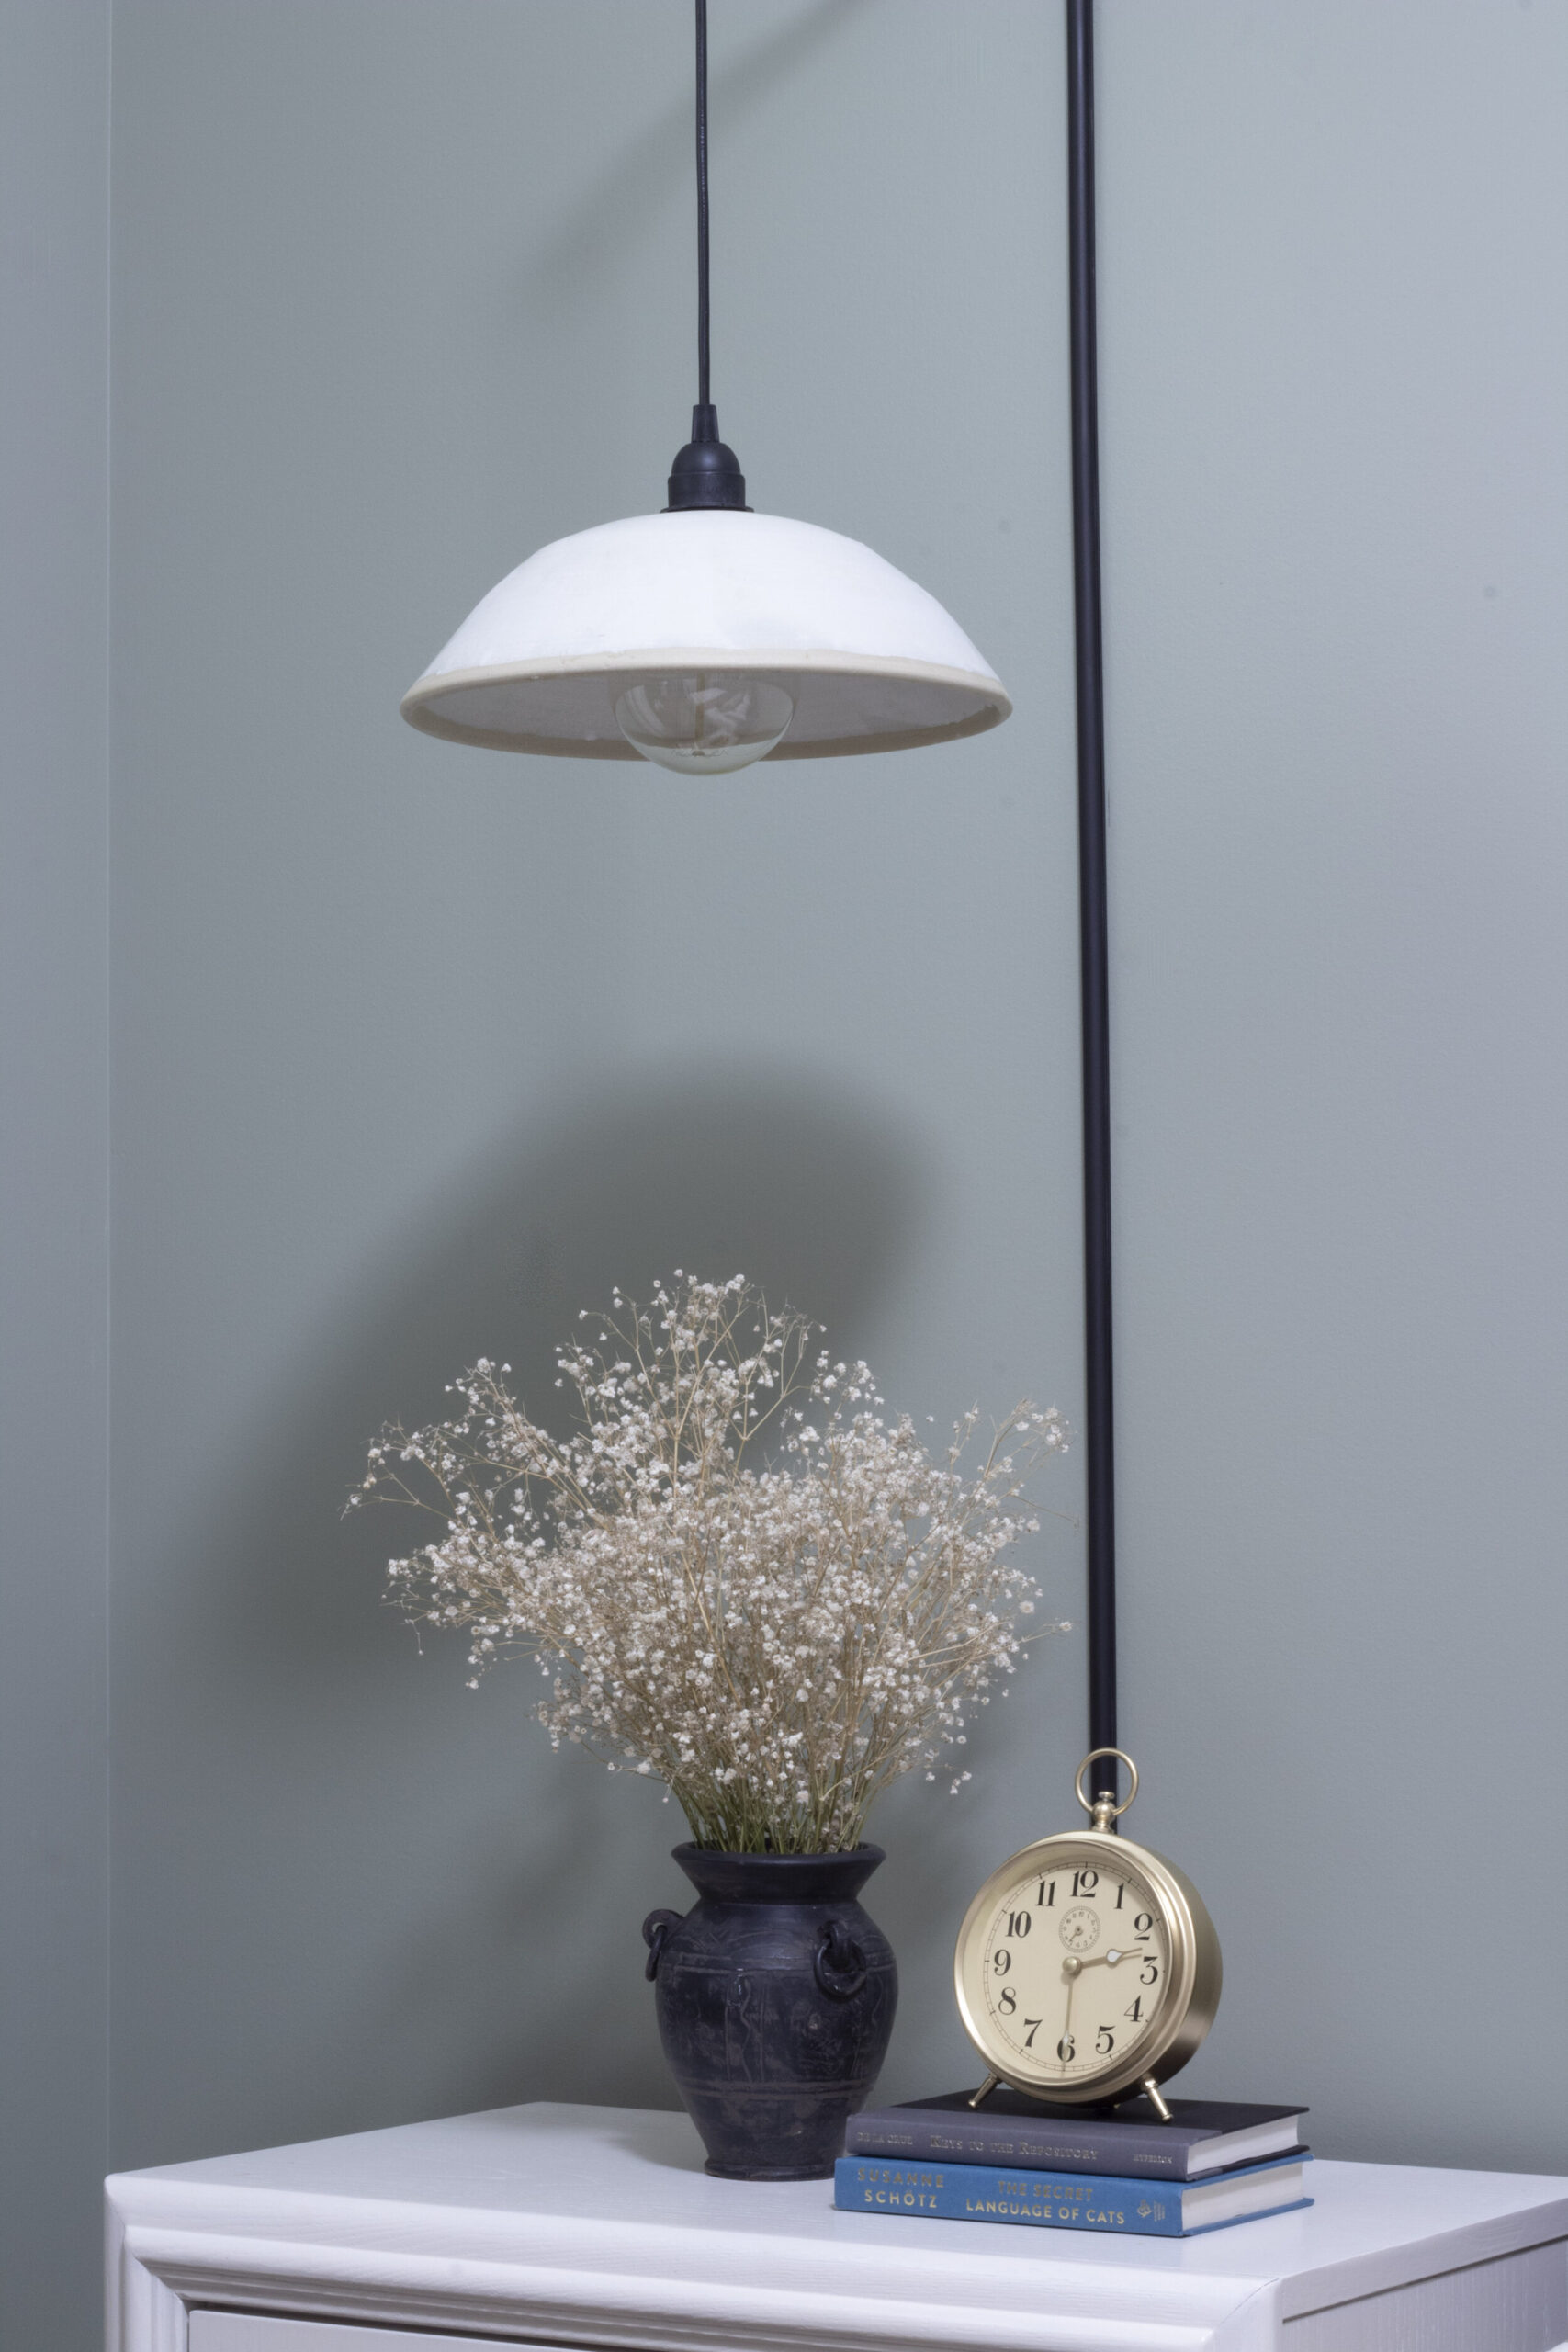
I came across THESE ones from Canadian Tire. (These are similar, from Amazon) They are actually plant hangers and they extend just under 12” from the wall, and I loved the simple shape. I decided to drape the cord casually around these and drop from there. Then to “neaten up” the cord (which won’t hang straight no matter how hard you try!) I used a plastic cord cover (similar to this) that I painted black to match the brackets. I paired these with an over-sized bulb – I actually bought and returned a couple before I found these – over-sized enough to just peek out the bottom but not too big. Then I tacked the cord where the switch was to the backside of the nightstands for easy access, and VOILA! Aren’t these beautiful? My sister really did outdo herself, she is such a talented potter and I’m so lucky she’s willing to make me a gaggle of lampshades!

I know you all are going to be sad that these are made by my sister who doesn’t sell her work (you guys ask me that every time I show you something she makes me!) – so I rounded up a couple of ceramic pendant lights on Etsy below from other talented makers (click image to shop):

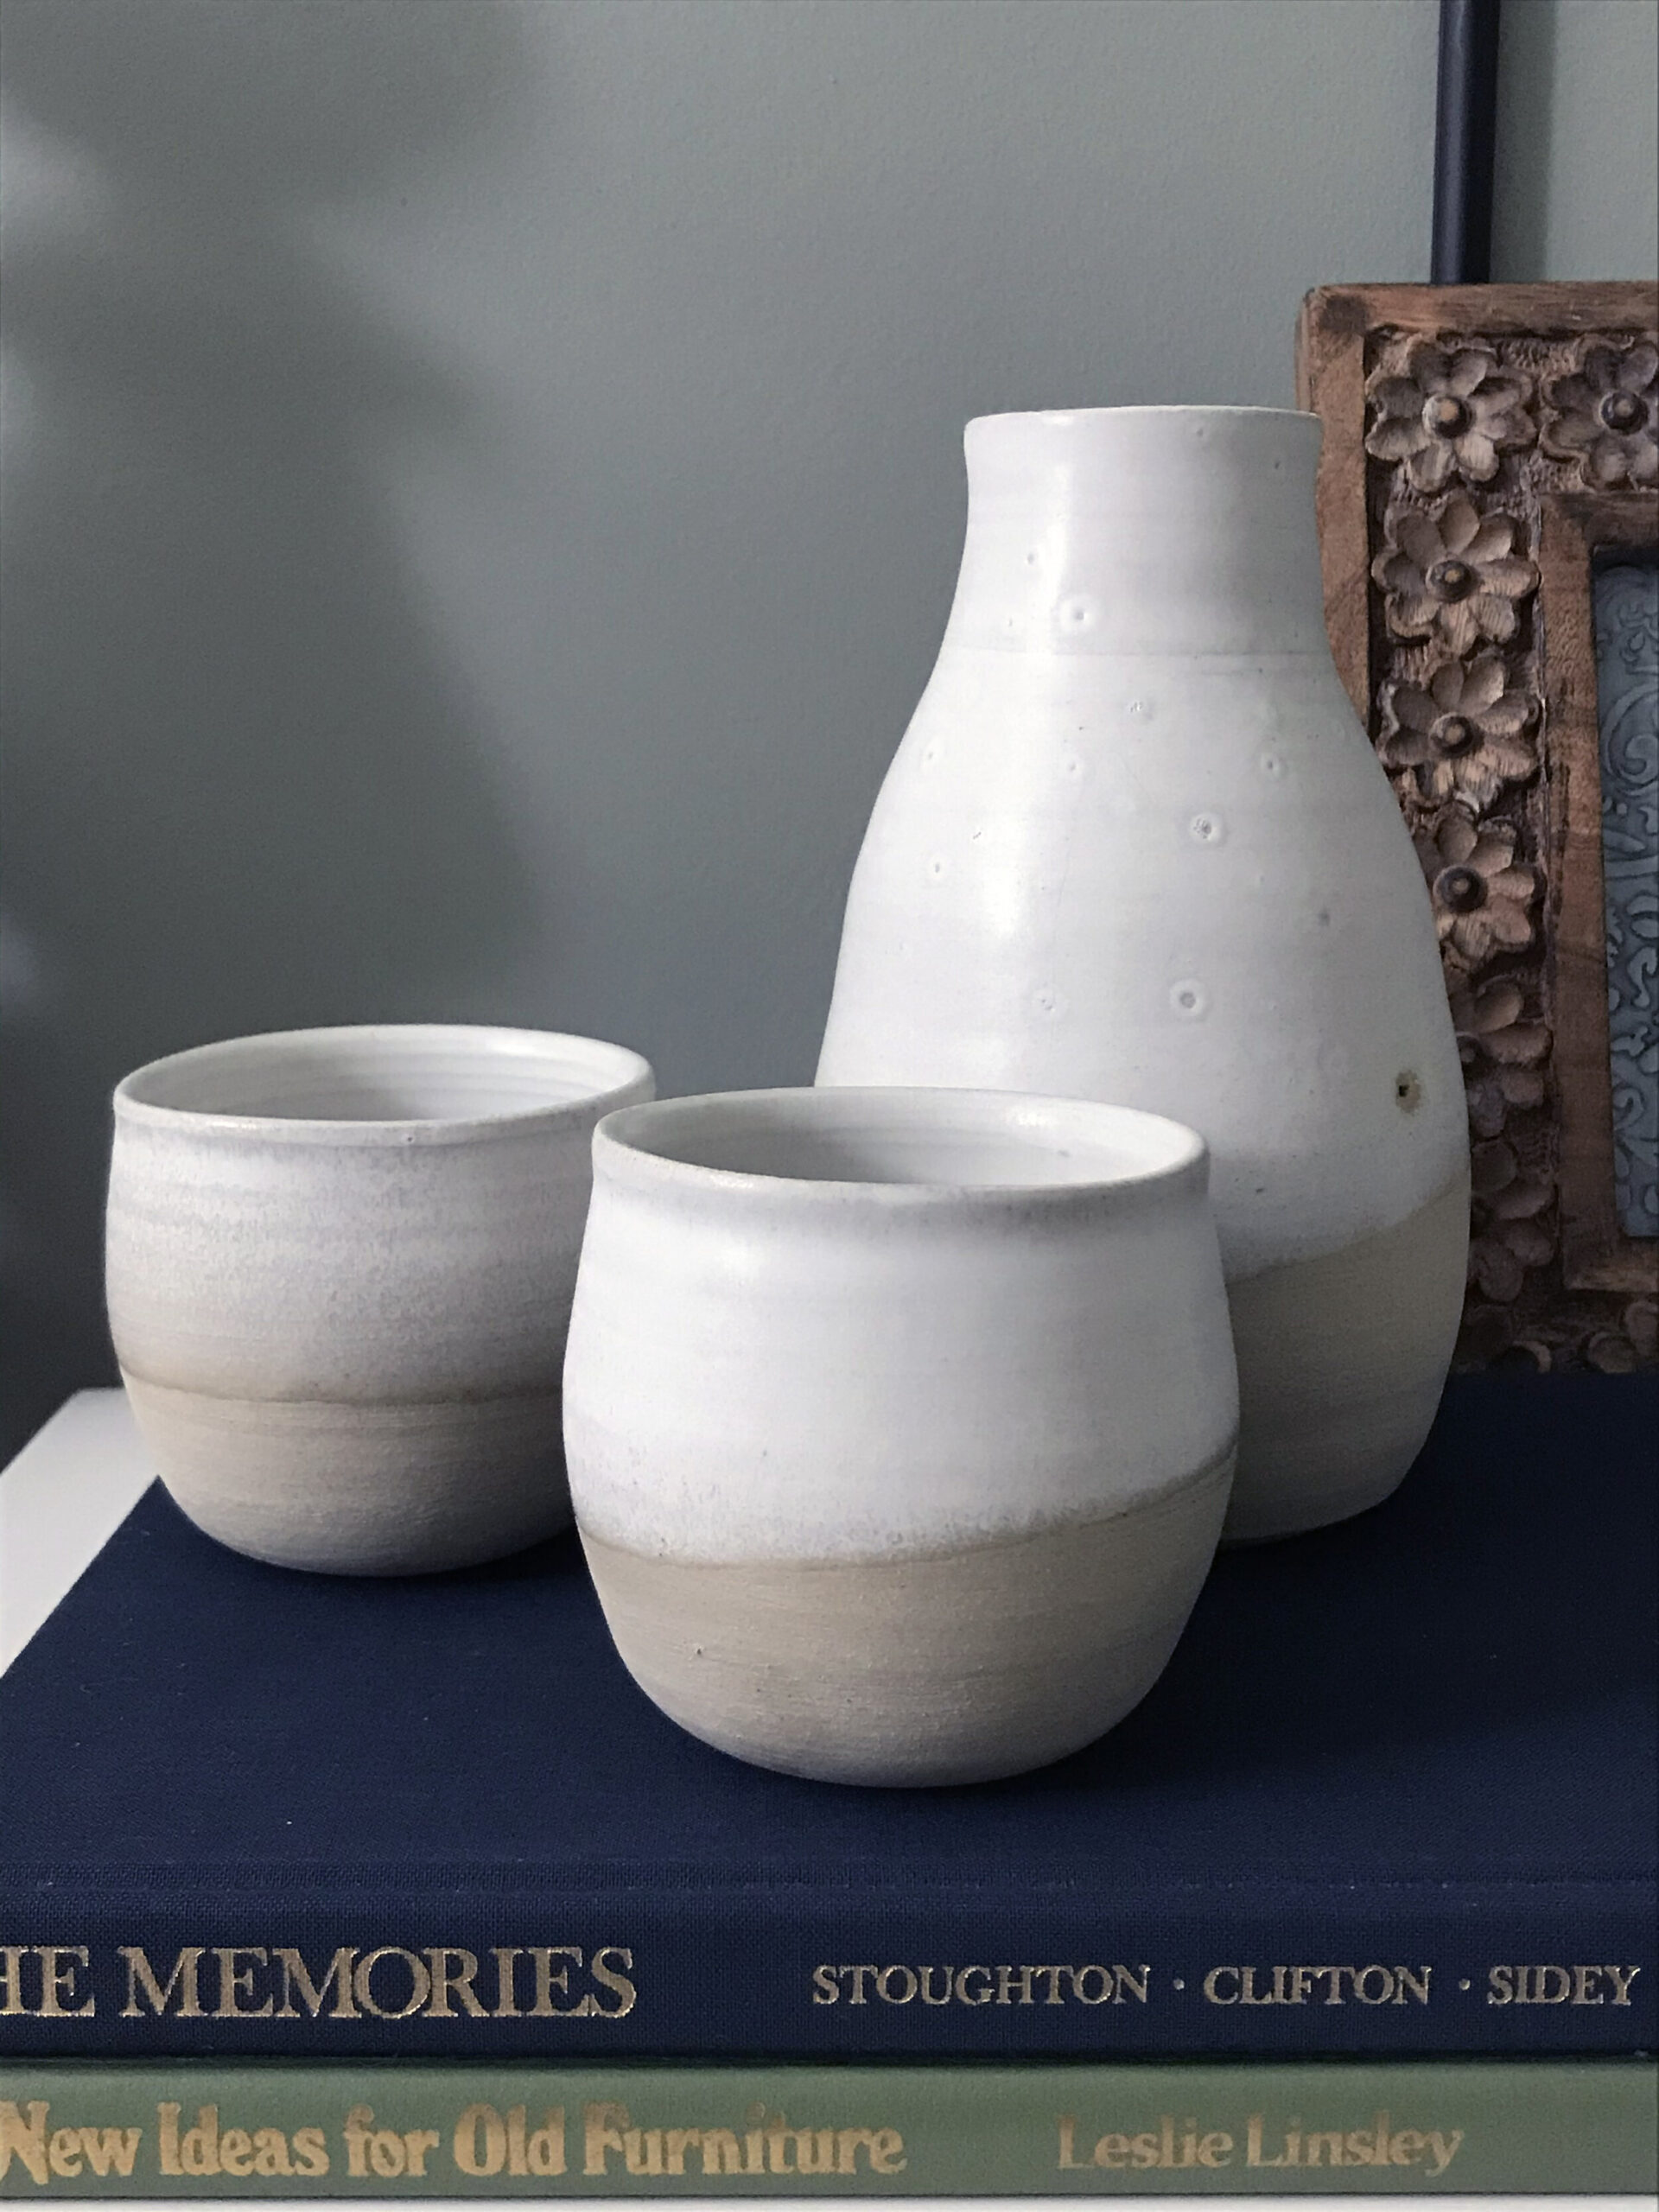
While my sister was busy on the potters wheel, she asked if I wanted a nice water carafe and a couple of glasses for the night stand too. I replied with a HECK YES and she whipped these up, and now my guests won’t be parched in the middle of the night either. These are so cool – one of the glasses actually fits on the top of the carafe and acts as a lid!
DIY Art
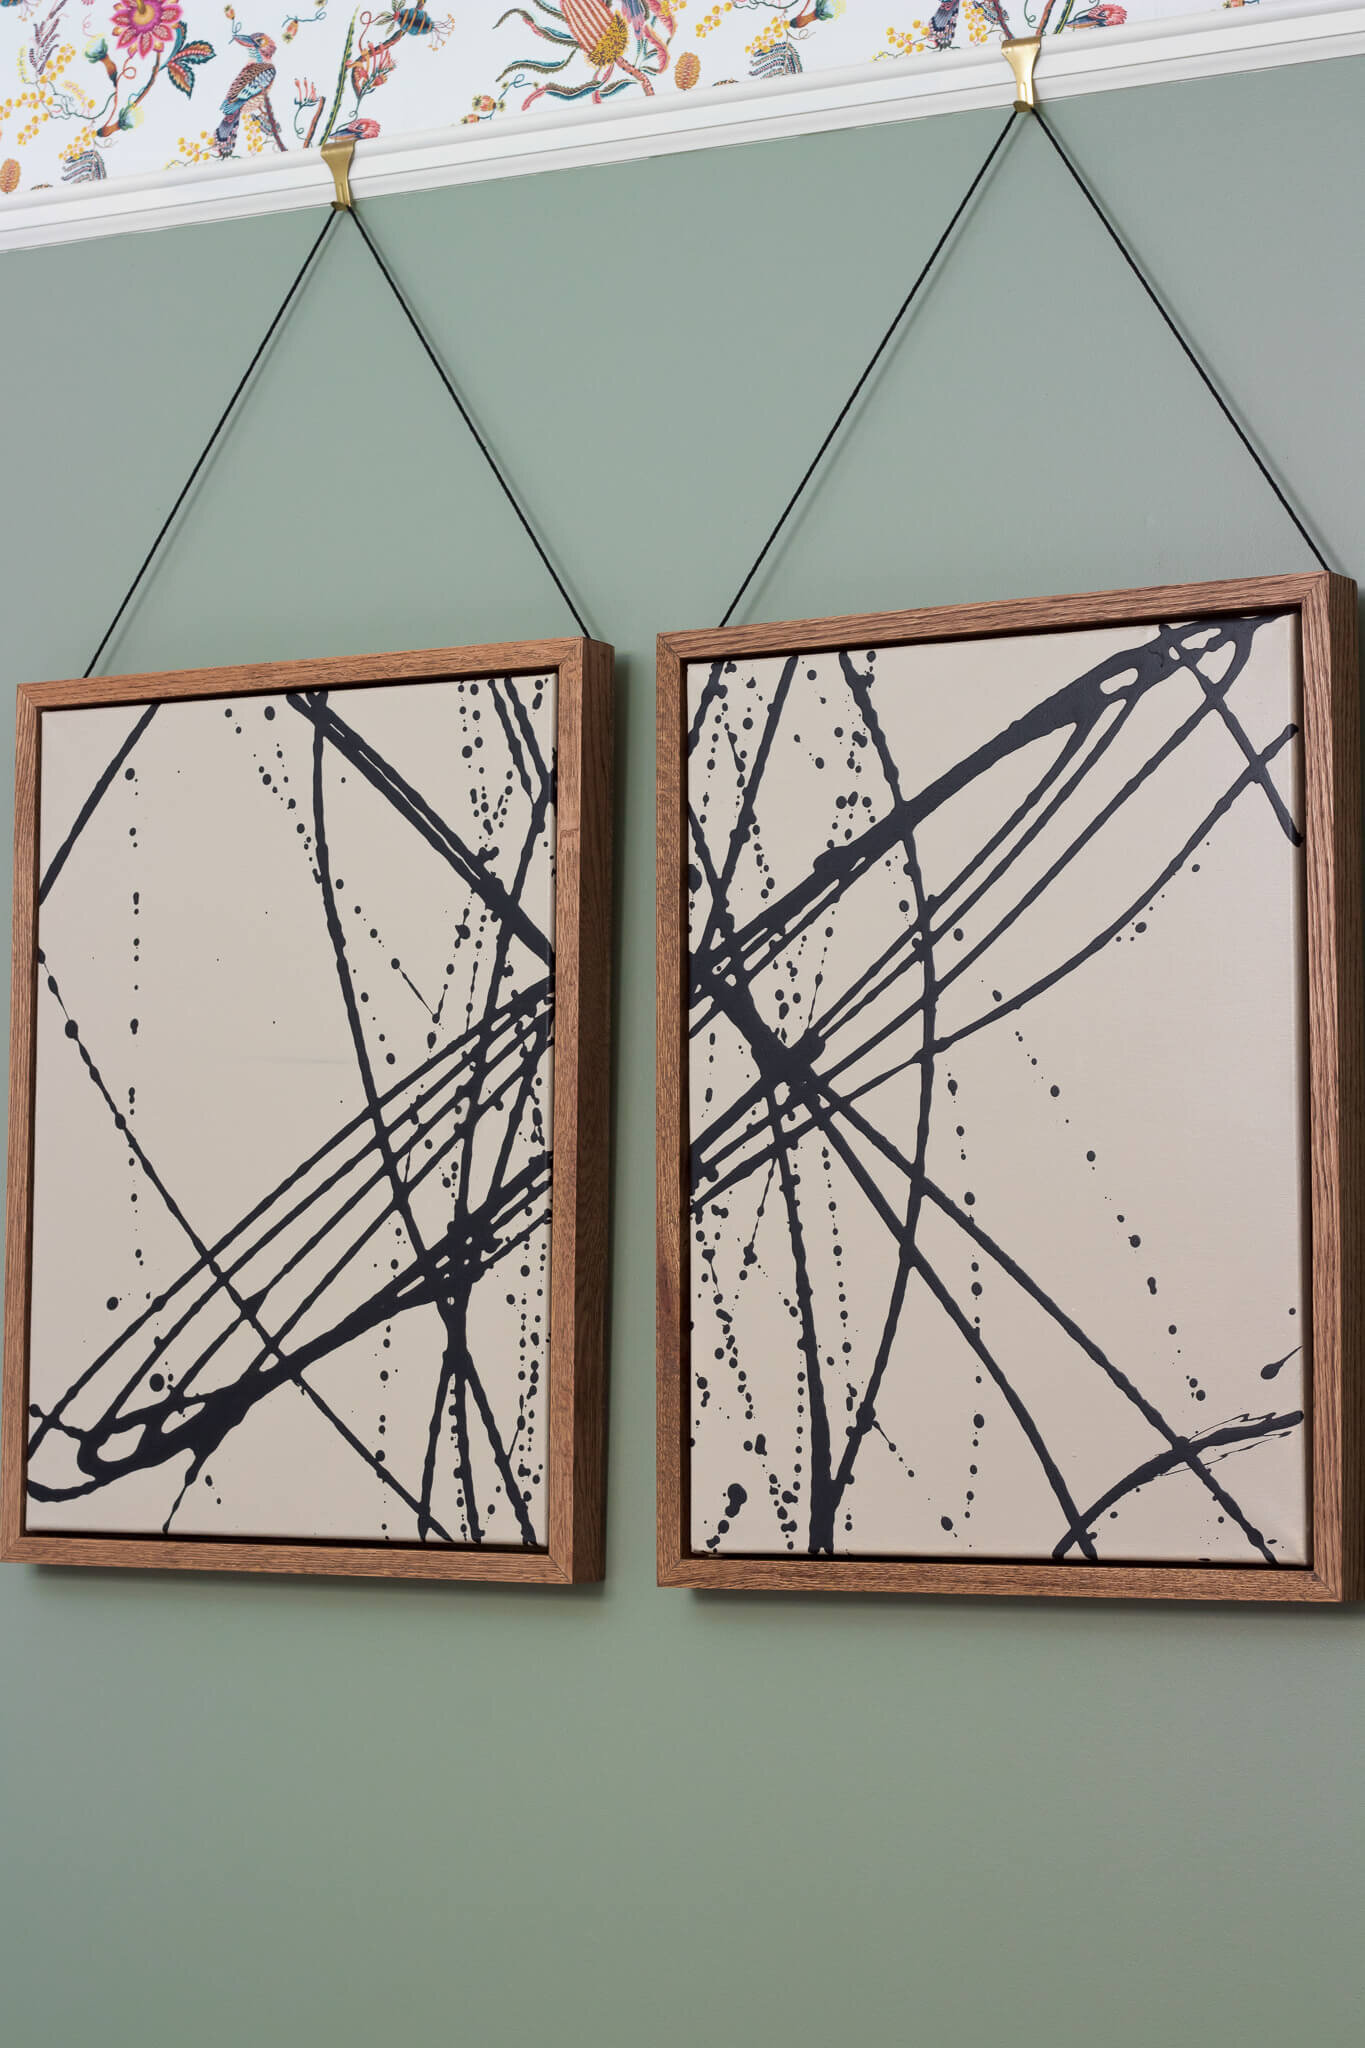
When I was thinking about what art to put in the space, I knew I wanted something abstract and thought I could make my own, but turns out, that’s pretty hard for a non-artist like me. Since I am actually an engineer and not an artist, my mind turned to science and I came across a pretty cool science experiment on YouTube that was showing all the different patterns that you could make with a pendulum and different swing patterns. So I grabbed a couple of cheap canvases, painted the background beige, and rigged up my own little pendulum experiment. Now I don’t want to take credit for this idea as it’s actually been done many times before, I found out, including by the infamous Martha Stewart, and there is a famous pendulum artist I’ve been told that does some amazing things. (Google “Pendulum Painting” and you can get an idea of all the possibilities!) At any rate, my daughter helped me make this little video that shows our (not so scientific) process:
I should mention that the first time we tried it, the end didn’t open all the way which is why we ended up with drips instead of a stream of paint – but a happy accident I think! I showed this DIY art on my Instagram page the other day and more people saved that post than any other post I’ve had on Instagram! I think that means that a lot of you want to try it to, and I don’t blame you! Its fun to do, inexpensive, you can do it with kids, and at the end of it you end up with some pretty unique art!
Once they were done I made some DIY float frames for the canvases using a tutorial from Chris Loves Julia (you can find that tutorial here) and I stained them to match the wood dresser in the room, and I’m in love with the final result!
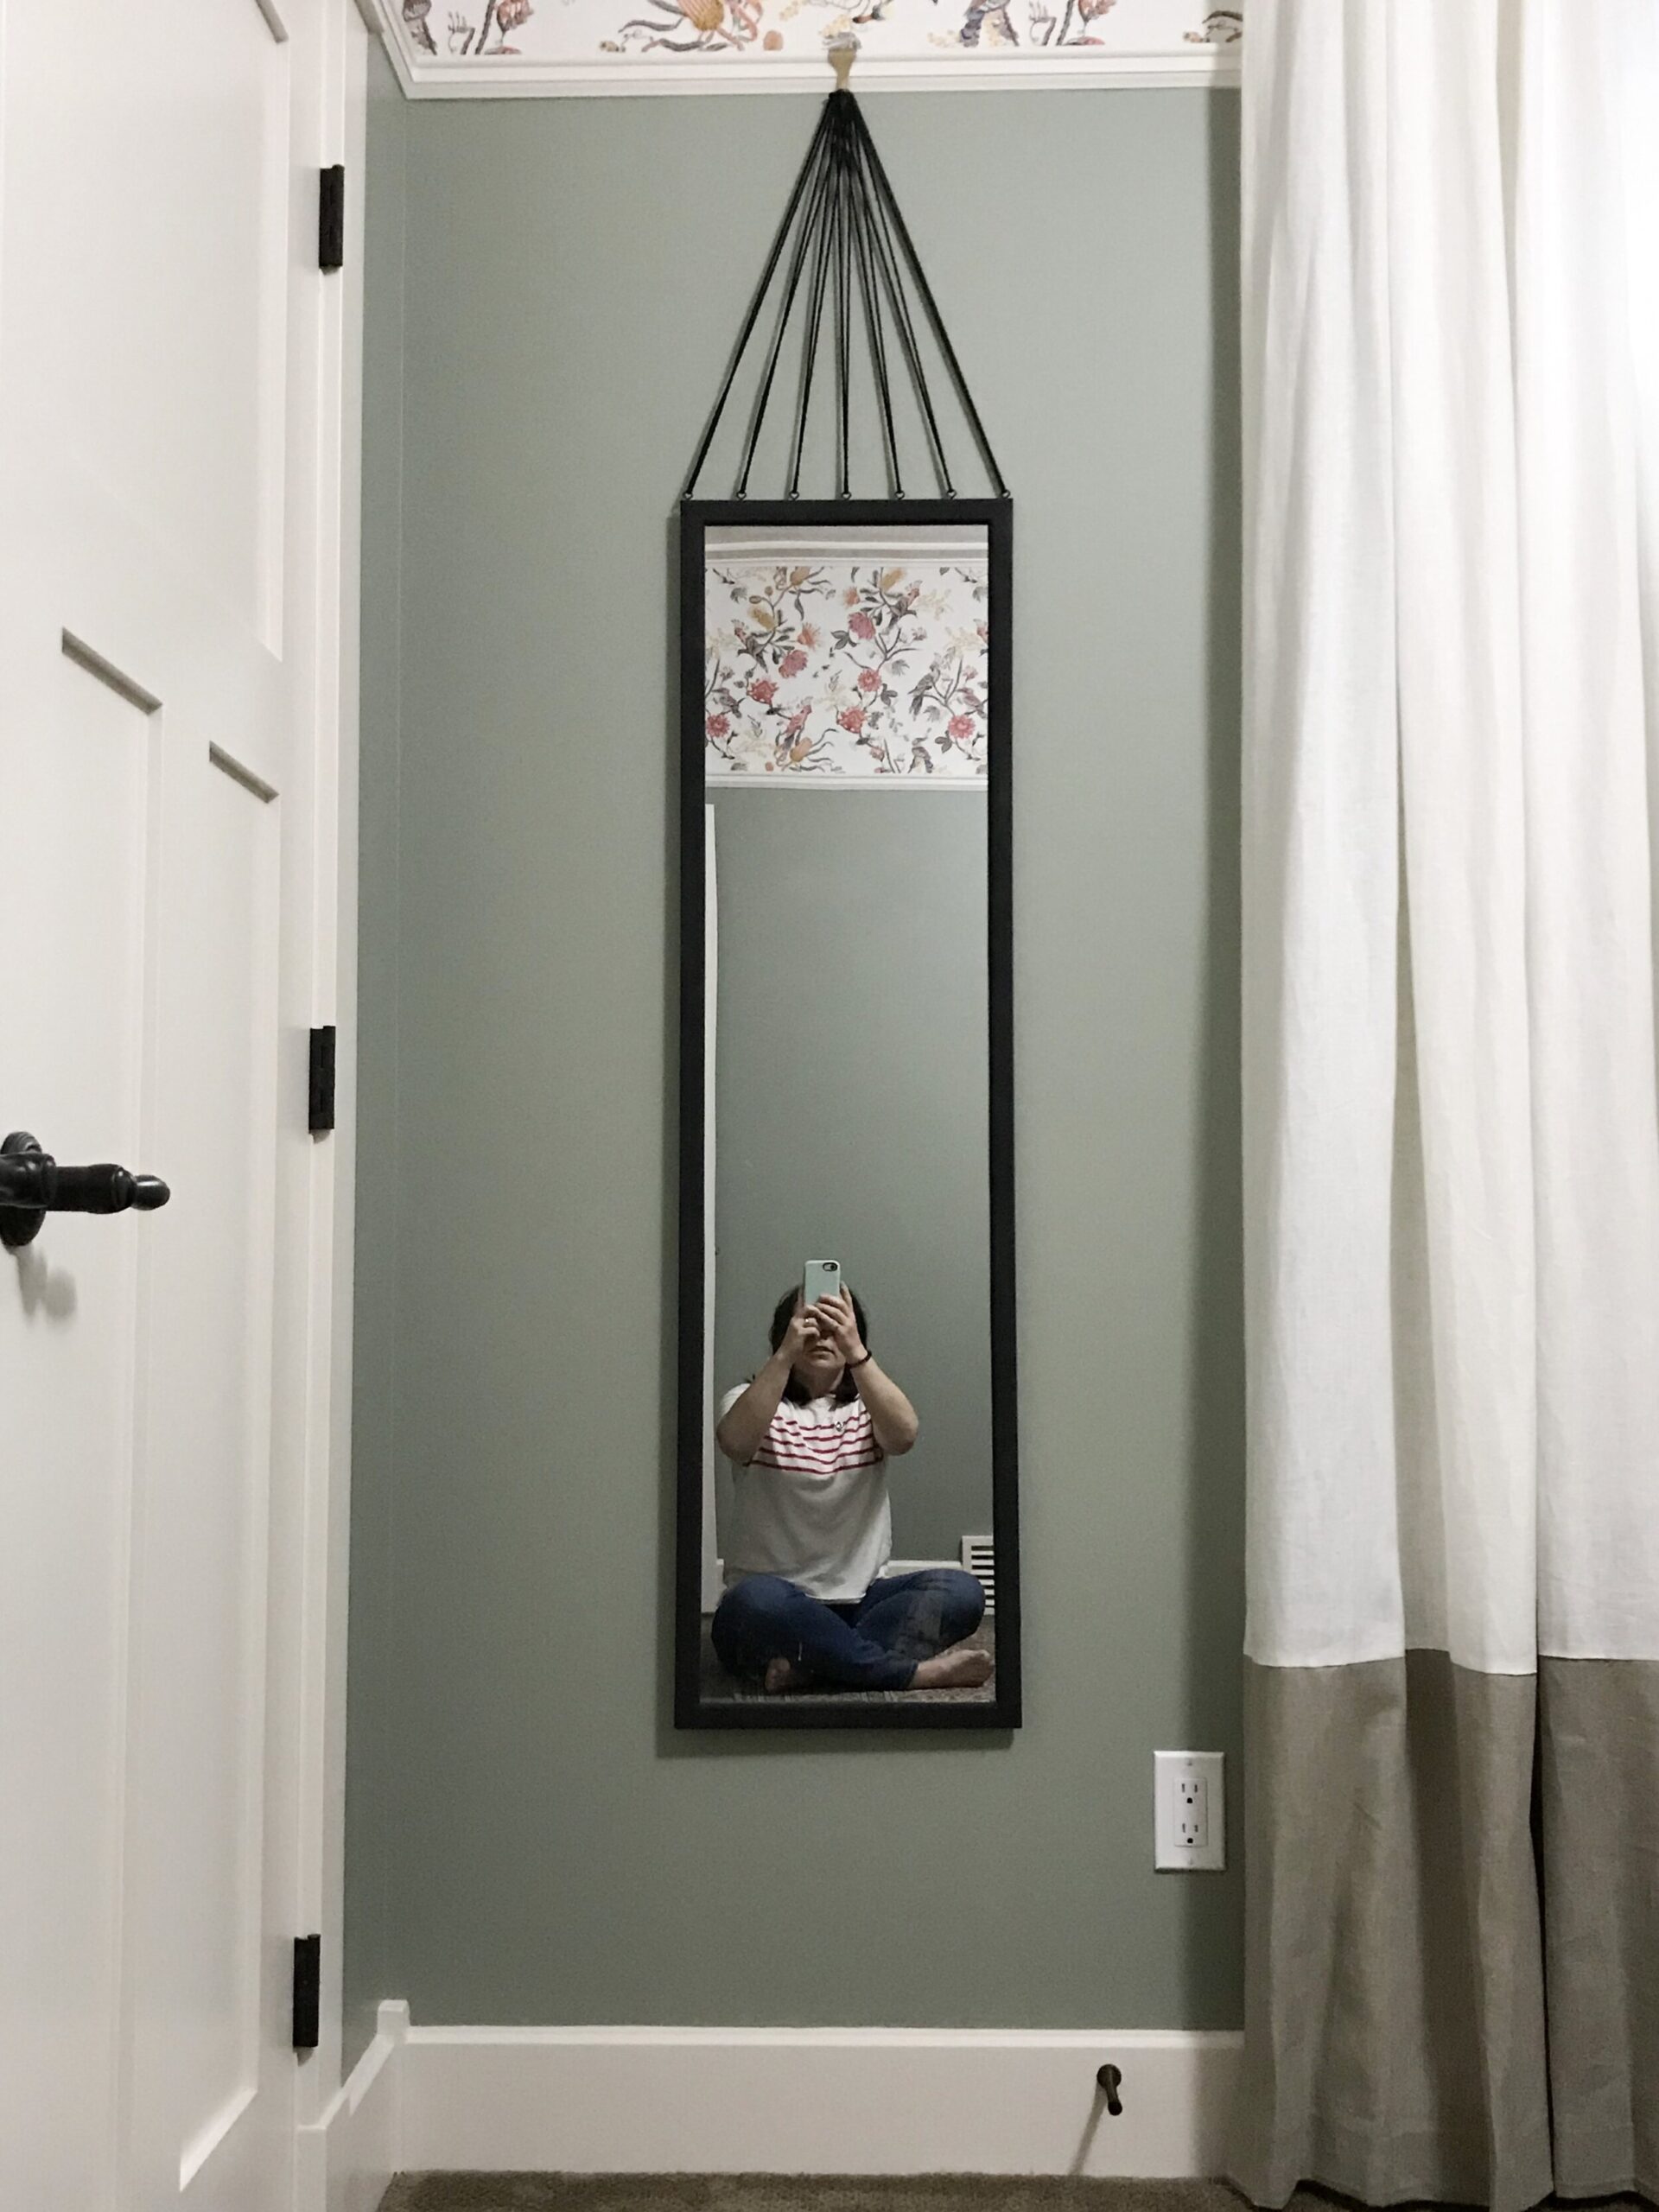
DIY Zero Deniro Mirror
I wanted a full length mirror in the room, (because isn’t a full length mirror in a guest room so nice to have?) but at the time I was planning this out, the pandemic was just beginning and I wasn’t going to be able to shop. I kept my eye on Marketplace for a while but nothing was looking promising. I knew I had a few old $10 Wal-Mart mirrors in the garage so I set out to try and make one a little more interesting with materials I already had on hand.
This was literally the easiest project ever. I screwed in some little round eye-hook screws to the top of the mirror (evenly spaced), spray-painted everything black, strung some black string through the holes and up to a hook on the picture rail and called it done! This could easily be done with a simple hook on the wall if you didn’t have a picture rail.
The rest of the accessories in the room are thrifted or things I already had, and you will just have to wait to see how it all comes together next week! I am actually done early and getting some photos taken this weekend – and I can not be more excited to share the final room with you. See you next week for the big reveal!
I just wanted to give a HUGE thank you to the generous brands I have partnered with who provided sponsored items for this makeover. I’m so grateful that they saw enough potential in me and my little blog. I hope to do their fabulous product justice in the coming days!!
Milton and King (Wallpaper)
Spoonflower (Bedding)
Revival Rugs (Vintage Rug)
Valspar (Paint)
Its crunch time for many and I’ve been following along closely with so many participants with such huge projects happening, I’m on pins and needles watching the progress! If you want to see what some of the other participants are up to, check out the other designers HERE or click the ORC Logo below, there is a great lineup of both featured and guest participants and there is a lot of great stuff to follow along with. See you next week!

CLICK THE IMAGE TO BE REDIRECTED TO THE ORC WEBSITE!
Absolutely beautiful! I love those light fixtures and that art is soooo fabulous!
Thank you so much Heather!
Brilliant way to customize a $10.00 mirror! Looks fab.
Thank you Brenda! I’m glad you like it!