Spring 2020 One Room Challenge – Week 1
Well hello there! If you have clicked over from the One Room Challenge Website, welcome! My very new blog and I are very happy you have joined us for a little low down of the project I am tackling for the One Room Challenge Spring 2020!
This post may contain affiliate links. That means if you purchase anything from these links I earn a small commission, at no extra cost to you! This helps support my blog, so thank you!
Background
First of all I hope this post finds you safe and healthy during these challenging times. The current crisis has us all facing challenges we did not expect. The One Room Challenge has been delayed due to concerns over Covid-19, which of course are on-going. However, I am hoping that by following along with the One Room Challenge, it provides everyone with some kind of distraction and a bit of fun to focus on during these challenging days. I am fortunate in that I planned ahead and obtained most of the things I needed before anything was closed down. Fingers crossed I thought of everything! (Cue knocking on wood).
If you are not familiar with the One Room Challenge, let me give you a bit of history. The One Room Challenge was created by Linda from Calling it Home, who originally challenged a group of her blogger friends to complete a room in 6 weeks from start to finish. This challenge has grown throughout the years to include hundreds of participants who all cheer each other on to complete the room within the specified time frame.
I participated in the Instagram Only section of the One Room Challenge in the spring of 2019 and I had a blast! (You can view a few more photos of that project here!) I virtually “met” a huge community of like-minded individuals and creatives, and I have been dying to do another one. This time, I’ve started a blog so I can document a lot more behind the scenes as we go through the process.
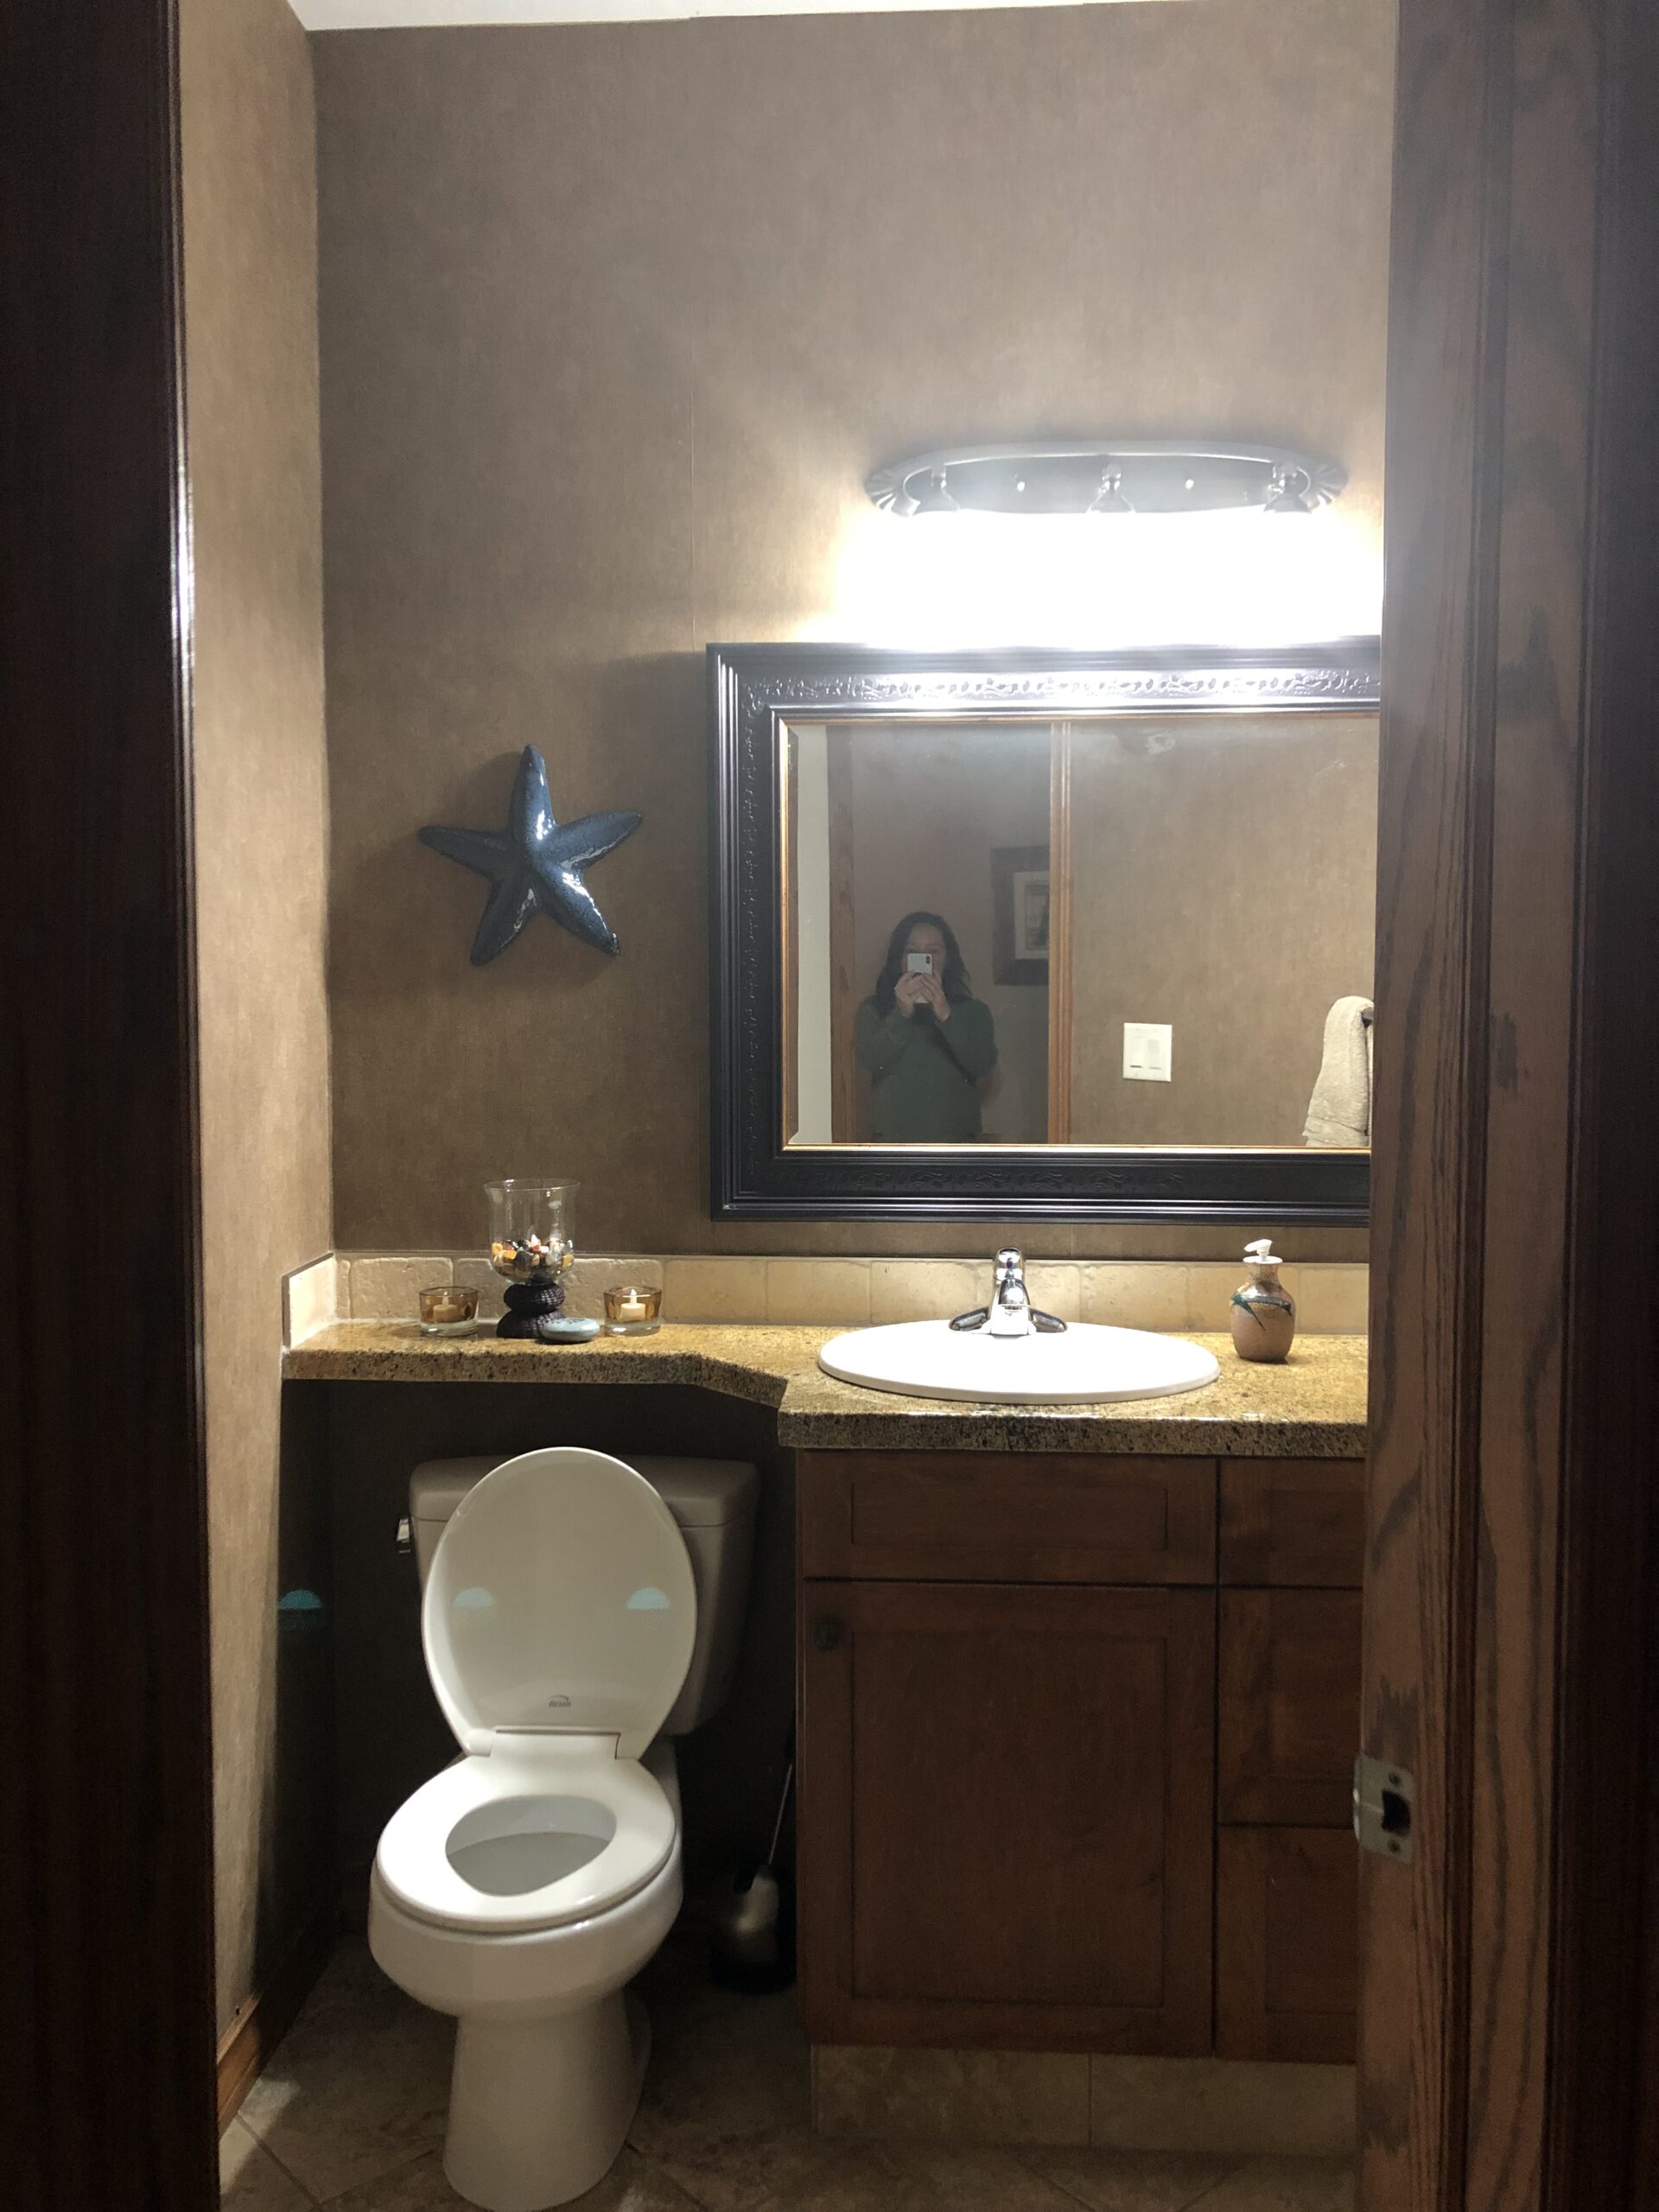
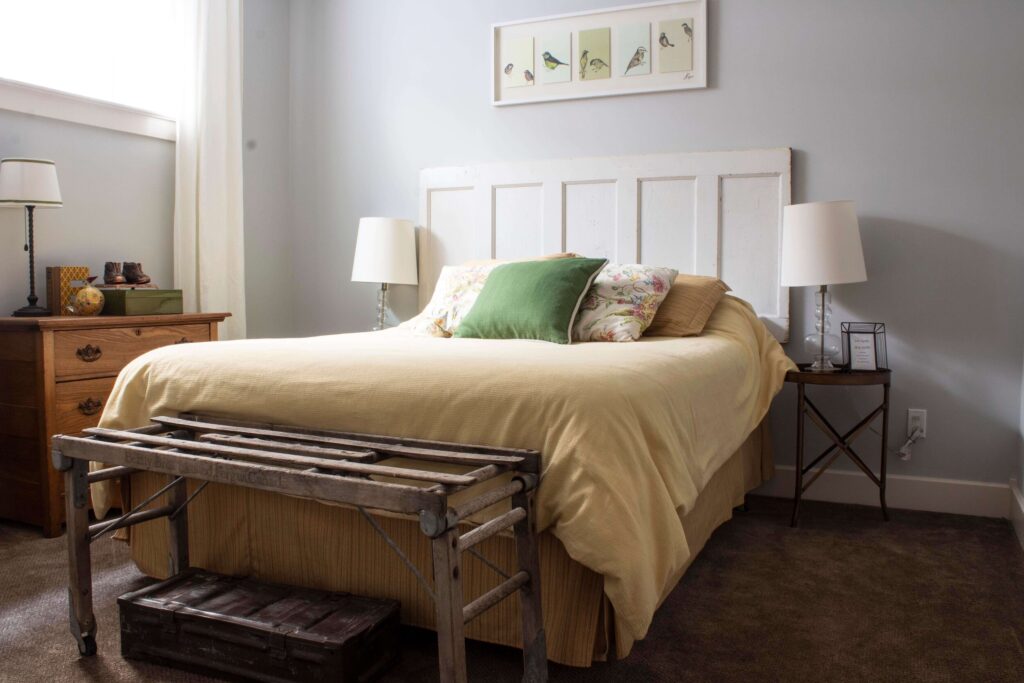
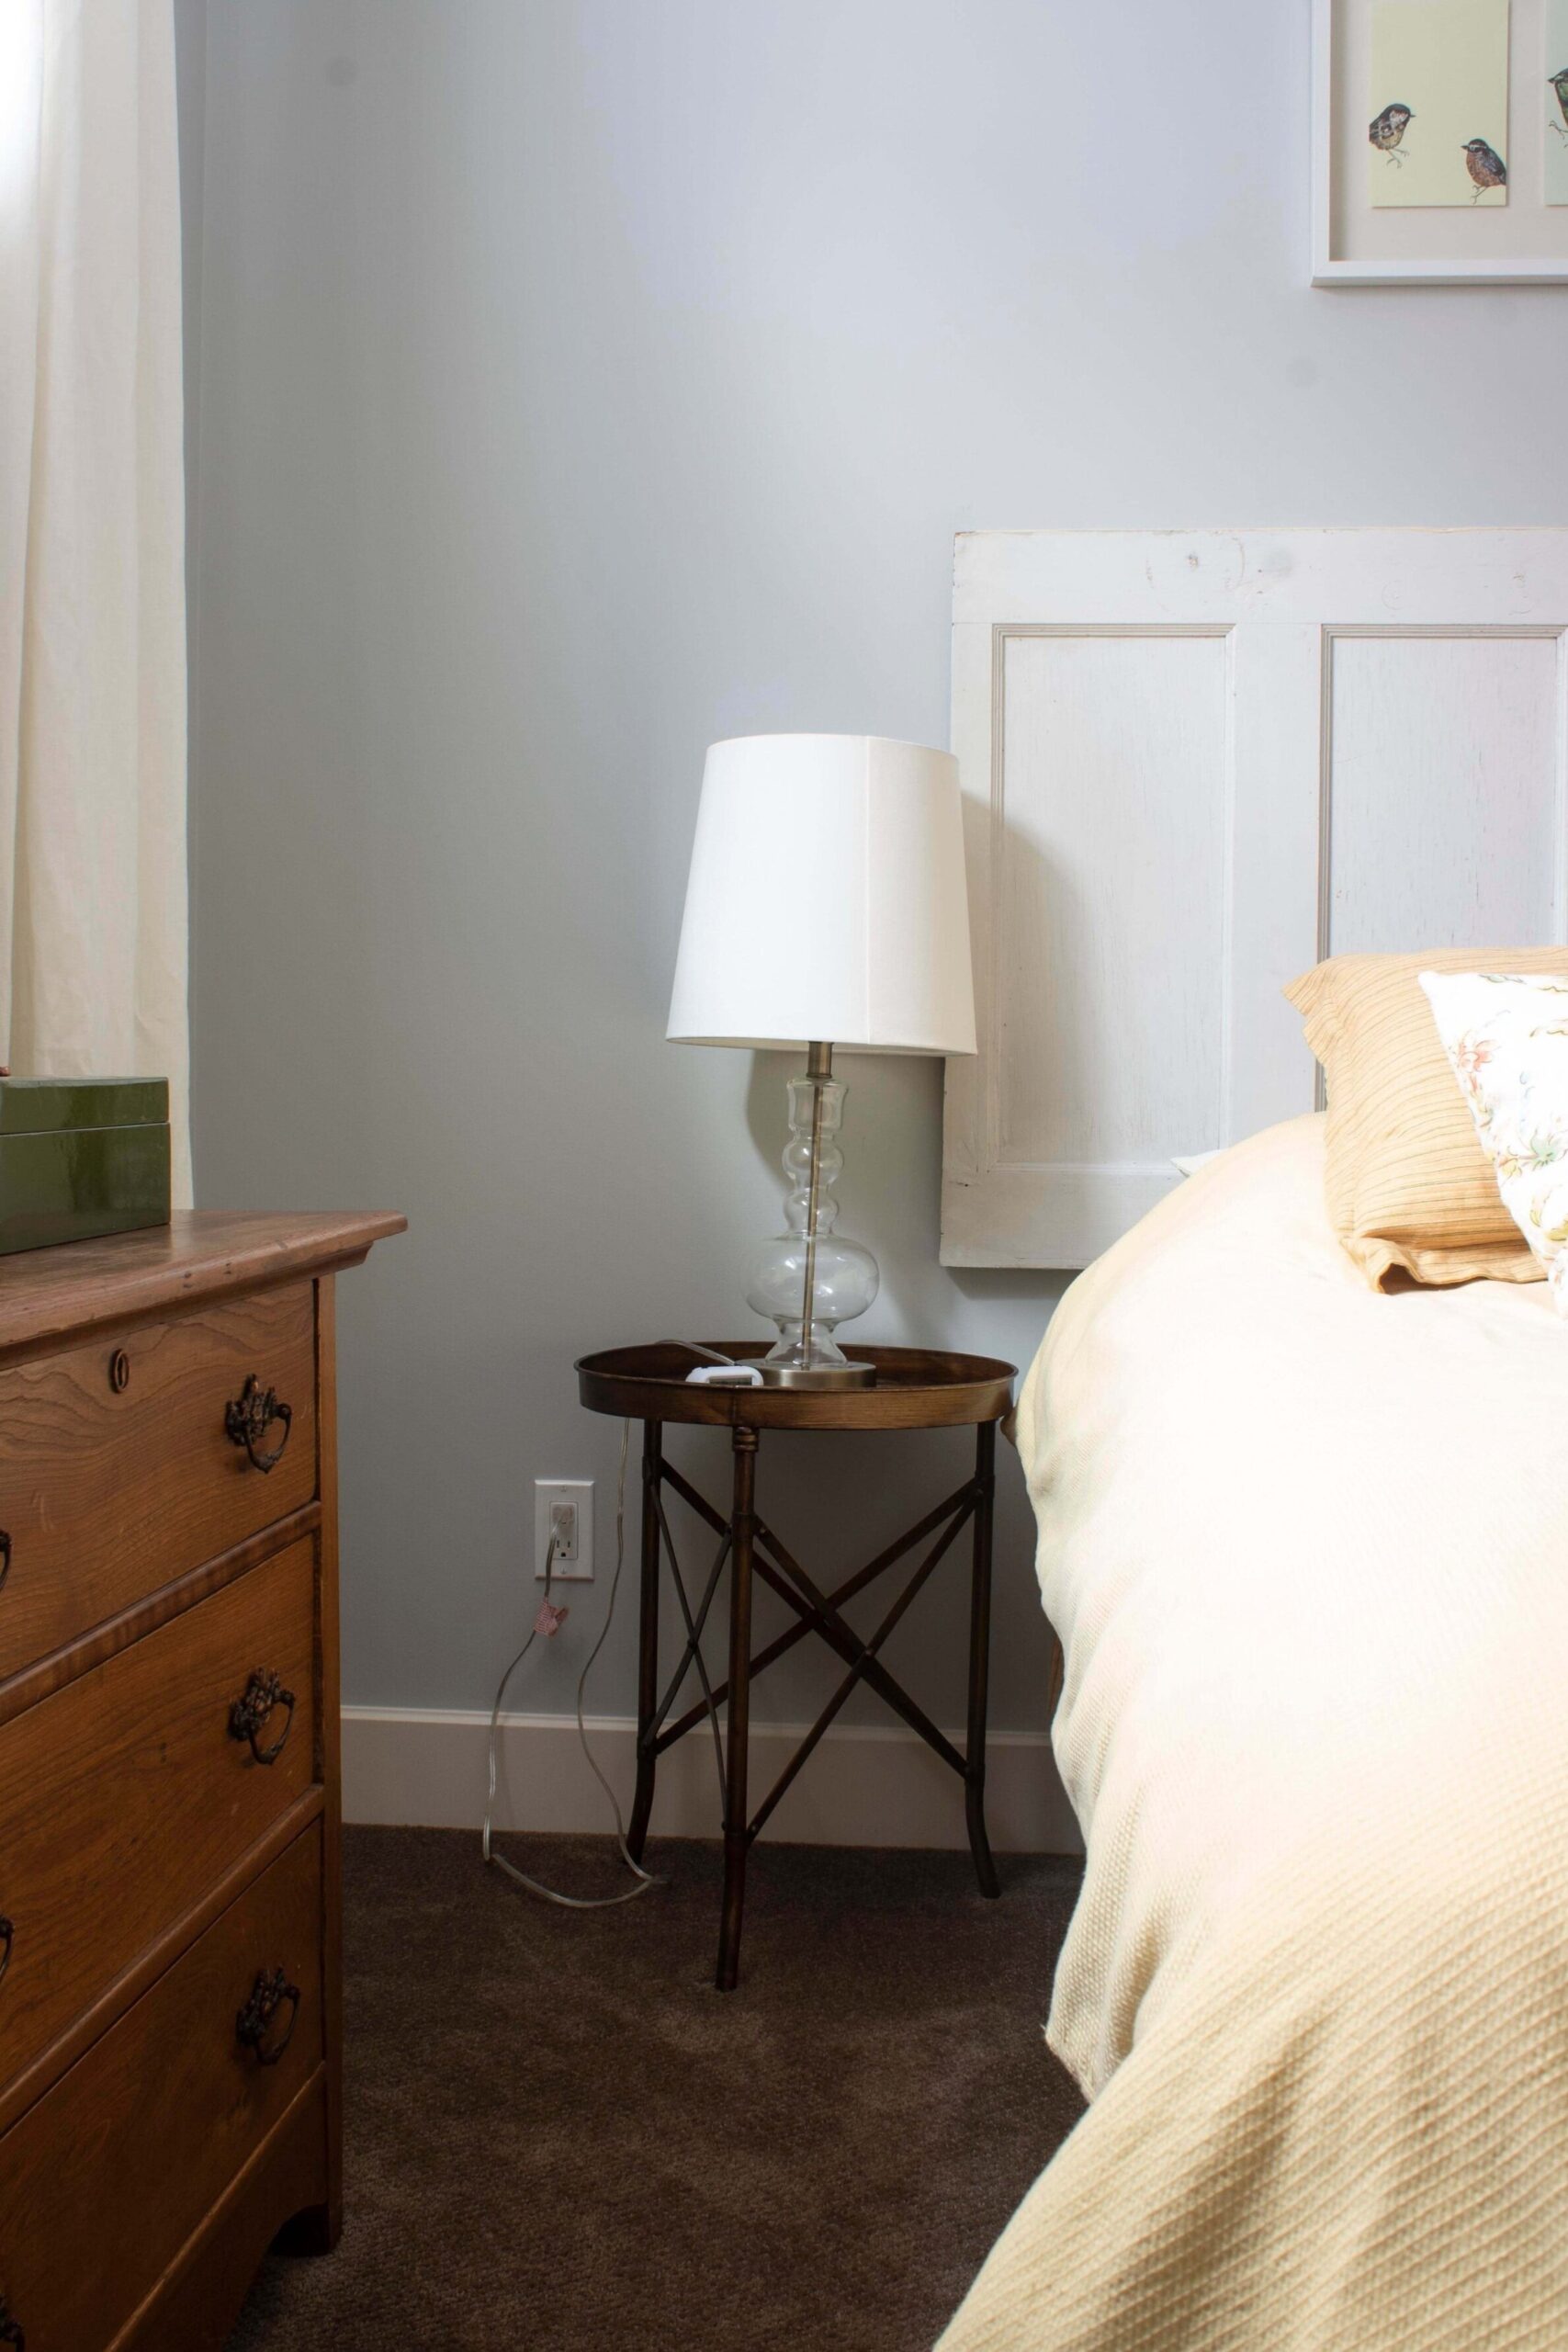
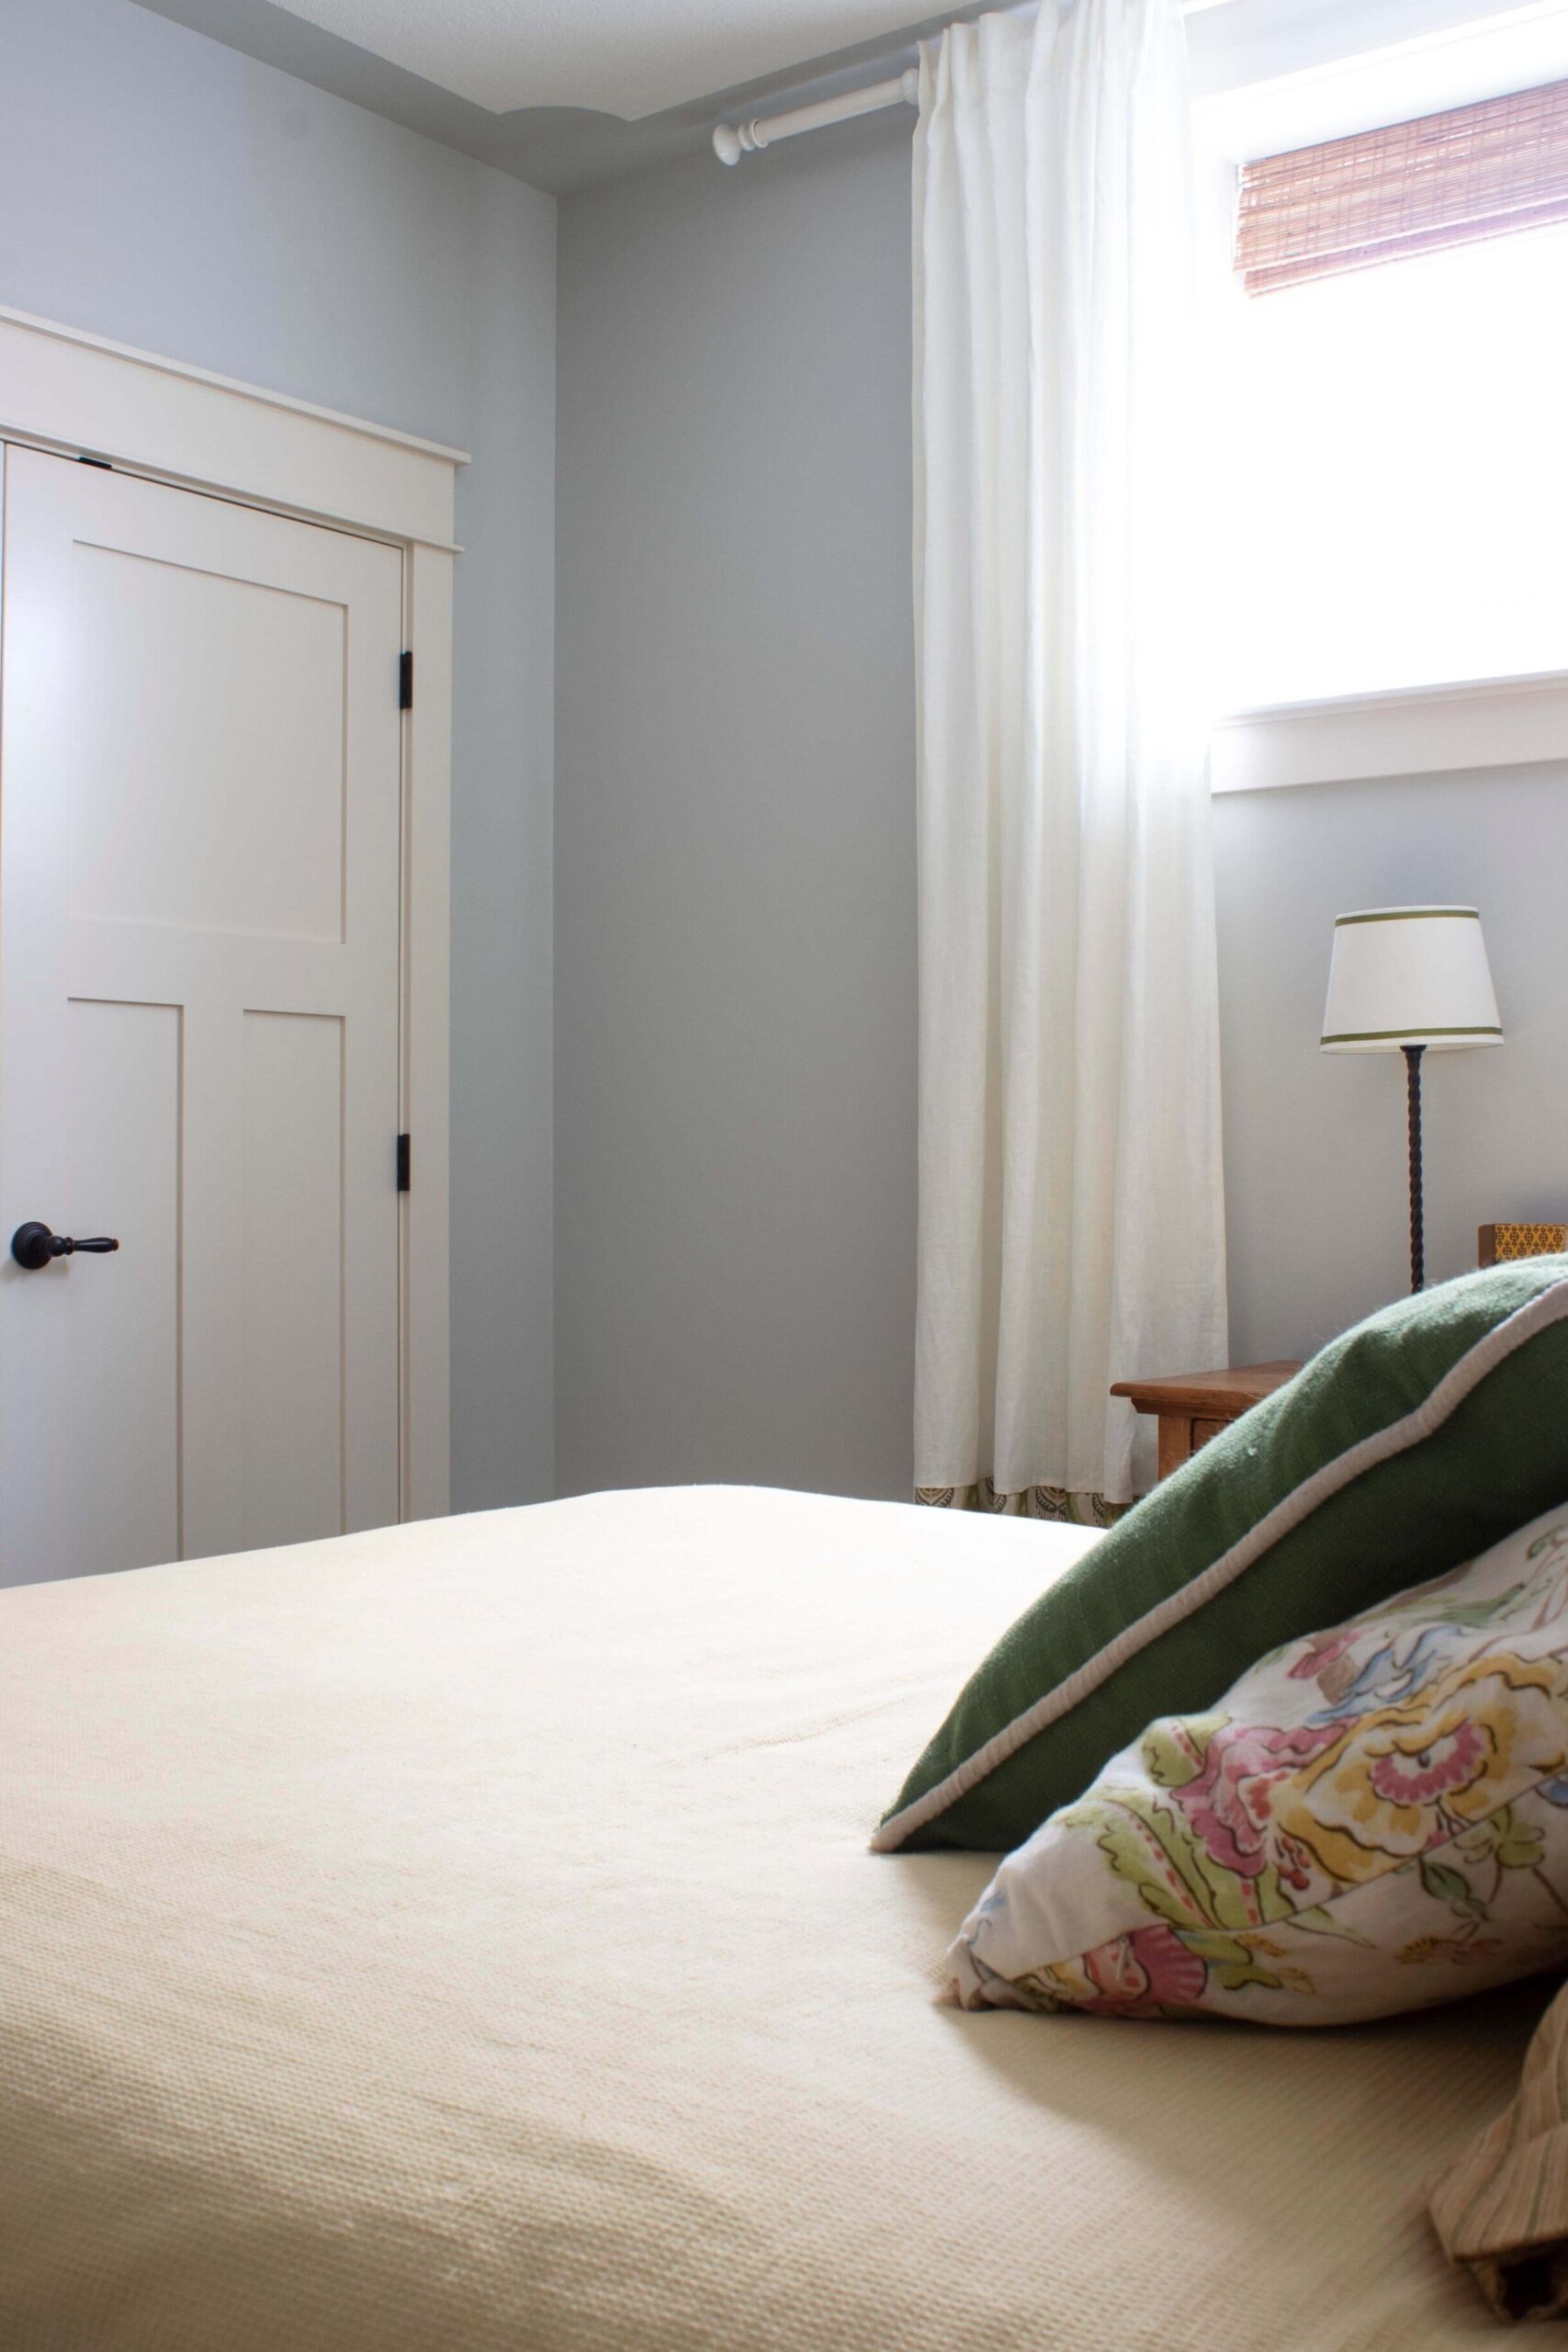
The Before
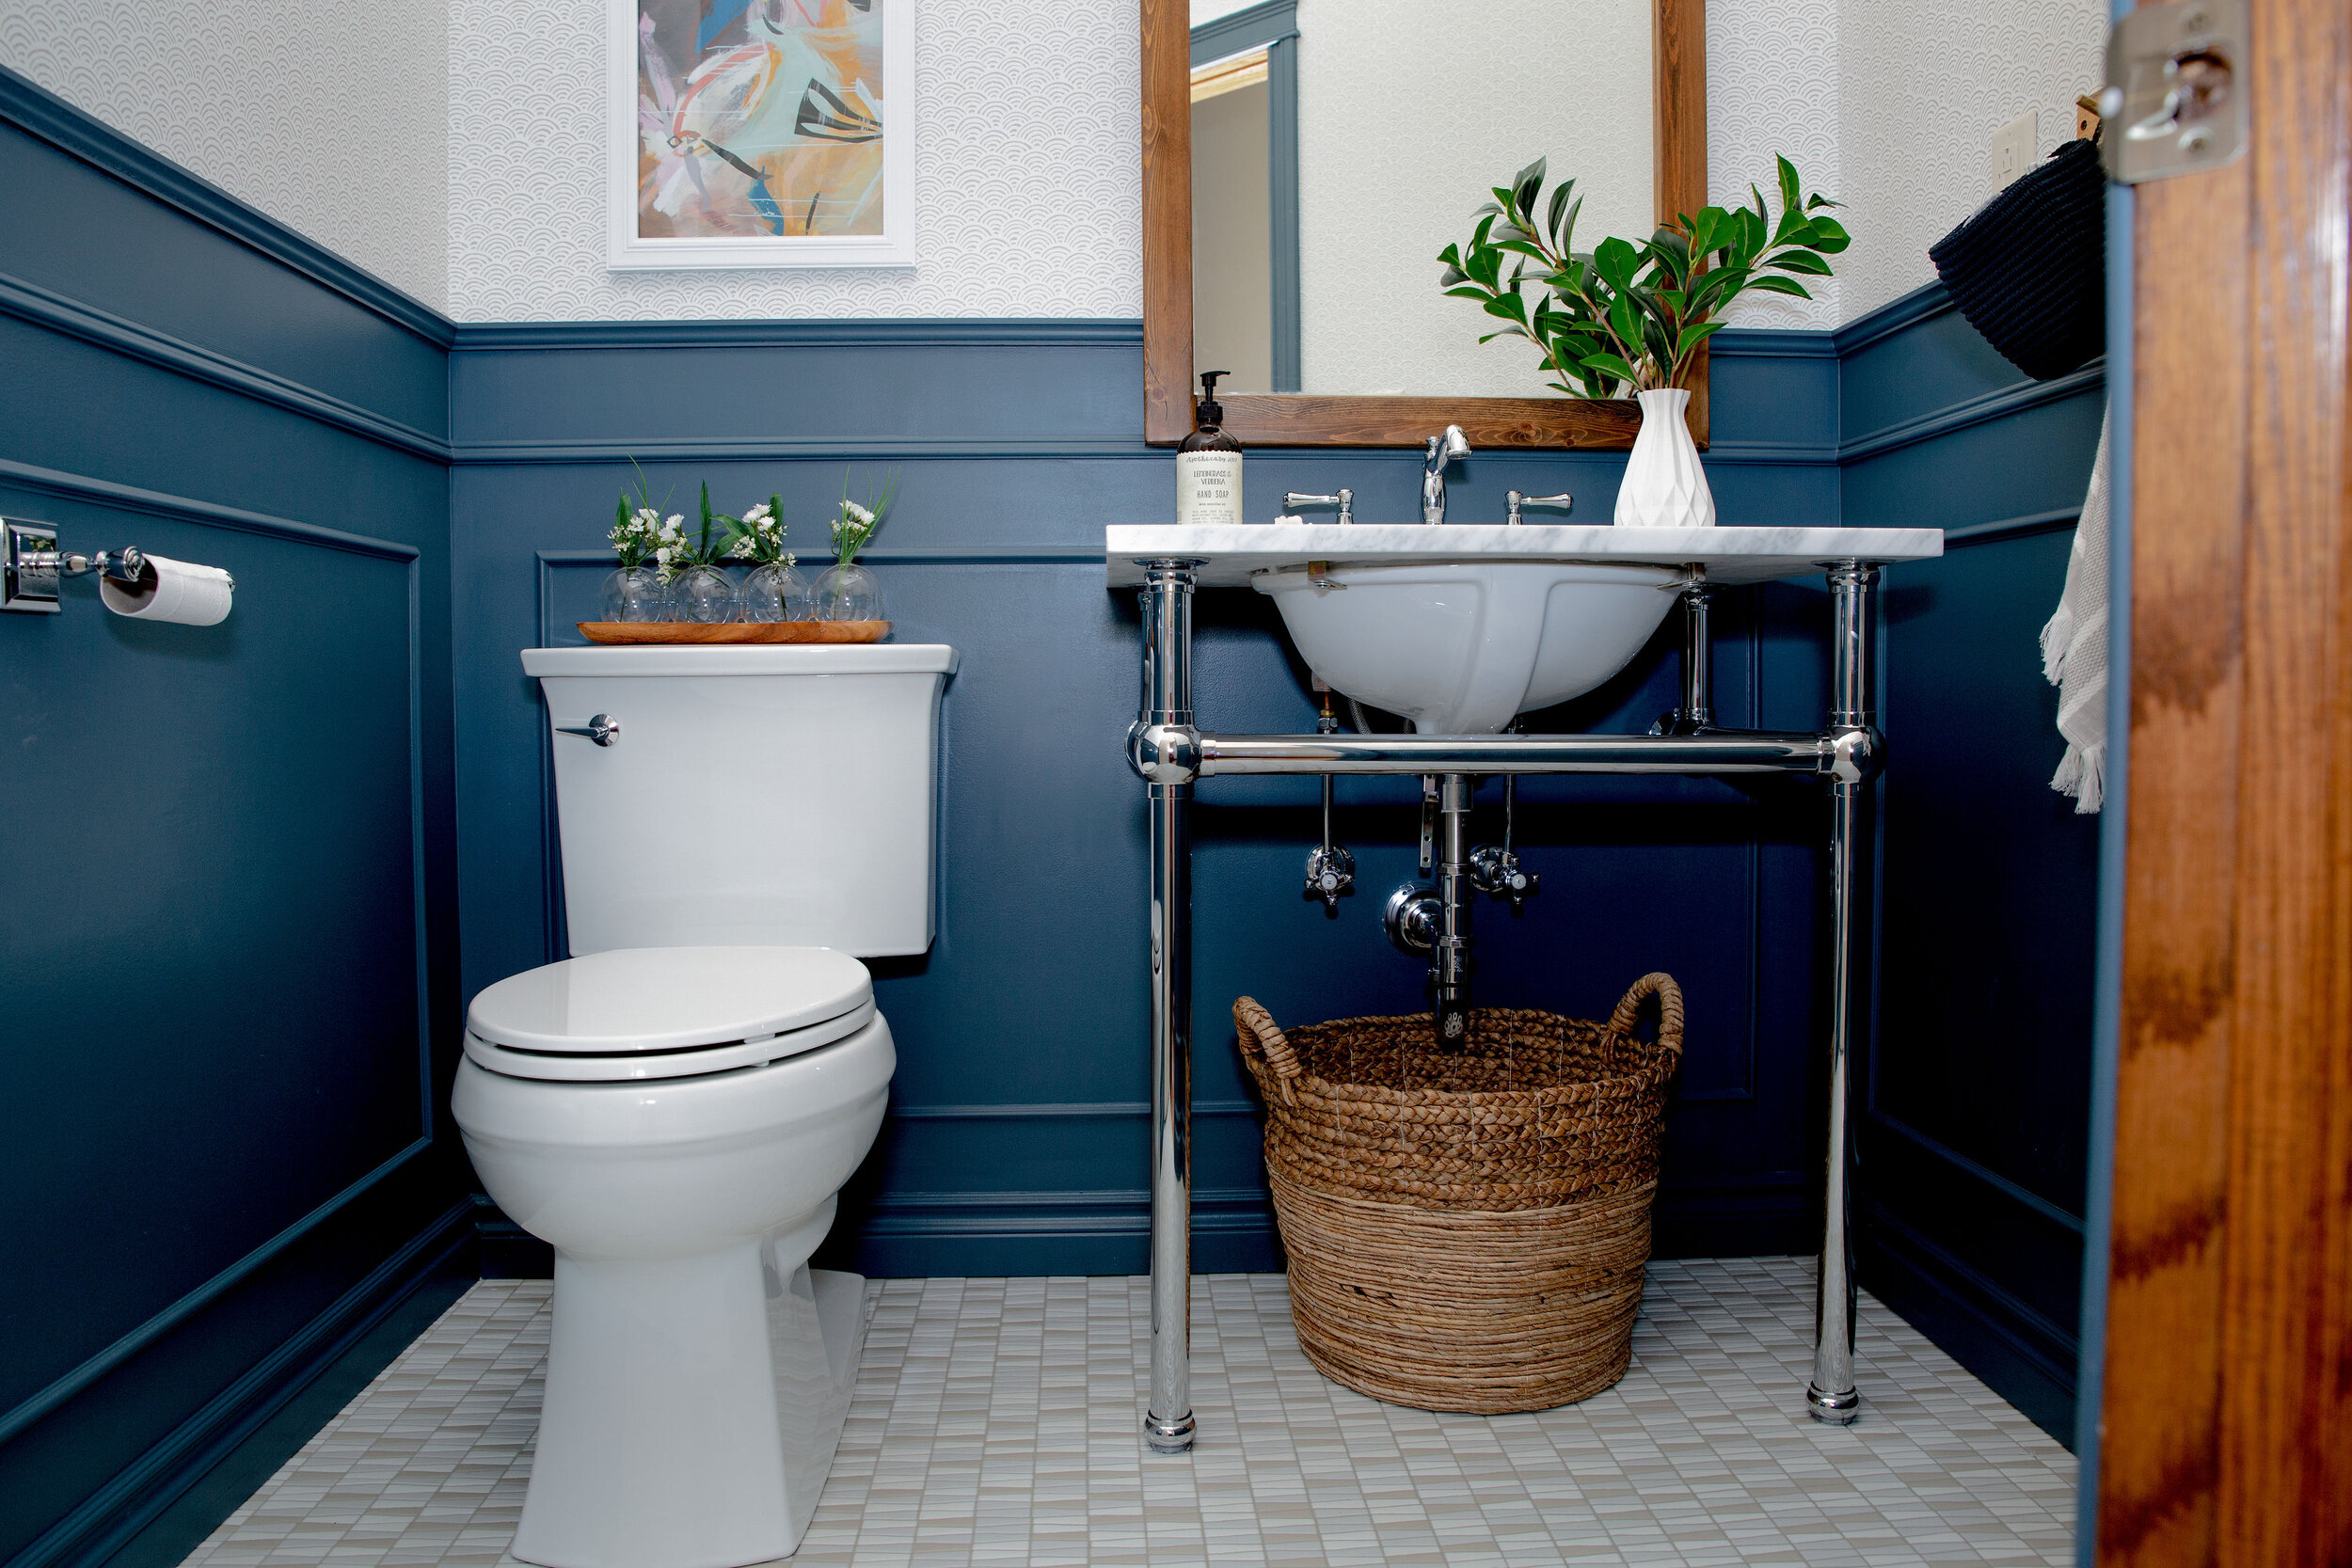
So let’s get into the meat of this post… what room am I doing? As you likely already know if you follow me on Instagram, it’s my guest room, which is located in my basement. Other rooms in my basement recently got some love, and I realized that the light grey paint I had throughout my house was not working that well in the low light basement. I painted the basement bathroom in Sherwin Williams Woodlawn Lichen (a deep, rich green) and then the rec room in Benjamin Moore Blue Note (a very dark navy), and I can not tell you how much better both of these rooms feel as a result! These rooms were NEVER going to be light and bright, so the minute I stopped fighting that, things started falling into place.
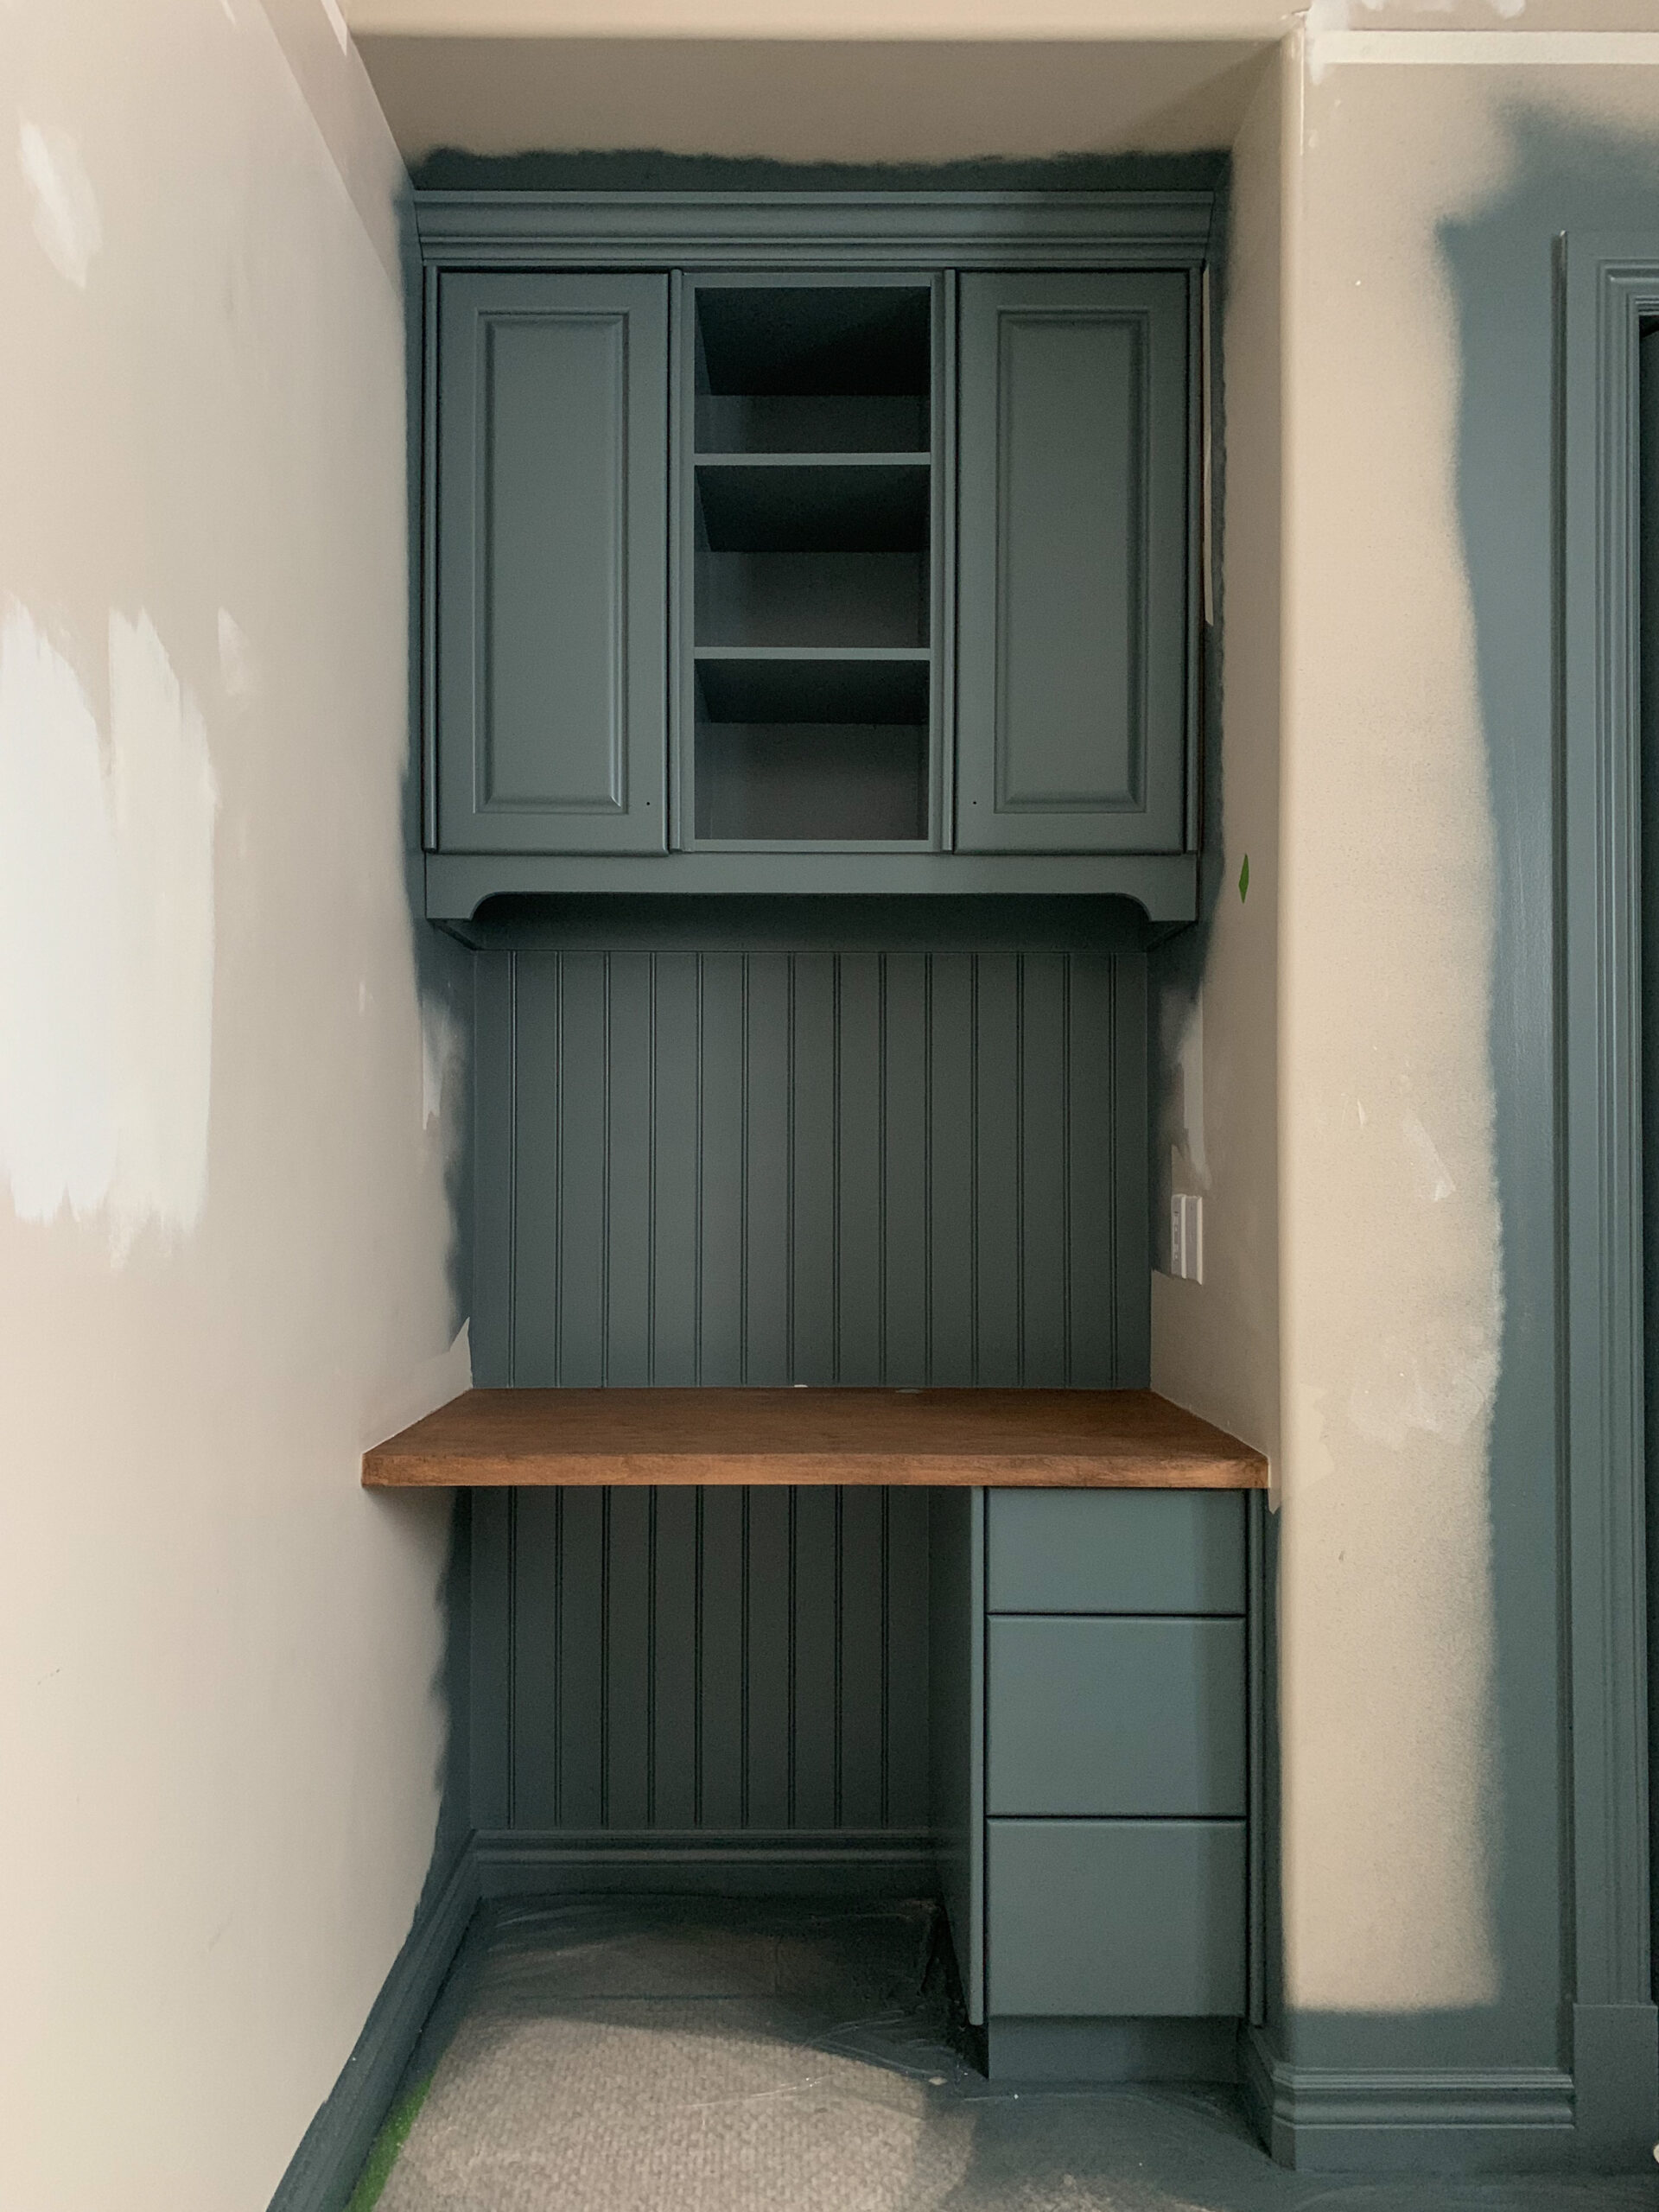
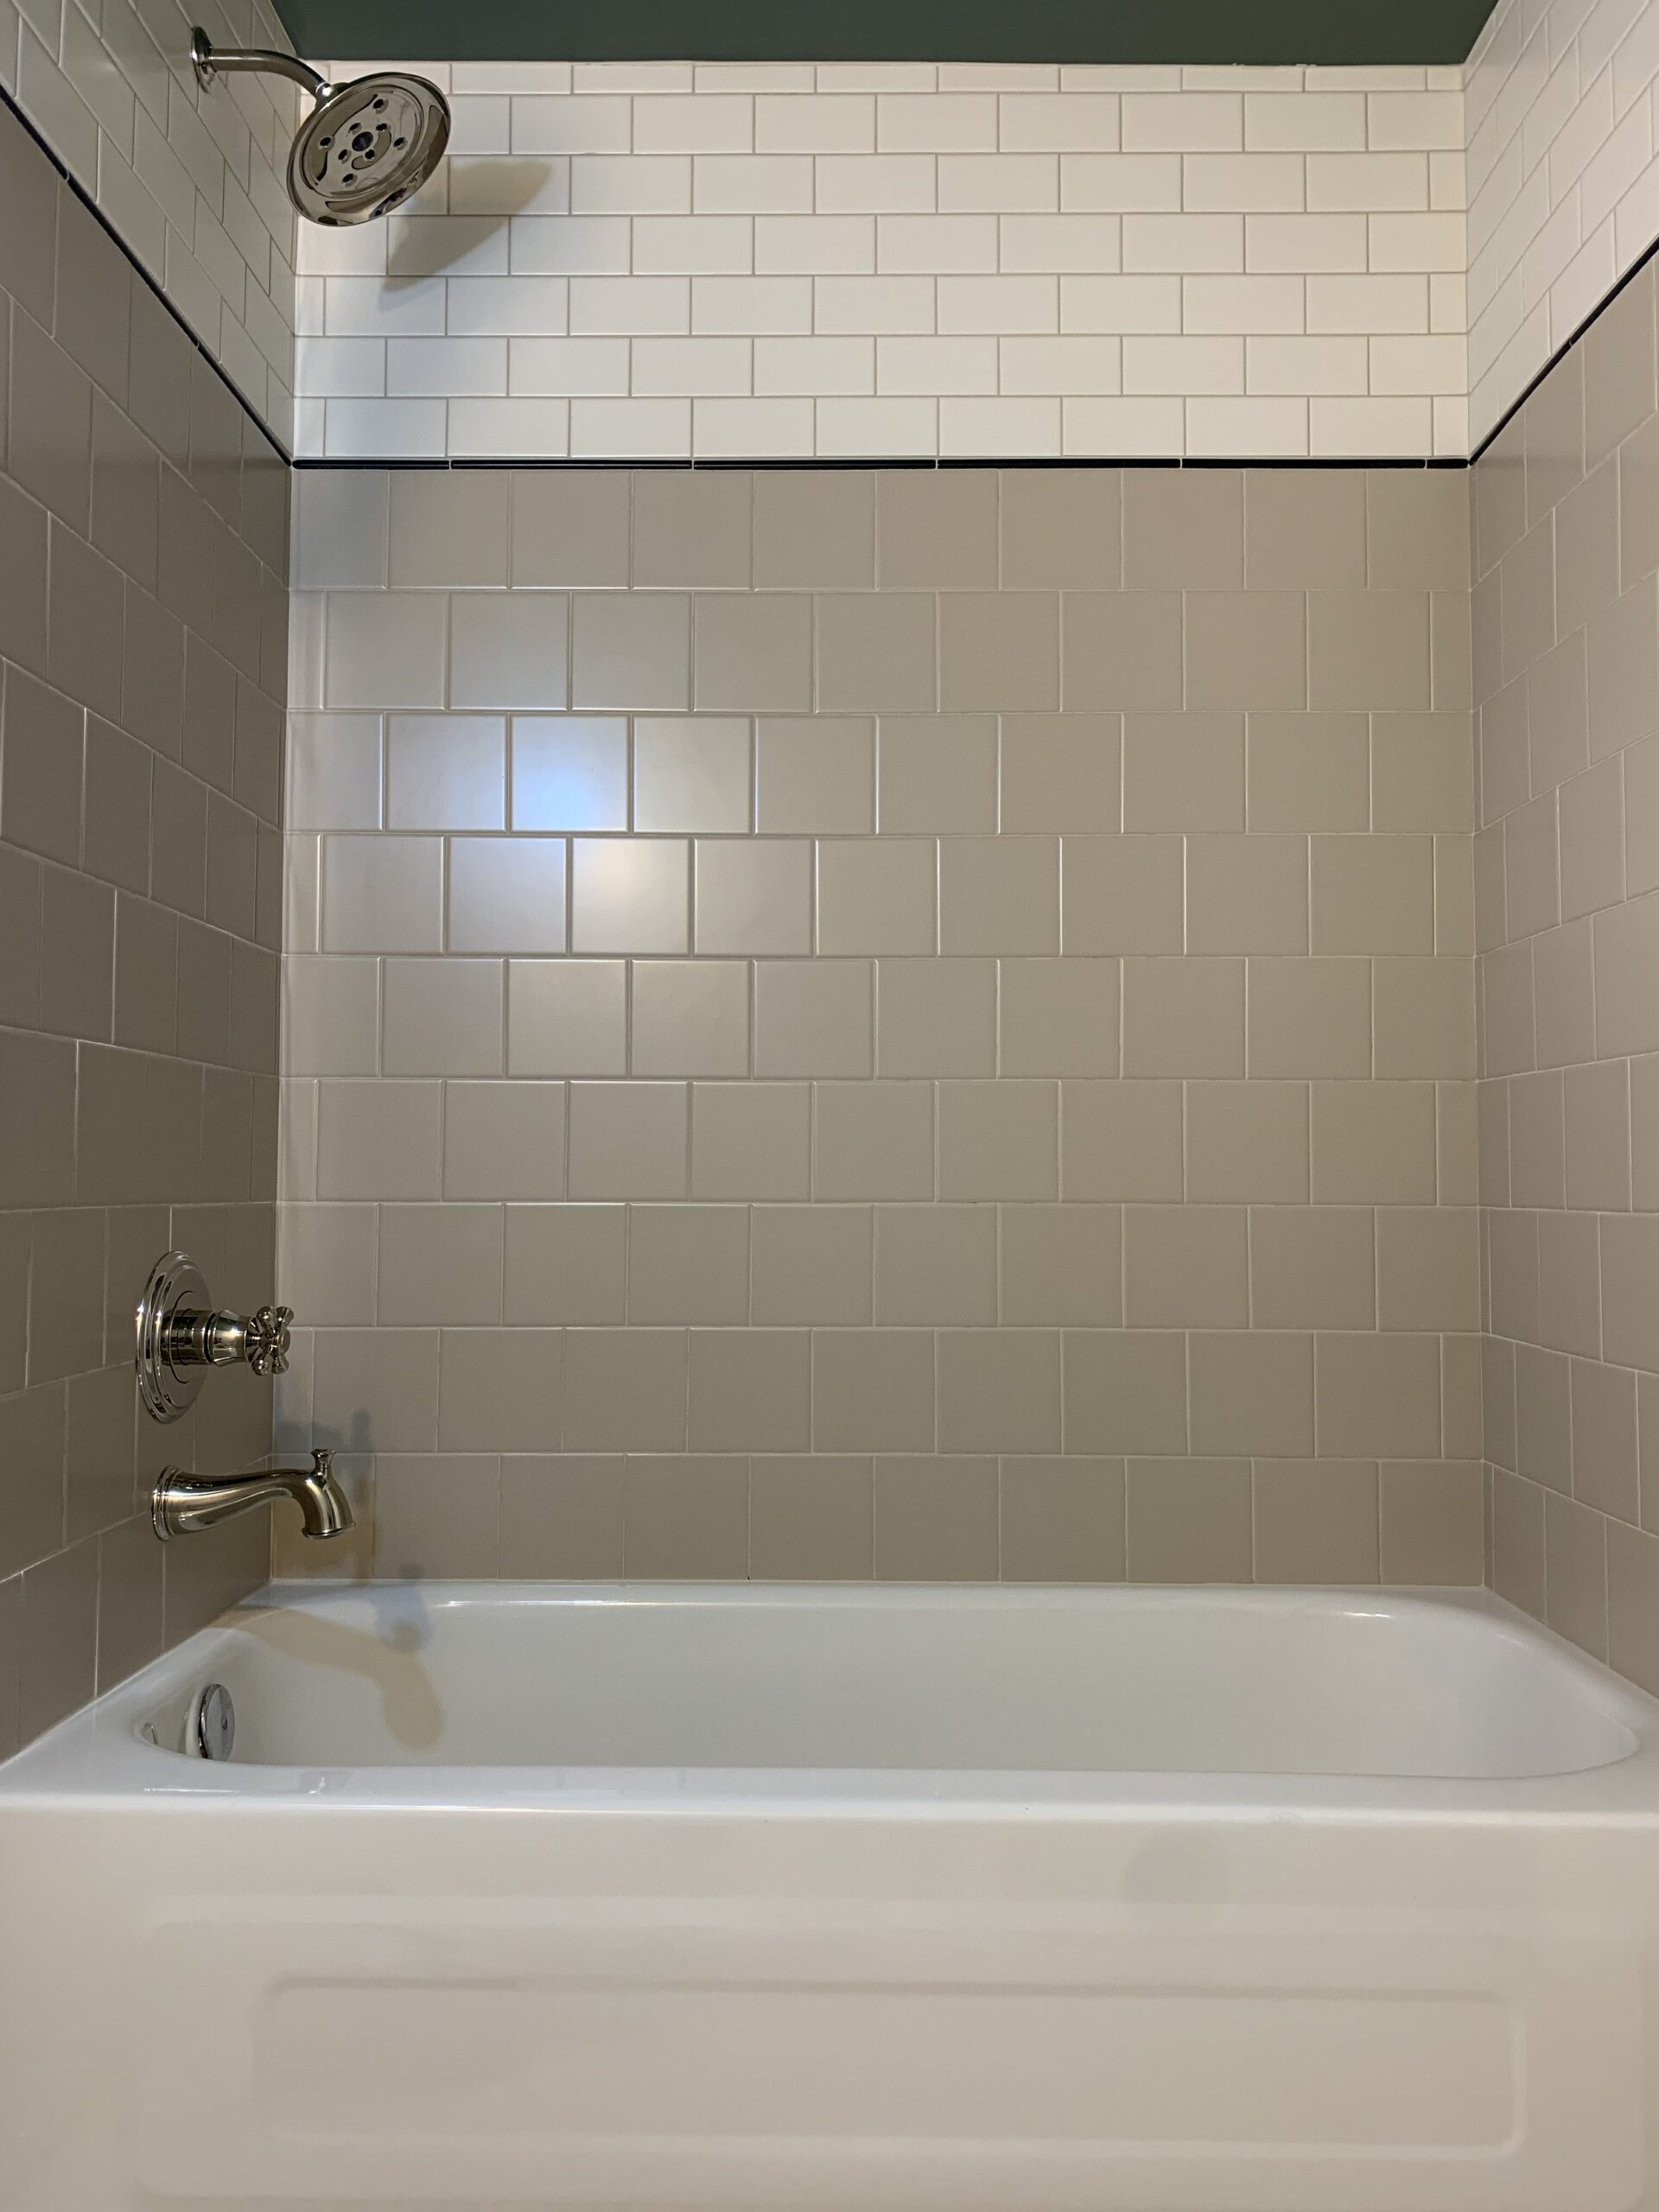
The last room in my basement left unpainted is the guest room. The room is not a mess, it does function just fine for guests and has for the last 7 or so years. I had originally re-purposed a wood door that we salvaged as a headboard, added some side tables and lamps I picked up from Target (this was back during that 5 minutes that Target was in Canada – remember that Canada?), threw in some hand me down linens from my mom and called it a day. But it had never really been ‘designed’ and I thought it could be a whole lot better with a little bit of a design plan and some elbow grease. It has a lot of great things going for it already (gorgeous craftsman trim, 9’ ceilings and big window (for a basement) but it lacks a little pizzazz. So I decided to enter the One Room Challenge once again and give this room the attention it deserves. Here are some before shots:
The Plan
So what’s the plan? I have discovered through trial and error that my favourite spaces incorporate a bit of colour, some pattern play and a bit of whimsey. I’ve tried to incorporate all of those things in this room, along with a healthy dose of traditional, my other design love language. And of course, some DIY. Here’s what I’m planning:
I’m adding gorgeous wallpaper from Milton & King to the upper part of the walls, all the way around the room.
The room will be getting some crown moulding and a picture rail (with real functioning picture hooks!) to frame out the wallpaper and to enhance the look and feel of the craftsman moulding already present in my house.
The remainder of the walls will be painted using my favourite paint, Valspar Signature in a muted green. Bye-bye boring grey!
The bedding is getting a major upgrade with a custom duvet and sheets from Spoonflower. (My own bed is a little jealous.)
If you watch my stories on Instagram you may recall that I did not know if I could fit a rug into the space because of how the closet doors open. But, you might also know how much I love rugs and how much I feel they make a space, (especially the vintage variety!) so I decided I just had to figure out how to make one work. I’m so excited to report that I sorted it out and will be including a gorgeous vintage number from Revival Rugs!
I have sourced a new bed and nightstands from Facebook Marketplace that need a little lovin’ before they are allowed in the house. If you know me, you already knew there would be a furniture refresh happening somewhere.
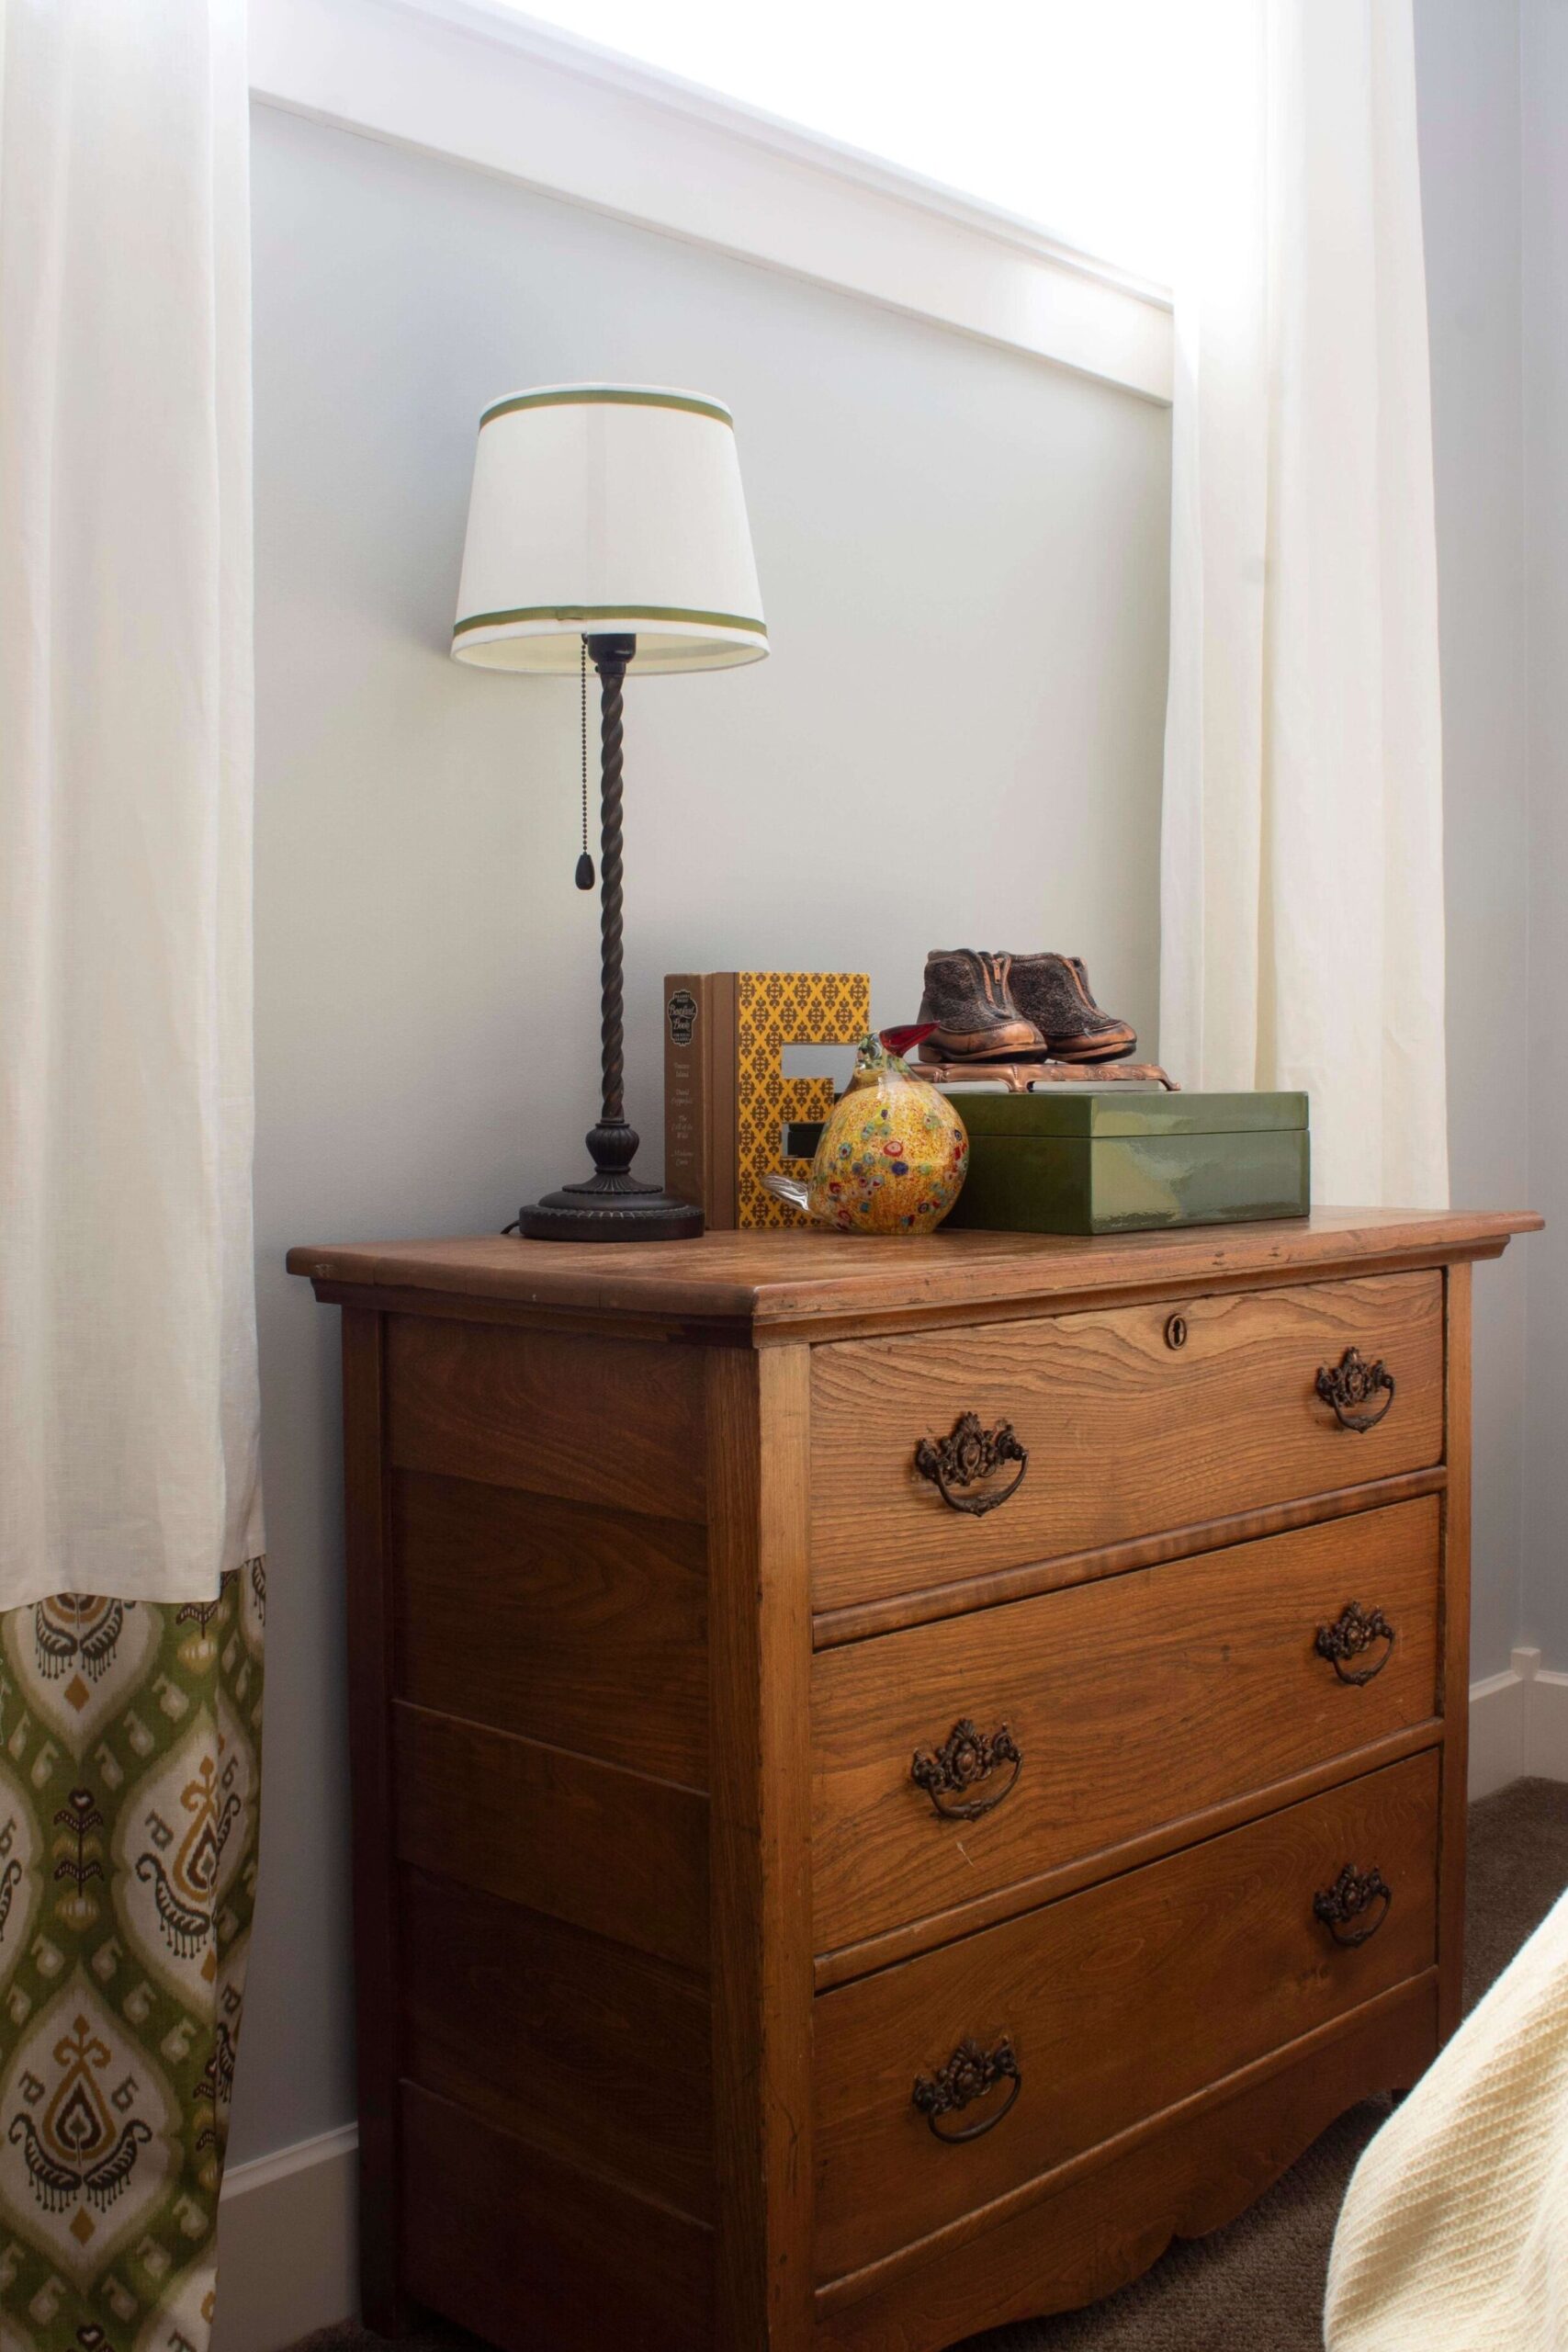
The existing curtains have already undergone a little makeover, thanks to my mom and her sewing skills!
The dresser is an antique that I refinished 17 years ago and it holds a special place in my heart. I took a class shortly after I had my first baby on refinishing antiques, and that 2 hours out of the house for that course once a week was my ESCAPE. Mom’s, you know what I’m sayin’ right? (My husband still has PTSD from that time I think.) So needless to say, it stays!
I’ll be adding some affordable DIY art and figure out how to hang it from the new picture rail.
I had a pretty cool light on order that seems to be lost somewhere in the Pacific Ocean. So instead I have a really fun new idea that I just can’t wait for, fingers crossed that works out! Otherwise, I may be scrambling! Stay tuned!
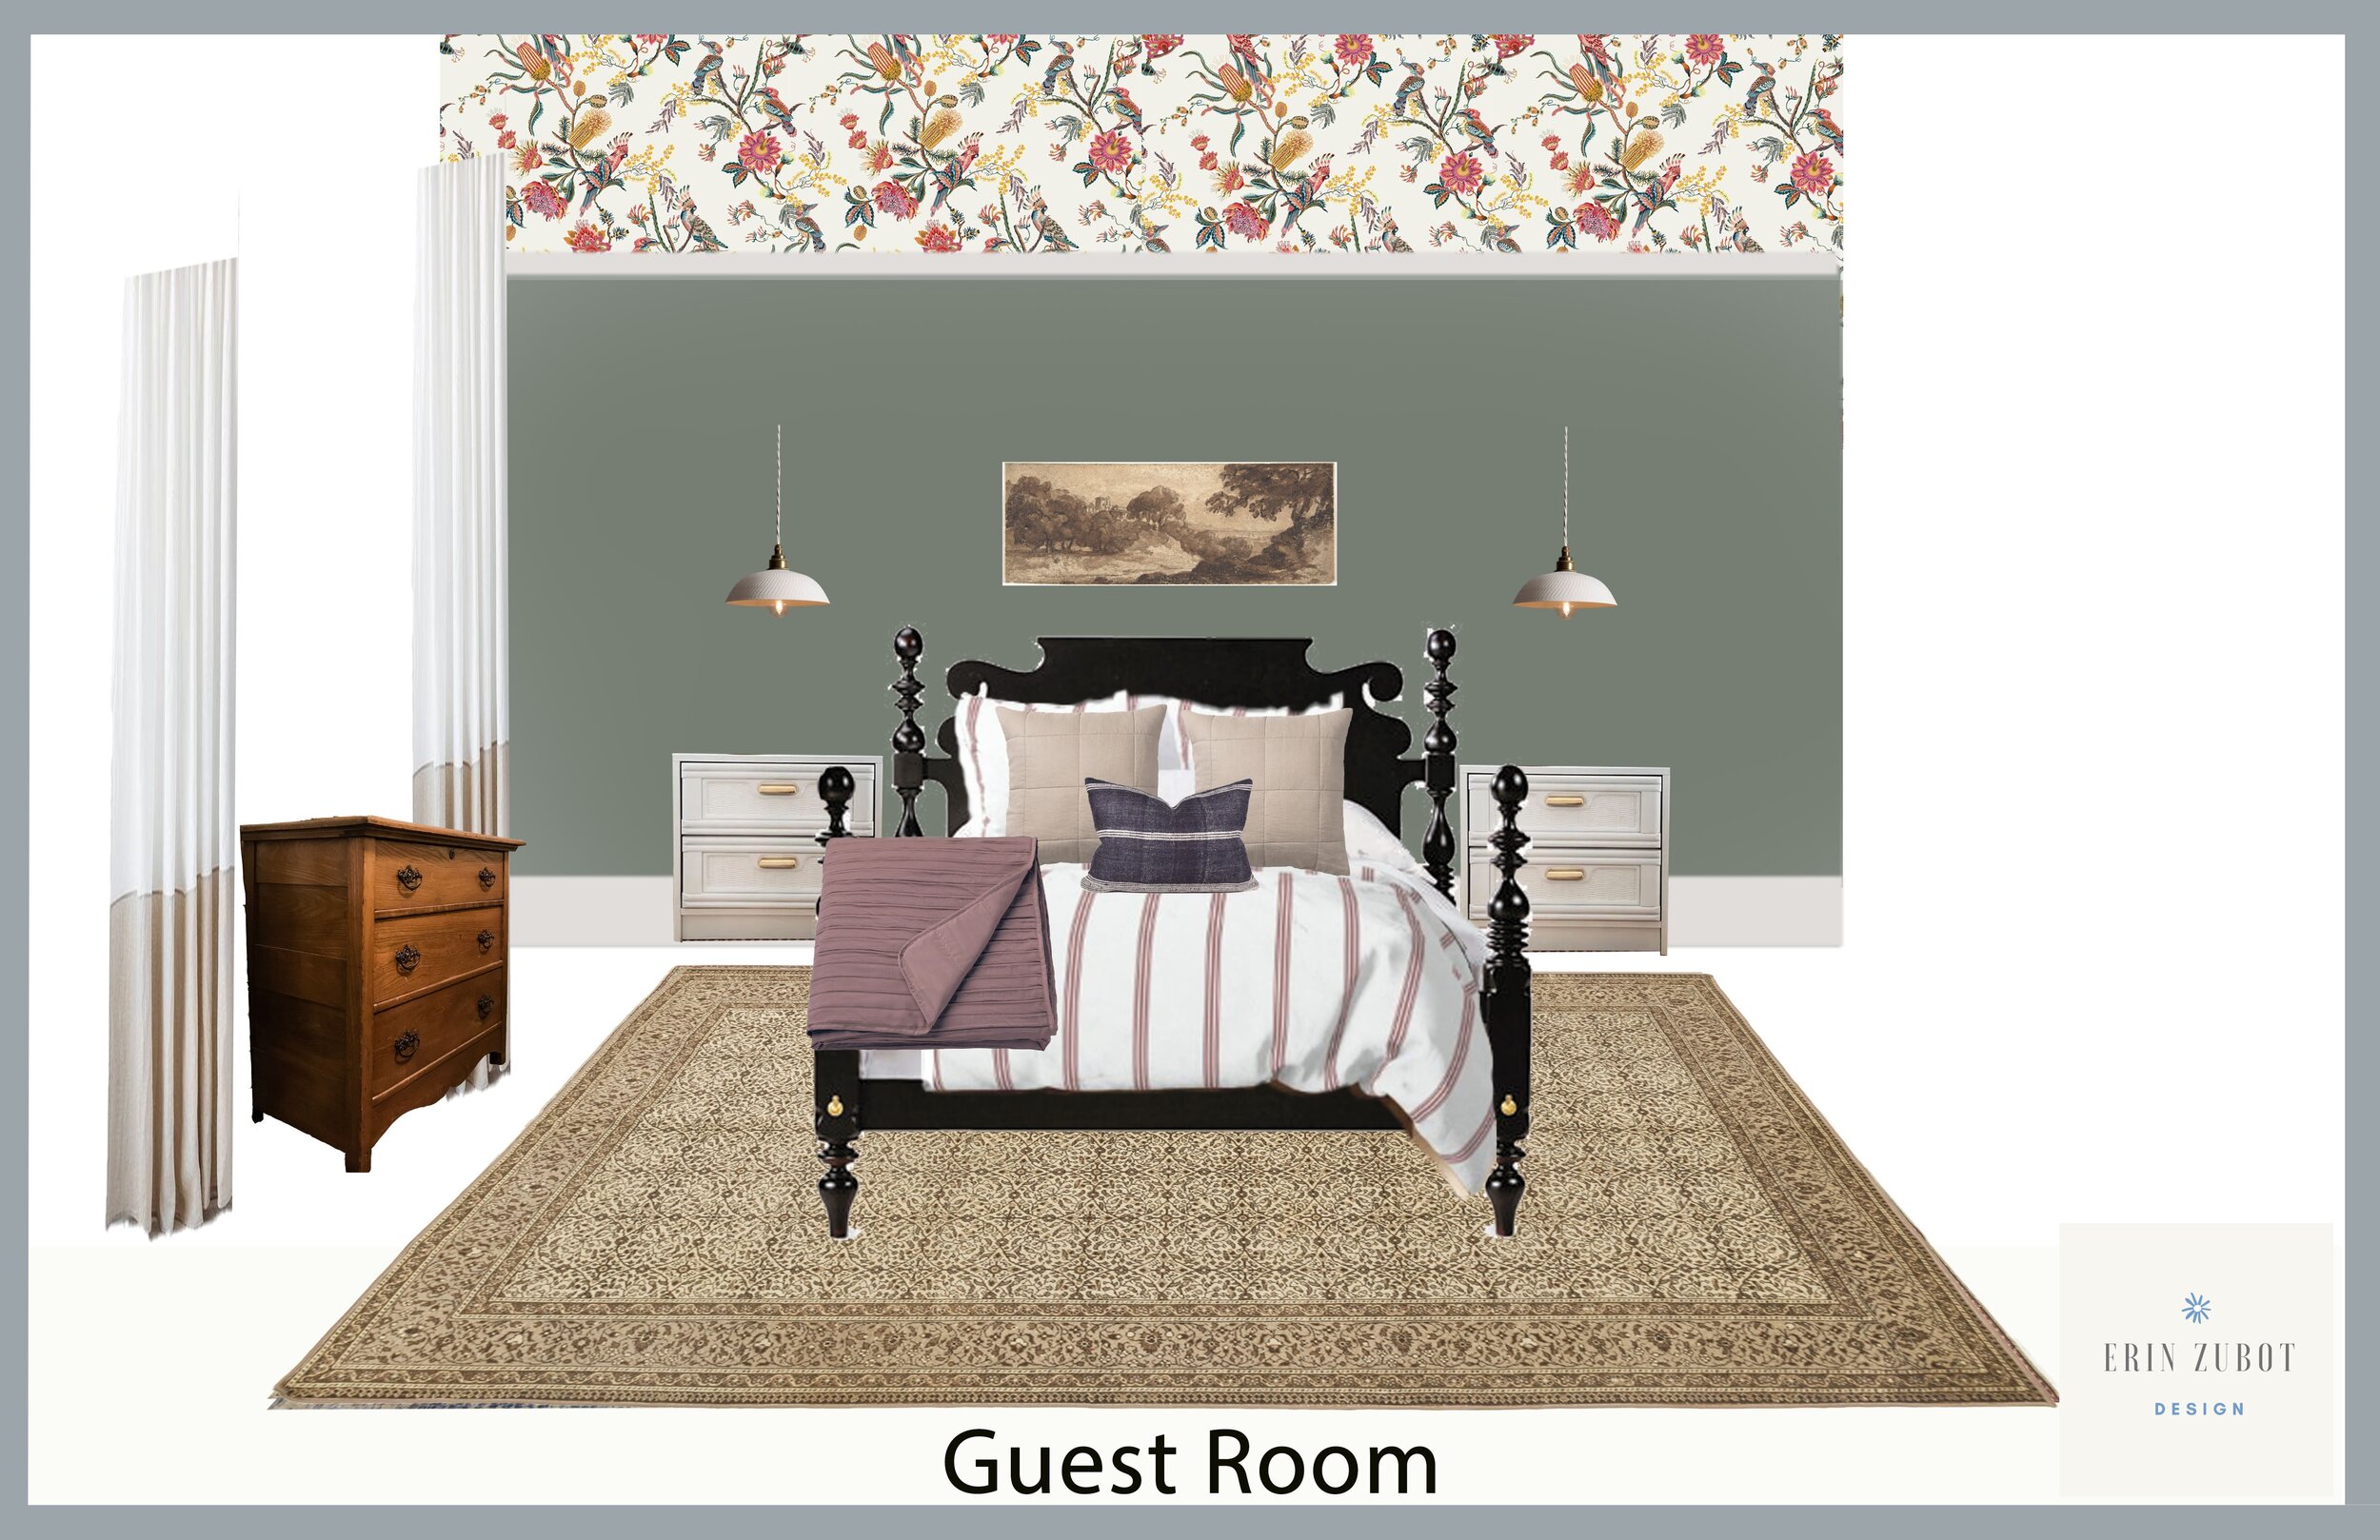
Ok so enough with all the reading, let’s give you what you are here for! Here is the mood board for the space:
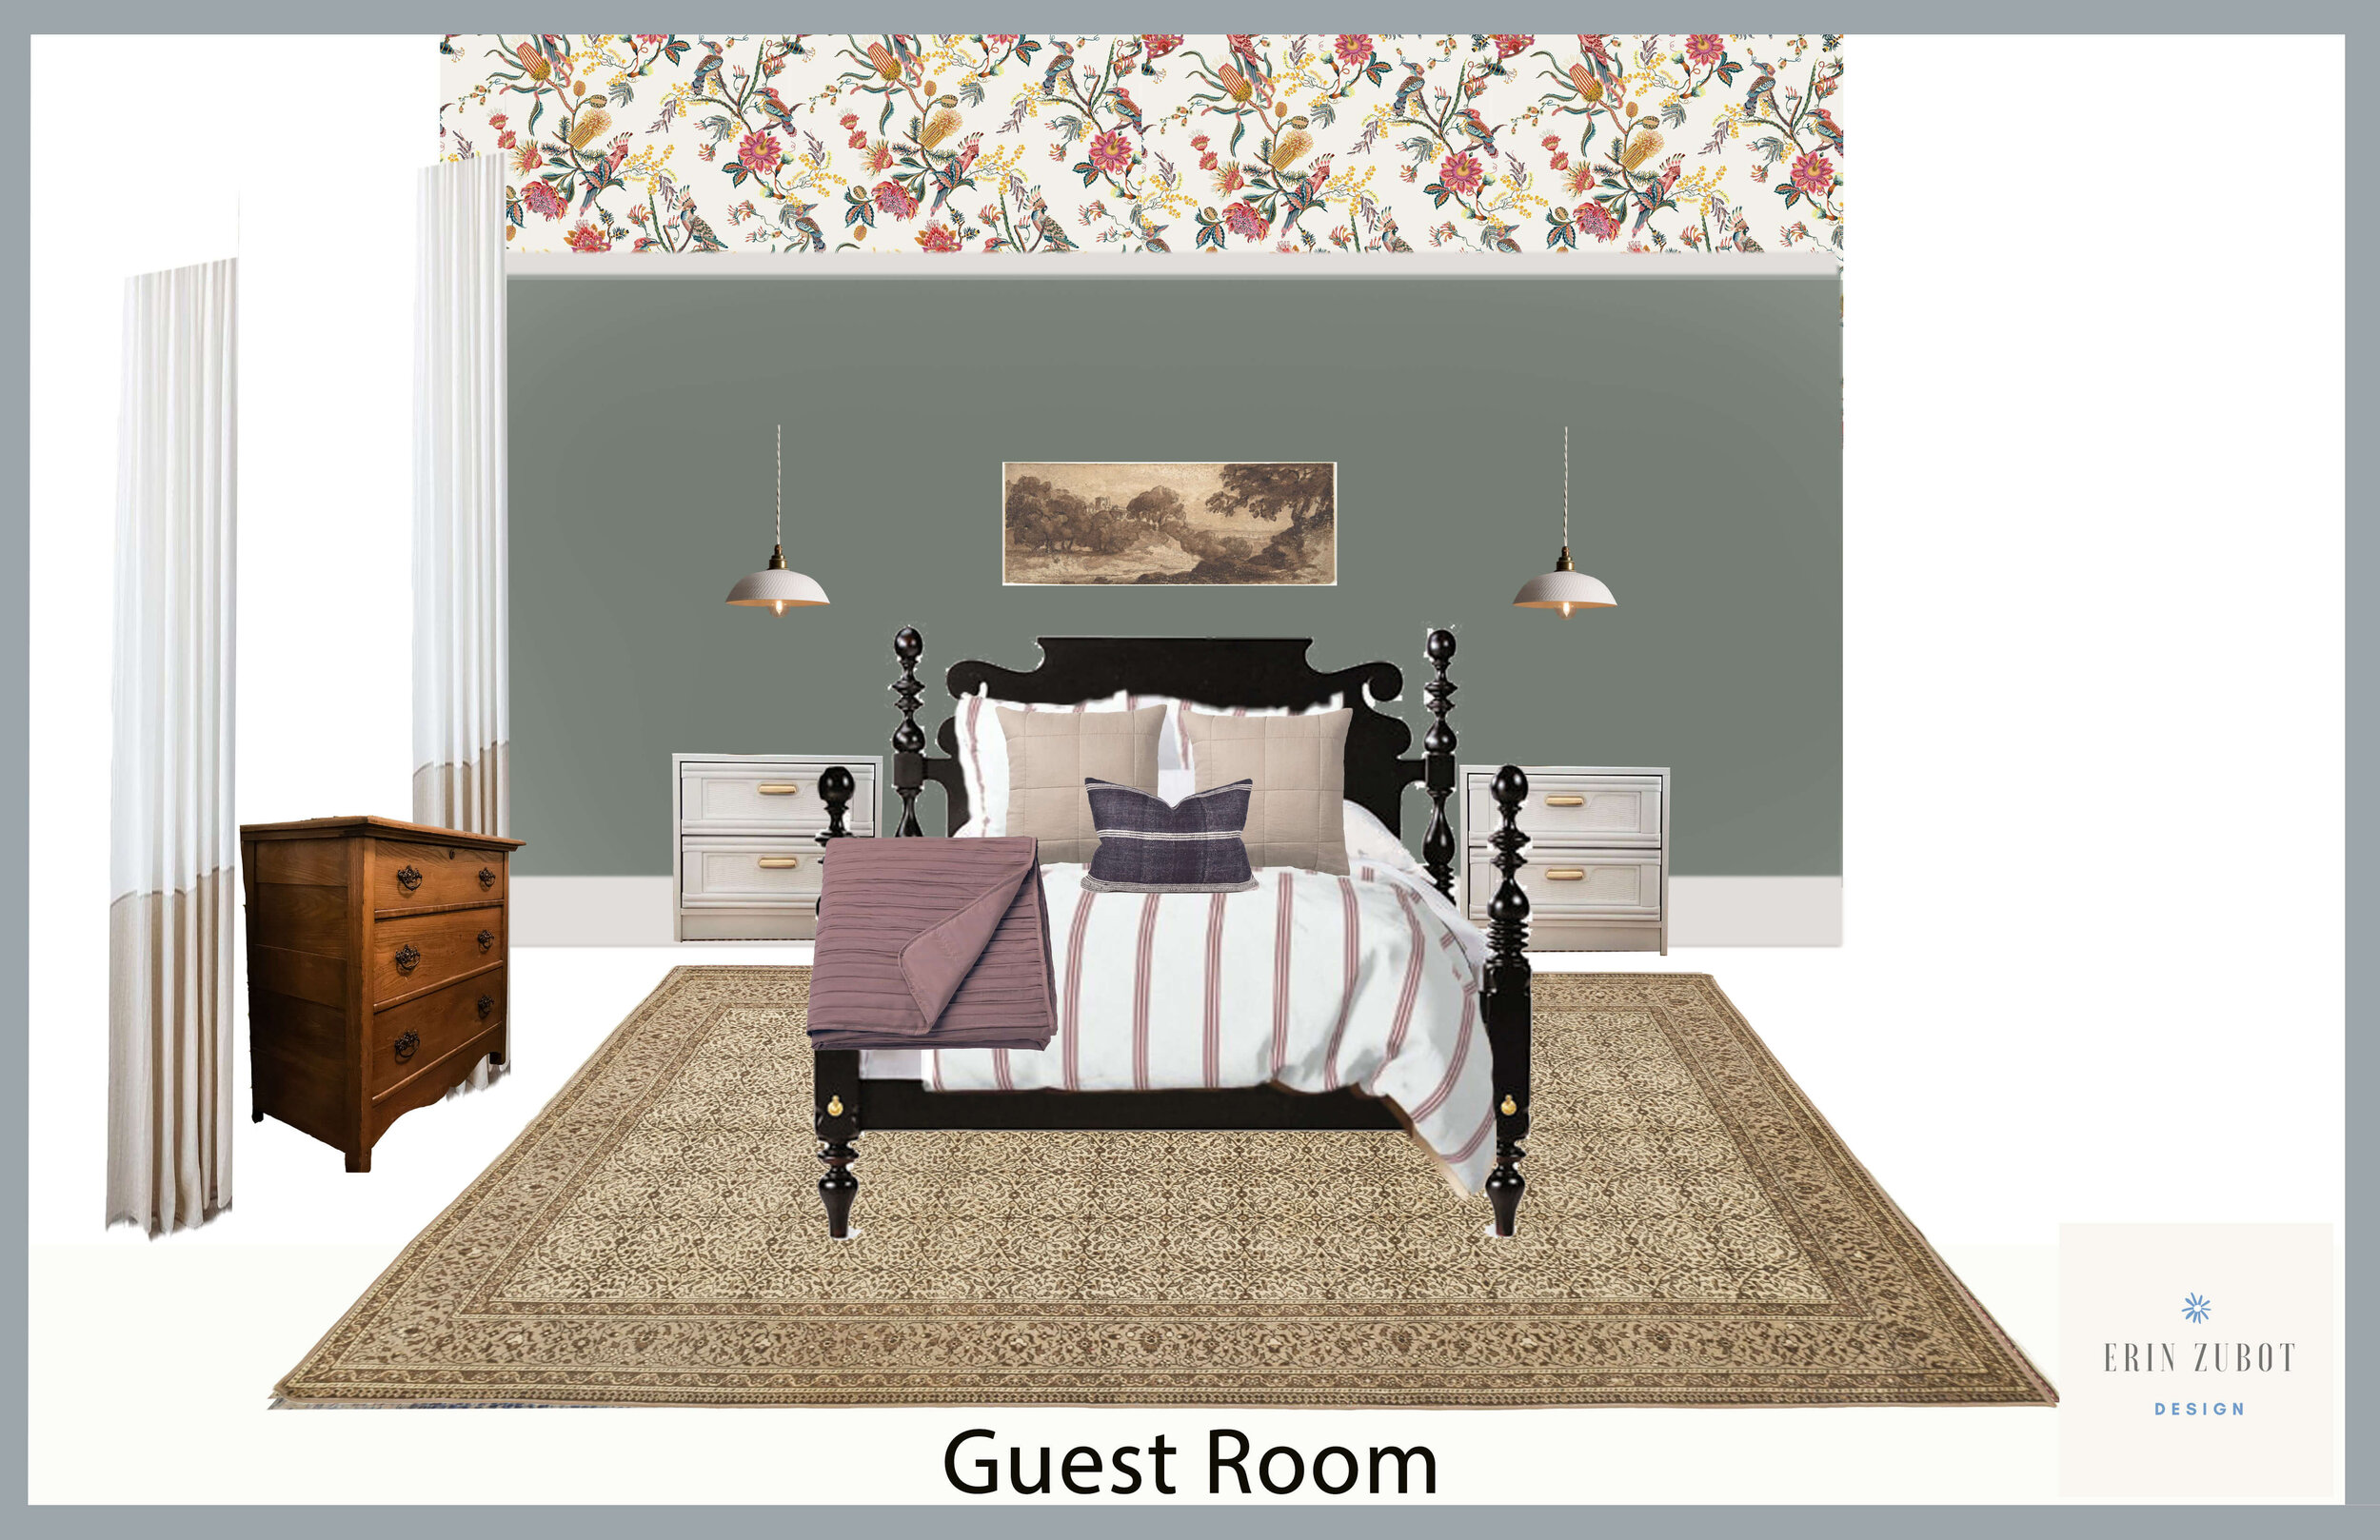
I’m hoping my modern-traditional/colourful/ quirky design plan all comes together in this space as it has in my head for the months I have had to (over) think about it. This 12’ square room is going to pack a lot of punch for a small space.
I just wanted to give a HUGE thank you to the generous brands I have partnered with who provided sponsored items for this makeover. I’m so grateful that they saw enough potential in me and my little blog. I hope to do their fabulous products justice in the coming days!!
Milton and King (Wallpaper)
Spoonflower (Bedding)
Revival Rugs (Vintage Rug)
Valspar (Paint)
That’s all for today – be sure to check back next week where I will hopefully have some progress to show you – trim and paint will be the first up. If you want to catch some sneak peeks follow me on Instagram (@erinzubotdesign), I’ll be sharing a lot of behind the scenes there. Also, check out the other designers HERE or click the ORC Logo below, there is a great lineup of both featured and guest participants and there is a lot to catch up on. See you next week!

Can’t wait to see this new makeover!
Thank you so much, Laura! Yes, the dresser is staying, I love a good antique. Thanks for being here!
Thanks!
This is going to be amazing! I love that dresser and I was so glad to see it in the rendering! Can’t wait to follow along!
I love that wallpaper so much and that pop of black from the bedframe is such a great decison
Thank you so much Lindsey!
That wallpaper is beautiful! So excited to follow along!
Thank you so much Rachel!