
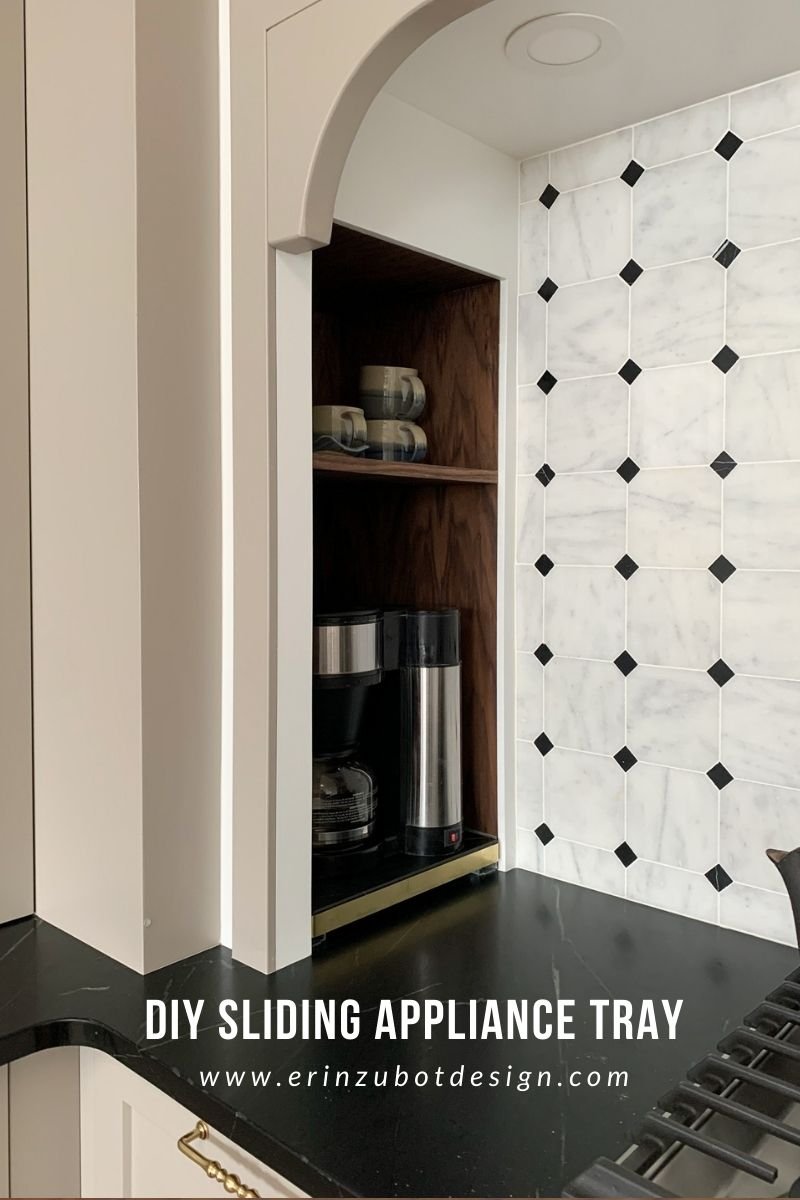
DIY Pull Out Tray for Appliances (Using a Stone Remnant!)
So my favourite detail in my new kitchen is probably the pull-out shelf (or tray) in the coffee nook. If you read my first kitchen post when I talked about planning the kitchen, you might remember that my main concern was to find an out-of-the-way spot to keep my coffee maker.
This post may contain affiliate links. That means if you purchase anything from these links I earn a small commission, at no extra cost to you! This helps support my blog, so thank you!
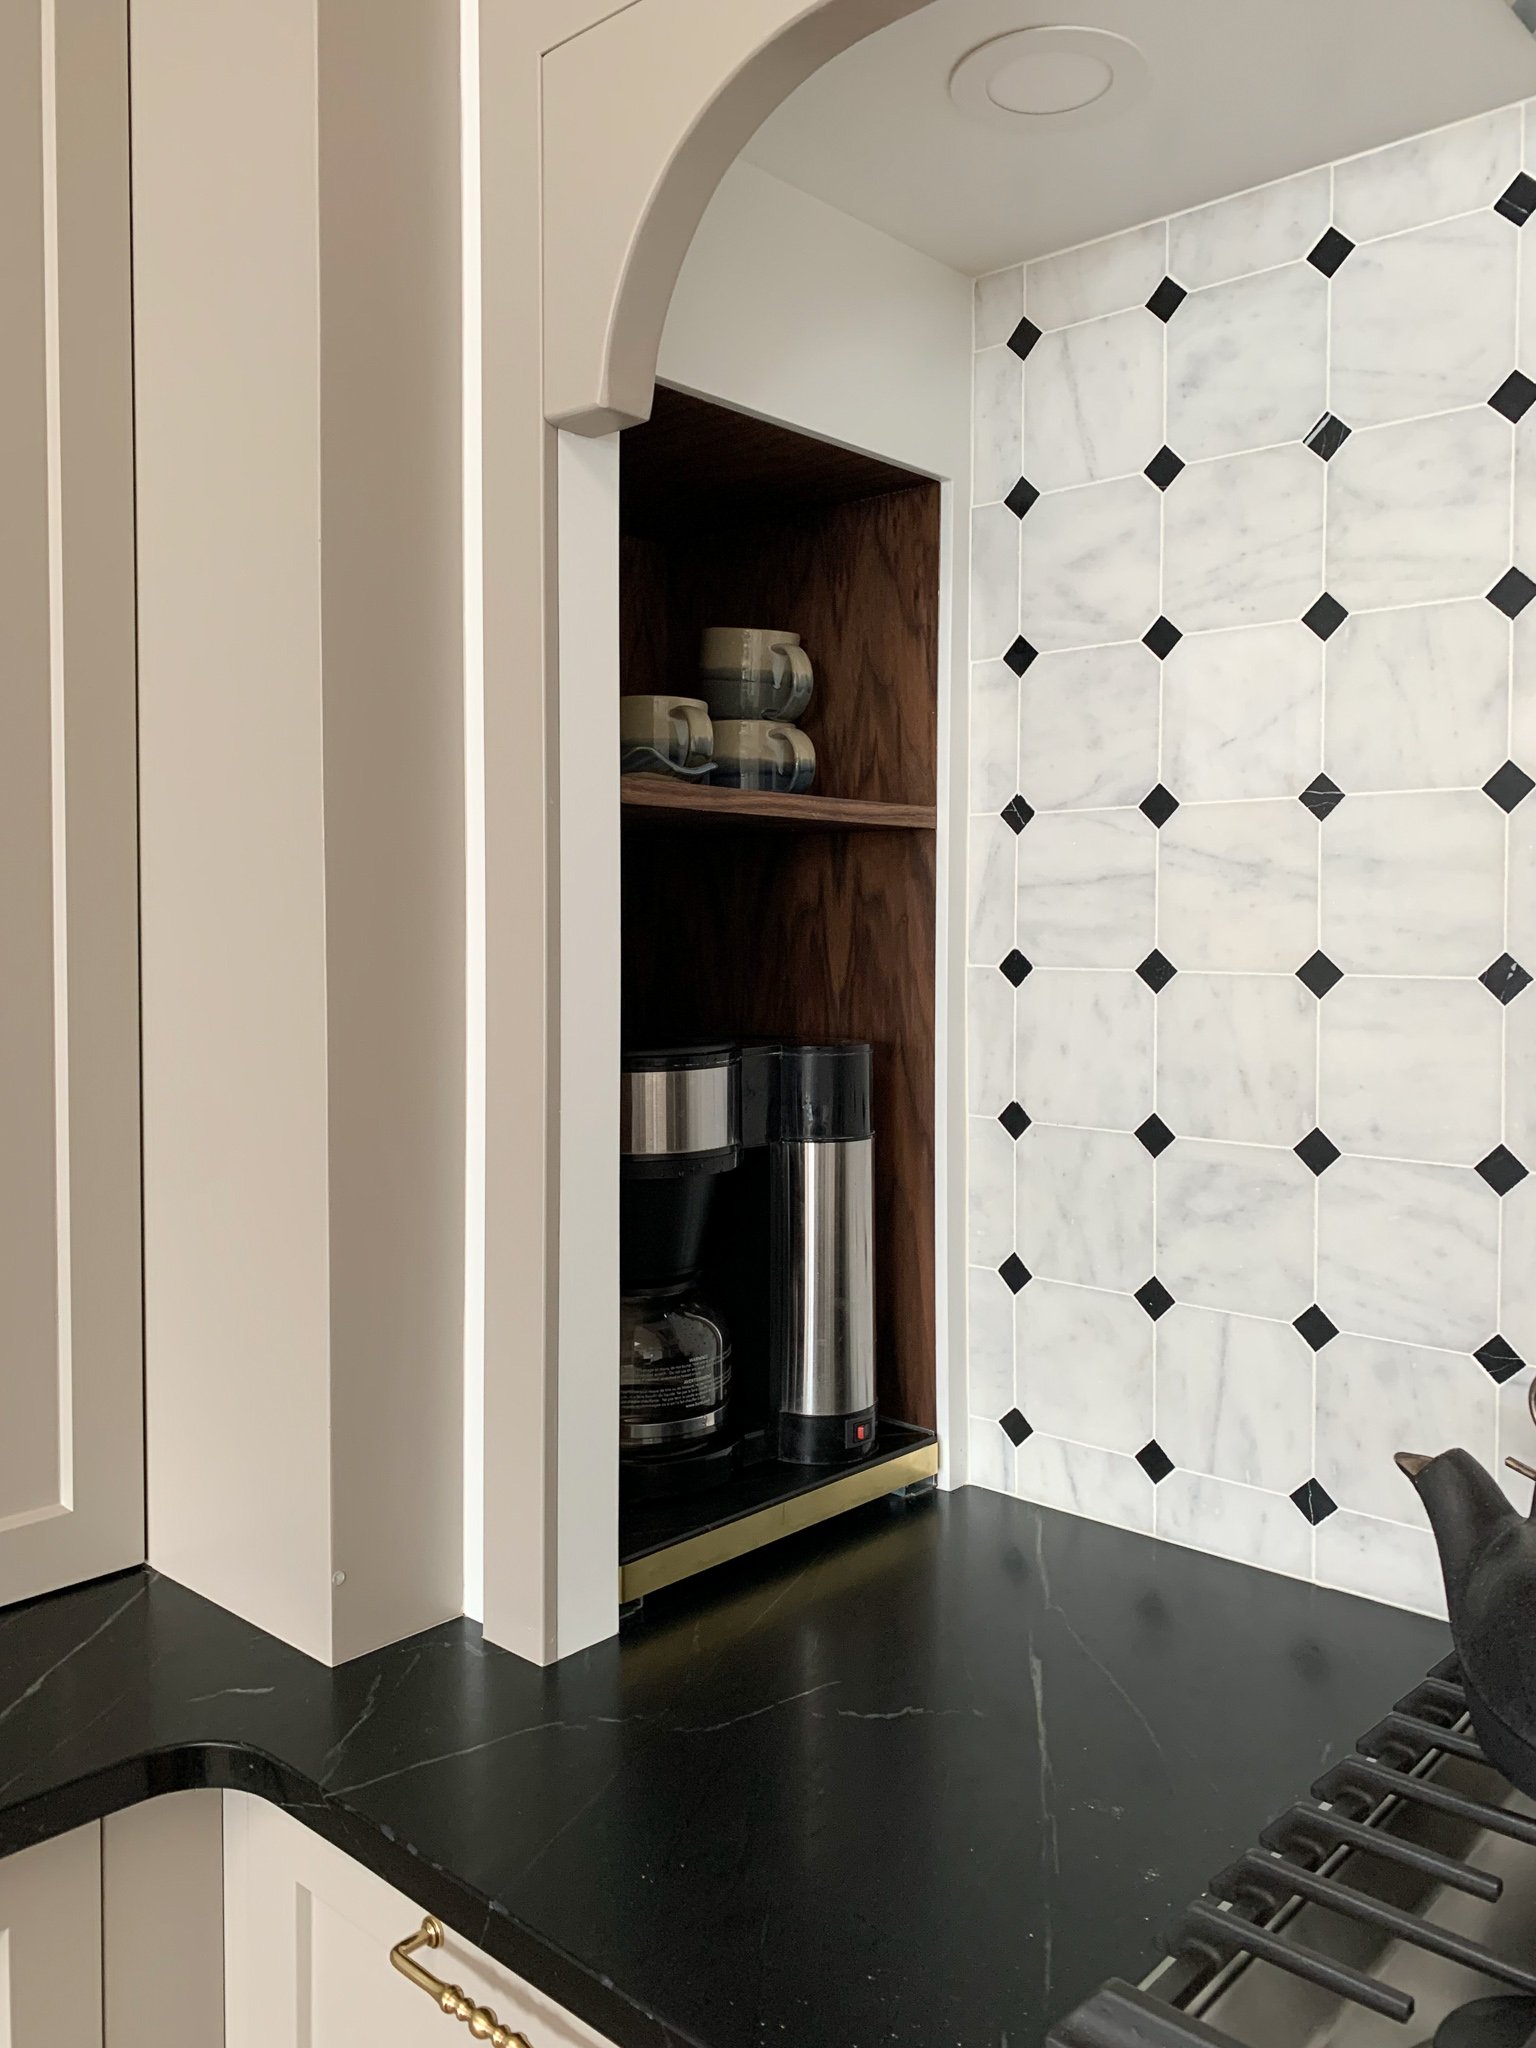
You see, the coffee maker is quite ugly, I will admit, but I’m also very attached to it and without coffee there would be chaos and darkness. At least in my house. In Alberta where I live, the current building code says that you can not hide a switch inside a closed cabinet unless it has a switch that shuts the power off when the door is shut. However, this particular coffee maker has a reservoir that keeps water hot and so it needs to stay ON at all times, so that wasn’t going to work for me.
We considered a built-in pantry with a counter for appliances (that’s what we had in my last house and it was great!) but we didn’t have enough space for the kind of pantry that we would need to do that. I considered briefly just leaving it out but MAN it’s an ugly frigging thing and I really didn’t want to mess up my kitchens mojo. Inspiration struck when I saw an image from Jean Stoffer Design, in her shop kitchen. She designed a little corner cubby, away and hidden but open, no door!! Perfect! So the idea was born and we added a little corner cubby to the design.
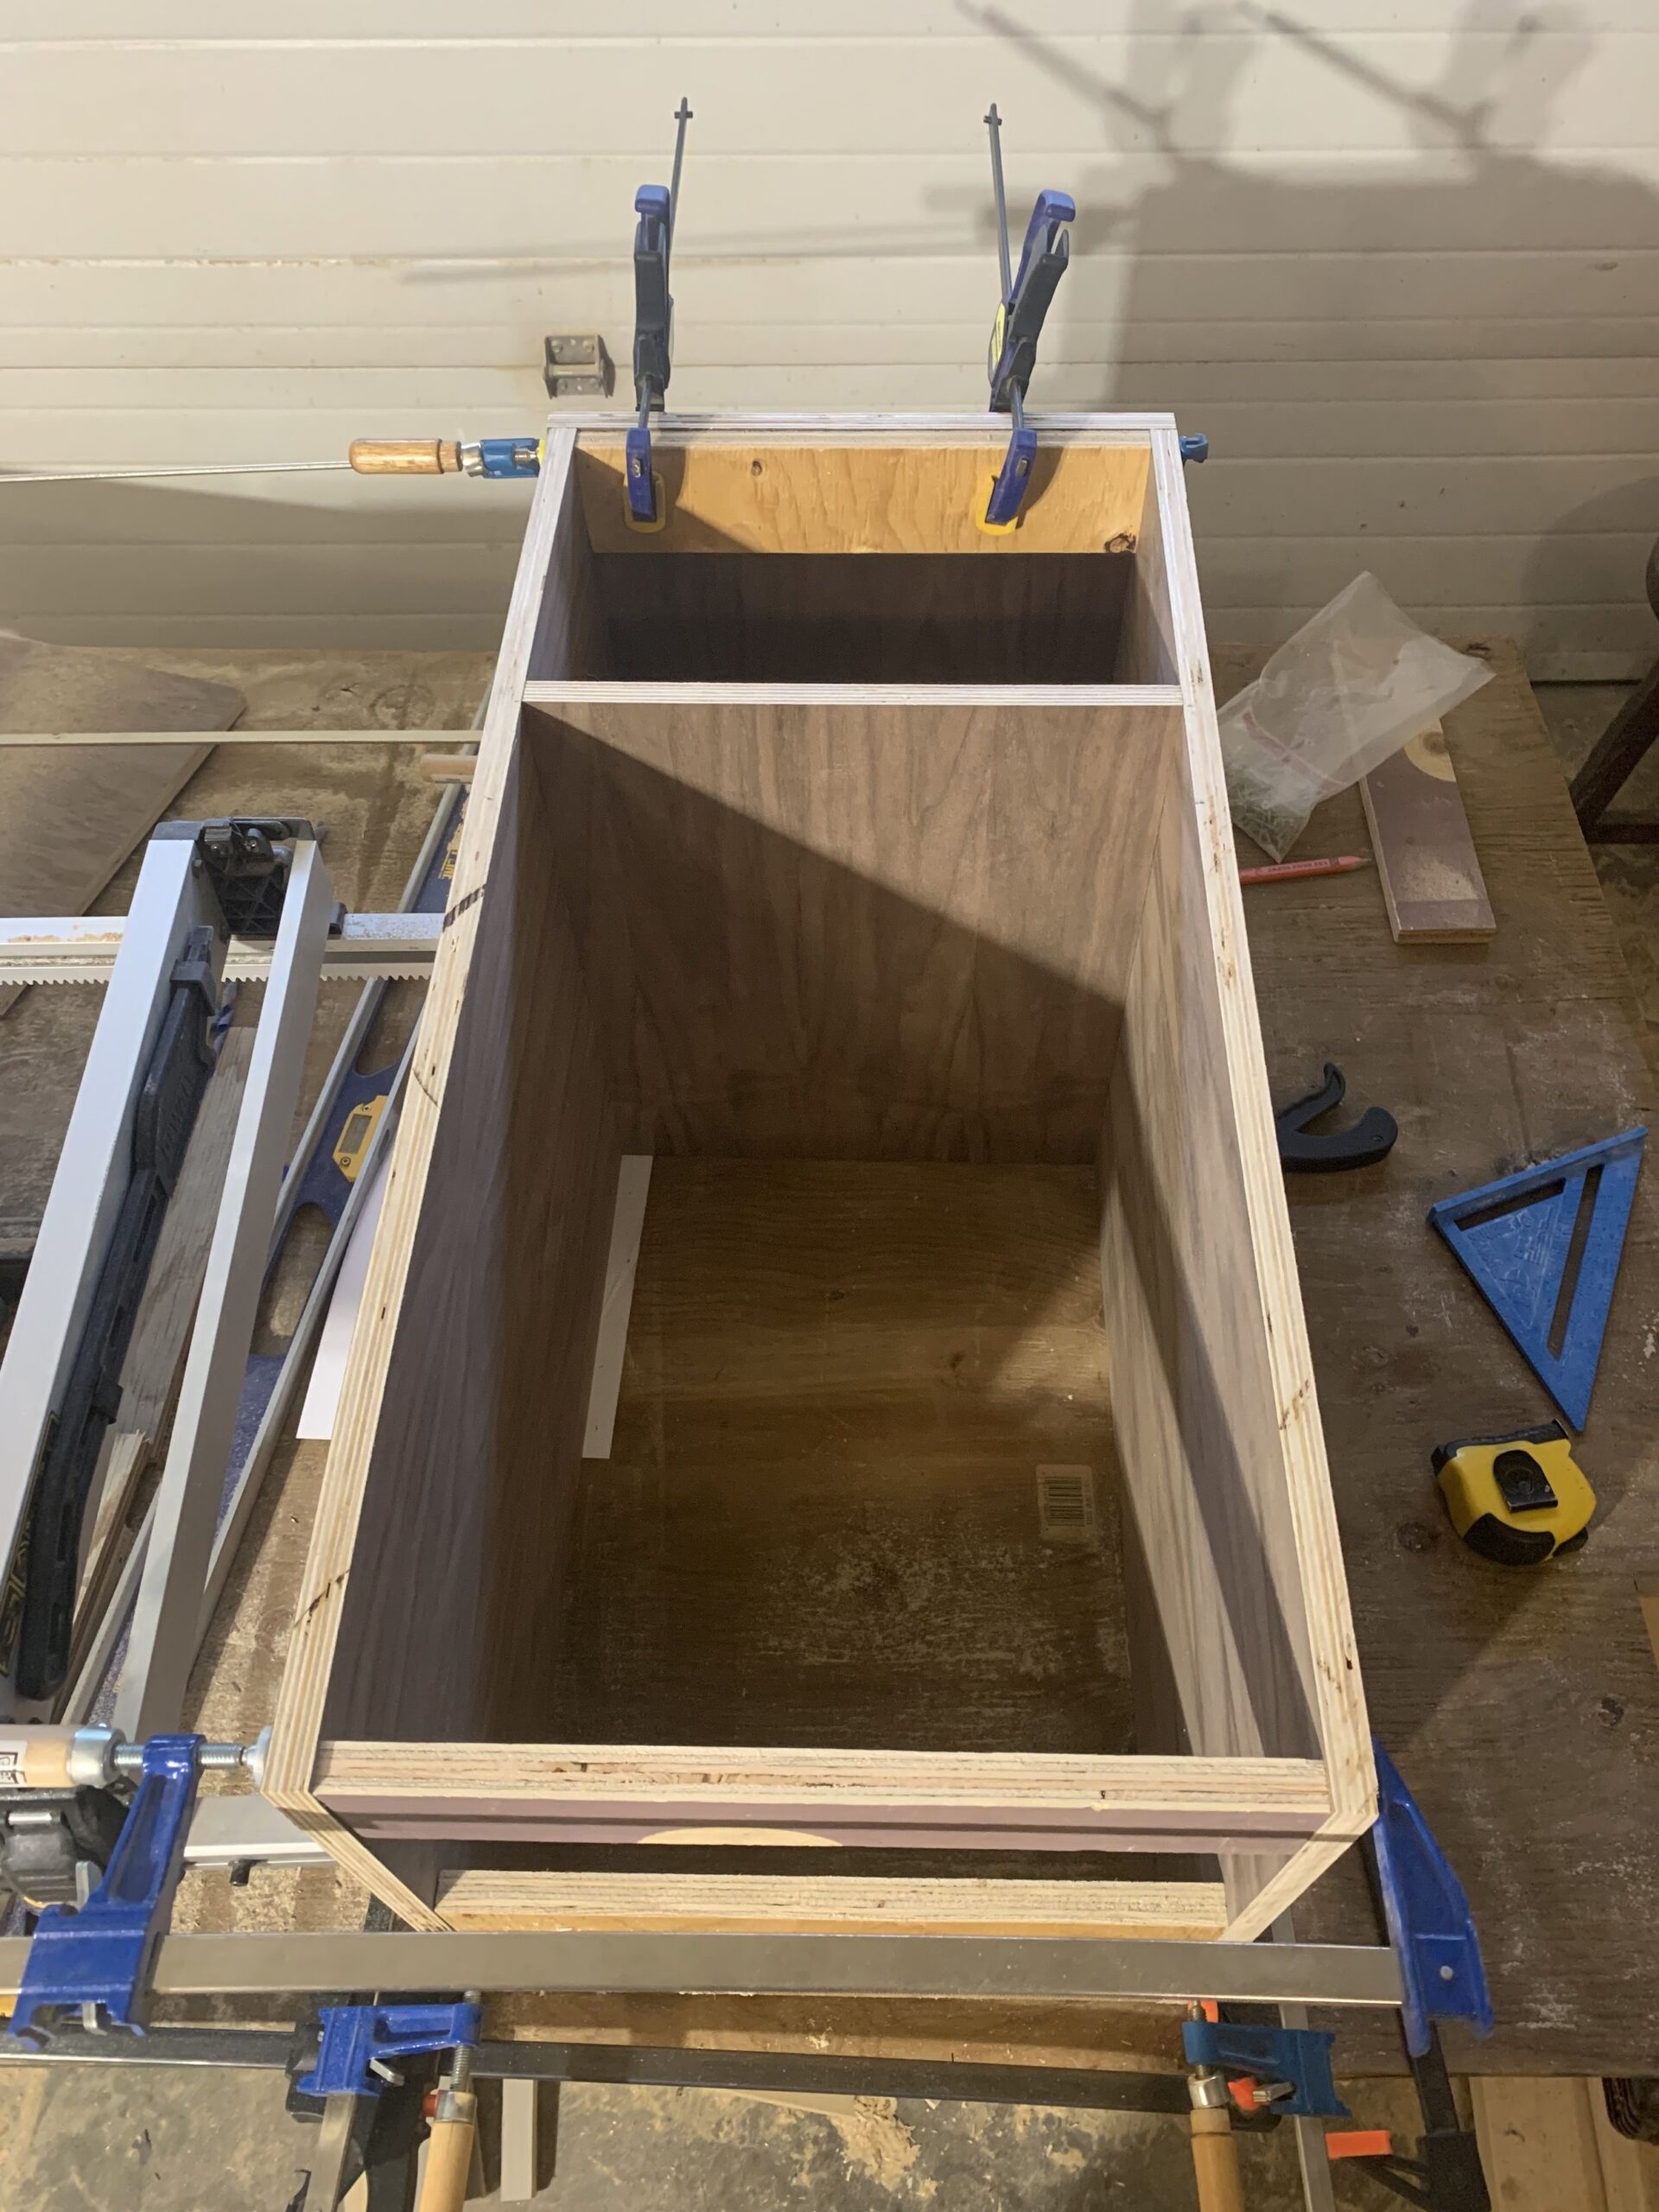
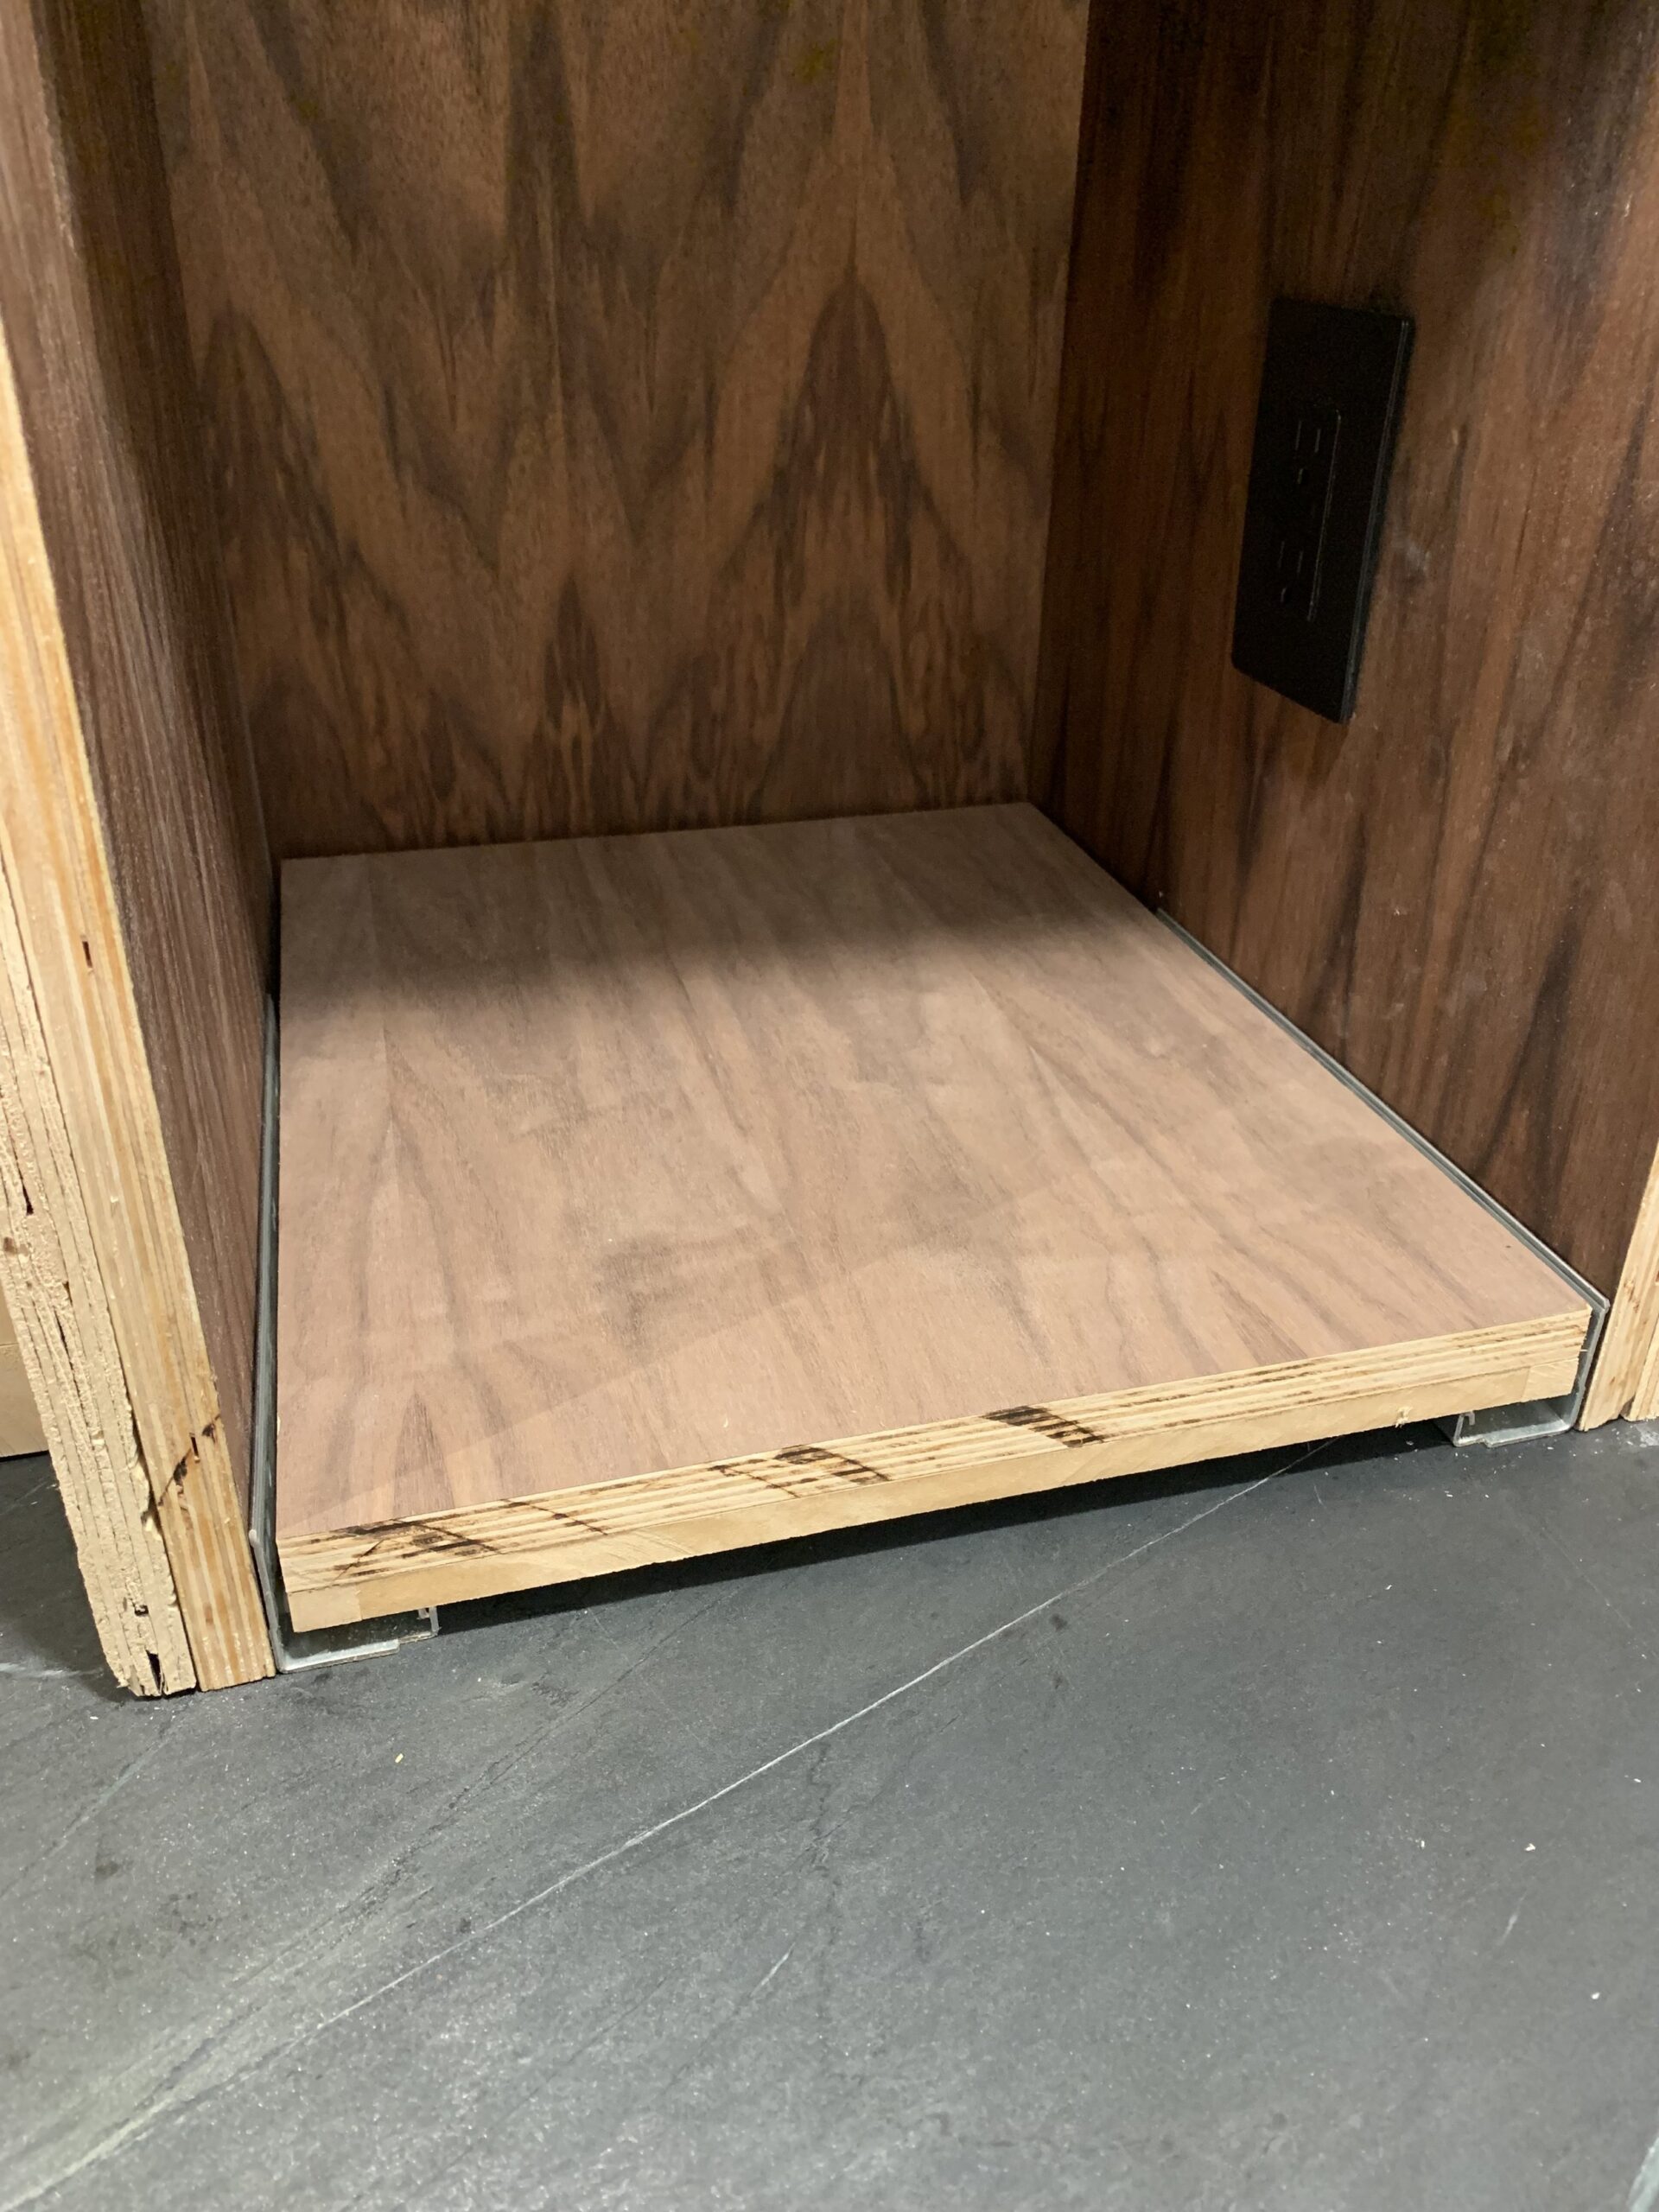
For the box itself, we decided on walnut as the island butcherblock was walnut and we wanted those to tie together. So we built an open-bottom box using walnut plywood, with a little shelf above for mugs. The box was treated with Rubio Monocoat (a one coat system that I used for the first time on this and it was AMAZING). That part was relatively easy, and then we just sat it on the counter and we built the rest of the framing around it.

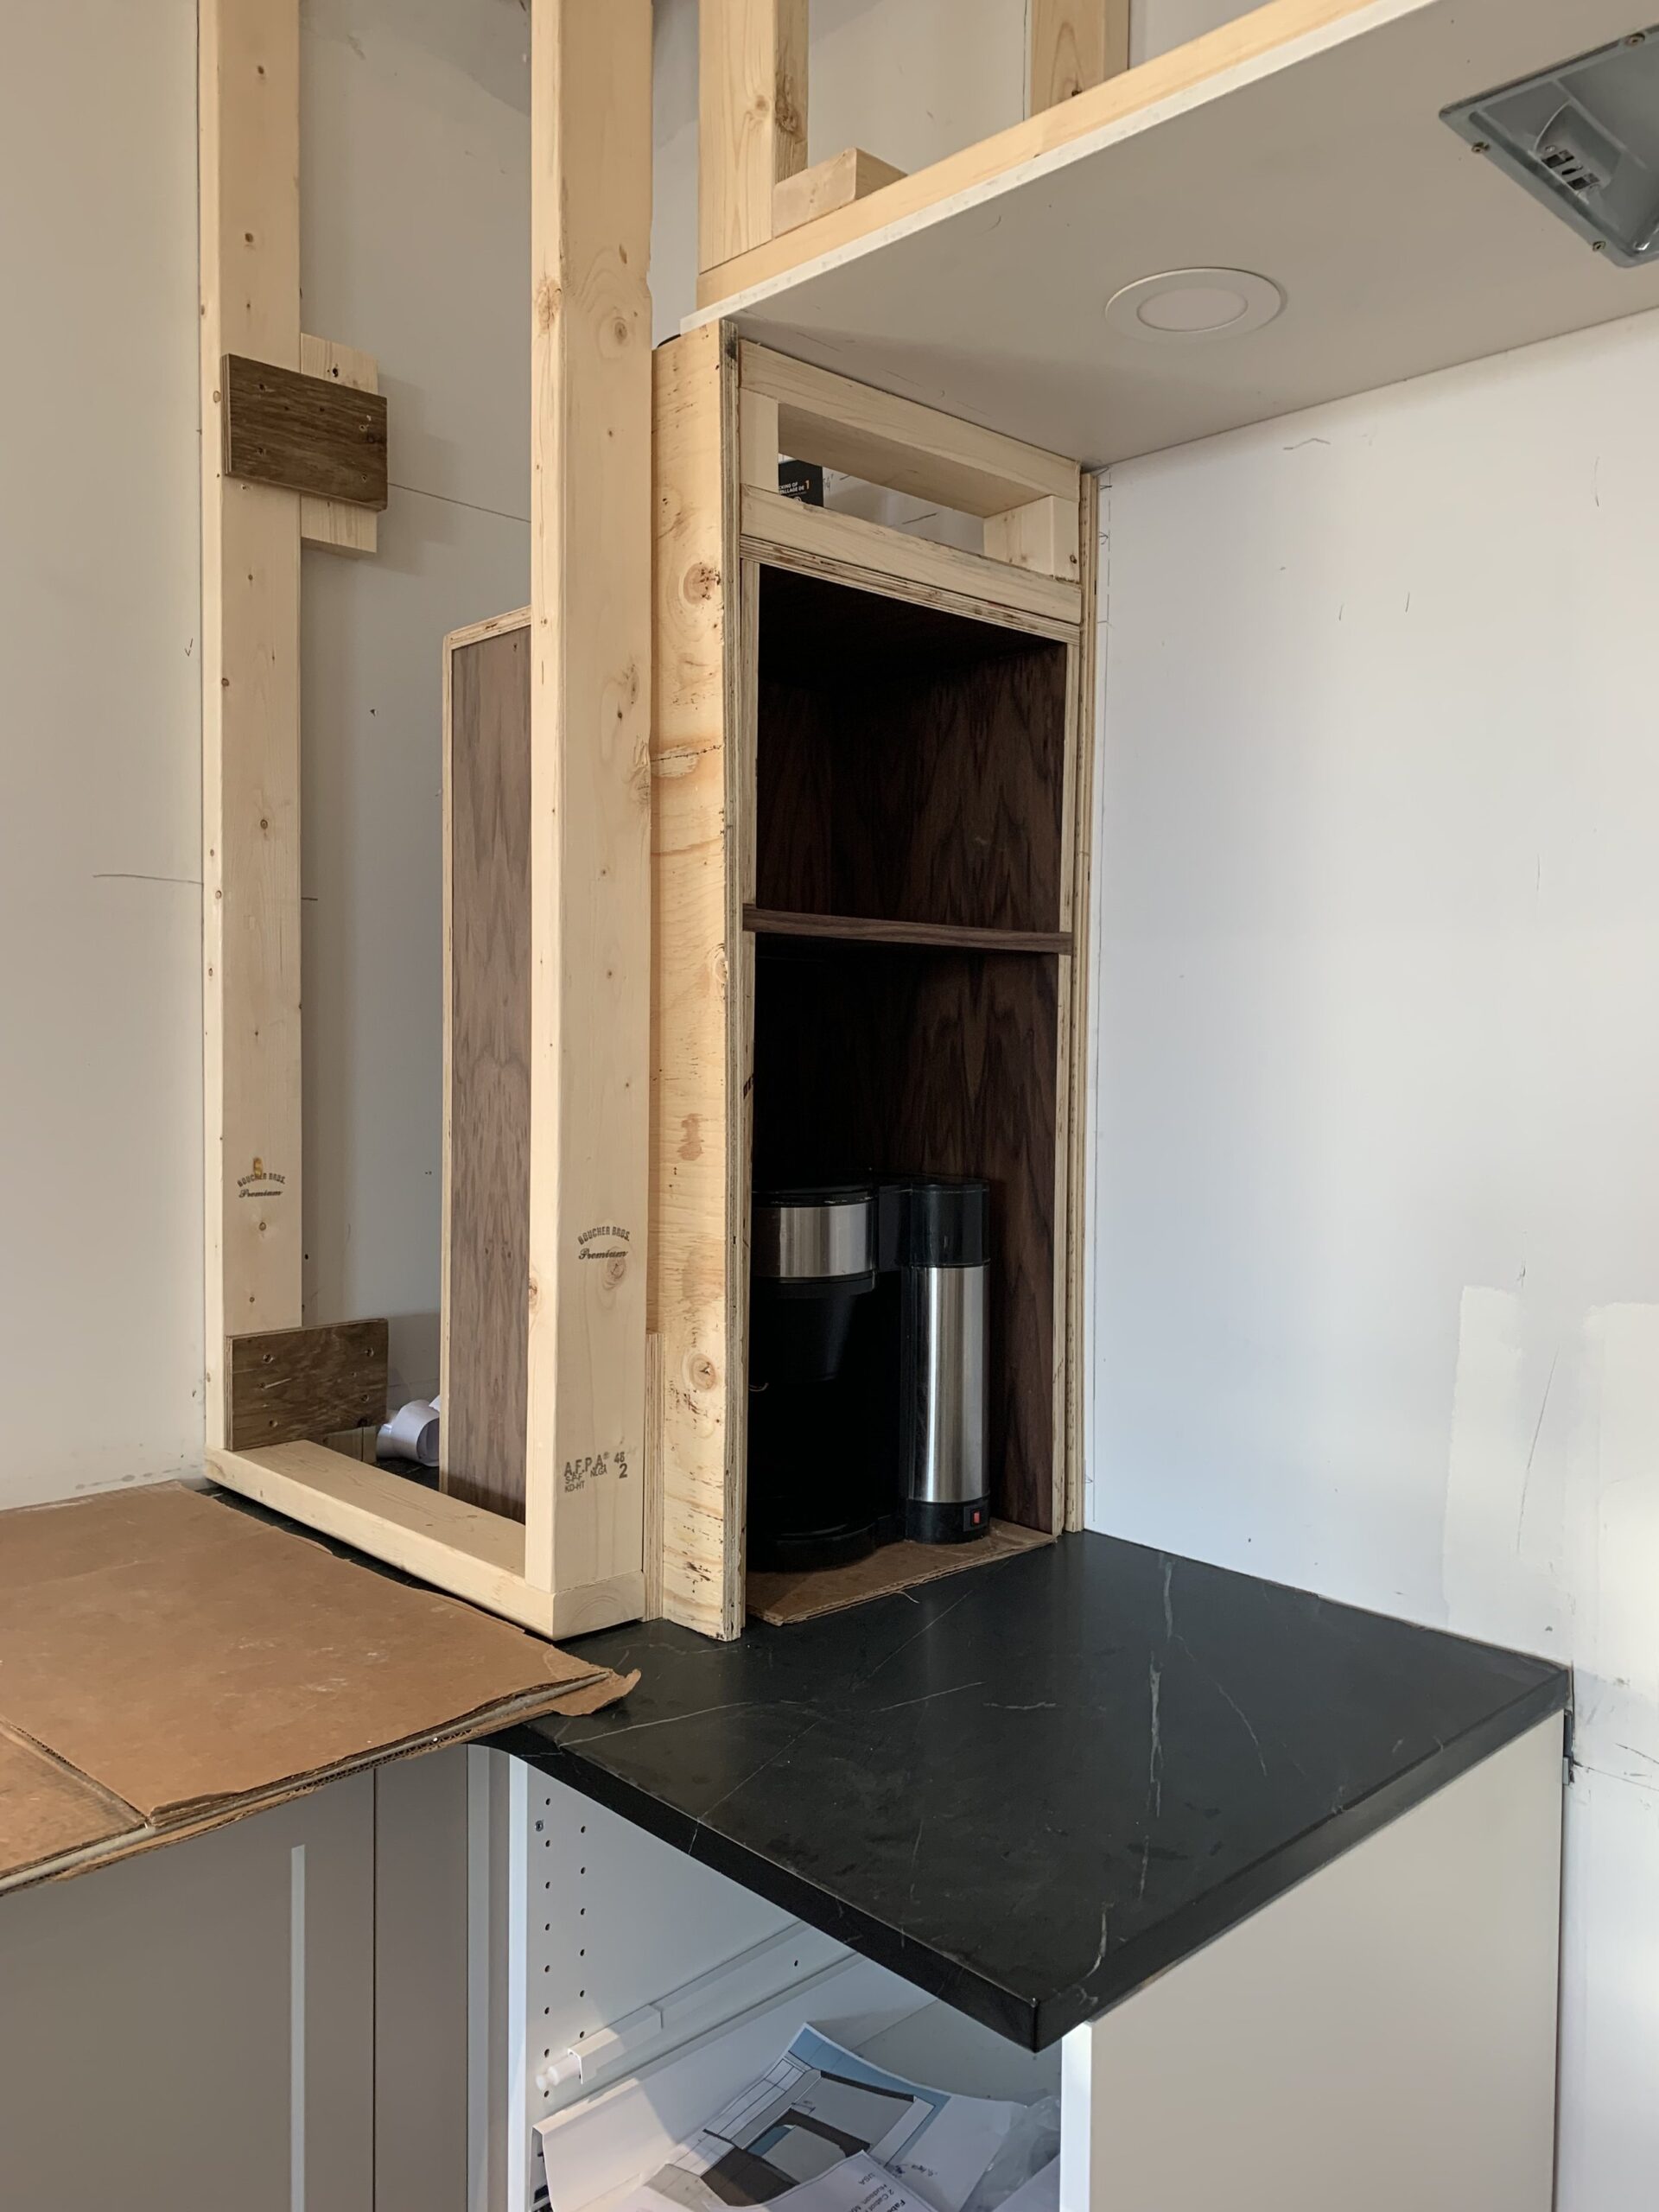
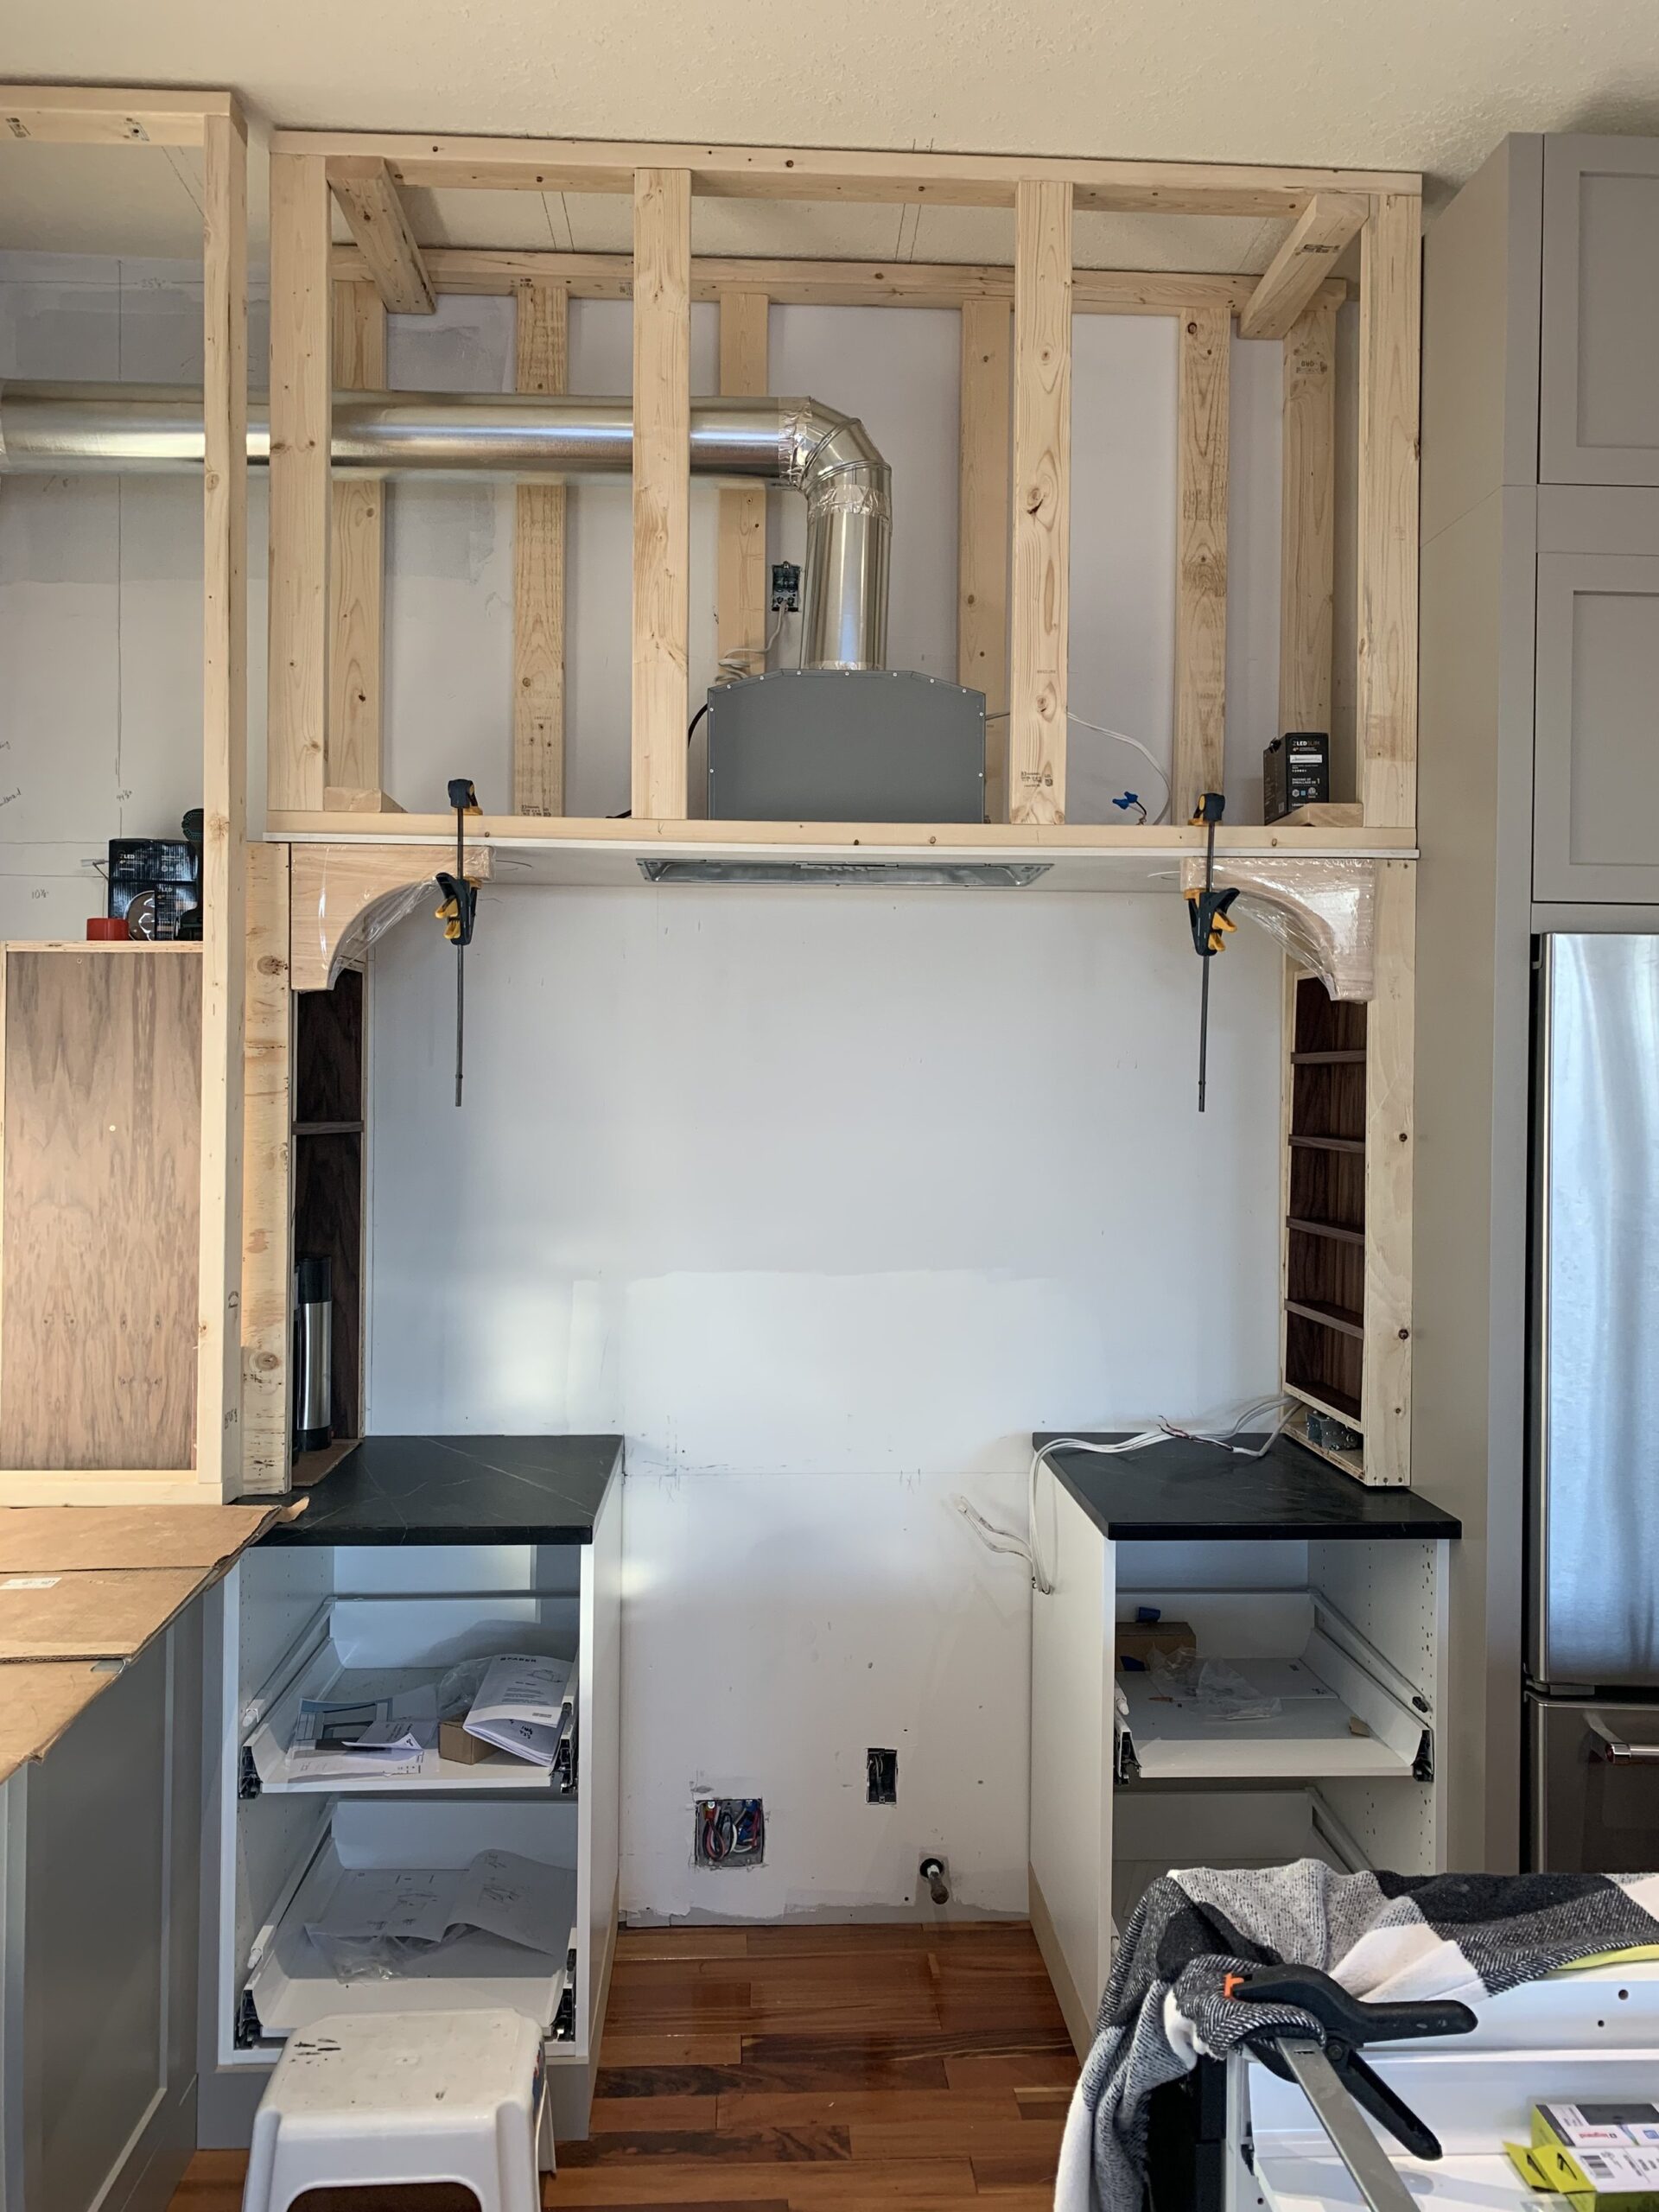
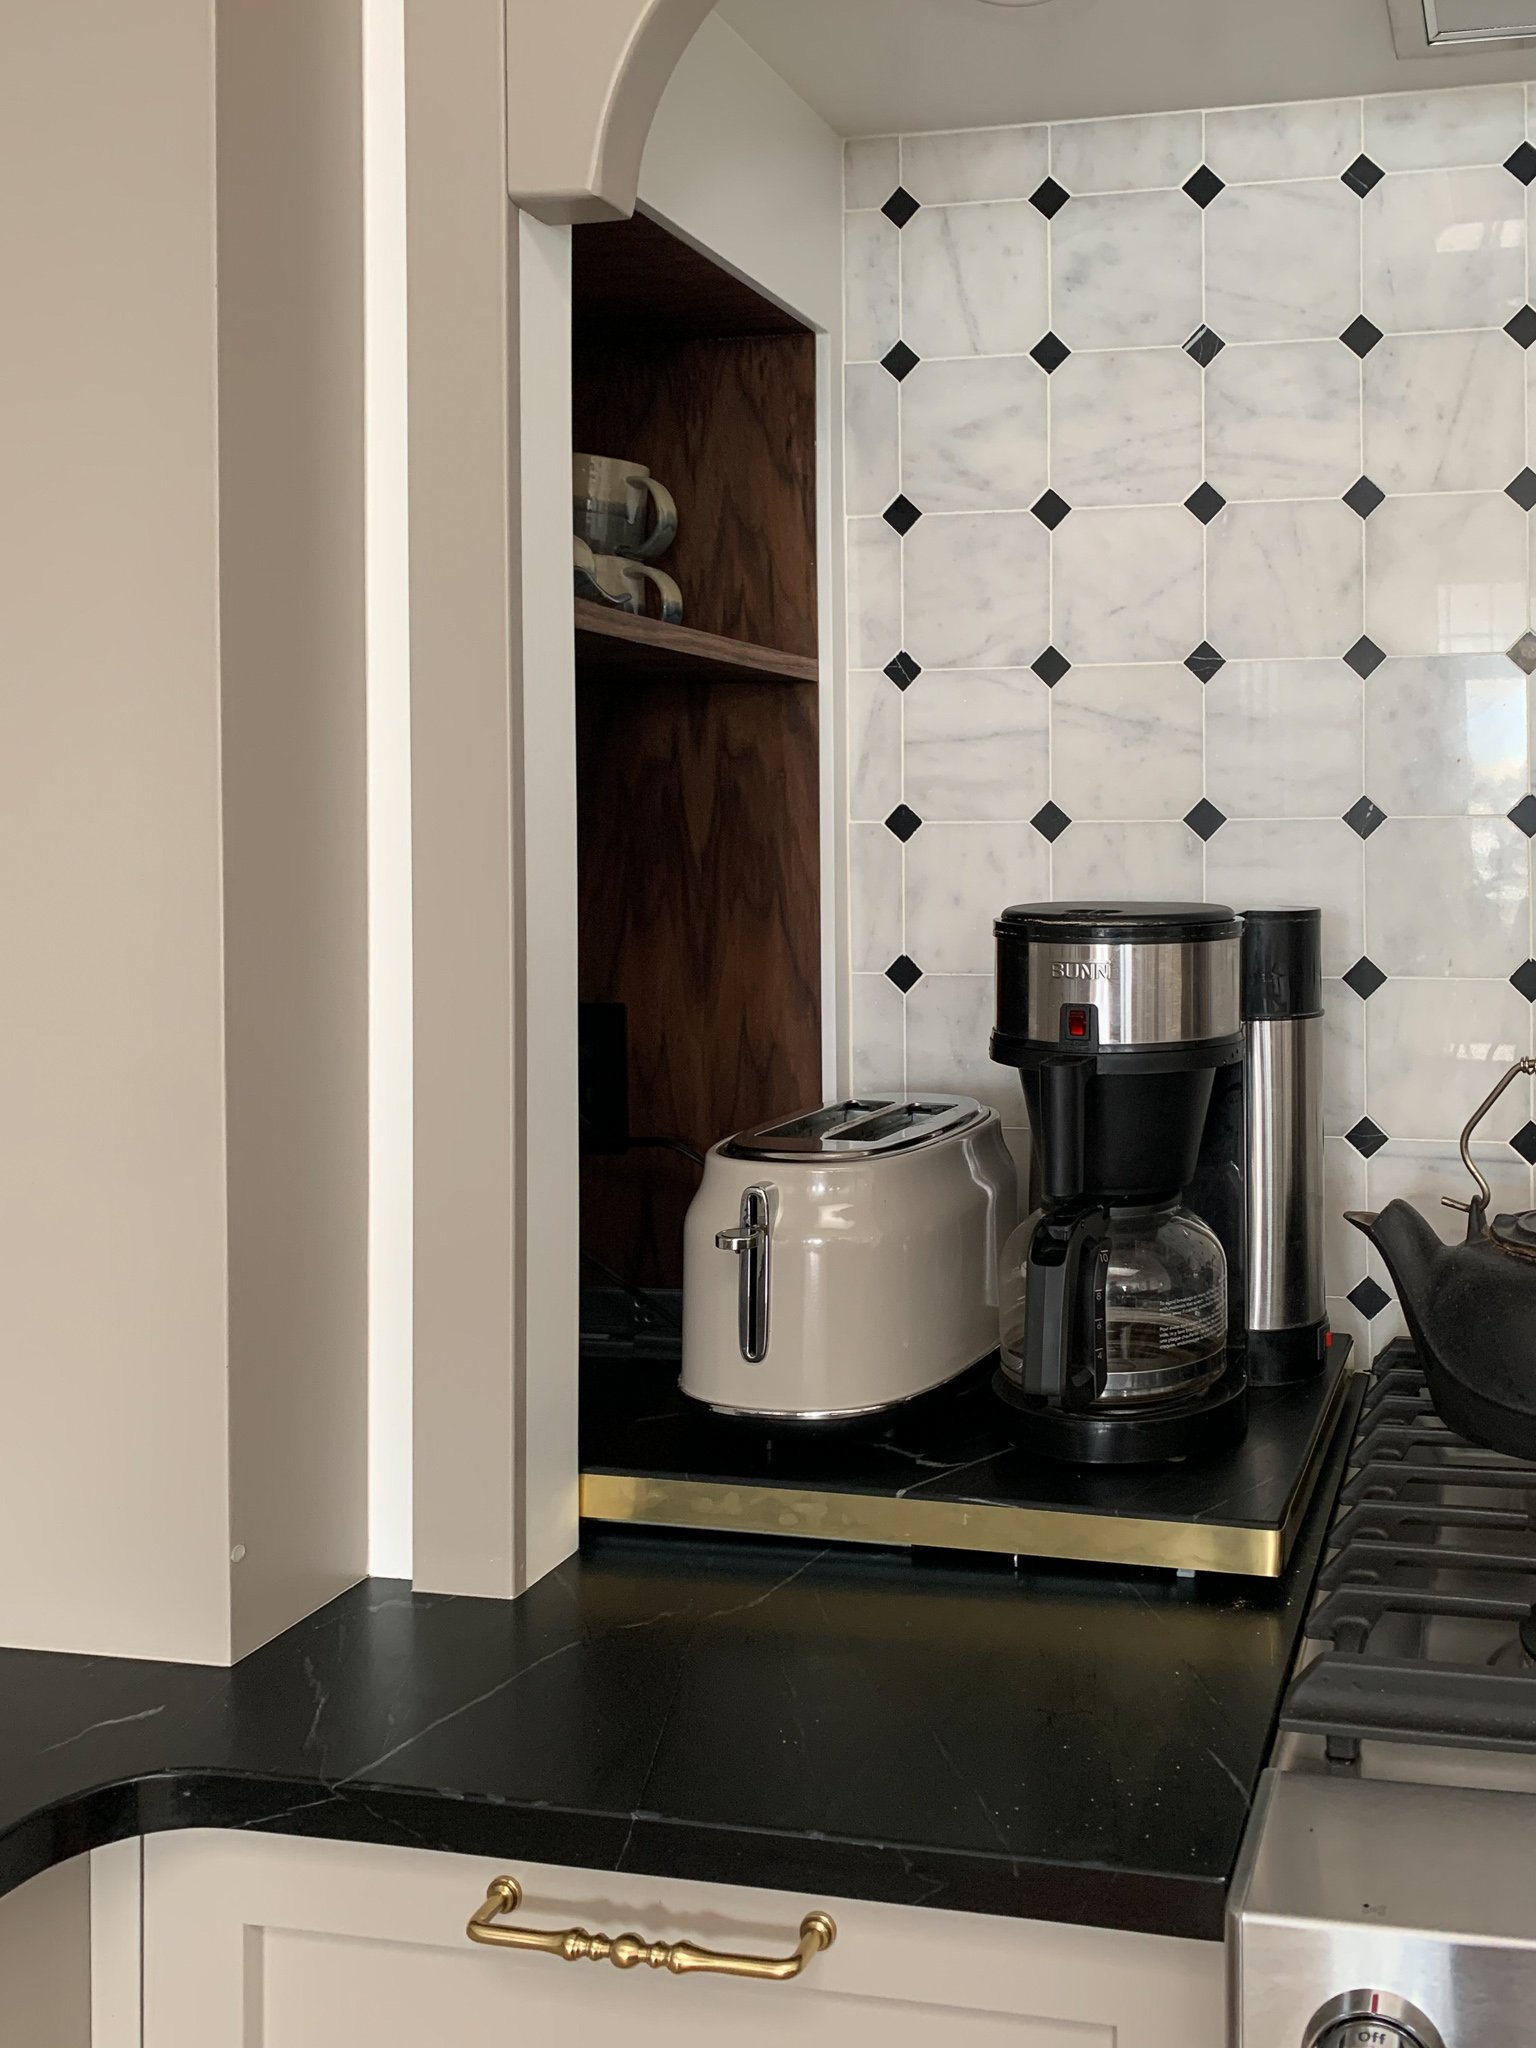
We could have just left it at that and pulled the coffee maker out of there every day sliding it on the counter, (at some point I decided the toaster should live there too so we sized it accordingly) but then I thought how much cooler would it be if it actually had a slide-out shelf?
I did a little research and decided I wanted some heavy-duty drawer slides that didn’t show on the sides when the shelf was pulled out (so they mount on the bottom) and I grabbed these from Home Depot.
Wood Shelf – A Fail!
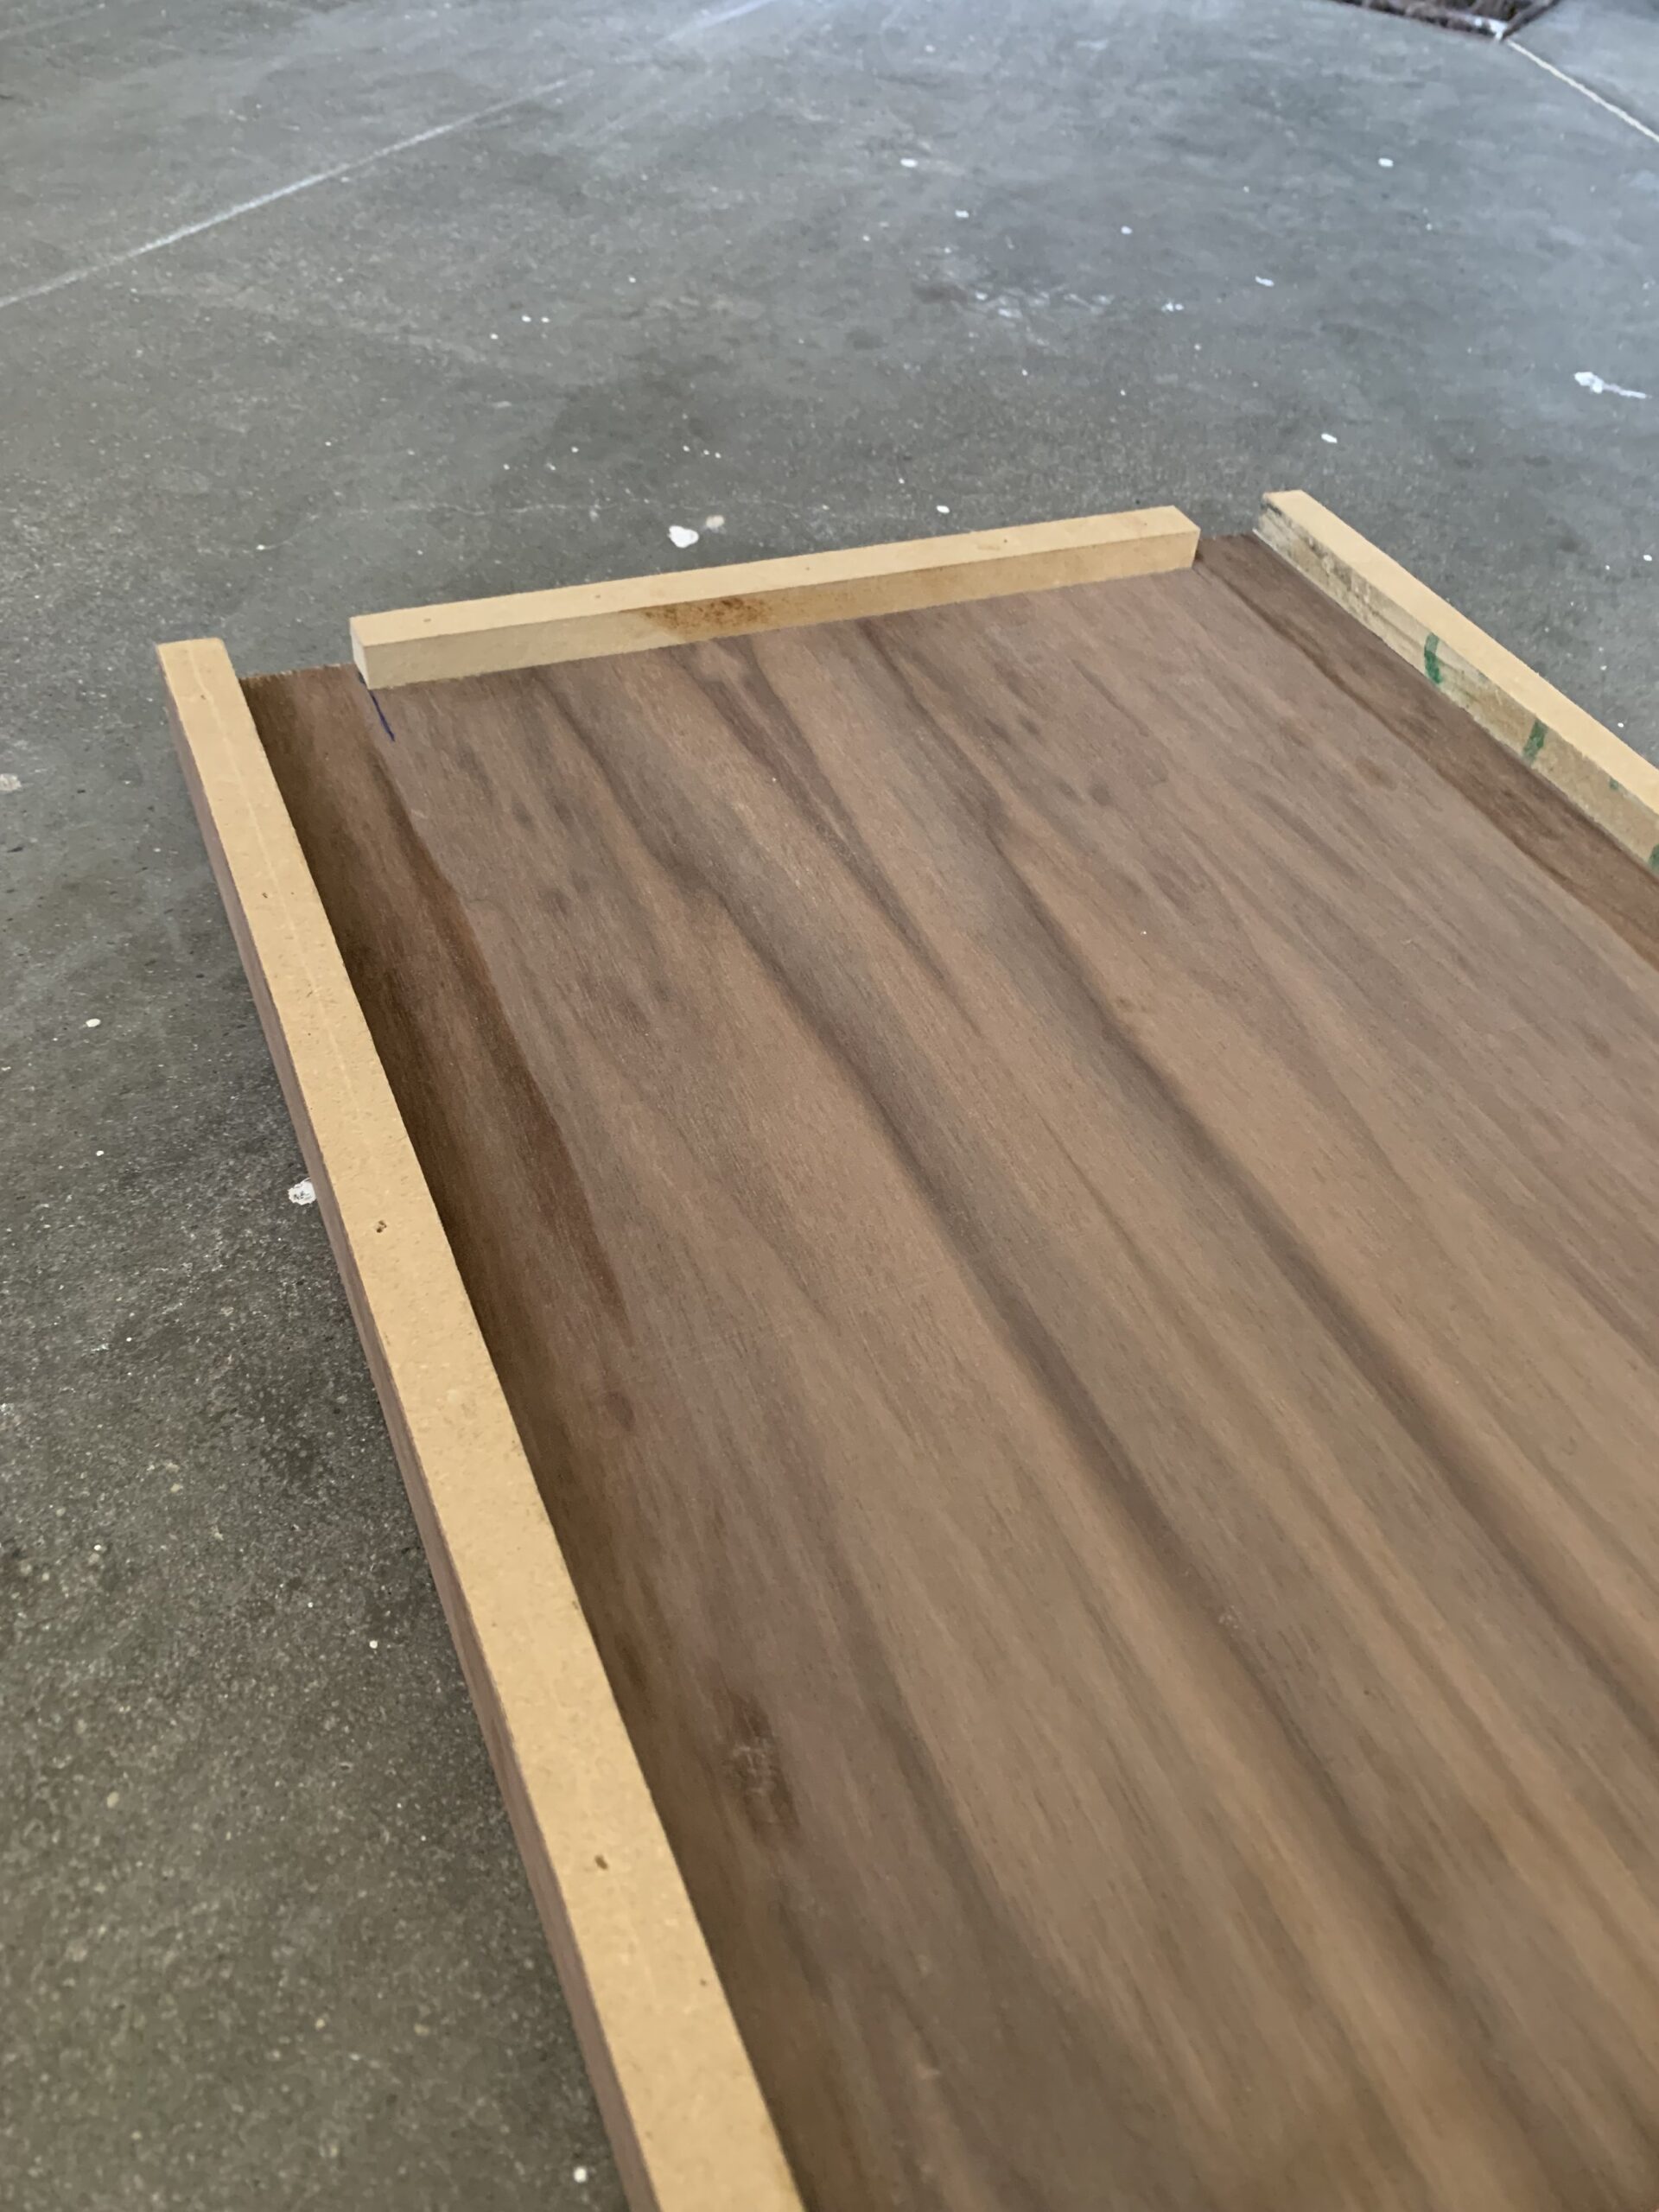
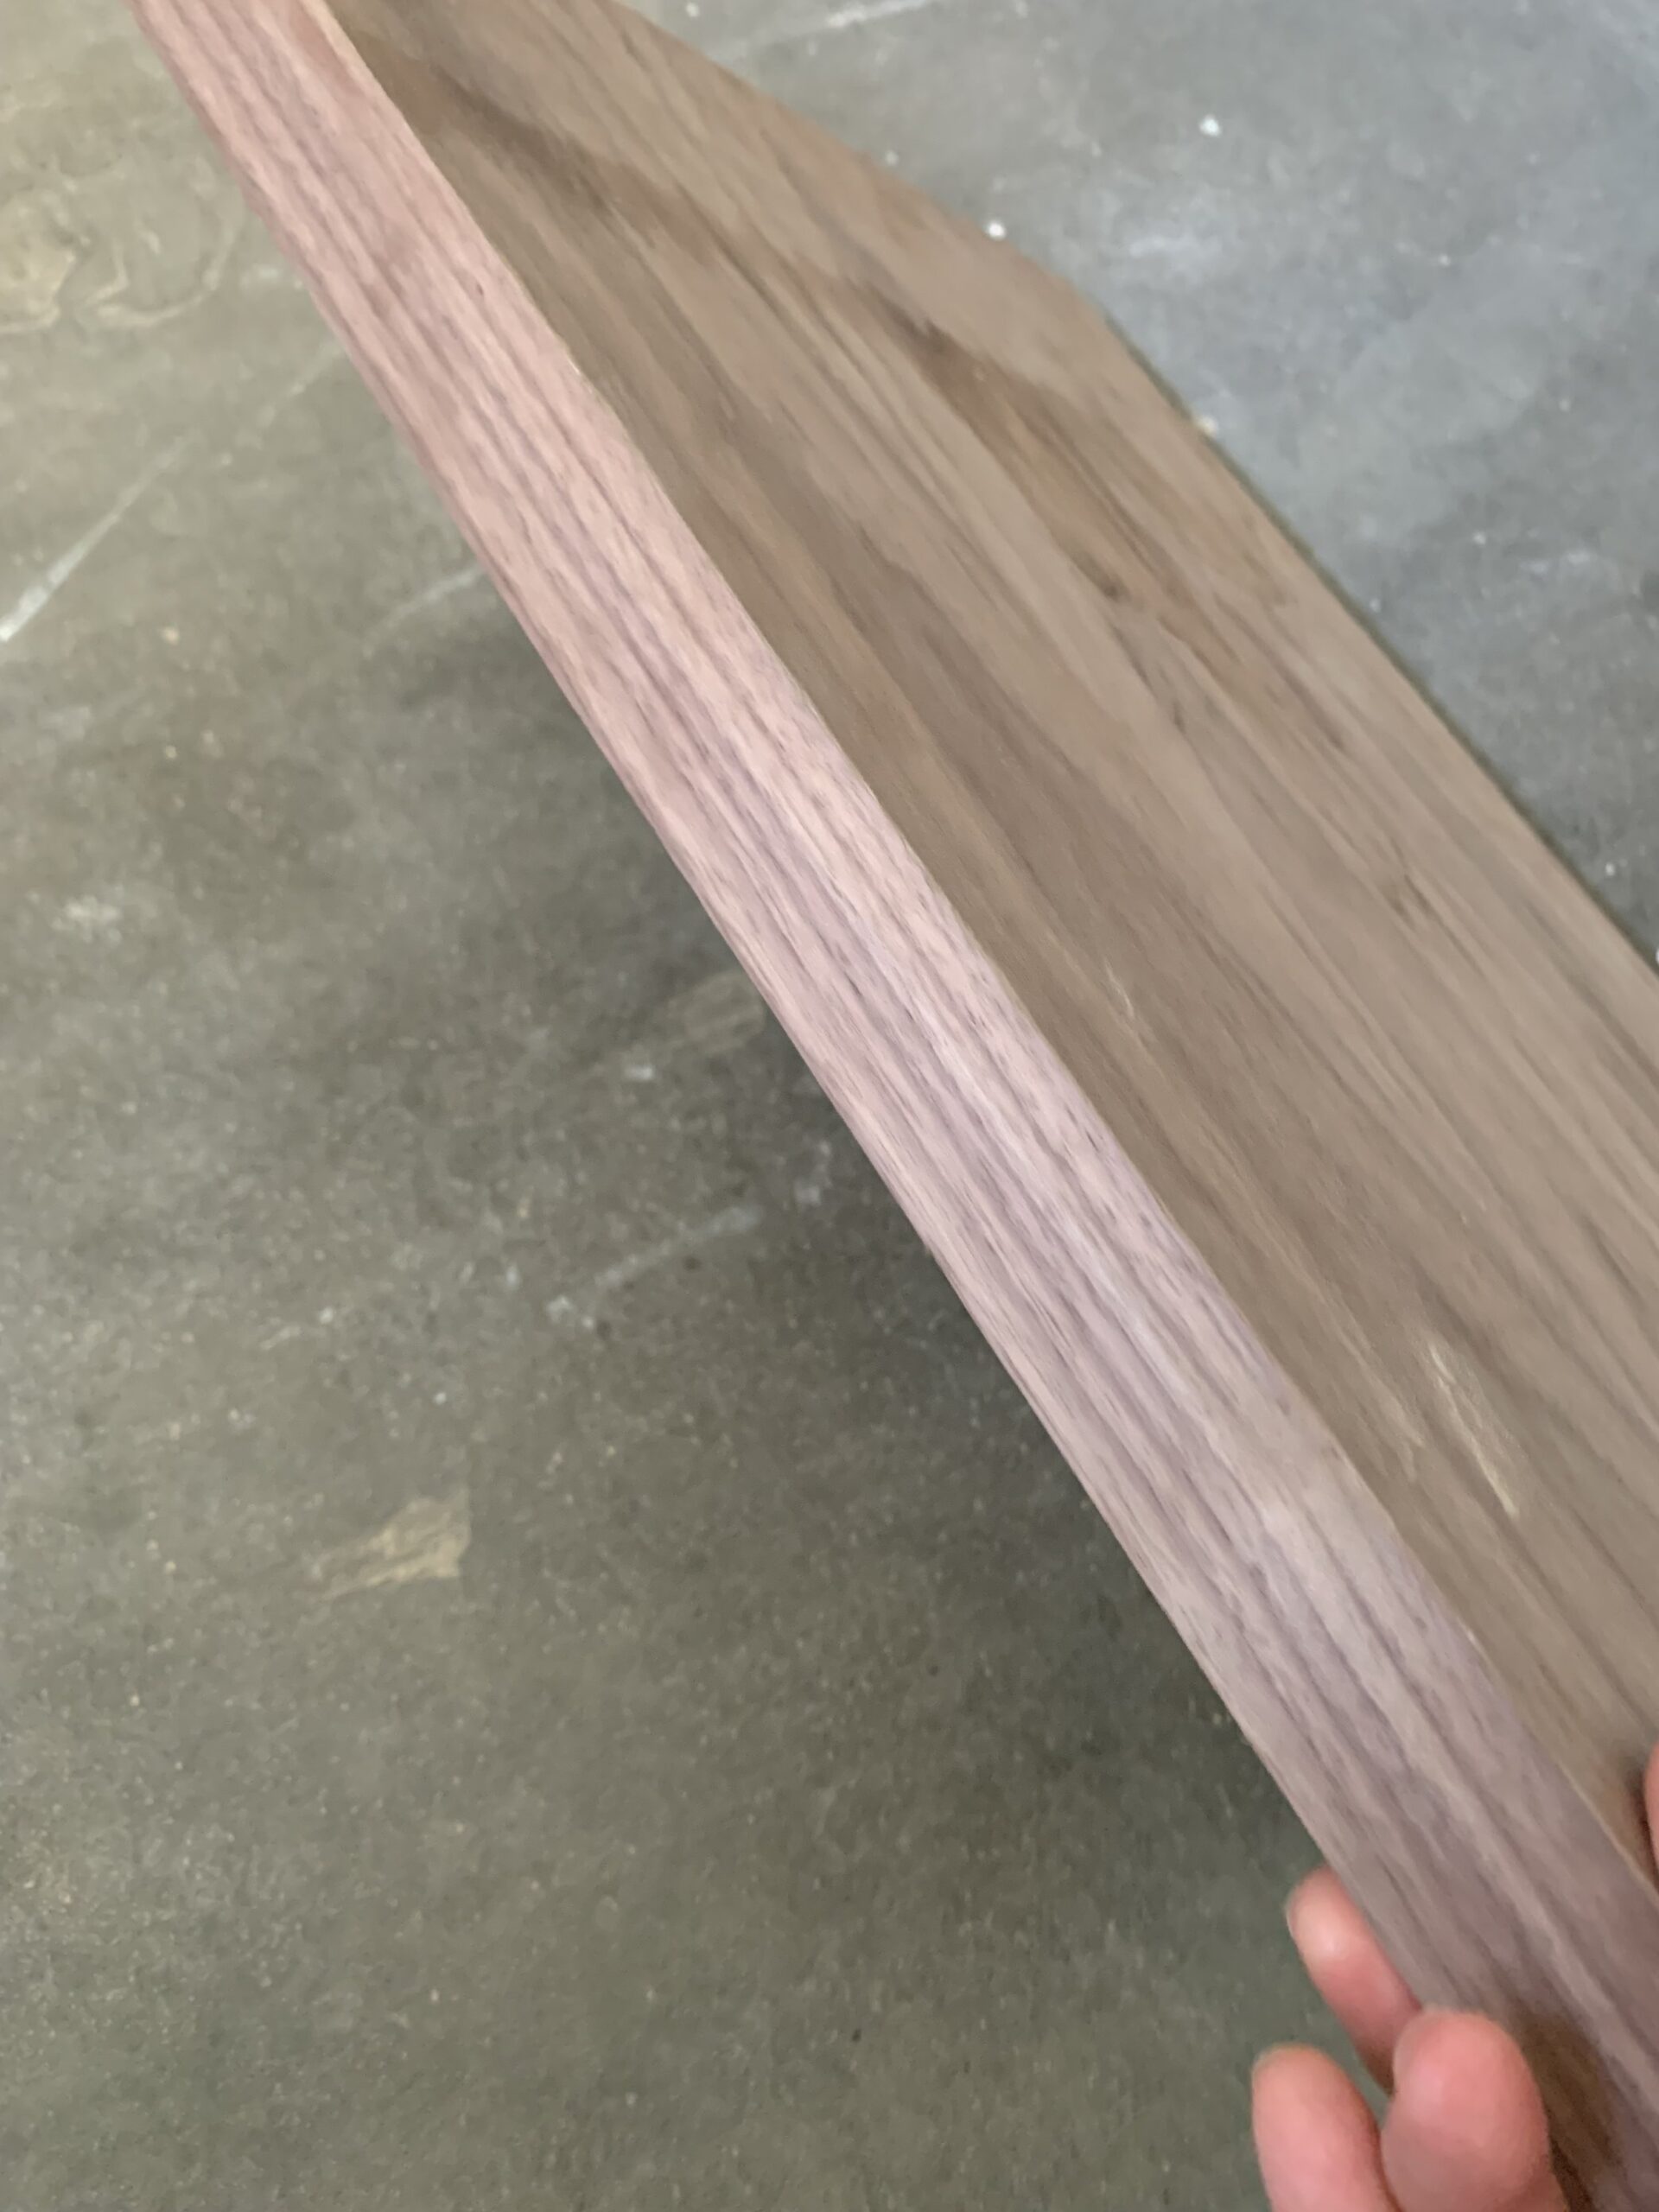
Ok ok, it wasn’t exactly a fail but we didn’t end up using the first shelf I made. I made a shelf out of walnut to match the cubby but eventually realized that if the shelf was pulled out, it would be right next to my stove and didn’t meet the required clearances for fire code. So if I was going to have a shelf, it needed to be non-combustible. (If you are following this and want to build a shelf out of wood or a similar material because you aren’t next to a stove like me, all I did for this was to build the pull-out according to the dimensions on the directions. I glued strips of MDF to the bottom of the shelf and covered the exposed edges of the plywood and MDF using a thick walnut veneer banding to make it look like a solid shelf.)

Round 2 – Using a Stone Remnant for the Shelf!
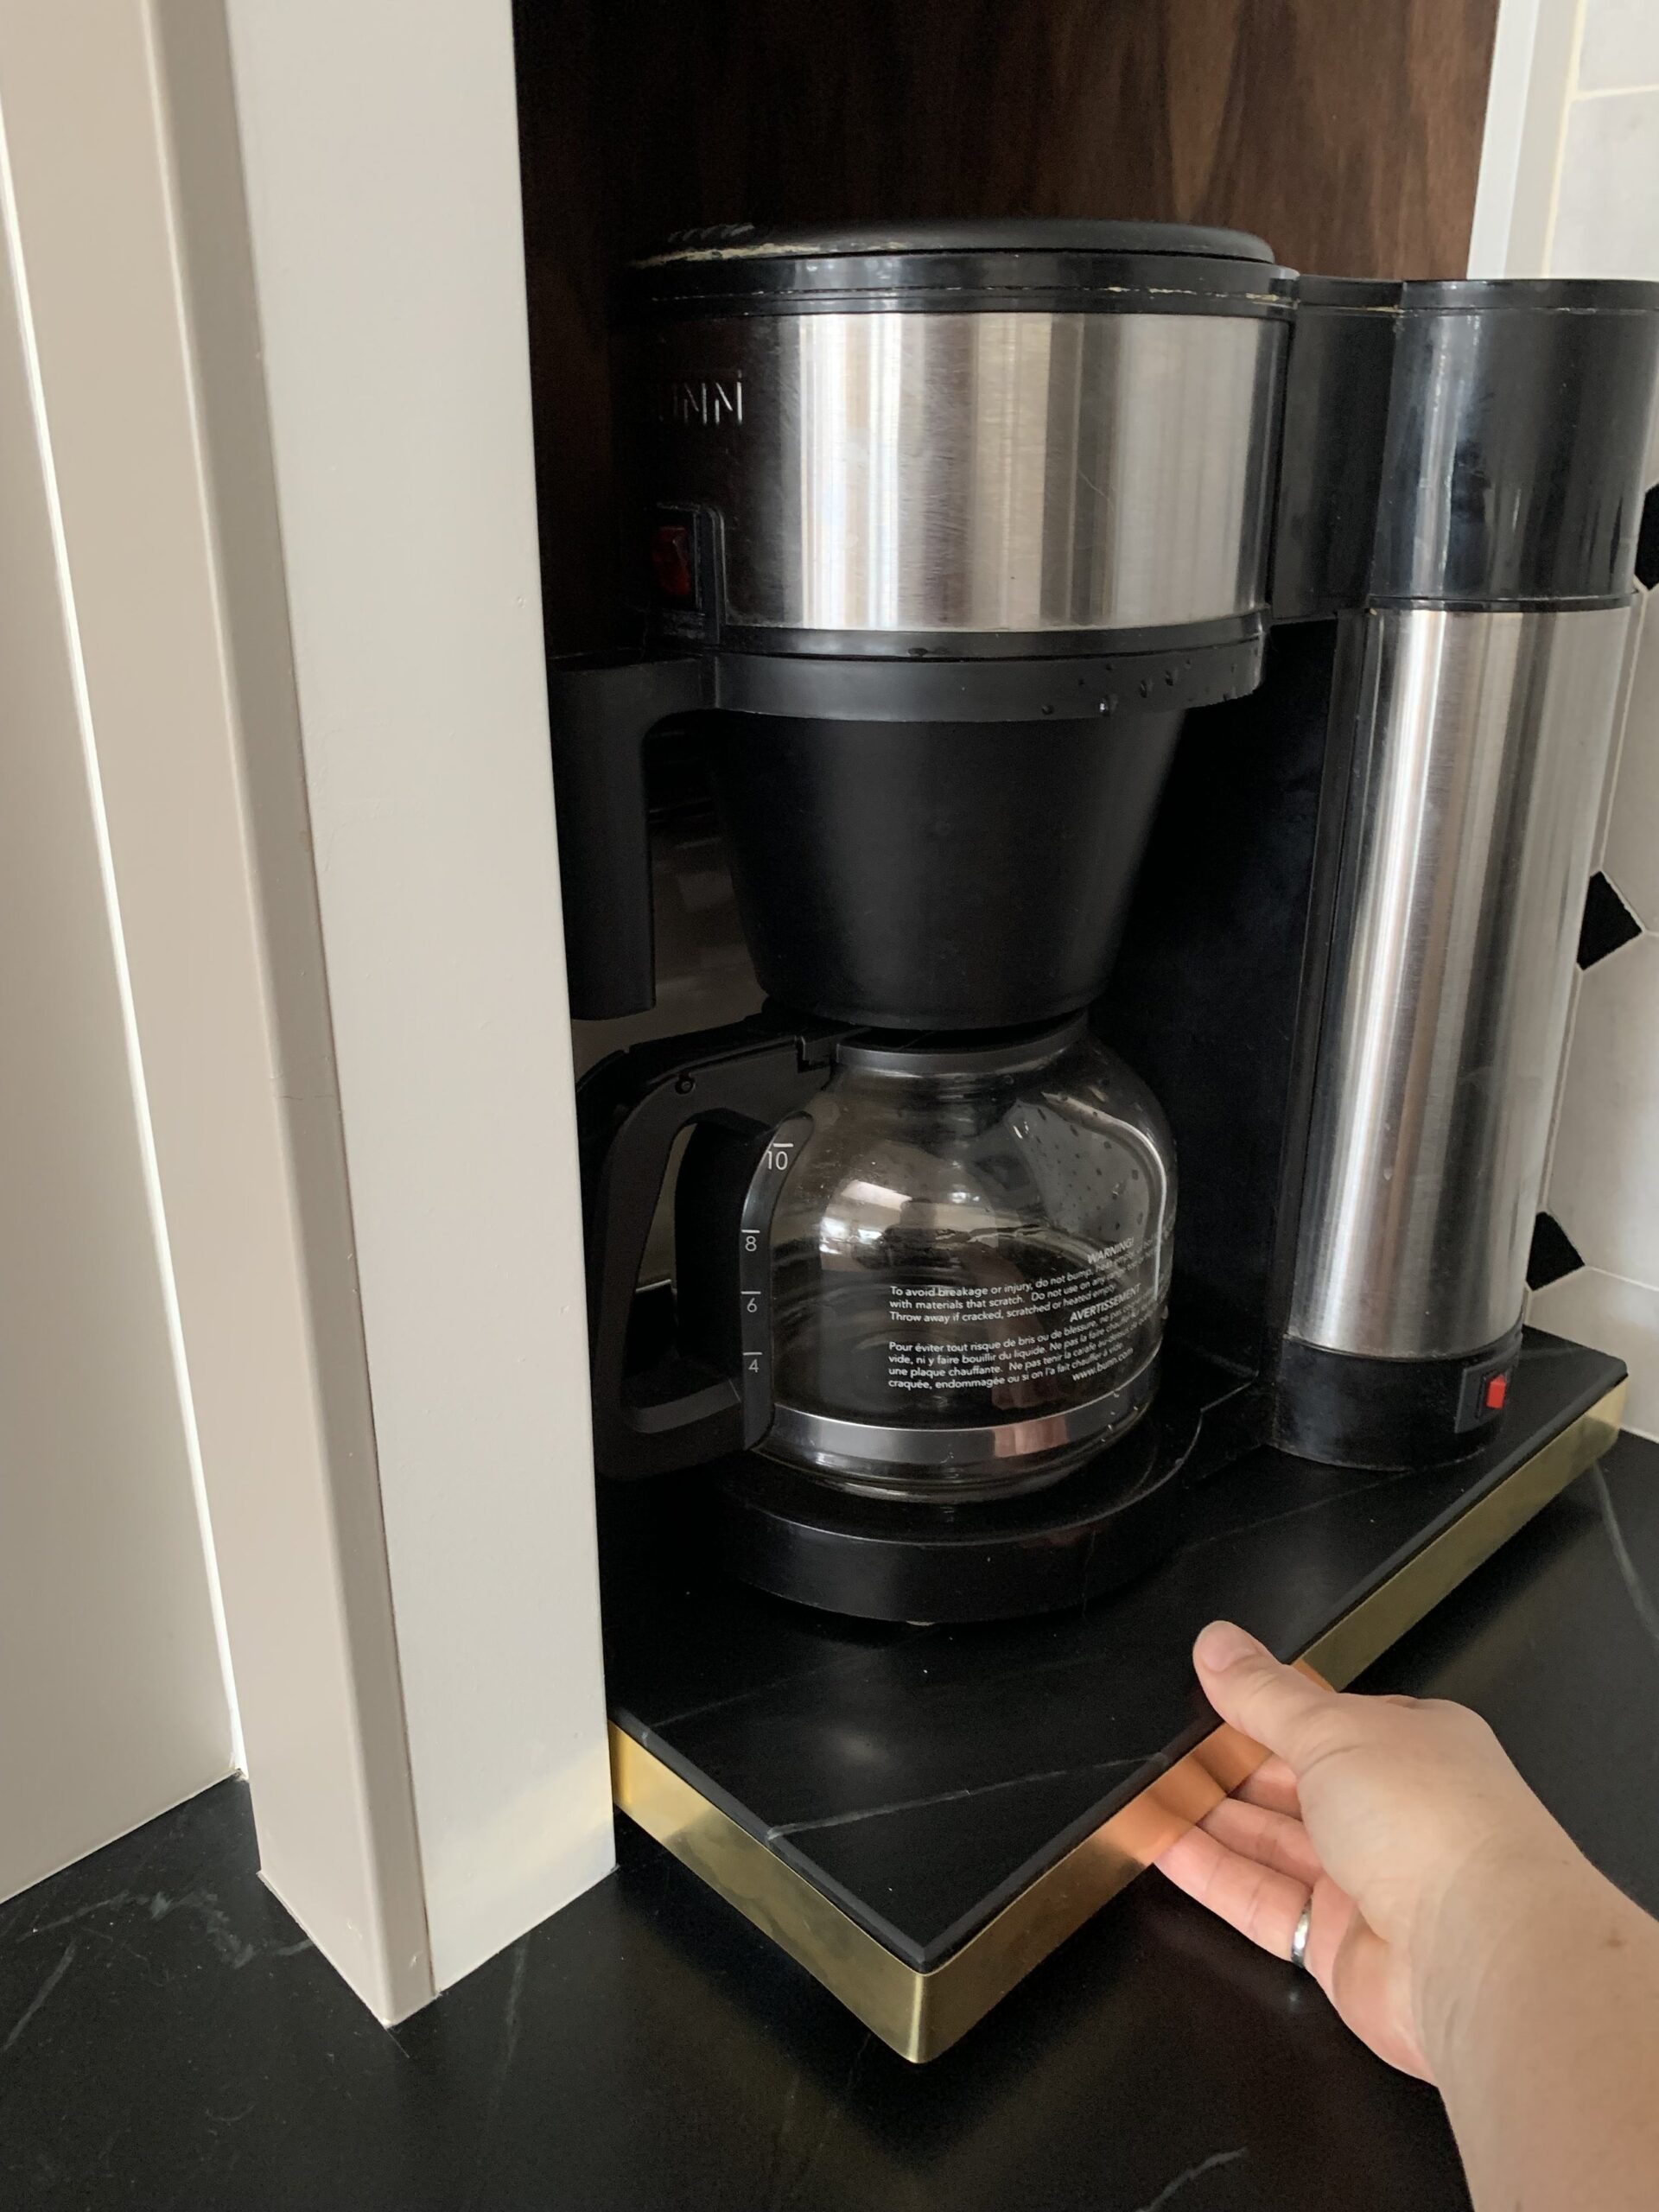
So how was I going to make a new shelf that was non-combustible? I had two ideas for this – the first was to build the shelf out of marble. I found a marble cutting board that was big enough and actually ordered it, (This one) but I wasn’t crazy about the idea of it being bright white and potentially drawing attention to the inside of my cubby which was sort of dark which would also draw attention to the ugly old coffee maker (clearly I have a love-hate relationship to that thing). It was at about this time when my countertop manufacturer was working on my stone backsplash, so I phoned them up and asked if they could also cut me a piece for my sliding tray out of the countertop material (soapstone). Since I’d already paid for the stone it was just a little shop time to get this done and they also milled the stone down to ¾” thick, so it wouldn’t be quite as heavy.
When they delivered the stone I got to work installing it and this is what I did:
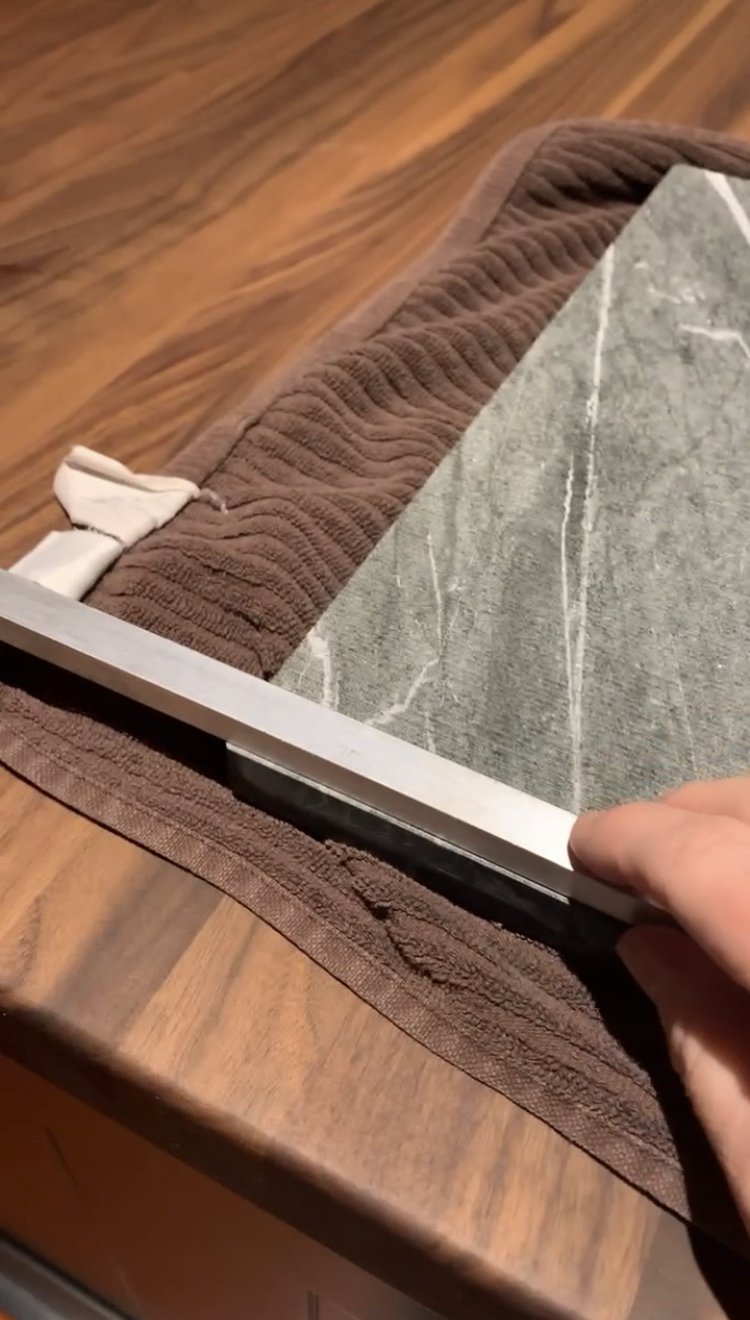
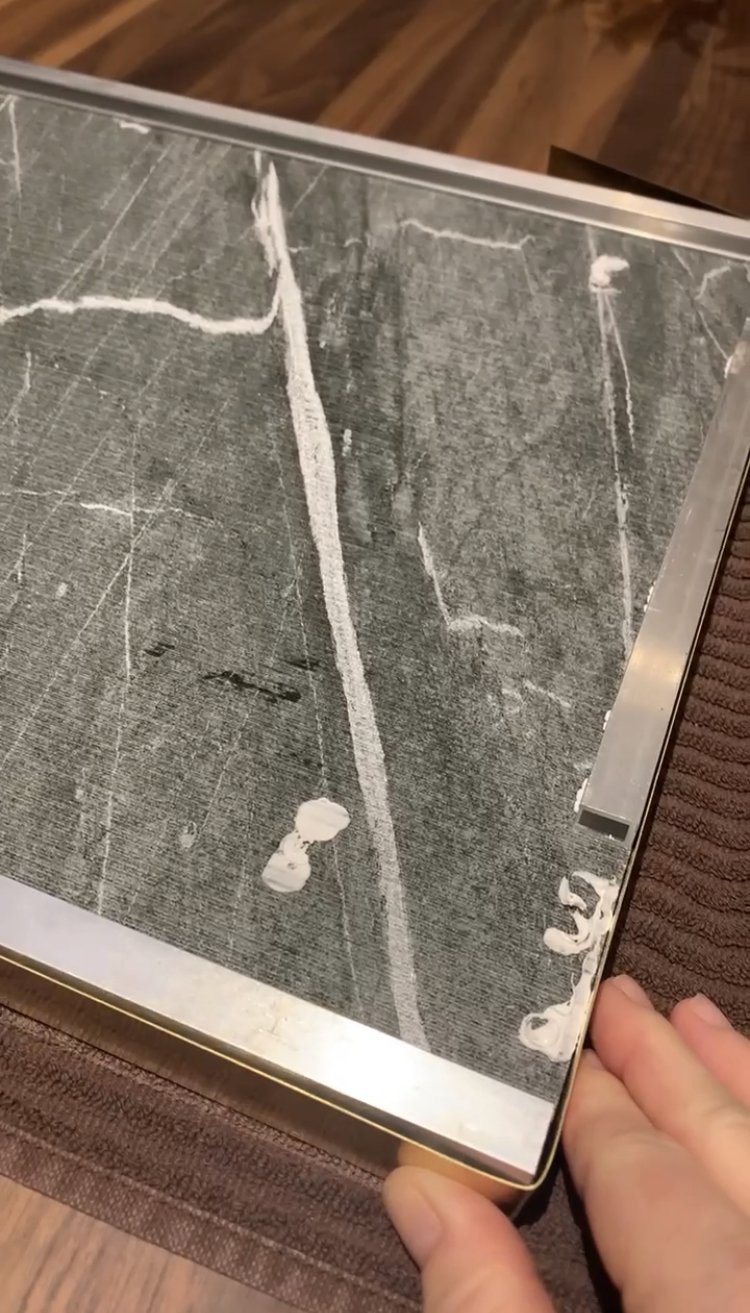
I bought these ½” aluminum channels at Home Depot and cut them to fit the side of the shelf using my mitre saw. These are like the “rails” that keep the shelf from sliding to the left or the right as you pull the shelf out. I used silicone to glue them to the bottom of the stone.
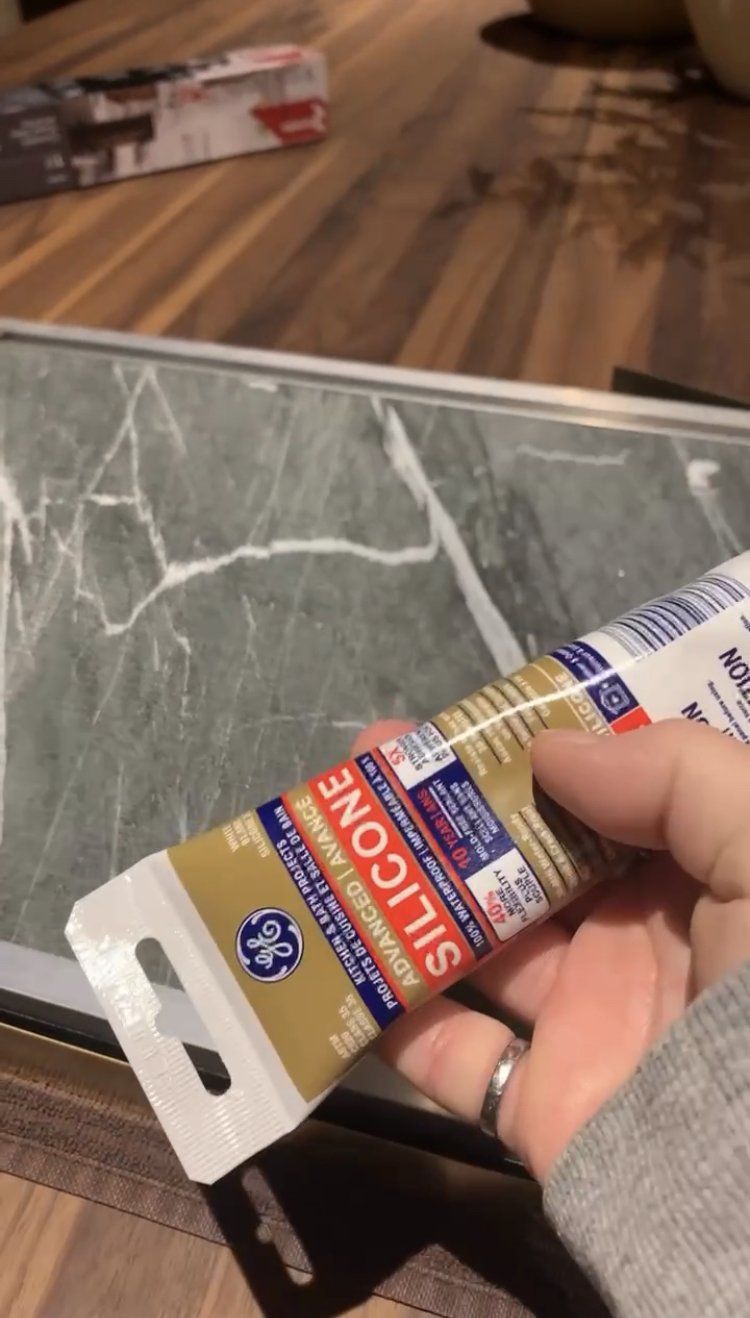
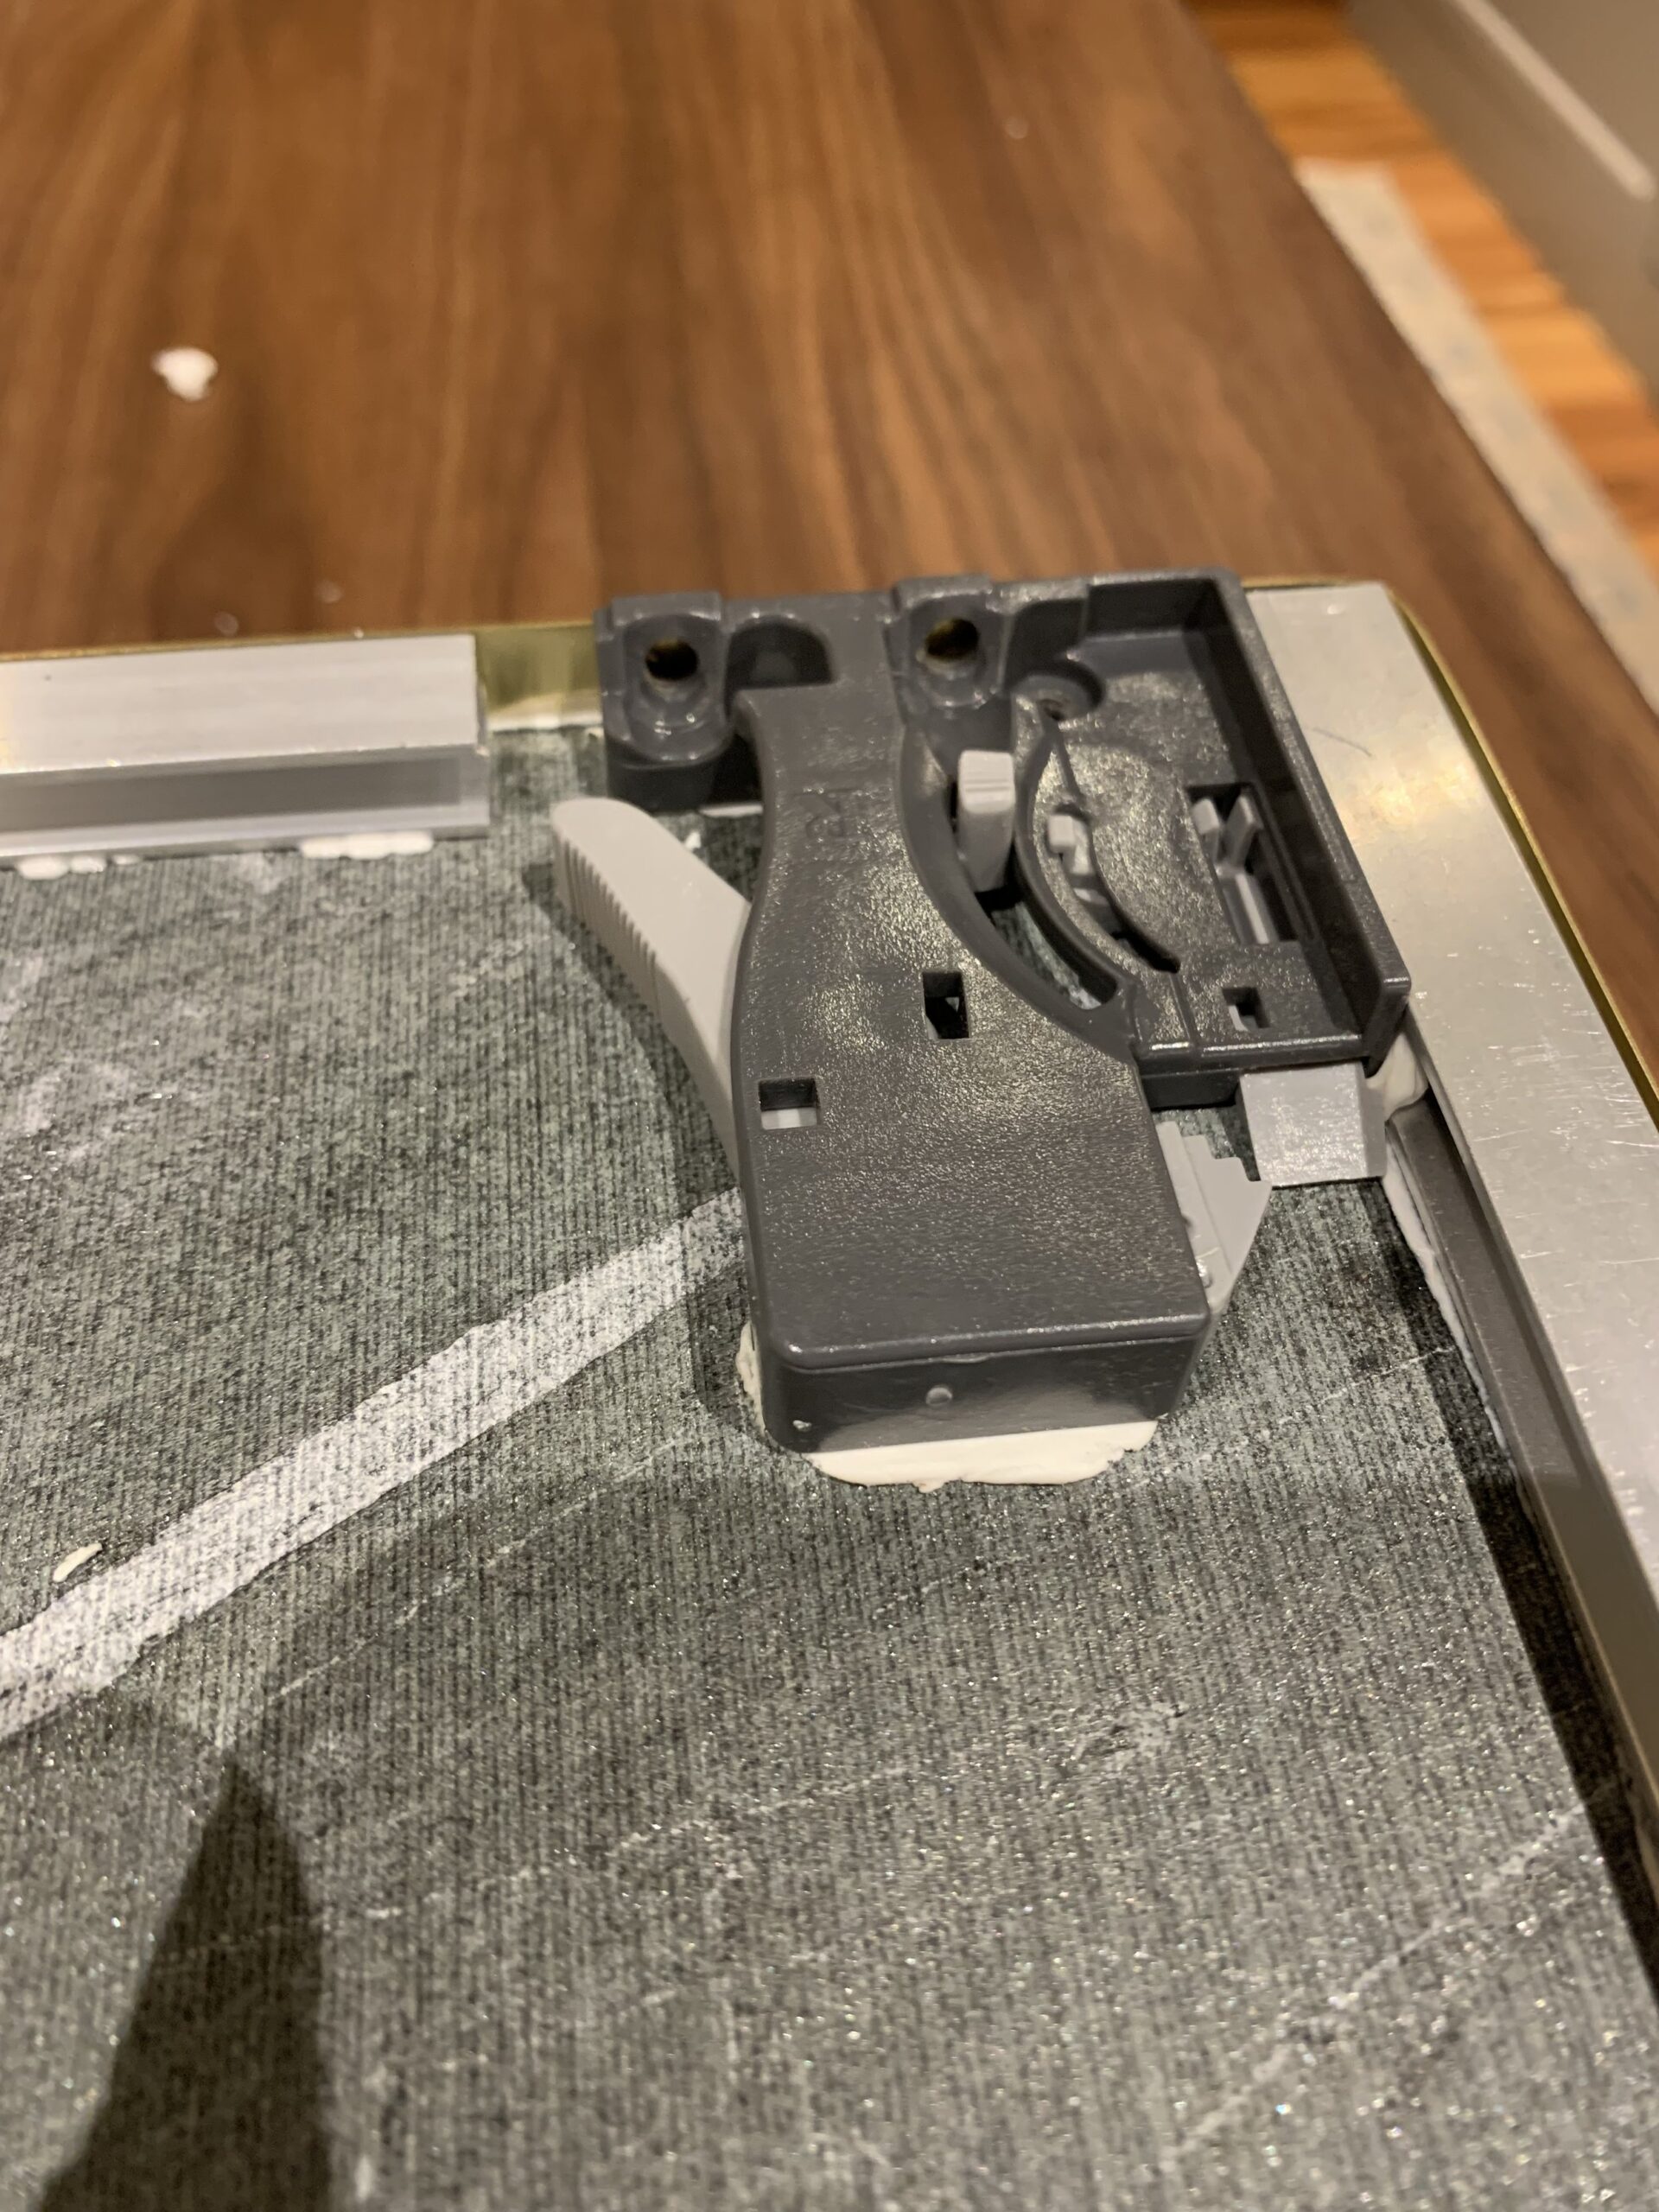
I tried to use the same silicone to stick down the drawer slide mechanisms that came with the drawer slides onto the stone as well but the silicone did not hold them. These guides are to keep the sliders under the drawer and actually act as the attachment between the drawer slides and the shelf itself, and they make sure the slides move with the shelf when the shelf is pulled and it doesn’t just slide on top of the slides. I tried gluing these down with silicone, and I also tried using museum putty, at the suggestion of someone on Instagram, but these did not stick. However, when I put the drawer onto the slides they worked without the plastic mechanisms, I think because the shelf is so heavy, so I just left them off in the end and it’s been working fine without them.

Now, all that was left to do was to hide the aluminum channels that I had glued to the bottom so they didn’t show when we pulled the shelf out. I bought some 1” thick strips of thin hobby brass off amazon and just used them to cover the edge, bending them around the corners. Once they were bent to fit I added some silicone and clamped it in place for a little while and bam!!
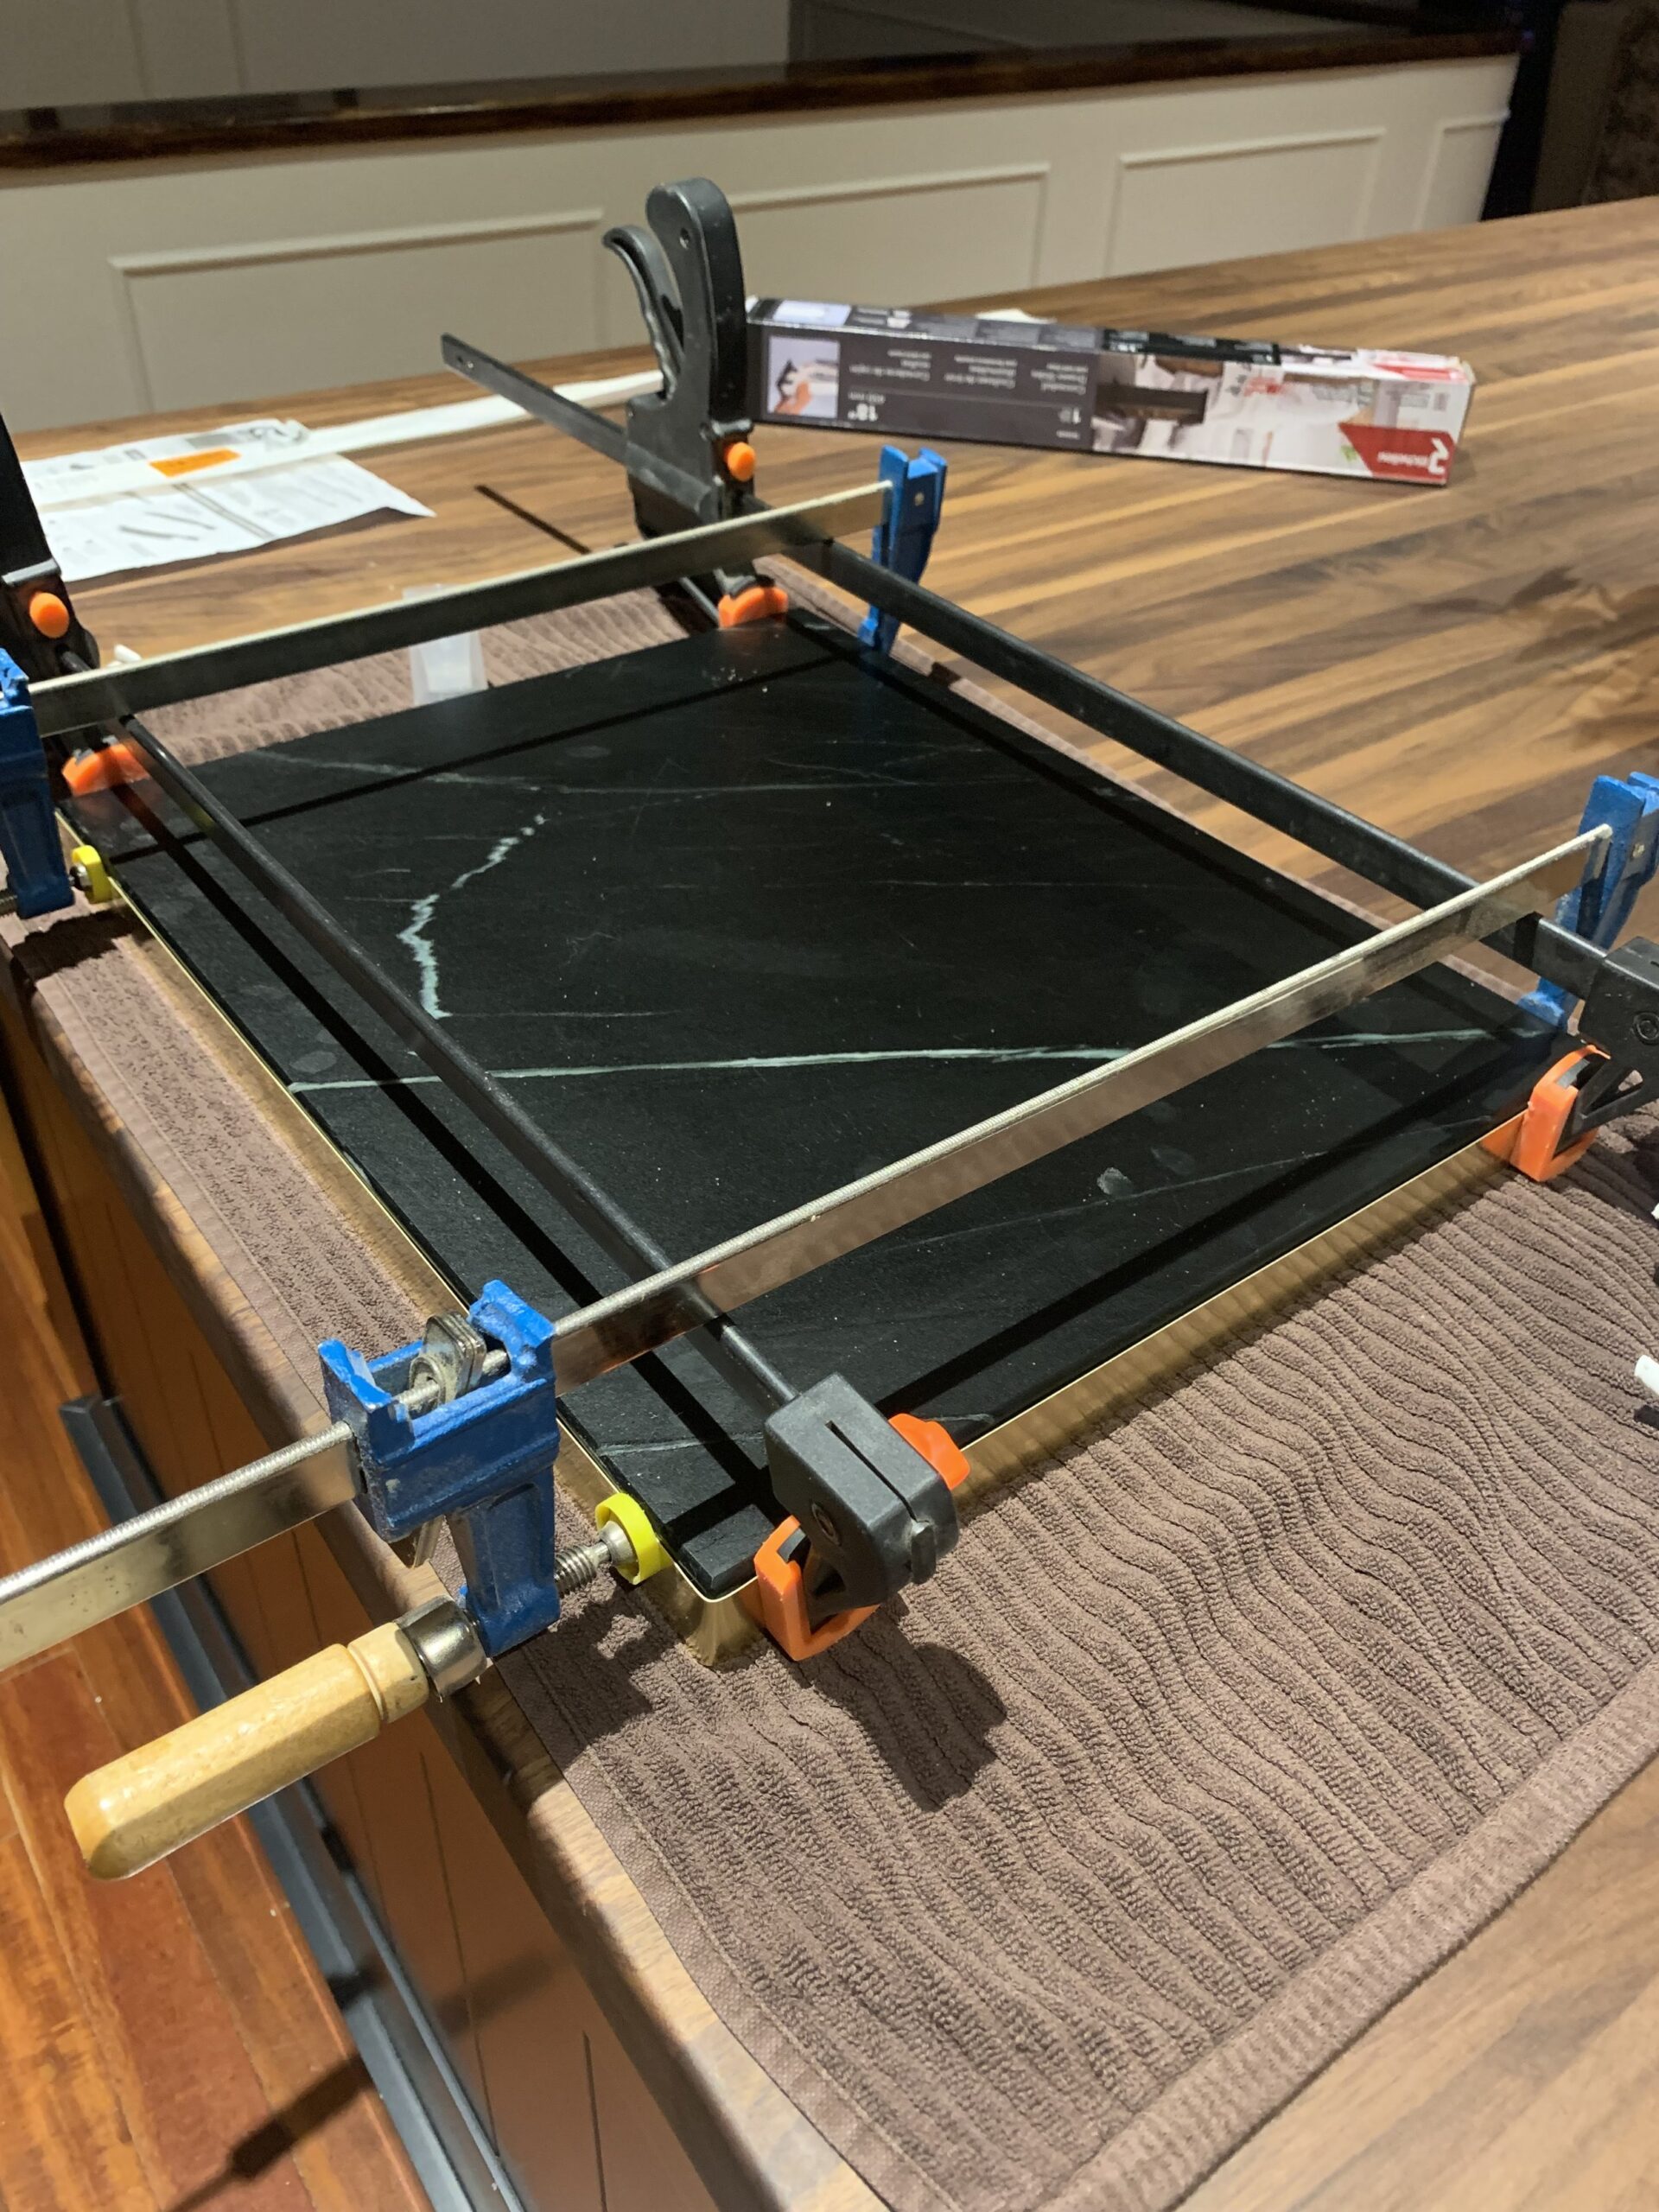
It worked! Brass-edged, sliding soapstone tray. My ugly coffee maker never looked so good!
You might also like:
Hello,
What are the exact ½” aluminum channels you purchased?
Thanks
Hi there – sorry I realize there was no link, I’ve updated the post to the link for the aluminum channels.
I love the design, and am planning to do something similar in a blind corner in my kitchen. However, I think I would have made the box the full depth of the alcove to make use of that wasted space (I appreciate the moving shelf couldn’t be pulled out to its full length because of the stove, but there would still be valuable extra space above it), and I’d also have added at least one and possibly two extra shelves. so the cups wouldn’t need to be stacked on each other (which can cause chipping), and would provide storage for coffee, tea, etc.
Absolutely love this clever and stylish pull-out appliance shelf—functional design at its finest!
Thank you!